


Data
Guides and strategies
Media
Chapter 2: The Hunt is On
Watch out for monsters hiding in the dark.
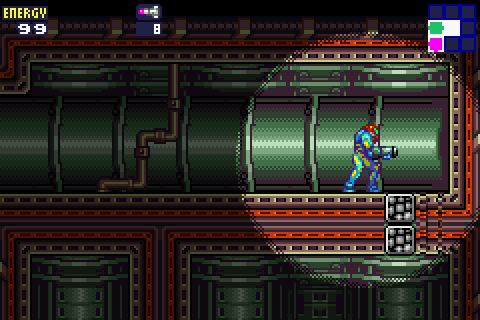
Go back out into the large room and save your game through the lower left door. In the large room you'll find a few platforms in the air, use them to reach a glowing ventilation cover on the right side of the room. Shoot open the cover and go inside the tunnel. In the next darkened shaft you'll find a large creature sitting above a cracked floor region. Shoot the creature with missiles to destroy it, then drop through the cracked blocks to fall down below.
Watch out for the Zombie Researchers on the way down, and keep an eye out for cracked wall and floor sections. Once you pass through the giant twisted wiring in the foreground you'll find Missile MD.01 waiting just on the right. Drop down off the ledge once you've grabbed the missile and go through the opening on the left. In this dead-end room you'll find Missile MD.02 hidden within one of the blocks on the wall.
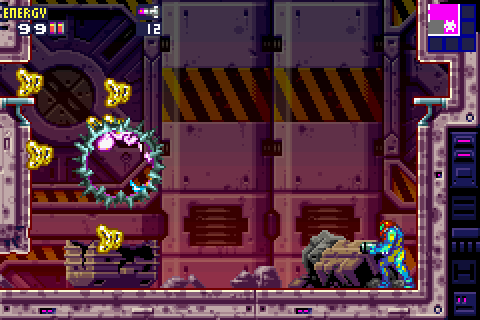
Go back into the red shaft and go right to find yourself in a well-lit large room. At the top of this room you'll find another Save Room, so save your game here. Down on the right side of the large room you'll find an Eyeball Door. These doors are similar to the Eyeball Doors found in SM, you'll need to fire three missiles into the eye when it opens to destroy it. If the eye opens and begins flashing, quickly jump out of the way to avoid its plasma projectile. Once the door's destroyed grab the X that appears and head inside.
This can't be good - here comes a Core X.
The music changes to a creepy tune in the next large room, this is where the SC detected life readings. Climb up around the terrain here, not far in you'll find Energy Tank MD.01 in plain sight resting atop a platform. Just beyond the Energy Tank is a hole leading down, walk over to the edge and shoot out the roof section directly above with missiles. You'll open up a hidden passage, go through to find Energy Tank MD.02.
Back in the large room, drop down into the hole to fall through crumbling blocks at the bottom, below you'll land in a large open space where you'll face the first of many Core X bosses, Arachnus X. Refer to the bosses guide for tips on taking this sucker down. Defeating this creature will restore your Morph Ball ability, so you'll be able to exit the room through the small opening on the left. Go through the next corridor and crawl through the small opening up on the wall to reach a long red darkened tunnel. Proceed through this tunnel using the Morph Ball to crawl through the narrow passages.
At the end you'll re-emerge back out into the lit shaft leading up to the second Navigation Room. Just above in this shaft you'll find the creature you passed earlier blocking a door, destroy it with missiles to find a Recharge Room inside. Go left at the base of the shaft and save your game before returning to the first Navigation Room you found earlier.
The SC has bad news for you when you return to the Navigation Room, the X have invaded some of the breeding environments in the station and are already consuming the life-forms kept there. The SC will show you where the Main Elevators are that lead down into the six sectors of the station. Once you're ready, head left and climb up the next shaft. Halfway up this shaft you should spot a narrow opening leading into the right wall, crawl through here to find Missile MD.03 hidden beyond.
Hello there, who might you be?
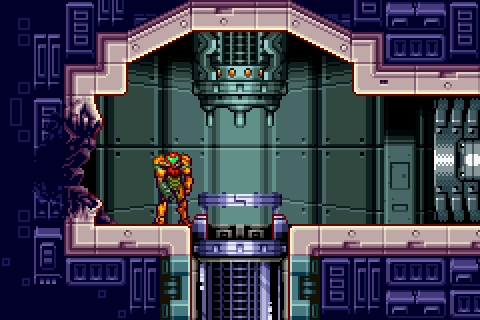
Go through the door at the top of the shaft, inside you'll be able to crawl through the small opening ahead below the ruined roof section. Keep going left through the tunnel to eventually find an elevator leading down. Ride it down to reach the six Main Elevators. Just after Samus disappears off the screen however, you'll witness a chilling scene. The creature that caused the explosion back in the Quarantine Bay, you're about to get your first glimpse of it. The wall to the left of the elevator Samus just rode down will explode and one of the weirdest things you'll see in any of the current Metroid games appears.
Walking out through the cloudy remains of the wall appears to be Samus in her original Varia Suit! But how can this be, the real Samus just rode down the elevator in this same room? The creature will stand still and face the camera before it zooms in on the creature's face, revealing something definitely not human. This creature is on the prowl for Samus, staying away from this creepy monster is top priority. We'll be learning more of this creature soon when the SC discovers its presence on the station.