


Data
Guides and strategies
Media
Chapter 7: Don't be Afraid of the Dark
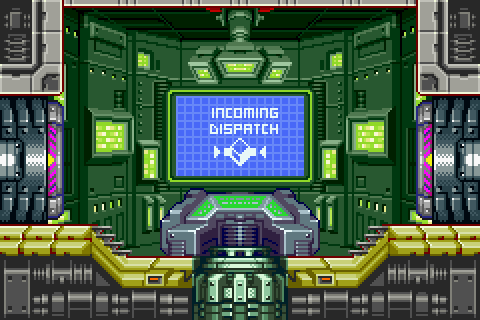
Who is this message for?
The SC informs you that Sectors 5 & 6 are now open and have most likely been infiltrated by the X. You won't be able to enter Sector 5's freezing environments without protection, so we'll be heading into Sector 6 to download the Varia Suit data. Leave Sector 4 and head over to Sector 6's elevator. Once you leave the sector you'll witness a special cutscene where a Federation officer contacts the SC and asks if Samus suspects anything. Come again??
The creepy music playing in the background suggests that something fishy's going on, but Samus won't be kept in the dark much longer as to what the Federation officer was taking about (even though we're now heading into the darkest area of the station, heh). Ride down Sector 6's elevator and head into the Navigation Room. After giving you the map, the SC will tell you that the Varia Suit is ready to download.
There's a problem though, as sub-zero X parasites from Sector 5 have invaded this area and are waiting to attack Samus. Whatever you do, don't absorb the large blue X parasites as they'll freeze Samus and cause damage. Just fire away at them to stun them as you pass by. Once you find the Varia Suit you'll be able to absorb them without taking damage, so we'd better track it down.
Save your game and use the Recharge Room if needed before moving on. Watch out for the flying bugs in the following room, cross this area and head through the door on the right. You'll now be in a really dark area (it's almost impossible to see on a normal GBA's screen) so make sure you don't run into any enemies crawling around. As you make your way through this room you'll be able to pick up Missile S6.01 and Energy Tank S6.01.
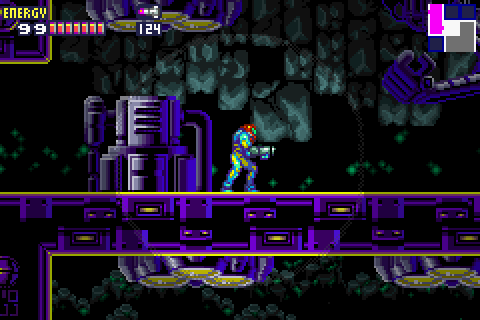
Watch out for blue X in this darkened environment.
Climb up through the room once you've picked up the items and head through the door on the right. Cross the following corridor and quickly shoot the blue X before it touches you to stun it. Head through the next door to find a long shaft leading down. Quickly stun the blue X ahead and drop down the tunnel to the very bottom. Go through the door on the right and cross the long platform ahead. You'll eventually reach three large blocks, shoot out the middle and top ones to get through, but don't shoot the bottom one as a blue X is hidden inside.
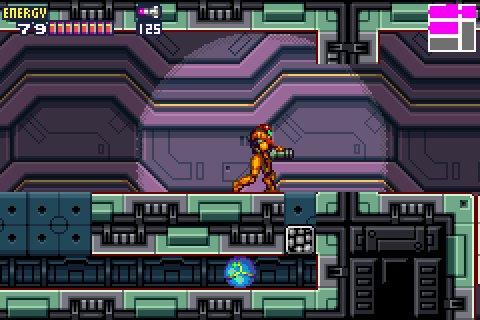
Drop down and grad hold of the ladder down on the right wall, then climb down and shoot through the narrow wall you'll find on the left. Jump over the first hole you find and stun the blue X there, then drop down the second hole and run through the door on the left before any blue X catch you. Run through the next corridor while shooting at the blue Xs above, keep running to break through a wall containing Speed Booster blocks. Climb down the ladder, down below you'll find a door on the right that eventually leads to a Save Room, only go there if you're not playing for speed. Once you're ready go left through the previous blue X-infested room and head through the door to reach an apparent dead end where you'll find Energy Tank S6.02 waiting atop a platform.
Bomb open a hidden tunnel just behind the Energy Tank and drop down. Go down to the door and head through to find a darkened empty corridor. If the emptiness of this long corridor gives you the creeps, you're reading the signs correctly. Quickly run over to the right, you'll find a wall covered in Power Bomb blocks that you can't break through. Instead, bomb open the ground below and roll down into the narrow tunnel below the floor. Roll back towards the door, when you reach it the door will open and... Guess who? Yep, the SA-X will stomp into the room while the creepy music plays and you hear the SA-X's weird breathing sound.
Don't let the SA-X find you...
Slowly follow it as it prowls down the corridor, once it reaches the wall it'll lay a Power Bomb to break through, stay well back to avoid the explosion and don't worry, you'll be finding some Power Bombs to play with soon. Stay where you are and wait for the SA-X to leave the room, you'll see why when you head towards the next door. When the SA-X jumps over the small hole in the floor you'll see it also has the Screw Attack, I bet you're just itching to pay this freak back for stealing Samus' abilities, but don't worry, you'll get your chance. Just beyond the destroyed wall you'll fall through the ground and land in front of the door, if the SA-X was still here you would've fallen for the trap and landed directly in front of it! If you're ever caught by the SA-X, just run.
Proceed through the next room to find a shaft leading down. Save your game in the room ahead before descending the shaft, just watch out for hidden blue Xs in the large blocks. At the base of this room in the left corner you'll be able to blow open a few blocks to reveal a hidden tunnel leading to a room containing Missile S6.02. With the missile in hand go back out to the shaft and go right through the door. Clear off all the flying bugs in this room and head right to face an Eyeball Door. On the other side of the door is the Data Room, it's strange that there's an Eyeball Door here, but you'll find out why in a minute.
Fry the door (one missile does the trick) and go inside to find a Core X floating in the middle of the pod somehow downloading the Varia Suit data! The freak then flies away before destroying the pod, by now you'll realize this game isn't very kind to Data Rooms. Go through the door on the right to face the Core X, check the bosses guide for tips on popping the bloated thing.
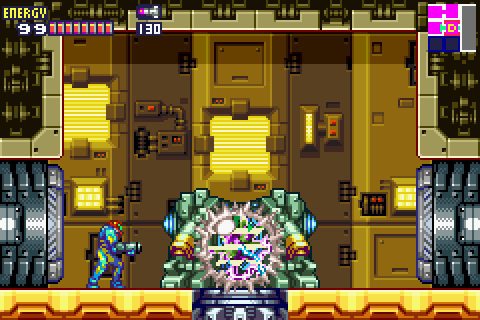
This thief takes off with the Varia Suit data.
With the Varia Suit finally back in your possession you'll be able to survive extreme temperatures and you won't be frozen by the blue X anymore. We'll now head back up to the Navigation Room. Go through the door on the right to find yourself in a tall shaft leading up. Go through the next door ahead to find another tall shaft leading up. Climb up this shaft after saving your game through the door ahead, you'll be attacked by blue Xs as you ascend but of course they won't harm Samus at all. Up at the top of this shaft, go through the left door to find Missile S6.03 waiting just ahead.
Watch out for the crumbling blocks just in front of the missile, jump up and land on top of it to reach it successfully. You'll then drop through the floor after grabbing the missile, hold left and hug the wall as you fall to grab hold of the small opening you'll find. Roll into the small hole to find Missile S6.04 hidden up in the roof inside. With both missiles tucked away climb back up the second shaft and go through the right door at the top (notice how the blue Xs here will try to get away from Samus, they're the hunted now).
Climb up the next shaft while watching out for the Puffer and other crawling enemies, through the next door you'll find yourself in the second large darkened room filled with blue Xs. Make your way back up to the top and go through the door up in the left corner. Ascend the next shaft, from here you'll be able to track down Missile S6.05 through the door up on the right wall. Once you've claimed it it'll be time to leave so head on back to the Navigation Room from here.