


Bosses Guide

An army of hostiles stand between Samus and the Alimbic Order's secret to ultimate power. Her deadliest threats come in many forms, ranging from rival hunters to the Alimbic security systems guarding their most precious and sacred artifacts. Samus will need to overcome all this realm of space throws her way if she wishes to solve the mystery behind the Alimbic race's disappearance. Read on for tips and what to expect when coming up against these hostiles.
When engaging major bosses an overlaying energy bar appears, so you'll be able to tell how much health they have left. Also remember to scan all the Cretaphid and Slench boss forms for your Logbook as you'll only have one chance to.
Note: If you lose to a hunter after collecting Octoliths they'll make off with one of them. Either go back to your last save or track the hunter down in question to reclaim your stolen goods by defeating them.
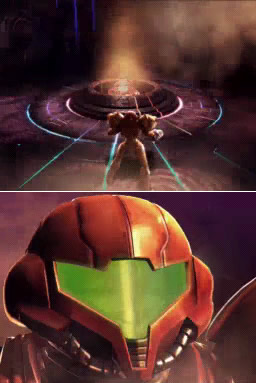
Kanden

- Location:
Celestial Archives (Data Shrine 03) - Attacks:
Volt Driver, Stinglarva - Weakness:
Battlehammer
As the first rival hunter to encounter in the game, you won't have Kanden's weakness in the form of the Battlehammer. So instead you'll need to rely on the Power Beam and missiles. Kanden tends to enjoy using the Stinglarva to drop his small exploding mines, so try not to get caught in the torrent. Keep your distance and open up with rapid-fire shots to begin with. Watch his movements as he can easily disappear from view in the large Data Shrine chamber, use your radar to track him down.
If he does get too close in his alternate form, break out your missiles quickly as he'll be far easier to hit up close. Don't be afraid to drain your missile payload, just avoid using them at a distance as without lock-on functionality he'll be easy to miss. Strangely his Volt Driver shots won't mess with your visor, so don't be scared off when he stands up and sends shots your way. If you're running low on ammo or health quickly look for one of a number of crates scattered about the room and bust them open for refills.
Watch out as his health inches towards nothing, as he'll tend to streak straight for you while in Stinglarva form. Try to pick off Charge Beam shots if you run dry on missiles, and keep up the pressure to send him running.
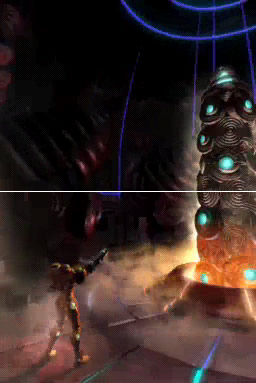
Cretaphid v1
- Location:
Celestial Archives (Stronghold Void 01) - Attacks:
Chemical lasers - Weakness:
Charge Beam, Missiles
This initial form of the Cretaphid security system only boasts one form of attack, but a nasty one nonetheless. It'll emit four red laser beams from a set of the nodes running up the pillar, each one sweeps up and down as the entire pillar rotates. You'll need to keep your sights skyward and watch the patterns of the lasers to sneak by each one as they pass. Try to avoid taking a beating from any laser as you'll take continuous damage the longer the beams connect.
Watch the nodes adorning the pillar, shoot at them when they turn blue to knock them off. Watch out for the beams switching positions and grab any health the nodes drop. Once you've taken care of all the nodes a small crystalline object will pop out from the top of the pillar. This thing is the entire unit's core, so open up on it quickly to inflict critical damage.
Watch out as the core node can defend itself with a potent laser, don't worry if you need to stand still to get a shot in as it can be difficult to strike the target. Use missiles or the Charge Beam to speed things up. After a few seconds or with enough damage dealt the node will retract back into the pillar's housing before it restores all the nodes and resumes the laser attack. Take out all the nodes and open up on the core node again when it resurfaces.
Keep this sequence up to eventually finish off the menace, just remember to grab any health refills the nodes drop and take your time if this is your first run-through, as the combat will really test your skill (remember that thumb stylus? This is one scenario you'll definitely want it handy).
Spire
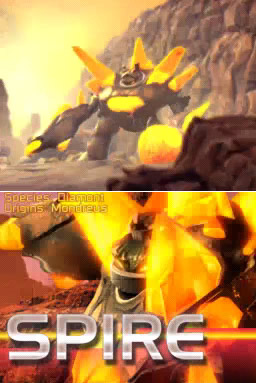
- Location:
Alinos (High Ground) - Attacks:
Magmaul, Dialanche - Weakness:
Judicator
You'll face Spire in a number of areas around the High Ground region before finishing him off. When you first spot him, head inside to the Elder Passage and deal with the two Voldrum-spawning units to summon him above. Scan him quickly then open up with missiles. After a few blows he'll dive below to you and fire up his alternate form - the Dialanche.
Stay as far back as possible from this torrential rock beast, keep using missiles as his size makes him an easy target. Don't forget to scan the Dialanche for your Logbook as well. With enough damage dealt Spire will promptly run away, deactivating the force field keeping you barred in this chamber. Before following him, scan the small orange node on the wall to reveal a Shield Key - pick it up so you can easily secure the Attameter Artifact nearby on your way out.
Once back outside you'll face Spire head-on. His ultimate weakness is the Judicator, but without it just stick with missiles and the occasional Charge Beam shot. Hop around if he breaks out the Dialanche, you can usually easily avoid his attack runs. If you need health badly, look for the small plants and shoot them to uncover health refills (just don't touch the nasty flora). Spire's size makes him an easy hit, so you shouldn't have too much trouble taking him down.
Slench v1
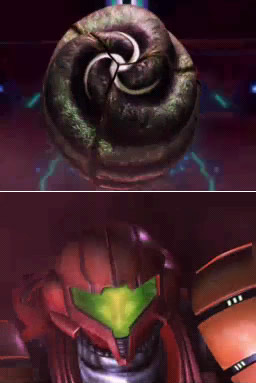
- Location:
Alinos (Stronghold Void 01) - Attacks:
Green venom torpedoes, Deuterium laser - Weakness:
Charge Beam, Missiles
The actual Slench unit is a giant mechanical eyeball attached to the chamber's real wall. While attached to the wall you can't inflict any sort of damage while that red shield is active around it. From here it'll generate small green torpedoes that tend to home in on you, try to take them out as (incredibly) they'll drop energy and ammo refills. Scan the creature now, also don't forget to scan one of the three energy blasters surrounding it.
The energy blasters all fire rapidly at you often so you'll need to keep yourself moving. Now to find a way to damage this orb. See those small slug-like synapses connecting the Slench to the energy blasters? If you shoot them you'll see a few of the lights surrounding the blaster dim, keep firing to cause the synapse to retract inside the wall. Quickly open up on the other two before any of them revive themselves. With all three disabled the shield will lower and the Slench will literally detach from the wall and float about the room.
Scan the creature again (each Slench has an A and B form) and watch out for the torrent of shots coming from the eye. With the eye completely open and the shield nowhere in sight, now's your chance. Open up on the exposed eye to inflict critical damage, don't be afraid to use missiles. Each hit yields a loud shriek from the beast, eventually with time or enough hits it'll automatically return to the wall. The energy blasters will power up again, use this time to take out the green torpedoes if you need health.
Disable the blasters again to cause the Slench to detach, then open up on the exposed eye again. Keep this cycle up and watch out as the Slench will move around the room much faster as its health drops, but with a good aim you should finish the beast off in no time.
Weavel
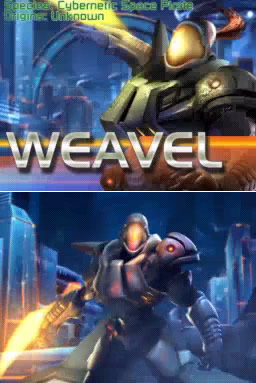
- Location:
Alinos (Echo Hall) - Attacks:
Battlehammer, Halfturret - Weakness:
Volt Driver
Weavel lives up to his name by moving about extremely fast. His main weakness is the Volt Driver, but without it missiles will do fine. Keep yourself moving at all times around the environment and don't lose him from your sights. His Battlehammer is more irritating than anything else, and with a time limit during your first encounter you don't want to waste any time.
Deliver enough damage and he'll break out his alternate form, the Halfturret. In a slightly disturbing way Weavel will run to the center of the room before his upper body detaches from the lower half. Scan the lower half for your Logbook, then proceed to rip it apart while keeping your distance from the roving upper body.
With enough damage dealt the small force field blocking an opening on one wall will open before Weavel makes a break for it. Quickly bust open the crates nearby for supplies, then follow him through the tunnel. You'll find yourself back in the first open area of the Echo Hall where Weavel awaits. Blast the Zoomers in the sandpit quickly to avoid stepping on them, then focus on finishing the Pirate off. He'll use the Halfturret again with only a touch of health left, ignore it and finish him off before you run too low on time.
Sylux
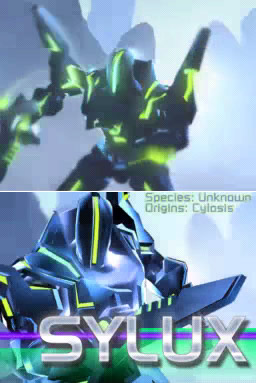
- Location:
Vesper Defense Outpost (Weapons Complex) - Attacks:
Shock Coil, Lockjaw, Delano 7 turret - Weakness:
Imperialist
Sylux loves his Shock Coil and uses it whenever in close proximity. The weapon causes continuous damage as long as it connects, but thankfully it saps your health slowly. Return fire quickly with missiles but don't waste too much ammo as this is one tough target to hit. Switch back to the Power Beam if his mad hopping is too annoying, just don't let up as the Shock Coil doesn't give you any breathing space.
Eventually Sylux will break out his alternate form, the Lockjaw. Stay back from any mines he drops, keep in mind that electrical conduits will connect multiple mines so stay well clear. He tends to run off down one of the multitude of corridors so you'll probably have to go look for him. Blow open any crates along the way for health refills, you're definitely going to need them here.
Open up on Sylux as soon as you see him again, with enough damage dealt he'll retreat into the open center of this region. Follow him there and open up again. After a few seconds you're in for another nasty surprise - his ship will join the battle from above and open up on you with a turret - what a cheater. Scan the ship for your Logbook and fire away at the turret to disable it for a while. Bust open any of the crates in the corners of this area if you need refills, just don't lose Sylux from view.
This is going to be one tough battle, as Sylux tends to try and weave out of your line of sight all the time. Use your Battlehammer if you feel like it, it won't cause much damage but it's better than nothing. Deal with his ship if you need to, but concentrate more on Sylux himself. This is definitely your first real challenge delivered from a rival hunter, so don't be discouraged if you have trouble. Also keep in mind that in future he won't use that nasty ship of his again, and by the time you face him again you'll have plenty more weapons to use.
Cretaphid v2
- Location:
Vesper Defense Outpost (Stronghold Void 01) - Attacks:
Heat-seeking plasma projectiles - Weakness:
Battlehammer, Missiles
This Cretaphid will launch balls of electrical plasma from the nodes covering its surface. They tend to spew out in large numbers so you can easily get caught in the storm if not quick enough. Keep in mind that using the Battlehammer against this target will yield stronger damage inflicted. Keep circling around the pillar continuously in one direction to avoid the plasma balls, you can also try to hit them but shouldn't need to worry about them as they'll explode after a few seconds of exposure to the air.
Open up on the nodes as you circle around the pillar, you'll only be able to destroy them as they turn blue but don't wait for them to change colour as they tend to rapidly switch from blue to red. With all nodes dealt with the crystal core will emerge from the apex of the pillar and open up on you, quickly break out the Battlehammer and send rounds into it to cause stronger damage compared to the Power Beam or missiles.
Don't worry if you need to stand still to get your shots in. Start up your circling maneuvers once it retracts back into the pillar in anticipation of the plasma balls. Also be sure to use the Charge Beam to draw in any energy refills appearing from destroyed nodes.
Take out the nodes once again and use the Battlehammer as the crystal node emerges. Keep this cycle up and you'll finish this fight easily in one piece.
Noxus

- Location:
Arcterra (Sic Transit) - Attacks:
Judicator, Vhoscythe - Weakness:
Magmaul
As a creature of ice, Noxus loves to use his Judicator's charged shot to freeze opponents. Keep yourself moving to avoid his blasts, but if you're caught and frozen solid quickly rub the touch screen to break free. The Magmaul's an easy weapon to exploit against Noxus, but without it stick to missiles. Keep your distance and bring on the pain.
Watch out when Noxus breaks out his alternate form, the Vhoscythe. This rapidly spinning object likes nothing more than to get up close and personal and shower you with blades. Deter it with missiles, and as always keep your distance. Jump around the environment to avoid the torrent, try to leap up higher ledges to cut him off. As a side note, you may find Trace opening up on your with his Imperialist from above, take cover inside a cave if he does so. Focus your attacks on Noxus to send him off easily.
Slench v2
- Location:
Arcterra (Stronghold Void 01) - Attacks:
Green venom torpedoes, Superheated magma bursts - Weakness:
Judicator
This version of the eyeball-Slench utilises Magmaul technology to launch bursts of superheated magma from its energy blasters. Scan the Slench 2A while it's attached to the wall before engaging it. The creature will launch green torpedoes at you just like last time, so make sure you take them out for energy refills. Also keep in mind that if you ever critically need health, simply retreat to the rear of the chamber and stay there while ripping into the green torpedoes, as oddly the magma blasts can't reach you there.
Now to deal with this thing. Shooting the energy blaster synapses with the Power Beam won't work this time, but their use of Magmaul projectiles easily reveals the Judicator as the one to use. Use it to disable each synapse to pull the Slench off the wall. Scan Slench 2B before attacking. Watch out for more bursts of superheated magma delivered from the roving eye, send it back Judicator projectiles in a counter-attack. The blasts will cause continuous damage to you for a few seconds if you're struck, but don't let up your return attacks. Try to score a charged hit to sneak in more damage.
With enough damage dealt it'll return to the wall, use this time to stock up on health and UA refills by standing out of range of the energy blasters and opening up on the green torpedoes. Disable the synapses again with the Judicator and pour on the pain to the eye when it opens up. Keep this cycle going and you'll have it beat in no time.
Trace
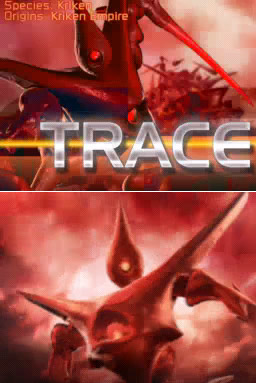
- Location:
Arcterra (Sic Transit) - Attacks:
Imperialist, Triskelion - Weakness:
Shock Coil
Trace always prefers to attack from a distance with his precision weapon, so fancy footwork and close proximity will save you here. Your first encounter is during an escape sequence so there's no time to lose. Open up on Trace with missiles and rapid shots, without the Shock Coil you'll need to resort to standard weaponry. But when you do have the Shock Coil, don't stop firing even if it seems you're only causing superficial damage as after several seconds the weapon will increase its damage rate.
He tends to disappear while standing still before unleashing the Imperialist. Don't worry if you're hit, just make sure your missiles hit home. His body armour isn't quite the strongest to be found, so you'll notice each missile blast takes a fair chunk of health. After a number of hits he'll abandon his platform and break out his alternate form, the Triskelion. This weird spider-like form allows him the ability to lunge at you from afar with pincers itching to sap your health.
Stay back and keep him in your sights, be sure not to let him get away out of sight. If he does run off and you lose sight, he'll stop moving and become completely invisible to the naked eye. If he does switch back to the Power Beam and spray your shots around to quickly reveal the target. Keep your missile attacks up to finish him off and watch out for significant health loss; go pull up some of the weeds around the area for health if you need some.
Slench v3

- Location:
Celestial Archives (Stronghold Void 02) - Attacks:
Green venom torpedoes, High-voltage bolts, Eyeball ram - Weakness:
Battlehammer
This Slench utilises Volt Driver technology for its energy blasters, so expect a reward of static if they hit you. Their inherent weakness is the Battlehammer, so break it out to disable the synapses. Keep in mind that these projectiles can't reach you if you retreat right back up to the door, so head up there and pick off the green torpedoes if you need health or ammo refills.
Scan the creature once it detaches from the wall, but watch out as it won't just have Volt Driver projectiles to use against you. If the beast stops, ceases firing, closes its eye shield and shakes violently you'll only have a few seconds to clear off before it lunges straight at you. As soon as it begins shaking quickly activate the Morph Ball and boost away to avoid getting up close and personal with it. Stand up when the danger's over and proceed to rip the eye apart with the Battlehammer.
The Slench's charge will take a fair chunk of health from you if it connects, so once the beast returns to the wall stand back and rip apart the green torpedoes for health. As you deliver more damage to the drone it'll hover around the room at increased speeds and delivers the ramming attack more rapidly, so be patient and replenish your ammo via the green torpedoes if you need to. Keep the cycle up to finish this penultimate Slench off.
Cretaphid v3
- Location:
Alinos (Stronghold Void 02) - Attacks:
Chemical lasers, Heat-seeking plasma projectiles - Weakness:
Shock Coil, Volt Driver, Judicator
This sneaky Cretaphid uses both the chemical lasers and heat-seeking projectile attacks of its predecessors. This means you won't be able to avoid taking some sort of beating, although circling around the object still does certainly help. This time you'll need to time your movements to weave in and out of each laser's trajectory. Don't stop moving otherwise the plasma balls will easily tag you.
Keep firing away at the nodes adorning the pillar, you'll need to blow them all off to reveal the core. Try to knock out one or two of the chemical lasers early to make your life easier. With all nodes dealt with the central core will appear, when it does break out the Shock Coil or Volt Driver and deliver the pain. Keep firing to easily score hits and watch as its health drops considerably.
Grab any health from exploding nodes as you're certainly going to need it here. Keep the routine up but don't waste time, the attacks are hard and fast so don't let the core appear then retreat without scoring any hits. Finish this second-last Cretaphid to secure your next Octolith and clear Alinos.
Cretaphid v4
- Location:
Arcterra (Stronghold Void 02) - Attacks:
Chemical lasers, Heat-seeking plasma projectiles, Roaming pillar - Weakness:
Shock Coil
This ultimate form of the Cretaphid defense systems not only uses chemical lasers and heat-seeking plasma, it literally roams about the chamber trying to ram you against a wall. This is going to take some fancy footwork to survive. Keep up your circling movements to avoid the heat-seeking plasma, just constantly check your footwork to avoid the laser trajectories and whatever you do keep your distance from the pillar.
Blast the nodes from afar as they turn blue, and be sure to draw any health refills towards you with the Charge Beam. Above all else avoid touching the pillar as physical contact seems to cause the most damage. Try to first pick off the nodes emitting heat-seeking plasma, then finish off the chemical lasers. With all nodes taken care of the core will rise from the top, but as the pillar continues to move it'll be harder to score a hit.
So just stick with the Shock Coil. The longer you connect the electric beam the more damage it'll deliver, so keep it up until the node retreats into the pillar. You'll need plenty of Energy Tanks to survive the torrent this Cretaphid deals so be sure to come along with as many as you can (up to six). Repeat the cycle by eliminating the nodes and use the Shock Coil again for maximum effect. Finish this drone off to finally conquer the Cretaphid line and secure the Octolith.
Slench v4
- Location:
Vesper Defense Outpost (Stronghold Void 02) - Attacks:
Green venom torpedoes, Supercooled plasma, Rolling eyeball, Eyeball ram - Weakness:
Magmaul
This final Slench hangs from the ceiling, so Samus is definitely getting a sore neck from this fight. The energy blasters utilise Judicator technology, so try to avoid taking a hit and becoming frozen. If you're caught quickly rub the screen to break free. You can't hide out at the door and avoid the creature's projectiles this time so don't waste time holding back. Open up on the synapses with the Magmaul, you'll need to aim your shots carefully as the projectile travels over a parabolic path.
Watch out when the Slench breaks free of the ceiling as it'll drop to the ground and commence rolling around the entire chamber. You shouldn't need to use the Morph Ball, just keep your distance and stay close to a wall. Eventually the creature will hover above and open the eye shield. It'll continue to use the Judicator against you, so try to avoid becoming frozen again. Return fire with the Magmaul but watch out if the eye's shield closes and the entire drone shakes violently.
Activate the Morph Ball and boost away before it rams you. This time the camera will pan back and you'll see the Slench as its zips towards you so you'll have a better idea of where it is. Stand up quickly and open up again with the Magmaul. Once it returns to the ceiling dash about and take out the green torpedoes if you need health or ammo refills, otherwise don't waste any time in taking out the synapses. The Slench will commence rolling around again upon detaching, so keep close to a wall again and jump out of the way if in close proximity.
As you sap more of its health you'll be assaulted by relentless attacks sapping more of your health with each hit, so don't expect this to be easy. It'll use the ramming attack frequently now, so be on the lookout and quickly use the Morph Ball to boost away. Finish the beast off to finally be rid of these weird floating eyeballs for good.
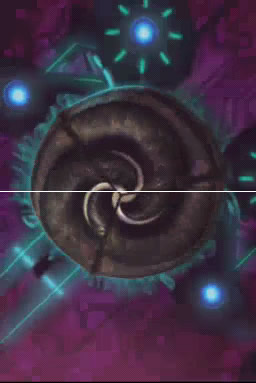
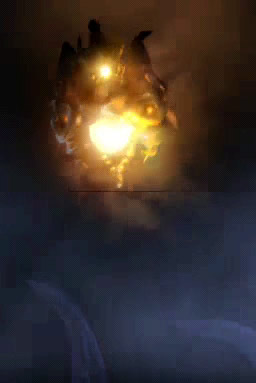
Gorea
- Location:
Oubliette - Attacks:
Volt Driver, Magmaul, Battlehammer, Shock Coil, Judicator, Imperialist, Arm swipe, Trocra bombs - Weakness:
All weapons
Gorea will deploy variants of all six of the main weapons in the game thanks to the carelessness of the other hunters. You'll battle the beast inside a huge open chamber surrounded by a deadly energy barrier - so don't hurt your feet around the edge. Quickly scan Gorea's main body to learn that it's impervious to attack. Scan one of its arms to learn that these limbs are periodically vulnerable to specific weapon types.
So this should be easy enough, depending on what weapon Gorea's currently using you'll need to use the opposite to hurt the arms. When the beast lurches back and slams into the ground it'll change colour. Strangely enough, the colour it turns represents its current weakness, so use whatever weapon corresponds with the colour. Keep your distance from the target as well as it may try to take a swipe at you with its arms.
You'll need to take out both arms to send it reeling. Be sure to use the Charge Beam to draw in energy refills the arms may drop. You'll need to be quick in taking out the second arm as Gorea will definitely use your hesitation to revive the fallen arm. Upon tearing off both arms the beast will flip over and hang in the air, while the Seal Sphere within it pops out and hovers above the main body.
Damaging the Seal Sphere will harm the creature critically, but it still has a few tricks to use against you. Scan the body and the Seal Sphere for more info. Watch out for its first attack; a long tentacle will emerge from the Seal Sphere and lash towards you. If this thing grabs hold say goodbye to a serious amount of health as it'll thrash you violently around the chamber. When you see it appear simply activate the Morph Ball and boost away to escape. Upon hearing a sound the danger's passed so stand back up.
The Seal Sphere will now draw towards itself small projectiles waiting for use around the boundary of the chamber. Scan one to reveal them as a Trocra. They're only dangerous to touch, so simply circle Gorea to avoid them as they're hurled your way. Focus all you've got on the Seal Sphere itself, try using your other weapons as this thing is going to take an enormous beating to finish off - whatever colour Gorea's body still is represents the weapon to use (any other won't do anything).
With a quarter of health drained the Seal Sphere will return to the bowels of the main body. You'll now need to commence de-limbing Gorea's arms again. Use the right weapons and be sure to pick up health the arms drop. A good trick is to weaken both arms to the point of destruction before finishing each off quickly to avoid Gorea reviving one. If you're running low on weapon ammo don't despair, as remember those Trocra? Leap over the harmful energy field bordering the perimeter and rip into the immobile objects to pick up dropped UA refills.
Take the arms off and the Seal Sphere will emerge again. Boost away with the Morph Ball when the tentacle appears and circle the beast to avoid the Trocra. Keep your attack up, eventually with three quarters of its health gone Gorea will revive its arms and commence weapon attacks again. Keep the regular cycle up to ultimately destroy the Seal Sphere, thus finishing the beast.
....
But hang on.... something's not right... Upon destroying Gorea you'll witness the entire Oubliette vaporising itself, but no word on whether Samus managed to escape or not. The game will end there... unless you've activated the "divine spectral sequence" hinted at in the Alimbic Prophecy lore entries.
Read on...
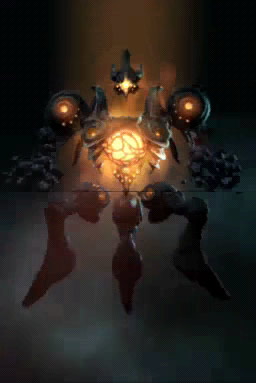
Gorea 2
- Location:
Oubliette - Attacks:
Laser, Comet meteor - Weakness:
Omega Cannon
The Alimbic Prophecies hint at what you need to do to unlock the final Gorea battle. Remember seeing those large coloured objects up high on the walls of Gorea's chamber? During the fight you'll need to activate each one by hitting them with the corresponding weapon in the right order. The order is as follows:
- Yellow - Volt Driver
- Green - Battlehammer
- Orange - Magmaul
- Blue - Shock Coil
- Purple - Judicator
- Red - Imperialist
Incidentally Gorea's first sequence of weapon use also follows this order.
With the correct sequence entered you'll hear a sound and your gunship will chime in with a telepathic translation: "Spectral sequence initiated. Photon avalanche approaching cascade threshold." That sounds interesting. Destroy the Seal Sphere as you would normally and watch as instead of exploding, energy waves from all the objects around the chamber pour into Gorea's body, destroying its limbs and leaving it with a weakened Seal Sphere.
You'll be teleported along with the remains of Gorea to a large chamber atop a towering twisting structure. Scanning Gorea 2 reveals that Alimbic essence is no longer present inside the Seal Sphere, and that none of your weapons can harm the beast. So you'll need something else to finish the job. Quickly descend the chamber to find what you're looking for at the base - the Omega Cannon.
Step towards the shield covering the Omega Cannon to lower it and gain access to this final piece of weaponry. Pick it up and read about the dangers the Alimbic tell of the potential harm this thing can do to the user. Let's make sure the business end of it stays firmly fixed on Gorea.
Quickly look for Gorea and blast it with the Omega Cannon. You'll see instantly the creature will take damage, so we've got it on the run. After a few blasts Gorea will most likely disappear and teleport higher in the chamber. Watch out for Gorea's two main forms of attack, a piercing laser originating from the chest and a nasty projectile resembling a small meteor capable of passing through solid objects to reach you. Bear in mind you can destroy the meteors with the Omega Cannon, sometimes they drop health so be sure to grab them.
The meteors sap a decent amount of health, go grab one of the health refills lying about if you need them. Use the jump pads to reach the top of the structure if Gorea disappears, as he'll often travel up topside (check your radar too). Keep pouring on the pain with your devastating weapon, but with the loss of some serious health Gorea will annoyingly teleport about the chamber rapidly.
You'll have a hard time tracking it and those meteors won't stop coming. Don't let the flash of white every time you fire your weapon disorient you. Keep watching your radar to find the monster, its projectiles also show up on the radar so watch for incoming hostiles. Don't take your eyes off the radar and ascend the structure till you spot the target.
Don't let Gorea hide for too long, grab any health you need and destroy any meteors you manage to spot for health. Deal the final blow to ultimately destroy Gorea, then watch as Samus (and the other hunters - so they weren't killed by Gorea after all) escape from the Oubliette before it makes its final bow and heads for oblivion. Enjoy the finale!