


Chapter 14: Taking the Fight to the Ing
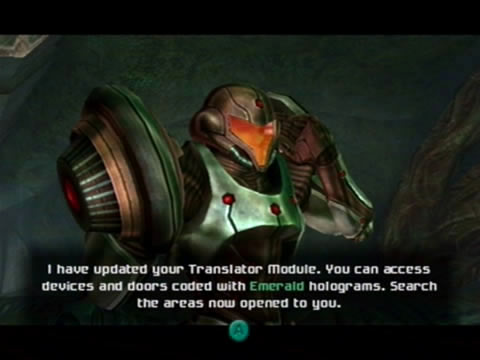
Emerald hologram objects can now be scanned.
Return to the Torvus Temple and slide down the elevator. Now that you can access emerald holograms, scan the hologram atop the elevator in the center of the temple. Just watch out for the Shriekers taking up residence around it. With the elevator active ride it down below. Under the temple you'll discover a number of doors leading off around you. Restore some of your Light or Dark Beam ammo by destroying the surrounding Bearerpods with the opposite weapon.
One of the doors is covered with a purple blast shield, so we can't go through there for now. The green door down the eastern side of the room leads back towards the Great Bridge, so for now we've got two doors to explore through. So let's pick one. Look around you and search for a narrow tunnel opening up on a wall. Roll through the roots and vines with the Morph Ball to find a door beyond. Go inside to find a large elevator transport.
Now this is certainly something interesting. Scan the two Luminoth remains for info, then scan the control terminal nearby to power up the lift. Ride it down to discover a door leading into the depths of the Torvus Bog. Exit the transport lift to locate the Hydrodynamo Station - a deep shaft mostly flooded with water. Listen closely to the music here, you'll ge greeted with a remixed classic from Super Metroid's Brinstar (it's a perfect fit for this watery domain). Walk forward and look up at the rotating platforms; scan one of the Preed floating about for your Logbook.
Up above at the apex of the shaft you'll find a Save Station behind a red blast shielded-door, save your game there before moving on. Back in the main shaft, descend into the murky water below. Down below you'll discover three ledges surrounding the central pillar, each with an exit (and one with a Missile Expansion). Scanning one of the two visible Bomb Slot-looking devices reveals that you can't reach those platforms from here. You might hear a gentle grumbling sound from below, look down to spot a large aquatic creature circling the central pillar.
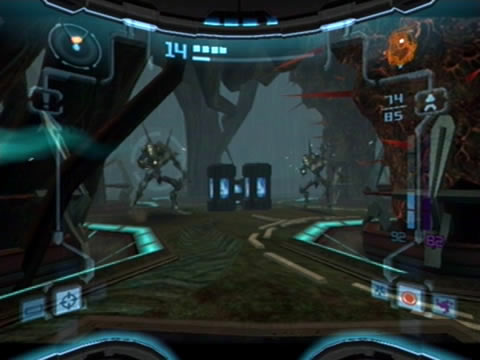
Space Pirate Commandos offer a challenge - unless you shoot the Phazon canisters.
Scan it to reveal it as a Blogg. These nasty critters won't attack unless provoked and are only vulnerable in their mouths, so try to keep your distance. Descend further down to find three more platforms surrounding the central pillar. One of them contains a Bomb Slot-looking device. At the very base of this shaft lies a currently inaccessible door, releasing three security locks will open up passage. Walk over to the device nearby and scan it to unlock the first security lock. The short platform connecting this device with the central shaft will rise up, causing an extending platform above you to extend.
Right now you can't access the other two locks, so before concluding this short trip into the Bog's depths we'll grab the missile directly above. See the Morph Ball hologram at the base of the central pillar? You need to get over there to launch yourself back to the apex of the shaft. Watch out for the roving Blogg, keep your distance and fire missiles at them if they charge at you (their charging is pre-empted with a load roar).
Use the Kinetic Orb Cannon to shoot yourself back to the top, then drop into the water again. Down on the first level where the three exits lie, you'll now be able to reach Missile TB.02 sitting in front of the purple door. With your latest missile in hand, return to the Torvus Temple above (you didn't actually need to go down here now, so feel free to bypass it for now if playing for a fast completion time).
Once back above in the Torvus Temple, look for a translator gate adorned with an emerald hologram near the lift. Note its location, we'll come back here soon. For now return to the Great Bridge, then scan the mechanical gate up behind the Kinetic Orb Cannon (ignore the Grenchler who has recently taken up residence here). Inside you'll find the Torvus Map Station. With the map in hand, you'll now be able to see just how big this area is (especially the region down below under the temple).
Head back outside and turn right; go inside the Path of Roots to scan the Luminoth Lore Projector across from you. Now we can return to the temple. Once there, scan the translator gate and move through the open passage. Destroy the green blast shield on the door beyond with a Super Missile and head through. Inside you'll discover a large underground tunnel filled with water pipes. Hear that humming sound?
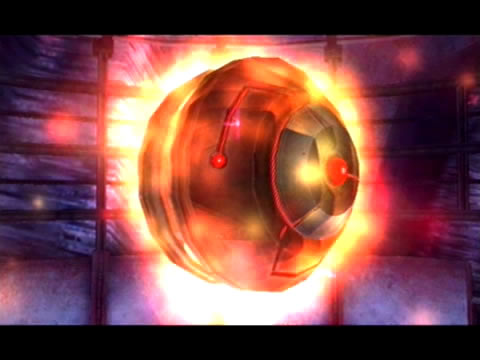
Conquer the Boost Guardian and take your Boost Ball back.
Drop below into the shallow pond and stand in the corner where the pipes are gushing water overhead. Activate the Morph Ball and roll underneath the platform you were just standing on, tucked away in a corner you'll discover Missile TB.03. Roll out from under the platform and stand back up. Watch out for a Grenchler appearing from down the tunnel, jump over it and quickly turn the corner ahead. Roll through the narrow opening you find and drop into the watery chamber beyond.
Stand up quickly and deal with the two Sporbs living on the walls of the chamber. Move onwards to find the exit, and don't forget to scan the Luminoth Lore Projector across from the white door.
Exit the Underground Tunnel to locate the Torvus Grove - a massive arena home to an equally massive tree in the center. Right below the tree lies a number of Phazon containers, so your pirate buddies can't be too far away. Walk over to the door opposite for a nasty surprise - a force field appears over the door while two Pirate Commandos enter from above. Scan one for your Logbook before engaging.
Take out the Phazon containers as they stand nearby to inflict some serious damage. Watch out for their relentless attacks, stay back and stop firing if they deploy a small red energy shield. Stand back from their EMP grenades to avoid a eyefull of static. Deal with both to secure the area and disable the force field.
If you scan one of the giant tree's roots you'll learn that they've been weakened by exposure to Phazon and Denzium, but without Power Bombs you can't knock it over. So for now, head through the door to locate the Meditation Vista - a huge open cliff side complete with a Luminoth-built Dark Portal. Scan the terminal beside it to power up the portal, then step on in.
Once on Dark Aether and the appropriately-named Gloom Vista, you'll see that this portal is two-way, so remember to return here for a quick escape back to Aether. Exit the vista to find the Polluted Mire - a huge open canyon with an equally huge tree winding up in the center. Jump across to the Light Beacon ahead of you and energize it. As you land you'll hear a nasty shrieking sound. Two Hunter Ing will emerge from the toxic waters to attack. Scan one of the freakish things before engaging them. Break out the Light Beam and quickly supercharge the Light Beacon.
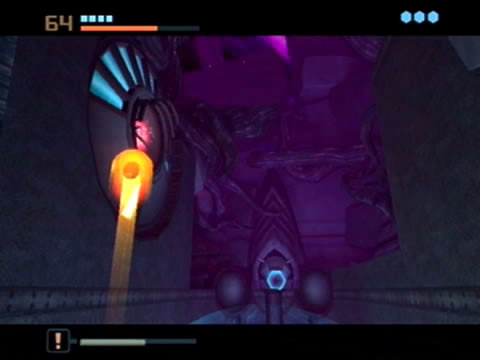
Reach this Temple Key via the Boost Ball.
Watch the Hunter Ing's movement, and move quickly to avoid their nasty tentacles. When you hit them with a blast of light they'll slightly phase out and move elsewhere, if you're lucky they'll move straight into the safe zone and be instantly incinerated. With both targets taken care of, recharge your ammo by taking out a few of the Ingsphere Cache lying around with the opposite weapon. Before jumping across to the underside of the tree, did you spot those platforms positioned about on the exterior of the tree?
Look for the lowest one near the door you entered via, then ascend the tree by way of the other scattered platforms. Once at the top, make your way across to the black door and proceed beyond. In the next region you'll discover a Save Station, make absolute certain you save your game here.
Beyond this region you'll find yourself in a sealed-off area within the Dark Forgotten Bridge where you first visited this part of Dark Aether. A Spinner lies before you, but it's in a state of dimensional flux and so only exists on the surface of Aether. Wander ahead through the caged tunnel and deal with the pair of Lightflyers you find. Beyond the door you locate you'll discover a narrow tunnel on an otherwise blank wall.
Roll through and enter the tunnel network. Ahead you'll reach a point where the ground breaks as you roll across it, don't worry about it for now and just bomb-jump your way to the left. Beyond here lies the Dark Torvus Arena. Way above you where a number of Dark Preed float about is the first Dark Torvus Temple Key, but for now you've got a bigger problem. A large Ing resembling the Jump Guardian awaits you down the other end of the room. It'll turn to puddle form before boosting away - this thief has your Boost Ball ability. Time to get it back.
Scan the remains of the Luminoth warrior beside you to learn this poor one was almost possessed by these foul creatures. Time to avenge her. Drop below into the huge half-pipe and stay within the safe zone till your health fully recharges (or shoot down the Dark Preed above for health). You'll need full health as the room ahead where you engage the Boost Guardian lacks a safe zone so you'll be constantly losing health. With full health restored, roll through the narrow tunnel at the north end of the room to confront the monster, and refer back to the bosses guide for tips to take it down safely.

You'll be dimension-hopping quite a bit.
With the Boost Guardian history and your precious Boost Ball back in your hands, quickly leave this hole before the atmosphere takes any more of your health. Once back in the large half-pipe, the game will inform you that the Boost Ball conveniently allows you to gain momentum and altitude on a half-pipe.
Now you can reach Dark Torvus Temple Key 1. Use the Boost Ball to gain height on the half-pipe, then once you're high enough just sneak inside the alcove and grab the key.
With the key secured leave this area and return to the Polluted Mire (Boost Ball across the breakable sections in the Dark Arena Tunnel to get through). Once there, drop below to the base of the tree and deal with the attacking Hunter Ing if you wish. Either way, take the exit nearby and power up the portal to return to Aether.
Once back in the Meditation Vista, you may spot a lone platform hovering about over the chasm ahead. Don't worry about it for now (you need the Screw Attack to get over there). Return to the Torvus Grove and head towards the white door opposite you. Before the door is a large half-pipe, use the Boost Ball to propel yourself up to the top.
Once above, move around the catwalks to reach the black door over on the eastern side of the area. Inside you'll find a very wet Grove Access, look into the pond where the Save Station stood on Dark Aether and scan one of the roving creatures to reveal it as a a Krocuss. These little ones won't really bother you, just keep out of their way. Walk up the path around the waterfall pond and exit via the door ahead.
Beyond here you'll be back in the Forgotten Bridge area. That dimensional-flux Spinner you saw on Dark Aether is now right before you, so hop inside (scan it first for your Logbook) and use the Boost Ball to open up the gate near your position, with this gate open you can now access the bridge area from here in both worlds.
Break this open easily with a Super Missile.
Before jumping down to the bridge, follow the caged tunnel around to the red blast shielded-door in the corner. Blow it off and head inside. Roll through the narrow tunnel you find to locate a different tunnel network from the one on Dark Aether. Here you'll discover a device capable of spinning around, giving you a platform to bomb-jump from. Move around to the Bomb Slot down below and energize it to spin the device around.
Move around to the second Bomb Slot ahead and rotate the second device. You'll notice that there's a tunnel opening at the top of the second device, so climb up and roll through there for some exploration. Inside you'll discover a cosy half-pipe and hear that familiar humming sound. Build up momentum with the Boost Ball, up the right shaft of this tunnel lies Missile TB.04. With the missile in hand, return to the first section of the tunnel and head left.
Inside the Torvus Plaza ahead you won't be able to do much, as there's a number of Spider Ball tracks above the half-pipe but without the Spider Ball you're stuck. So instead return to the Forgotten Bridge (remember to come back here when you do pick up the Spider Ball).
Once back at the Forgotten Bridge, check your map. You'll see that you've pretty much completely mapped out the surface regions of the Bog, just the sub-level remains to be explored, but that purple door down in the Hydrodynamo Station is currently making sure that can't happen. So for now, proceed back to the main elevator and return to the Temple Grounds where the item to open up purple doors awaits.
Chapters:
- Planetfall
- The World Divided
- Fate of the Federation Troopers
- The Plight of the Luminoth
- The Sands of Agon
- Dark Aether
- The Space Pirate's Lair
- Samus vs Dark Samus
- Unlocking the Dark Agon Temple
- Restoring the Energy Controller
- The Journey to Torvus
- The Everlasting Deluge
- Restoring the Flooded Temple
- Taking the Fight to the Ing
- Expanding Samus' Arsenal
- The Underwater Temple
- Securing the Dark Torvus Temple
- The Path to Sanctuary
- The Mechanical Marvels of Aether
- The Sub Guardian Nightmare
- Subterranean Conquest
- Searching the Fortress
- Retrieving the Charge Combos
- Following the Echoes
- The Screw Attack Returns
- The King of all Mechanoids
- Gearing up for the Finale
- Unlocking the Sky Temple
- The Final Treasure Hunt
- Ending the War