


Chapter 3: Fate of the Federation Troopers

The Federation arrives at Aether in hot pursuit of Space Pirates.
Beyond here you'll finally locate the GF trooper's landing site and their mostly-intact ship. The huge vehicle is surrounded by all manner of GF equipment and fallen troopers, looks like this is where all their troubles began. Walk towards the ship to trigger a cutscene, where you'll witness the final GF log entries before everything went south.
You'll discover their real attackers weren't just the feeble Splinters but what looks like swarms of black twisted variations of the same creatures. Once the compound fell, as his last action the captain managed to send out a distress signal, the very same one Samus responded to. Once you regain control, you'll find that despite that massive assault on the ship, the place is completely deserted.
Scan every object around you, especially the GFS Tyr (the ship) and all the fallen troopers for your Logbook (don't forget the trooper up high on the ledge near the bow of the ship). You'll locate another mechanical gate - this one with an emerald hologram - near the starboard side of the ship, leave it alone for now. Over by LCPL J. Brode's remains you'll discover a unique cargo container with distinct yellow markings. Scan it to reveal it as an ordinance crate, meaning something you'll need is inside. Stand back and unload a Charge Beam shot into it to reveal the Missile Launcher, your first item pickup of the day.
With your new toy in hand walk forward towards the ship for a nasty surprise. You'll see a number of small dimensional rifts open before you as a number of the twisted black Splinters emerge - the same creatures that brought about the GF trooper's untimely demise. Time for a little payback. Scan one to reveal them as Dark Splinters - possessed versions of the normally weaker Splinter kind. Open up with the Charge Beam and your missiles, just take care as you've only got five missiles to play with for now. Try to fire missiles at them if they cluster together, the blast will injure any nearby. Clear them all to secure the area.
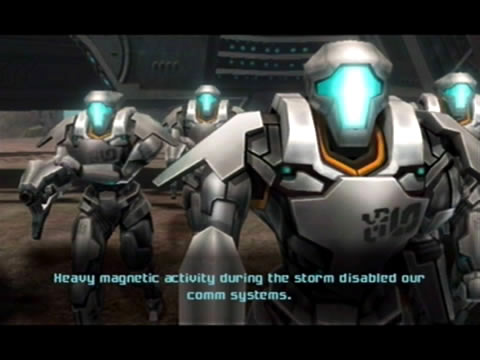
Samus learns of the Trooper Corps' fate.
Head up the ramp on the underside of the ship and scan the passenger seats to discover the names of all the personnel on board (most of them should be familiar to you by now). Scan the door at the rear of the compartment to open access to the Map Station. Grab the map to reveal more of the Temple Grounds area, including the massive structure at the center of the region - which is your next target. Back inside the ship, see the massive hole blow out on the starboard side? Jump across to the rocky ledge beyond from there.
Follow the path around to discover a circular metal object in the ground beside a control terminal. Scan the object in the ground for your Logbook; revealed as a Kinetic Orb Cannon, this thing can fire small spherical-shaped objects at high speeds. You know what that means. Scan the control terminal beside it to power it up, then activate the Morph Ball and touch the hologram. It'll promptly send you flying across the compound up to a ledge ahead of a red sealed door.
Jump down to the door and fire a single missile at it to open it up (try blowing open the nearby crates if you need ammo). You might notice a small opening in the rock wall on the right, through there you'll only find a sealed yellow door. Cross the through door you just unsealed. Inside you'll find a detailed walkway before a large panel blocks your path. The Scan Visor reveals that its control system is not present in the current time space or visible spectrum, so there's not much you can do about it for now.
Scan the fallen GF trooper nearby to confirm the worst, he was the last one left since the Dark Splinter onslaught and was attempting to go where you're headed now. So that's all the troopers accounted for, time for some serious avenging. Activate the Morph Ball and roll through the narrow tunnel opposite the fallen trooper. Down below you'll be greeted by a swarm of good old War Wasps - scan one and watch out for anything they fire at you. Deal with them all and blow open the storage pots in the small alcove for supplies.
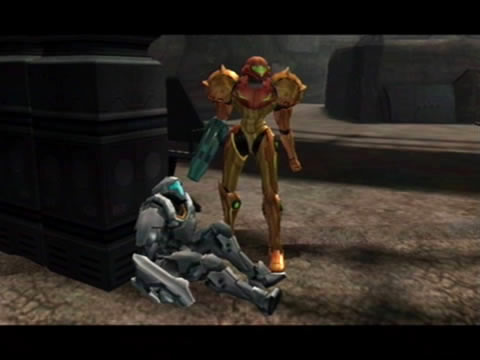
Good thing the captain got the distress call sent.
In the center of the ground here you'll find another Orb Cannon, scan the control terminal up on the ledge to activate it. Jump in to propel yourself up to the ledge, then head through the door. Beyond you'll locate another large open area, your target is on the far end. Quickly scan the visible War Wasp Hive directly ahead for your Logbook, then fire a single missile at it and deal with any War Wasps emerging. Take out the second hive ahead with another missile before going closer.
See the offline Orb Cannon over in the corner? There's a scannable wall section above which you can easily break through with the cannon, only once it's active of course. Fire a single missile at the wall initially to weaken it. Deal with the War Wasp Hive directly above the cannon quickly, then scan the control terminal nearby to power it up. Jump inside to launch over to the wall, breaking through it easily. Stand up and turn around, you should see a final Hive visible across the way. Destroy it from here then activate the Morph Ball and enter the narrow opening nearby (notice how the little moths flying about are attracted to the Morph Ball?).
Follow the railings around to reach the door on the far side of the region. Beside the the door you'll find the remains of a large moth-like humanoid, scan it to reveal that an unknown mysterious chemical is present on the target. Enter the door to find a large elevator platform inside. Scan the control terminal to power it up, then step into the hologram for a really rapid ascent up to the structure in the sky.
You'll now find yourself in the Great Temple. Climb up the steps to locate two more remains of the moth-like creatures. Beyond this room you'll discover a long empty tunnel with a standard door at the far end surrounded by spinning gears. Walk forward and scan one of the small Sandbat creatures as they swarm out from the wall for your Logbook. Walk forward and crawl through the narrow opening in the left wall to locate a Save Station. Inside beside the Save Station you'll discover a weakened wall section, but can't break through it yet without the Morph Ball Bomb. Save your game here before heading back out to the main tunnel.
One of Samus' first encounters with the Ing.
Beyond here you'll discover the Temple Sanctuary - a central room filled with ornate decorations and lined with stasis pod cocoons around the walls. Look closely at one of the pods, you'll spot the face of one of those moth-like creatures visible inside it. Turn around and take a look at the center of the chamber, directly above on the ceiling hangs a number of Splinter Cocoons, with a giant one in the very center.
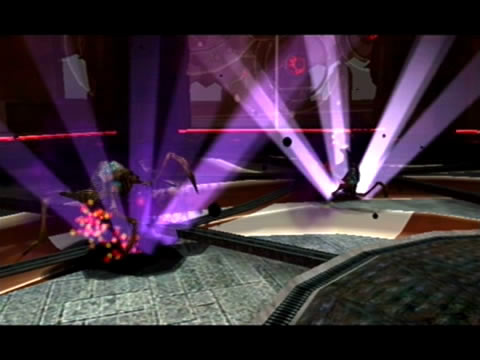
Walk towards them to suddenly find yourself caged in by several force field barriers. A number of Splinters will lower themselves from the ceiling, but not long after they'll be possessed by those twisted dimensional-rifting creatures.
Strafe around and finish off your twisted foes. With the room clear a giant Splinter will promptly emerge from the large cocoon and attack. Quickly scan it to reveal it as an Alpha Splinter - the head of the pack. Lock on and strafe around the target, make sure it only lunges at empty air. Rip into the beast with a few Charge Beam shots, eventually another dimensional rift appears before the twisted airborne parasite emerging takes control of the Splinter, becoming a Dark Alpha Splinter. Scan the beast before engaging it. This fearsome customer is your first boss battle for the game, so refer back to the bosses guide for tips to send its oily hide packing.
Chapters:
- Planetfall
- The World Divided
- Fate of the Federation Troopers
- The Plight of the Luminoth
- The Sands of Agon
- Dark Aether
- The Space Pirate's Lair
- Samus vs Dark Samus
- Unlocking the Dark Agon Temple
- Restoring the Energy Controller
- The Journey to Torvus
- The Everlasting Deluge
- Restoring the Flooded Temple
- Taking the Fight to the Ing
- Expanding Samus' Arsenal
- The Underwater Temple
- Securing the Dark Torvus Temple
- The Path to Sanctuary
- The Mechanical Marvels of Aether
- The Sub Guardian Nightmare
- Subterranean Conquest
- Searching the Fortress
- Retrieving the Charge Combos
- Following the Echoes
- The Screw Attack Returns
- The King of all Mechanoids
- Gearing up for the Finale
- Unlocking the Sky Temple
- The Final Treasure Hunt
- Ending the War