Bosses Guide

The Space Pirates have amassed an enormous army of Phazon-enhanced beings just waiting to try their luck against Samus. Not only that, Samus will also find herself facing the Leviathan Core protectors and the once-friendly bounty hunters Rundas, Ghor and Gandrayda in battle. All the while trying to stave off her own Phazon corruption. Not an easy day in the life of a bounty hunter.
Remember to scan boss creatures immediately for your Logbook as you'll only have a single chance to do so (for most bosses). Some will utilise their own form of Phazon-based attacks, while others can only be harmed from your own Hypermode weaponry - so rather than preserving ammo you'll find yourself trying to save health for extra Phazon rounds. Using Corrupt Hypermode effectively is also key, refer to the Hypermode Guide for more details.
Each boss displays a health bar below your own health so you'll always know how much more punishment they require. Also be warned that bosses possess plenty more health on Hypermode compared to Normal and Veteran, and their attack power is greatly increased so be ready for an insane challenge.
As for bonus rewards, defeating each boss on Normal or Veteran will grant you a yellow credit, while defeating them again on Hypermode will grant you another yellow credit (treasure the Hypermode credits, it's no easy task earning them).
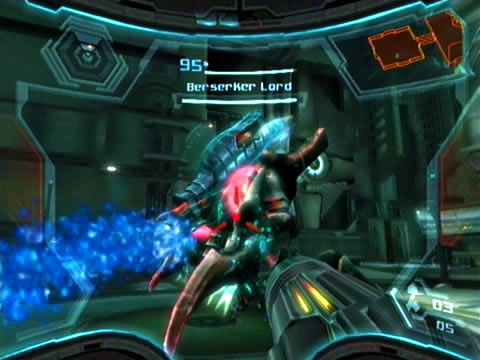
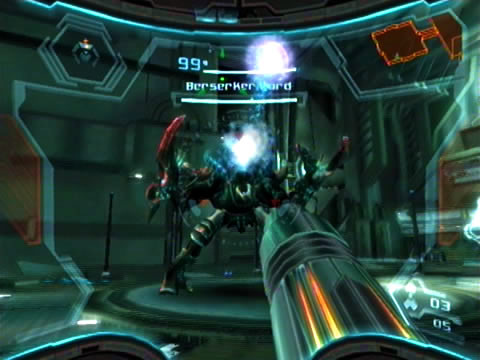
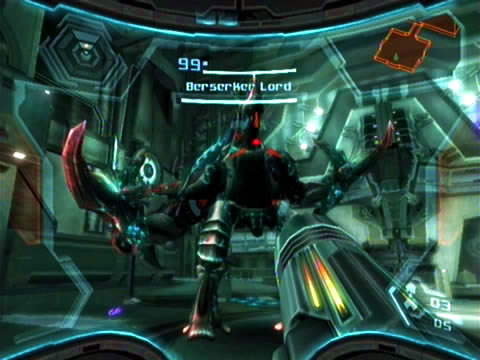
Berserker Lord
- Location: GFS Olympus (Docking Bay 5), SkyTown (Turbine Chamber)
- Attacks: Phazon breath, Sweeping laser, Phazon sphere projectiles, Shockwave
- Weakness: Missiles, Charge Beam, Phazon projectiles
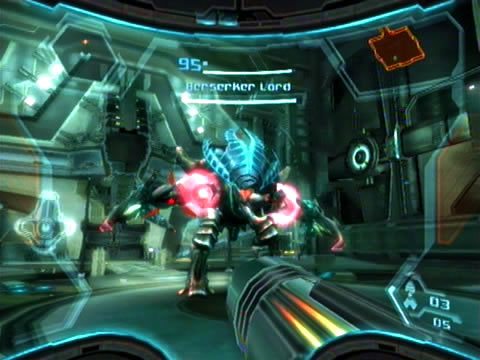
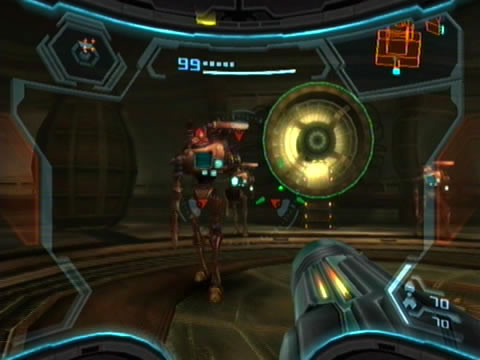
You'll encounter two Berserker Lords throughout your travels. The first is the only obstacle between Samus and her gunship aboard the GFS Olympus, while the second lies in wait in SkyTown inside the chamber of the first Theronian bomb part. These hulking monstrosities tend to throw all their weight at you, simply keep your distance at all times from those pincers.
The Berserker Lords tend to utilise long range attacks, including a ground-based shockwave and nasty Phazon-enhanced breath. Space Jump to avoid the shockwave, and keep the target locked on and dash-strafe left and right to avoid its stinky breath. Also watch out for a sweeping blue laser attack, simply leap above the beam as it passes by to avoid it. Scan the creature to learn that its weak point resides below the thick Phazite armour plating above its head. None of your weapons can penetrate the Phazite armour, instead you'll need to target those two red sections on its shoulders.
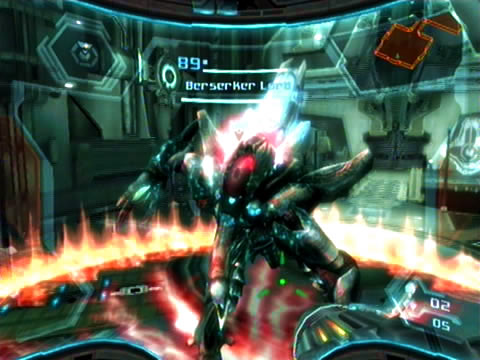
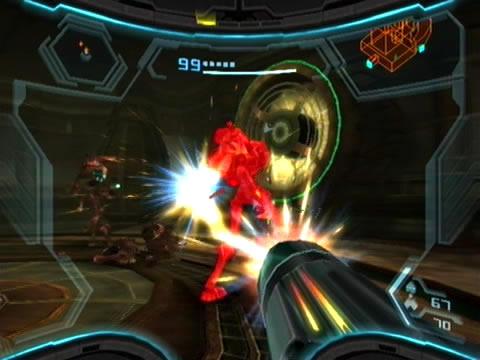
Tear into the shoulder sections till they weaken, eventually with both disabled the monster will launch two large purple Phazon energy spheres (grab any health refills the damaged shoulder sections drop). Wait for at least two spheres to launch then quickly fire at them as they travel towards you to hand them right back to sender. Just keep your distance if red electrical energy charges up in the creature's body as instead of a purple sphere you'll find a huge red fireball coming your way. Also be wary that the beast may launch a huge meteor at you instead of the regular purple spheres, stay back and be ready to dash-strafe clear.
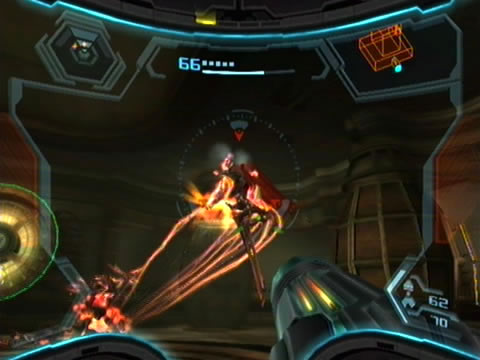
Each Phazon sphere returned to the Berserker Lord will weaken its Phazite armour. The beast will reconstruct its should plating, so resume attacking them again to force the Berserker Lord to launch another round of purple spheres. Eventually the Phazite armour will collapse to reveal a vulnerable weak point beneath. Don't waste any time in opening up on the core with everything you've got (don't be afraid to unload all five of your Missiles on the first encounter).
The Berserker Lord will now go nuts with its shockwave attack so be ready to hop into the air quickly. On your second encounter feel free to use Hypermode to finish the beast (that object in the center of the chamber also provides good cover). You'll now see the Berserker Lord's health decrease, keep your attacks up while dodging everything it throws at you to finish it off.
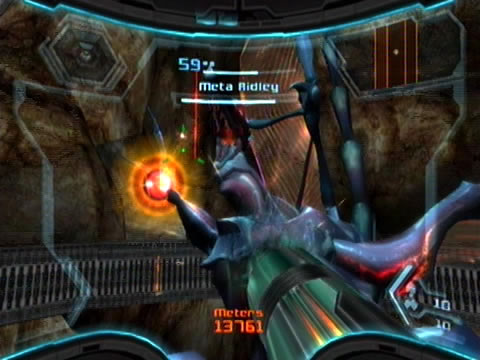
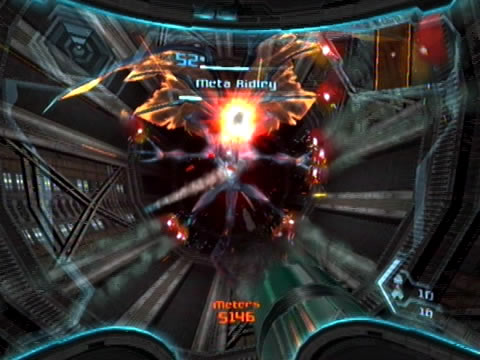
Meta Ridley
- Location: Norion (Generator Shaft)
- Attacks: Mouth laser, Claw swipe, Energy projectiles, Magma meteors
- Weakness: Power Beam, Charge Beam
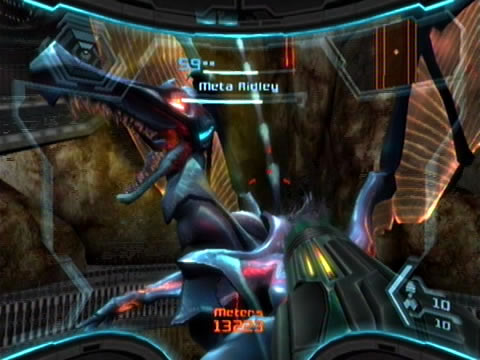
This is one fight you won't soon forget. You'll face Meta Ridley while plummeting down a 17,000 meter shaft at incredibly high speeds so there's no time to lose. Ridley starts out below you as you fall, trying to slow his own descent with his arms and legs (that must hurt) - don't waste any time in attacking straight away. His only weak point is his mouth, keep firing towards it to inflict critical damage whenever it opens.
Seeing as you're free-falling down an almost never-ending shaft there's a few things to note. You'll be able to control the direction of Samus' descent with the C-stick, so be sure to avoid touching the sides of the shaft to avoid damage. This way you'll also be able to avoid anything Ridley sends up at you. Watch out for a pulsing red laser, simply keep away from the beam as it courses up the shaft. Also keep an eye out for strange red projectiles Ridley sends your way, simply shoot them down before they reach you.
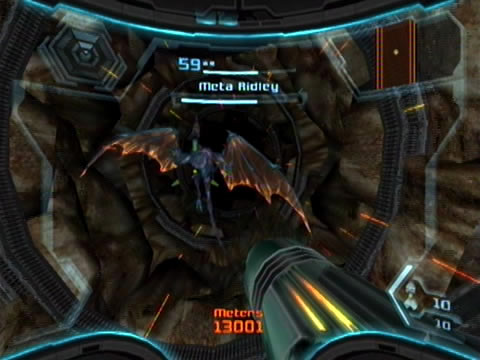
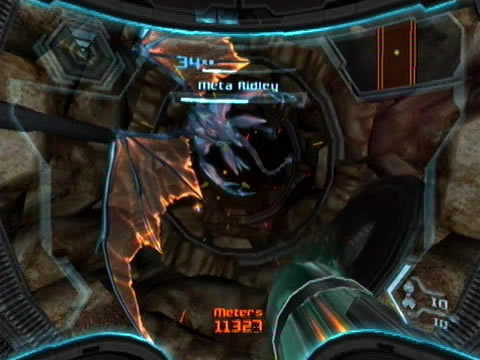
Ridley may also launch what easily could be mistaken as small red meteors in various formations; shoot these as well to stop them before they reach you. Eventually with enough of a beating Ridley will let go of the walls and swoop up at you - grabbing Samus in the process. You'll now be facing Ridley up close and personal. Don't stop firing at his face (yes, it will get tiring - pause the game if you need a rest), and watch out if he draws his other arm up. If he does and energy begins charging inside his claw quickly shoot at it to stop him from swatting you nastily. Keep firing at his head to stop any projectiles from launching your way. During this sequence you should manage to avoid any loss of health if your trigger finger is fast enough (strange how Ridley doesn't just try to squeeze Samus tight).
Eventually Ridley will release you and you'll swap places, with him swooping down as Samus falls. Keep firing at his head and drift around to avoid anything he throws at you. By now you may be less than 10,000 meters to the bottom, don't let that frantic counter make you nervous. Ridley will eventually grab you again and try to swat at you, just keep firing at his head and claw to avoid any significant loss of health. Upon releasing you Ridley will continue berating you with laser and projectile attacks, finish him off once and for all to discover how Samus will escape this predicament (I'm sure the classic Space Jump would've helped).
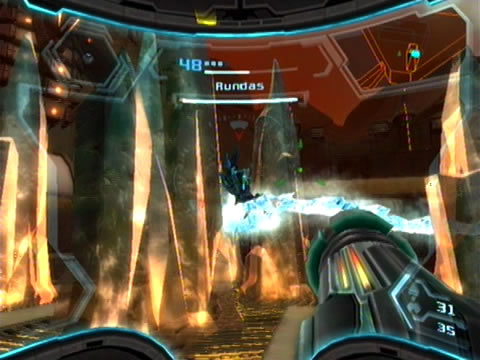
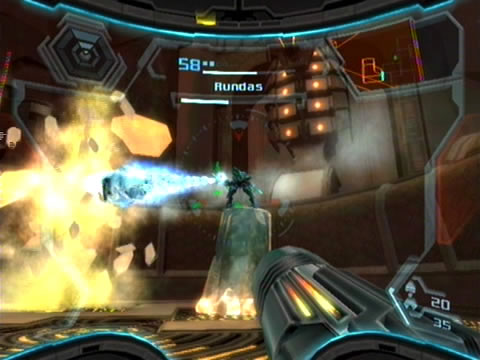
Rundas

- Location: Bryyo (Temple of Bryyo)
- Attacks: Ice Beam, Ice Missiles, Ice swing, Ice battering ram
- Weakness: Grapple Lasso, Missiles, Charge Beam
Upon arriving at the roomy Temple of Bryyo you'll find yourself directly at the mercy of one of the Space Pirate's main battleships. Deal with the infantry a number of Pirate ATCs deploy before witnessing an odd sight. Ice formations of all shapes and sizes suddenly appear and systematically pick off every remaining Pirate. Rundas quickly appears, but sadly his intentions are no longer in your best interest. Watch carefully right before the battle begins, the ghostly form of Dark Samus appears ever so briefly over Rundas - no doubt now, this guy is surely rampant.
Thankfully you'll have plenty of room to move around the arena, but those massive ice stalagmites won't make it any easier. Without wasting time Rundas will leap down to ground level while generating a heavy armour shield around his body. With that shield active you can't inflict any critical damage, so quickly scan him to learn that bringing that shield down is your first step to victory. Keep him locked on and don't stop firing, refrain from using Missiles too much as he'll freeze them in mid-flight (but you can still sneak one or two in between attacks).
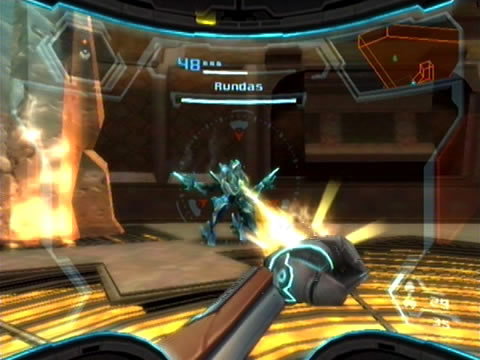
Watch out for several blasts of ice coming your way, if one scores a hit you'll be frozen solid. Quickly press A and B rapidly to break free if you're caught. If Rundas takes off and surfs around the air on his icy ride keep him locked on and track him as he winds around his icy terrain. Fire a homing Missile or two when in range. If Rundas lands and strolls about keep in him view and let rip a few more Missiles to try and score a stronger hit - just don't wander too close to avoid a nasty swipe.
Eventually with enough stress Rundas will be rendered momentarily stunned. Quickly spin around to his front and lock onto the C icon. Deploy the Grapple Lasso and rip back hard to completely demolish his hardened armour. Now your target is vulnerable. Open up to inflict critical damage, just watch out for a few retaliatory icy blasts.
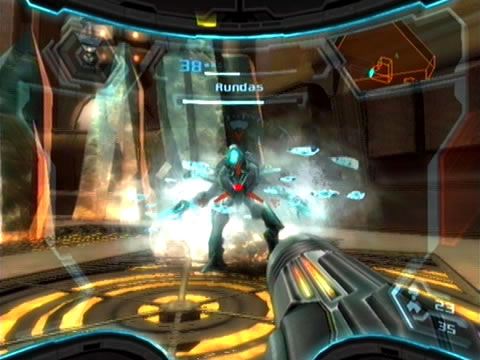
Watch out now if Rundas leaps atop an ice stalagmite. He'll generate four huge rounds of ice before sending them hurling at you. Quickly shoot them down with suppressive fire before they hit home, and try to score a few hits on Rundas as well. The stalagmites also provide good cover, but be warned - a single ice rock will demolish any stalagmite in its path. You can always switch on Hypermode now and use a Charge Beam blast to easily shred his projectiles, but you may wish to save Hypermode use for later (especially on the Hypermode difficulty). Some of the ice rocks may drop health and Missile refills, be sure to draw them in with your Charge Beam.
Keep tracking Rundas as he moves about and sneak in Missile hits when you can. Eventually he'll regenerate that protective armour (sneak in a Missile as his armour appears). Keep pummeling the target till the C icon appears then use the Grapple Lasso again to rip his armour off (if you catch him as he stands atop a stalagmite don't pull back until he falls to the ground.
Eventually with half his health down Rundas will launch small icy projectiles at you as he surfs around the arena. Shoot these down if you need health; every once in a while they'll drop health refills. Watch out if you lose track of Rundas though, he may land atop a stalagmite and create a massive ice battering ram capable of shearing through any other stalagmites as it closes in on you. Lock onto him and be ready to dash-strafe left or right as it heads your way.
Don't lose track of Rundas and keep your attacks up. Eventually with his armour disabled feel free to open up with Hypermode before he uses his own - if he does you'll be facing stronger attacks so be sure to avoid taking unnecessary damage. Shoot down his small ice projectiles if you need health and use Hypermode to have him beat in no time. Upon defeating Rundas you'll earn the Ice Missile upgrade, but unfortunately his fate isn't anywhere near as favourable.

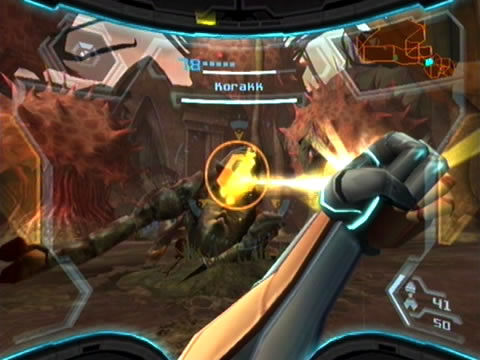
Korakk Beast
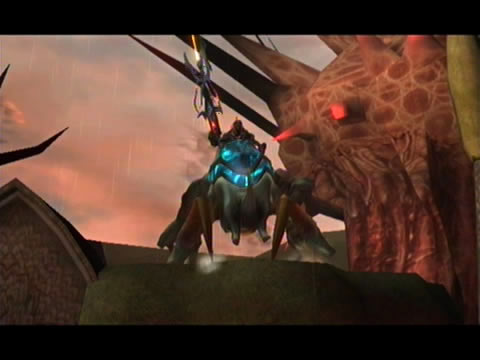
- Location: Bryyo (Jousting Field)
- Attacks: Energy lance (Pirate Hussar), Tongue leech, Pincers, Charge attack
- Weakness: Bombs, Grapple Lasso, Missiles, Charge Beam
Clearing out the two Aerotroopers in the Jousting Field will reward you with a once-encounter of this Korakk Beast and its rider. Don't forget to scan the Pirate Hussar riding atop the beast for your Logbook. Initially you're biggest worry is the rider and his energy lance, lock on and keep dash-strafing left and right to avoid the beam. Plow into the Pirate Hussar - he won't take much before falling from his steed.
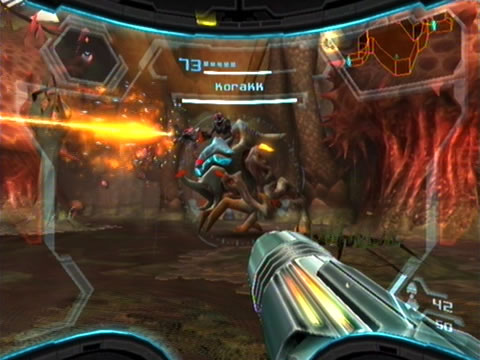
With the Hussar down it's just you and the Korakk Beast. As it stands the creature's hide is completely protected against your attacks. Lock on and keep strafing around the target, as it often tends to lurch or leap forward. Also keep an eye on where you're standing; stay clear of the Fuel Gel pond in one corner of the field.
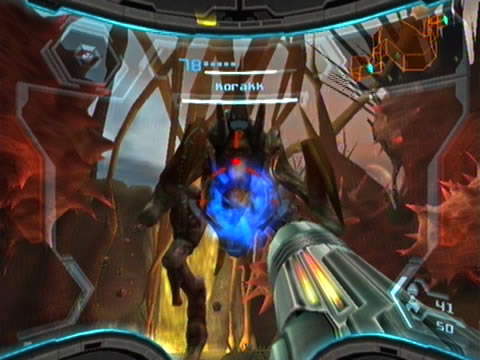
Eventually the Korakk will extend is oily tongue in an effort to ensnare you for its maw. If it grabs hold quickly shake the Wii Remote and Nunchuk up and down to break free. Keep your distance from the target and quickly open up on the tongue when it extends. If you score a hit on the tip of the tongue it'll retract and momentarily stun the Korakk. While the stars flicker about is head you'll spot rays of light emanating from below the creature. Quickly activate the Morph Ball and roll underneath, dropping bombs as you do.
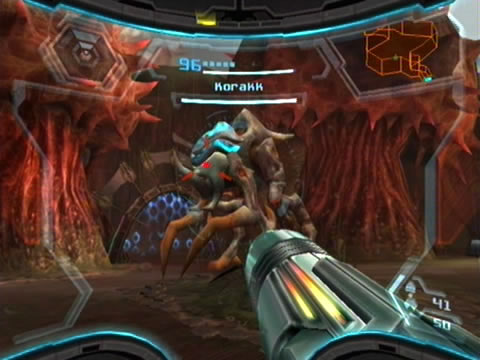
With a few direct hits the Korakk will topple over as its tail becomes vulnerable. Stand up and swing around behind it. Attach the Grapple Lasso to the tail and rip it back. The Korakk will lurch up with its underside completely exposed - quickly rush around to its front and open up on the exposed underbelly with everything you've got (feel free to use Hypermode to really speed things up).
With a round of critical damage inflicted the Korakk will resume its hunt for you, lashing out its tongue again while lurching at you every now and then. Stun the beast again, bomb its underside, then grapple the tail to expose its weak underbelly again. Keep this routine up to eventually cook the beast.

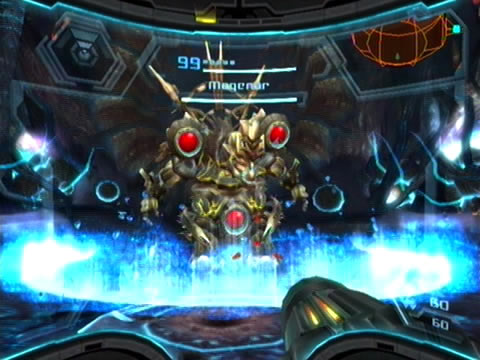
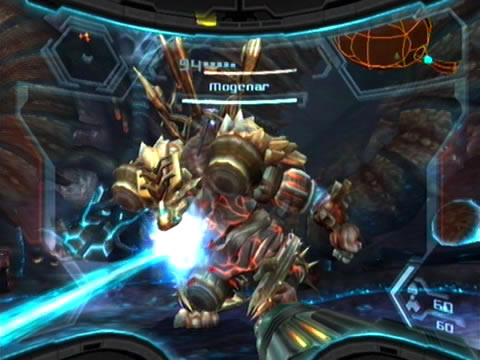
Mogenar
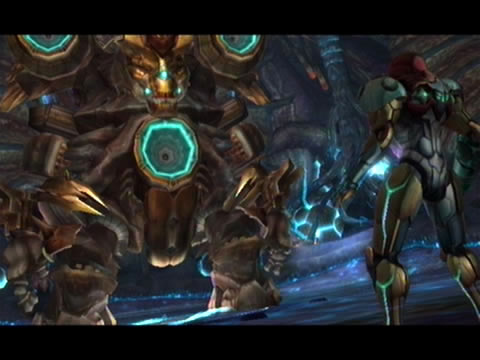
- Location: Bryyo Seed (Bryyo Leviathan Core)
- Attacks: Illusion hands, Shockwave, Mouth laser, Stomping shockwave, Stomping charge
- Weakness: Ice Missiles, Charge Beam, Bombs, Hyper Beam
This overgrown Golem protecting the Leviathan Core won't be an easy customer to bring down (especially on Hypermode). Upon powering up its four energy cores the beast will stir and attack. Scan the creature to learn that only its energy cores are vulnerable - taking all four offline will destroy the unit (much easier said than done).
Mogenar's entire body is impervious to your weaponry, save the four red energy cores. You'll need to penetrate the outer hull of each core then fill it with Hyper Beam fire to inflict critical damage to the beast. That sounds easy enough, except that each core constantly opens and closes, and while the cores are sealed they'll slowly heal themselves.
Mogenar begins with its heaviest attack - a jumping shockwave. Time your Space Jump right to avoid the blast, be certain that you're never caught off-guard as this attack tears a nasty chunk from your health (half an energy tank on Hypermode!). Keep the beast locked on as often as possible, as Mogenar will also often stamp one giant foot on the ground to send a nasty quake right at you - dash-strafing left or right should keep you out of trouble.
Don't waste any time ripping into the red energy cores as they become exposed. Missiles generally take too long to score a hit before the cores seal so stick to rapid-fire Power Beam shots. If all the cores seal and green swaths of energy cycle between them they'll rotate around and switch positions. Focus on one target and keep firing until the core breaks open.
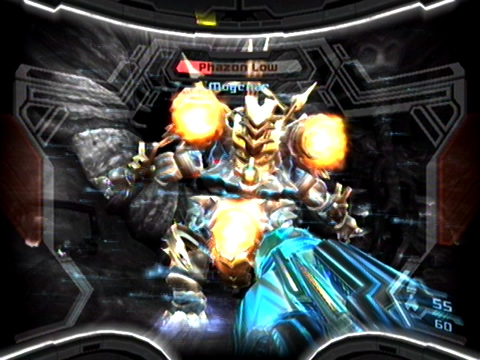
Immediately enter Hypermode as a core blows and wait for the cores to become exposed again. Fill the damaged core with Hyper Beam fire, just don't drain your Phazon reserve too quickly (if it's low and the core hasn't exploded yet try to wait until you enter Corrupt Hypermode and slowly regulate blasts until the core erupts). With a core permanently destroyed you'll notice a quarter of Mogenar's health bar gone. Unfortunately you'll need to destroy an unprotected core as quickly as possible, as Mogenar won't waste time trying to restore it. The beast may stand still and launch two illusion hands towards the large red pillars adorning the chamber - both will then slowly draw two fresh red cores into the body. Allow Mogenar to grab them and the damaged core will be restored. Try to destroy the cores as they're slowly drawn towards the body.
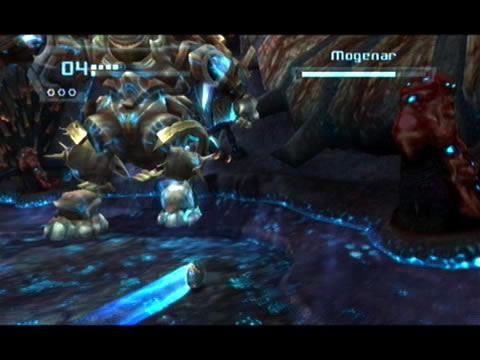
With each energy core permanently destroyed, Mogenar will execute a number of new tricks. Firstly, it'll summon a charge of Phazon energy to create hardened shells around its feet before promptly stomping across the chamber straight at you. Lock onto Mogenar and quickly dash-strafe out of its rampaging path. Watch out as Mogenar reaches a wall; it'll look around before swinging around to face you - sending out a nasty shockwave for good measure. Space Jump quickly to avoid the devastating blast.
Now to break those hardened shells on its feet off. As long as the shells are active you won't be able to harm the beast, so wait for it to stomp towards you. Stay up against a wall and quickly strafe around Mogenar then move in close proximity as it faces the wall. Quickly active the Morph Ball and roll between the feet (don't worry if you take damage, the collision detection is bit iffy here). Quickly drop bombs and roll away - you may see your explosives damage (or destroy) the shells but there's no time to waste. Immediately stand up and wait for the shockwave attack as Mogenar swings around.
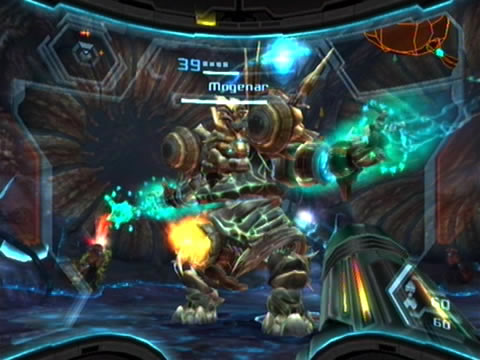
Eventually with both shells destroyed the remaining cores will begin opening and closing again. Watch out for two more attacks now, Mogenar may either slam a fist into the ground causing debris to fall from above (don't worry about the falling objects), or it may charge up electricity in its funky headpiece and emit a coursing laser from its mouth. Quite frankly, if Mogenar ever uses the mouth-laser you're in luck. Quickly counter it by locking on and firing a single Ice Missile into the beast's face. The blast will handily freeze the head and lock all the energy cores open for a few seconds. Use this time to rip into any of the exposed cores.
Mogenar may also generate a single illusion hand, sending the projectile straight at you. Use Missiles or a Charge Beam blast to disperse the projectile. The beast may also launch three smaller green projectiles at you, blast them all quickly and keep your eyes open for a follow-up shockwave attack.
Keep focusing your attacks on a single energy core until it breaks open, then immediately activate Hypermode and destroy it before Mogenar restores it. Eventually upon destroying all three of the frontal energy cores you'll find a single remaining one on Mogenar's back. Keep the beast locked on and continue strafing around until you find a clear shot. With the final core breached, immediately switch on Hypermode and throw everything you've got at it till the beast finally submits - rewarding you with the Hyper Ball upgrade.
This battle will be incredibly tough on Hypermode difficulty, thanks to the need to use Hypermode to inflict critical damage on Mogenar's energy cores. Throughout the battle you'll find health pickups appearing when destroying any of the energy cores, blowing off the hardened Phazon shells on the beast's feet, or destroying any of the illusion hands or green projectiles it fires. They can be difficult to spot in the large chamber, but as you destroy any of the objects use the Charge Beam to draw any health in as you'll certainly need it.
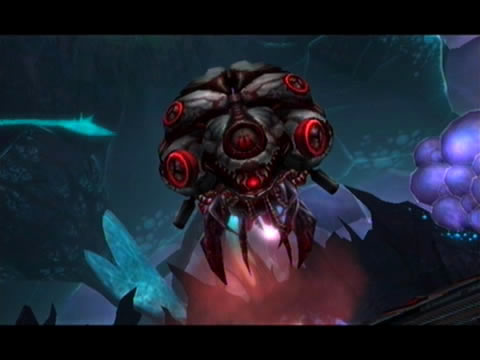
Steamlord

- Location: SkyTown (Hub Access, Barracks Access, Steambot Barracks, Skybridge Hera, Ballista Storage)
- Attacks: Steambots, Electric charge, Invisibility cloak
- Weakness: X-Ray Visor, Missiles, Charge Beam
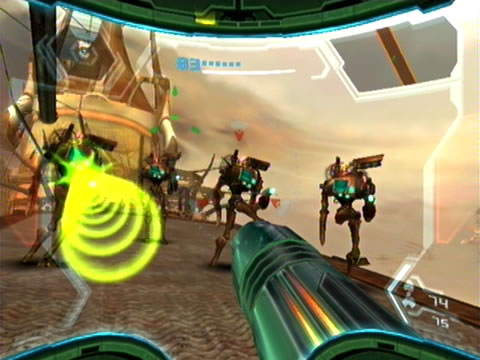
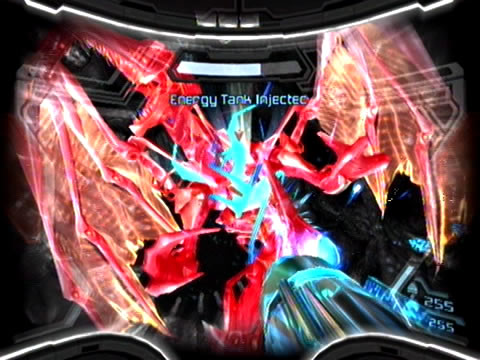
You'll face a number of Steamlords and their Steambot cronies throughout the SkyTown expanse. During the battle the Steamlord will keep itself protected by an invisibility generator, leaving the dirty work to the Steambots. Attack the Steambots with everything you've got, just be sure to attack any still in possession of their arms (armless Steambots can't really hurt you). Eventually as you shut down Steambots the Steamlord will emerge to effect repairs on the downed units. Lock on and open up on the floating target before it disappears again.
The Steamlord may also emit an electrical charge straight at you, just try to return your own fire as much as possible. Keep attacking the Steambots to lure the Steamlord out of hiding, eventually with enough punishment the Steamlord will explode, taking its small army with it (the first Steamlord conquered grants you an Energy Tank). Curiously, watch out if you use Hypermode as the Steambot's projectiles tend to drop you out of Hypermode if they hit home.
During certain battles with Steamlords you'll have a few nifty advantages. When you encounter the Steamlord atop the rickety Skybridge Hera, instead of engaging it simply cross the bridge to solid ground and watch as the entire structure collapses, taking all your foes with it (and earning you a Friend Voucher). In your final battle against a Steamlord in the Ballista Storage you'll be in possession of the X-Ray Visor. Simply switch it on to track the Steamlord easily and render its invisibility useless.

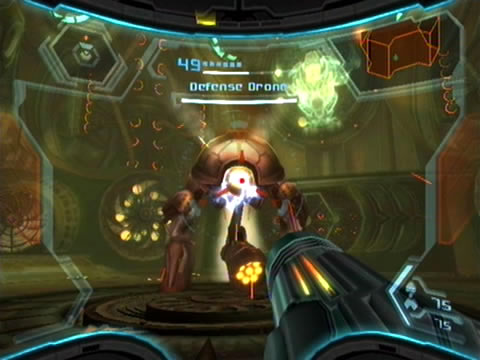
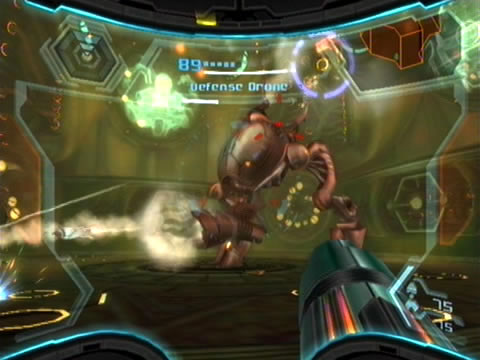
Defense Drone

- Location: SkyTown (Ballista Storage)
- Attacks: Missiles, Magma meteors, Shockwave, Homing bombs
- Weakness: Grapple Lasso, Missiles, Hyper Beam
This annoying foe is all that stands between Samus and the Boost Ball upgrade. Despite the cavernous chamber you'll fight this mecha in you'll need to keep moving to avoid coming in contact. Scan the drone to learn that those three antennas adorning its head must be disabled to enable you to rip open the head section. Keep your distance and lock onto the drone. Try to pick off shots at the tips of each antenna, but it won't be an easy task with the drone twitching around constantly. As you pick off each antenna don't dawdle as they'll eventually restore themselves.
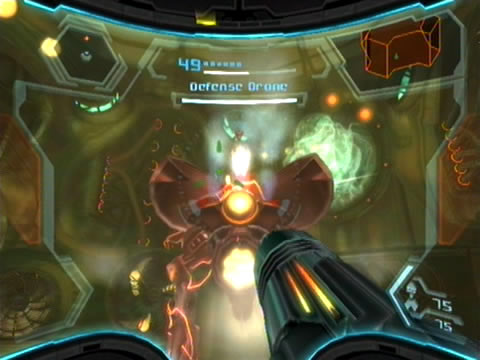
While the antennas are active the drone may unleash a volley of missiles at you, dash-strafe left and right to avoid them. Also watch out for a huge plasma meteor it often belches. If the drone leaps into the air quickly stand back and be ready to jump the incoming shockwave as it lands. Once you've disabled all three antennas the drone will shudder and fall in a heap - quickly lock onto its head and deploy the Grapple Lasso. Pull the grapple back to rip open the drone's head plating and uncover its vulnerable brain inside.
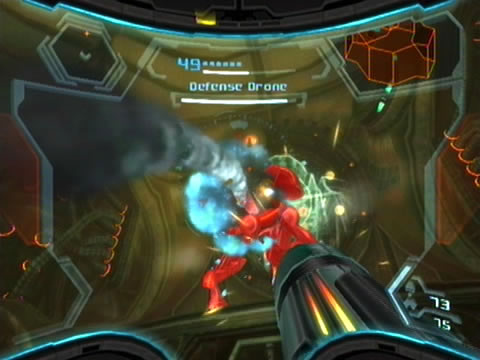
Now the battle heats up. The drone will abandon its position and leap up to one of the four platforms overlooking the main chamber. From here it'll deploy three homing bombs that love to follow you around the chamber (notice Ghor's image leering at you from all the holographic panels above). At first the drone will only deploy three bombs, so for now lock onto the drone and fire as many Missiles as possible to inflict critical damage. Shoot down the bombs before they make contact (and grab any health refills they drop). Also watch out for any more missile volleys from the drone. The drone will leap from platform to platform while deploying bombs, just try to score plenty of Missile hits.
Eventually the drone's head will reseal and it'll join you back on the floor of the chamber (jump the incoming shockwave as it lands). Disable the restored antennas again and grapple the head open to reveal its weak point. The drone will leap up to a platform and commence its bomb deployment antics again. Keep up the routine and use Missiles to damage the core.
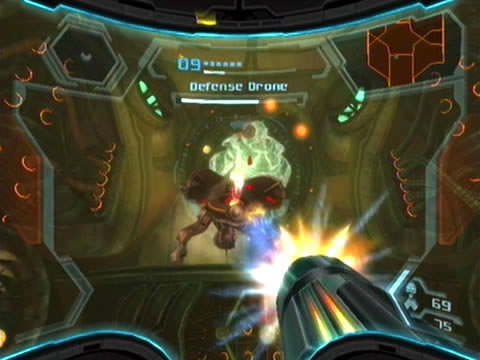
Eventually with half its health drained the drone will begin moving around more erratically than before. Not only does this make striking the antennas difficult, but with its core exposed it'll deploy plenty more homing bombs than before (a lot more on Hypermode difficulty). This is where handy use of Hypermode comes into play. Activate Hypermode as soon as the drone leaps up to a platform and be ready to rip into the exposed core as soon as it faces you (you may need to stand back to hit it). For now don't worry about the plethora of homing bombs, they can't hurt you for now.
Allow yourself to eventually enter Corrupt Hypermode and watch the red bar. Try to stay in Hypermode for as long as possible - as crazy as it sounds you may find that allowing the bombs to hit you keeps you in Hypermode longer as each hit drastically increases your Phazon meter, quickly giving you more energy to vent at the drone - just make sure that the bar doesn't max out (this trick will help immensely on Hypermode difficulty). If you've still got plenty of Phazon energy left try unleashing a Charge Beam shot into the core just after it shudders open and deploys bombs.
From now on with so many bombs deploying from the drone you're best bet should be to stick with Hypermode and allow the bombs to hit you to prolong Corrupt Hypermode and avoid losing real health. Just be sure to use Hypermode early to avoid dropping out of it with barely any heath left. With the drone almost dead don't worry too much about destroying the bombs and picking up health - just finish the annoying robot.
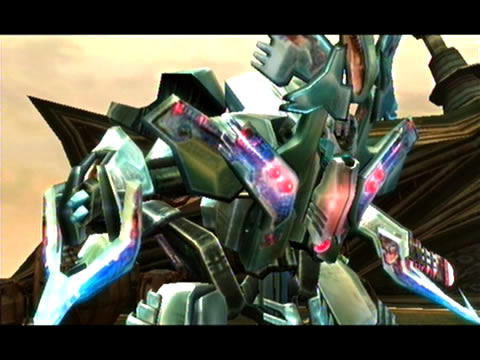
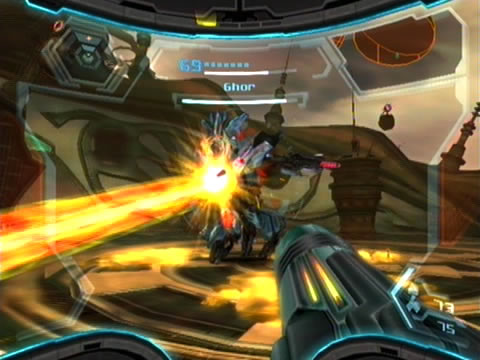
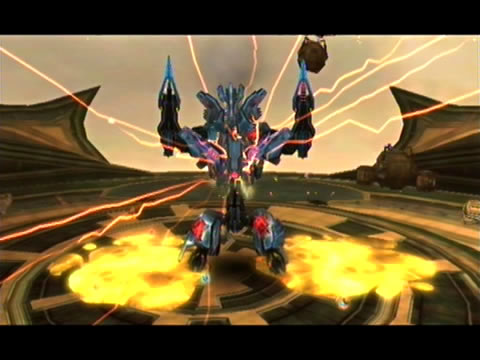
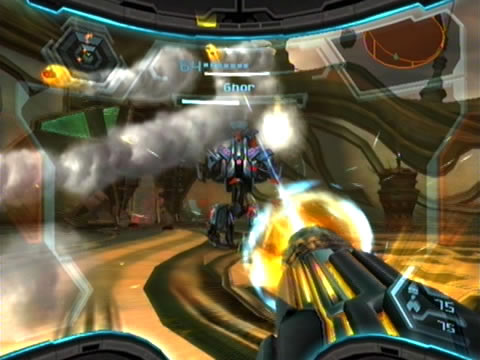
Ghor
- Location: SkyTown (Main Docking Bay)
- Attacks: Plasma bolts, Homing missiles, Alpha laser, Ram attack, Grappling hook, Hypermode
- Weakness: Ice Missiles, Charge Beam, Boost Ball, Hyper Beam
Remember back on Norion when you witnessed Ghor tearing that Berserker Lord a new one? Well now you're about to find out what he's fully capable of. At first Ghor will deploy an impenetrable energy shield as he rolls around the docking bay in his hulking gunship/suit. Keep your distance at all times to avoid any unpleasant attacks from his claws. Before inflicting damage to Ghor you'll need to power down that energy field - its generator lies on his back, so you'll need to find a way to get behind him.
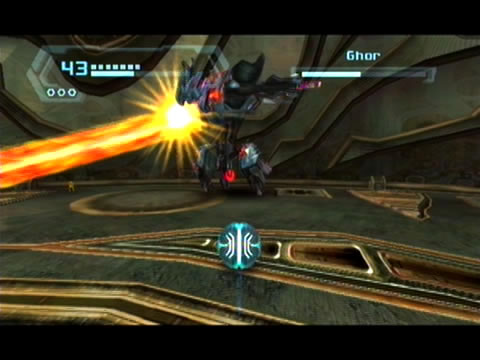
See all that hazardous Fuel Gel your ship leaked everywhere? Put the Fuel Gel between yourself and Ghor, then quickly fire an Ice Missile at a single puddle to freeze it temporarily. Eventually Ghor's upper body will spin around once before he literally tears across the field at you. If you manage to lure him across one of the frozen Fuel Gel pools he'll slip up and spin out of control, humourously slamming into a wall. You can't miss the now-visible energy shield projector on his back, quickly lock on and send a few Charge Beam shots and Ice Missiles into it.
Keep this up till the energy shield emitter fails. With the shield down you'll see a circular yellow pulse appearing above Ghor's head - this is his ultimate weak point. Rip into it as much as possible to find his energy bar lower with each blast. Eventually he'll restore the energy barrier, simply put the Fuel Gel puddles between the two of you again and freeze one or two of them to slip Ghor up.
Also watch out for a number of Ghor's potent attacks. If he aims both arms skyward he'll deploy a number of homing missiles right your way, try to either shoot them down or lock onto Ghor and dash-strafe left and right to avoid any damage. Upon finishing his missile bombardment he may begin rapidly firing plasma bolts at you, lock on and dash-strafe to keep out of the fire.
If you scan Ghor you'll learn that his attacks can be combined to form an alpha strike - watch out for a massive plasma laser he enjoys sweeping around the area, Space Jump over the beam as it passes through. With a chunk of health lost Ghor will eventually lose his energy shield emitter and try a few new tricks. He'll burn up the Fuel Gel puddles so you won't need to worry about the hazard they pose any more.
Watch as he charges up electrical energy in his body, see that small red orb appear at his base? You'll now need to disable that object to render Ghor's CPU vulnerable again. Watch out for his signature spinning attack; lock on and keep away to avoid a nasty bruise. As he streaks around the docking bay many of the containers surrounding the walls will undoubtedly explode - make certain to draw in any health or missile refills they drop (Ghor will also often drop refills after receiving enough of a beating).
Don't bother activating the Morph Ball just yet, as Ghor will take the opportunity to fire a grappling hook straight at you - if it connects you're in for a beating. Wait for him instead to stop still and deploy his sweeping alpha laser. Quickly activate the Morph Ball and Boost Ball straight through the red sphere to knock him down. As he rises you'll see the pulsing yellow aura around his CPU again, open up with everything you've got (feel free to start using Hypermode now). After streaking around the battlefield and deploying more projectiles your way the red sphere will eventually reappear. Simply wait for Ghor's alpha laser again before using the Boost Ball.
Eventually with only around a third of his health bar remaining Ghor will finally utilise his own Hypermode. In this state his homing missiles and plasma bolts are far more potent, so quickly switch on your own Hypermode to counter them. Remember to grab any fallen health pickups and look for any unexploded crates at this point. Don't stop attacking his vulnerable CPU and use the Boost Ball again to disable the red orb if it appears. Defeat Ghor to score the Plasma Beam and recover your poor crippled gunship.
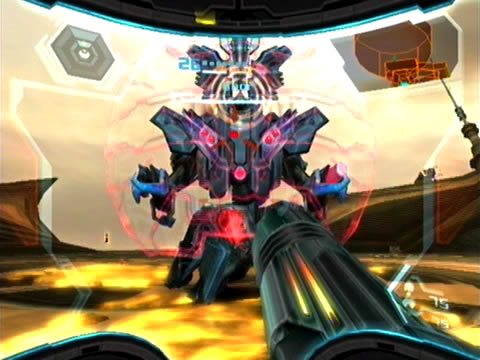
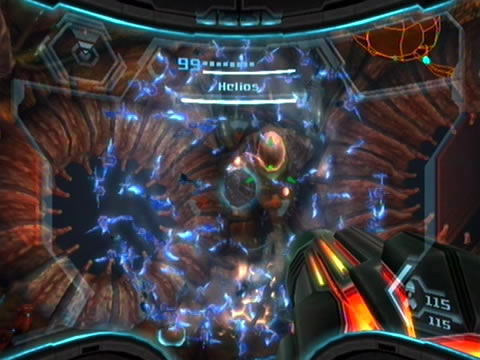
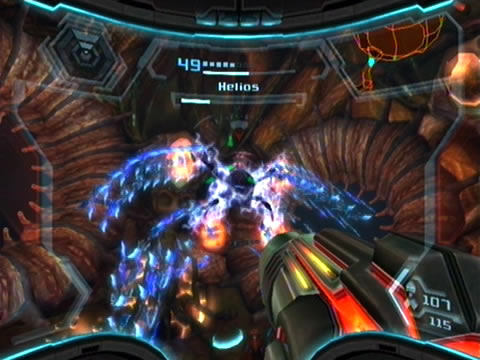
Helios
- Location: Elysia Seed (Elysia Leviathan Core)
- Attacks: Swarmbot attack formations, Razor claws
- Weakness: Charge Beam, Seeker Missile, Ice Missiles
This relatively small robot - while tiny in comparison to Mogenar's size - will certainly give you plenty of trouble. The floating main unit possesses a massive collection of Swarmbots which it uses for protection, but they won't completely block your attacks. Lock on and fire away at the main unit without delay. Helios will use the Swarmbots to change formation and deliver different styles of attack. If the Swarmbots form a spherical shape around the main unit and it lowers down to ground level the entire formation will begin rolling around the chamber. Keep back and stay locked on to dash-strafe around it safely.
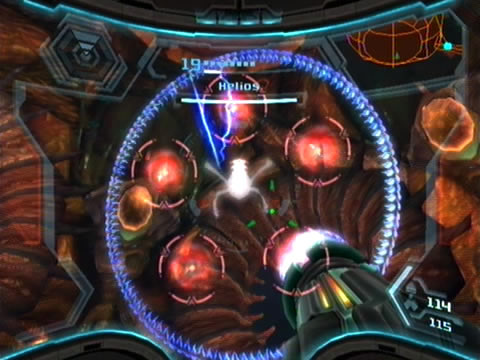
Don't stop firing as you'll spot health refills periodically appearing - be sure to pick up any if you need health. Eventually the unit will stop rolling and commence floating about in the air. Watch out for a second formation attack; if the Swarmbots form a giant circle around Helios, five red spheres appear within the circle as the entire formation swings around in an attempt to sideswipe Samus (Stargate fans, doesn't the circular formation of Swarmbots look curiously like a miniature supergate?). Very quickly hold Down and aim the Seeker Missile reticule over the five targets, release when they're all locked on to knock the formation down.
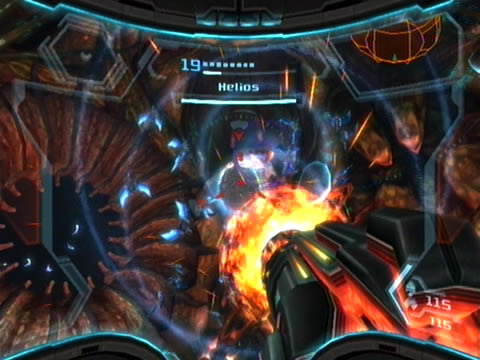
Eventually with enough of a beating Helios' outer shell will crack open, revealing its vulnerable core within. Don't hesitate to switch on Hypermode and open up on the exposed core to inflict critical damage (let yourself enter Corrupt Hypermode to deliver extra damage without losing more health). Keep your distance though as Helios will try to swat at you with its nasty razor claws - make sure it doesn't connect or you're in for an annoying time. As time passes the outer shell will reseal itself and summon the Swarmbot cloud again. If you're still in Corrupt Hypermode as the shell reseals quickly expend all your Phazon energy into the main unit.
Resume your attack on the main unit again but watch for further formation attacks. If packs of Swarmbots arrange themselves across the chamber Helios will slowly move among them, charging up their pulse attacks much like that of the regular Swarmbots. Don't allow them to fire their pulses at you to avoid a serious beating (there's far too many to avoid). Release your lock from Helios, stand back and hold Z to freeze your movement and keep all the Swarmbots in view. Deliver a Charge Beam shot to each one as they energize to knock them down quickly. Focus on them in the order they appear to give yourself enough time to stop them from returning fire, but don't worry if one or two fire their pulses at you, simply jump around as much as you can.
With this attack finished Helios may resume the ball rolling charge again, simply lock on and avoid its movements (remember to keep an eye out for health refills). With enough damage received the shell will reopen to expose the core again. As you see the Swarmbots fall to the ground and the shell shudders quickly enter Hypermode. Lock on and open up on the core, just be ready to move when Helios advances on you. Deliver as much damage as possible before the outer shell closes again.
With its Swarmbot cronies returned Helios may try a new trick. This rather humourous formation aligns the Swarmbots to form giant arms and legs for Helios. Be very careful if one of the legs stomps the ground - you'll have a giant shockwave coming your way. Also watch out for any projectiles the long arms throw, try to shoot them down quickly (but if you can't stand back to avoid the blast impact on the floor). See those red spheres connecting the Swarmbot limbs to Helios? Unfortunately the Seeker Missile can't help, so instead open up with regular Plasma Beam fire on them.
Watch out if you manage to knock out one of the legs as the entire mess will come crashing down to the floor. Stay back and keep ripping into the main unit while it slowly rises from the ground. Grab any health refills that appear, you'll certainly need them now. With all limbs destroyed the outer shell will once again open. Switch on Hypermode as it opens and rip into the exposed core.
Upon sealing again Helios will use one final devastating formation attack. The main unit will lower to the ground and begin spinning, creating a massive vortex of Swarmbots above itself. The entire formation will then promptly begin travelling around the chamber trying to give you a nasty present. As the Swarmbots begin appearing above Helios quickly activate the Morph Ball and use the Boost Ball to escape from the formation as it begins tracking you.
Eventually Helios will give up and try a different formation attack. If you see all the Swarmbots breaking up into groups again quickly release your lock on Helios and fire upon the pulses as they charge up. This time they'll unleash fury on you with plenty more pulses, so try to use Hypermode to knock down as many as possible and to allow yourself protection when the barrage begins (remember to grab health).
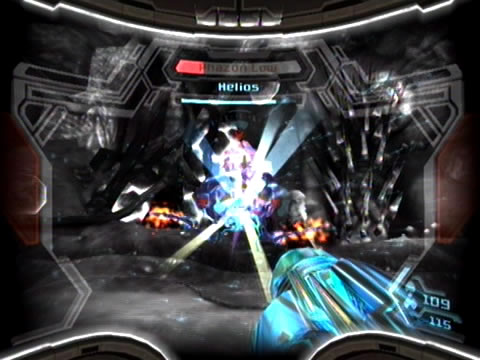
When you see the outer shell about to break open again quickly enter Hypermode and finish the crazy rogue with a few more shots. Upon sealing Helios' fate (I wonder what purpose the Chozo originally had for it?) you'll be rewarded with the Hyper Missile upgrade - and an extra dose of Phazon corruption.
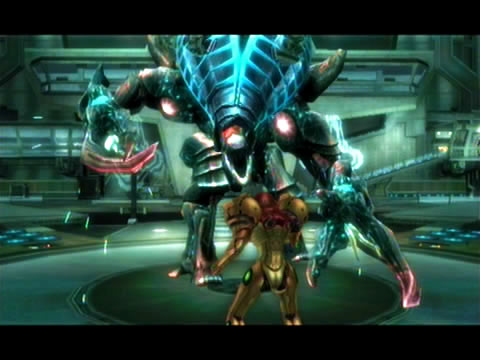
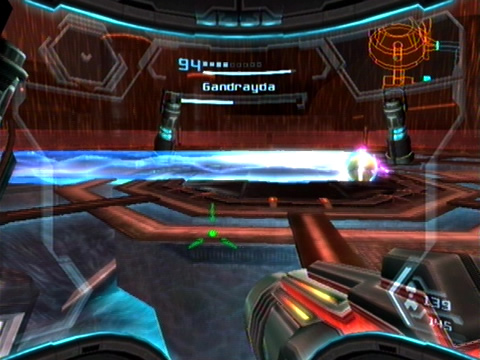
Gandrayda
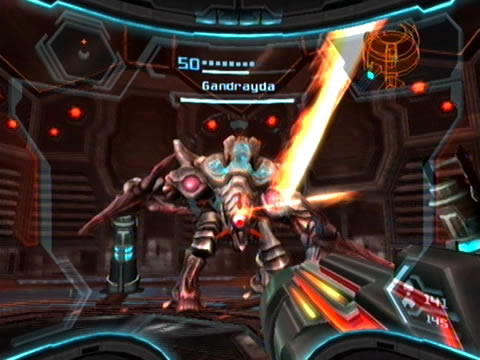
- Location: Pirate Homeworld (Proving Grounds)
- Attacks: Electric projectiles, Mimic ability
- Weakness: Ice Missiles, Charge Beam, Hyper Beam
Here's another fight you won't soon forget. Don't ever underestimate Gandrayda for her slim size, as she's packing a few tricks you won't be expecting. At first (and throughout the battle) she'll dance around the chamber (literally), spinning cartwheels while occasionally sending projectiles your way. Watch out for a small ground shockwave, simply lock on and dive left or right to keep clear. If Gandrayda sends three purple homing chakram objects at you, simply blast them and be sure to grab any health they may leave behind.
You're also going to need to keep your distance from Gandrayda at all times, as her dancing antics are far worse if you wander too close. If she latches onto Samus she'll begin sapping your health, quickly shake the Wii Remote and Nunchuk to break free. Lock onto the target and open up, as long as Gandrayda's in her regular form she'll be vulnerable.
Eventually Gandrayda will summon her mimic powers and instantly transform into a Berserker Knight. Deal with her exactly as you would a regular Berserker, by keeping your distance and striking the purple energy spheres it launches. Eventually with its Phazite armour broken open fire at the exposed weakness to bring Gandrayda back to her true form. Keep your distance and be ready to swing to one side as Gandrayda tends to leap right at you upon returning to her regular state. Resume pummeling her with Plasma Beam fire (try to sneak in a few Ice Missiles as well). Hold off from using Hypermode for now.
Gandrayda will continue changing forms, if she becomes an Aerotrooper try to break through her armour (use Hypermode on the slower target), but eventually she'll automatically return to normal. If she becomes a pack of Swarmbots simply keep your distance and watch for the pulse attack (fire at the core to dissipate the attack).
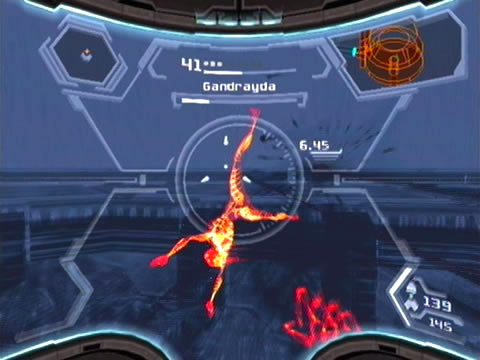
With around a quarter of her health lost Gandrayda will unseal the entire chamber, revealing the pouring acid rain outdoors. Don't worry about the rain, just be sure to stay undercover. She'll continue her prancing around the chamber, but this time she'll amazingly assume the form of Rundas and send ice attacks your way. Try to shoot down the small ice projectiles she fires while cruising around the chamber as they'll often drop health refills. Keep belting her Rundas form with Plasma Beam fire till the target is stunned, then rip its armour off with the Grapple Lasso. Keep firing to force Gandrayda back to her original state.
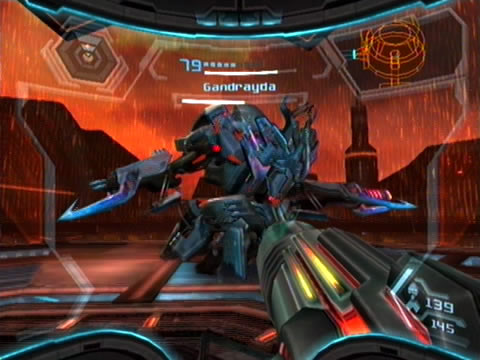
With Gandrayda easily taking the form of Rundas, its only a matter of time before she becomes Ghor. Watch out for the target's spinning attack, also keep your distance to avoid damage when it bowls straight at Samus. Once the yellow aura appears above the fake Ghor's head open up on the target to inflict damage. Watch out for missile payloads or plasma discharges delivered from the fake Ghor, also remember to use the Boost Ball on the exposed lower orb if the fake Ghor breaks out the giant alpha laser strike.
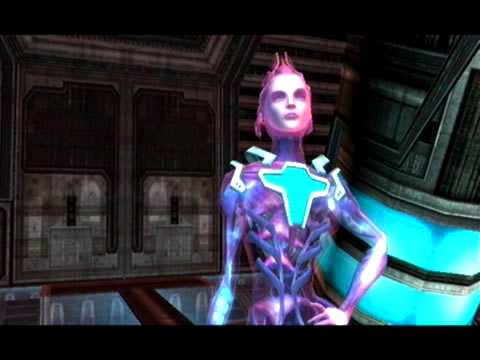
Once you've drained half of Gandrayda's health she'll have another surprise for you. Remember when you met in the Olympus' briefing room she playfully assumed Samus' form? This time she won't be so playful. Gandrayda will assume Samus' Varia Suit form and break out a number of potent attacks. Watch out if she zips around the chamber using the Boost Ball; try to use the four raised pistons for cover. Try to stay in the center of the chamber and keep Space Jumping up to avoid the target as she streaks around. If you lose track of her as she boosts around simply watch your radar - a dot will appear when she stands up. Also be wary of a nasty Power Beam sweeping attack she may use - Space Jump over the beam as it passes.
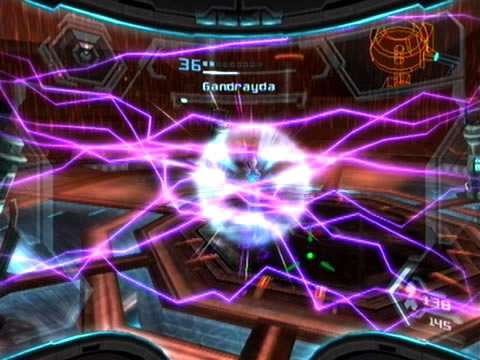
As you draw her health closer to zero Gandrayda will begin utilising a cloaking field to protect herself with. Simply switch on your new X-Ray Visor to easily track her. Quickly switch it off if she assumes a different form or if the screen becomes awash with static. Remember to keep your distance and shoot down the purple chakrams to summon extra health.
Gandrayda will now begin rapidly entering her own Hypermode. If she does simply keep your distance as always and watch out for a large ball of energy she may fling at you right after disengaging her cloaking field. You can try to use your own Hypermode against her to speed things up, but with all that constant evasion you may find it difficult to score a hit. Finish Gandrayda to see her unfortunate fate and score your prize - the Grapple Voltage.
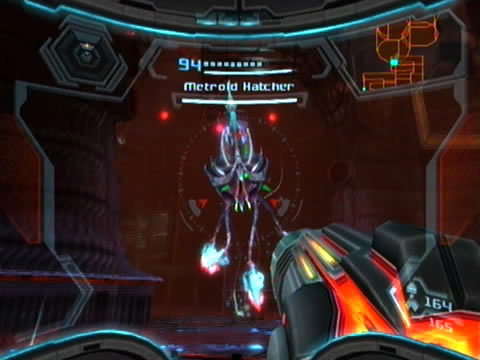
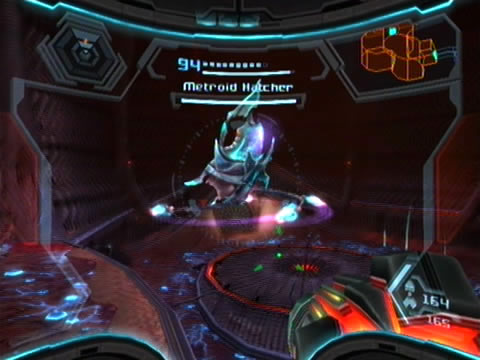
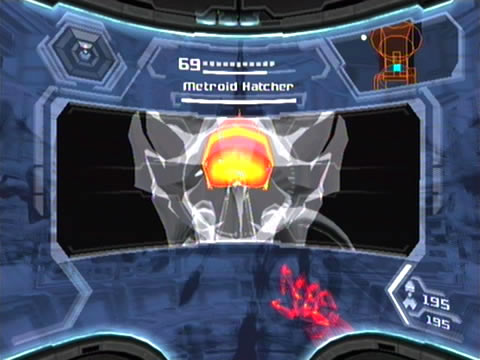
Metroid Hatcher
- Location: Pirate Homeworld (Metroid Creche), Norion (Generator B), GFS Valhalla (Aurora Chamber)
- Attacks: Tentacle vortex, Tentacle leech, Phazon Metroids
- Weakness: X-Ray Visor, Nova Beam, Seeker Missile, Grapple Lasso
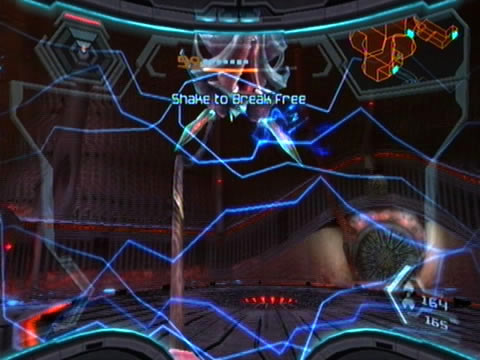
Three Metroid Hatchers await a challenge throughout your travels. The first is hiding inside a containment chamber in the Metroid Creche of the Pirate Homeworld. For this initial encounter you'll need to face the beast the hard way. This overly-mutated Metroid possesses four dangling tentacles and one ugly maw. As the creature floats about leering at you its tentacles can periodically try to ensnare you, if it grabs hold quickly shake the Wii Remote and Nunchuck to break free from its life-sucking grasp.
The Metroid Hatcher also tends to spin around flailing its tentacles in an attempt to sideswipe you into a corner - quite frankly this attack is very difficult to avoid. So instead of trying to move clear, simply activate Hypermode as soon as you see the creature begin spinning. It'll strike you harmlessly, exit Hypermode then to avoid losing any health at all.
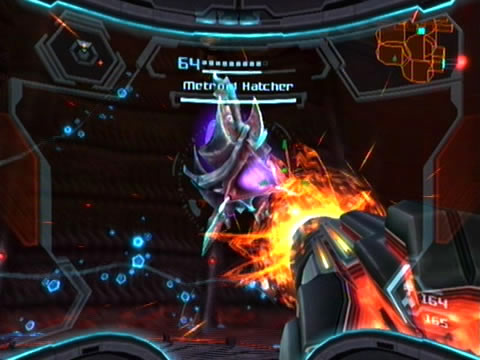
If you fire at the creature's main body your shots will bounce harmlessly off, instead try to score hits on the tips of the erratic tentacles (use the Seeker Missile to help). Eventually with enough punishment (plenty on Hypermode) each tentacle will retract up into the main body.
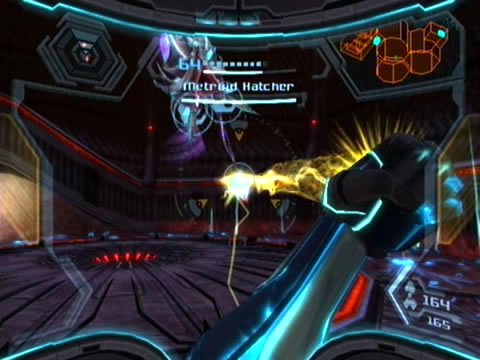
Send all four tentacles back into the main body and the Metroid Hatcher will try a new trick. It'll hover still and open its ugly mouth - attack it now. If you dawdle the beast will spawn Phazon Metroids to provide nuisance, so quickly pound the mouth with the Plasma Beam to stun the creature. If it manages to spawn a Metroid ignore it and attack the beast quickly as it tries to spawn a second.
Four C icons will appear below the Hatcher while it's stunned. Quickly break out the Grapple Lasso and attach it to one of the retracted tentacles. Pull back hard to rip the appendage off; the loss of a tentacle will cut a quarter of the monster's health. You may sometimes find it difficult to tear a tentacle off, rarely the Hatcher resists and can break free from the beam.
The remaining tentacles will reemerge, so simply attack them again and stun the Metroid Hatcher when it attempts to spawn Metroid cronies. Rip off another tentacle with the Grapple Lasso to further weaken the beast. Eventually with all four tentacles removed the hatcher will explode in a gooey blue mess.
During the first encounter, if you switch on the X-Ray Visor you'll see the Metroid Hatcher's glowing red Phazon core, but there's not much you can do about it. If you hold off facing the other two Hatchers at Norion and on board the Valhalla until after securing the Nova Beam, simply switch on the X-Ray Visor, lock onto the target and fire once at the core to finish the target instantly.
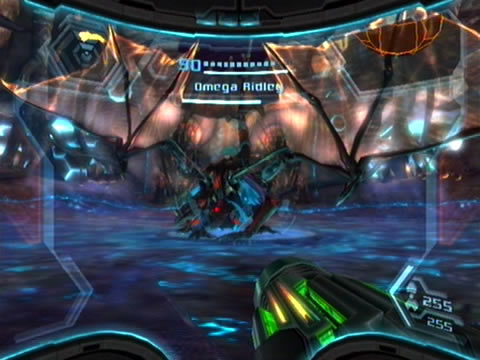
Omega Ridley

- Location: Pirate Homeworld Seed (Pirate Homeworld Leviathan Core)
- Attacks: Homing fireball projectiles, Shockwave, Flame breath, Super Missile, Tail lash, Hyper charge, Phazon orbs, Dual Flame breath / Tail sweep, Bombing run, Claw swipe
- Weakness: Nova Beam, Hypermode, X-Ray Visor, Charge Beam
Surely you didn't think the latest incarnation of Ridley met its end down the generator shaft back on Norion? Ridley's back to protect the Pirate Homeworld's Seed with plenty of firepower at his disposal. After Ridley's greeting immediately scan the beast to learn that a recent injury hasn't recovered fully and should be a suitable weak point. The only snag is the heavy protective Phazon armour strapped to his chest.
Without wasting time Ridley will attack from the center of the chamber. Lock on and keep strafing left and right at all times to raise your chances of evasion. If his eyes glow brightly watch out for a single Super Missile-esque blast coming your way. If Ridley launches smaller red fireballs quickly shoot them down (keep an eye out for any health refills they leave behind). Be wary of his signature sweeping Flame breath, that heat surely won't do you any good (especially on Hypermode). Keep to his center to give yourself enough time to Space Jump above the beam as it sweeps around (he can begin the sweep from either direction).
Watch out if Ridley leaps into the air, quickly jump as he lands and sends the obligatory shockwave your way to avoid serious injury - just don't land too close unless you want a meeting with his tail. If you've fought the original Meta Ridley back in Metroid Prime, remember when he tried to mash you against the wall with that mad lunging strike? This time you'll see it coming easily. If Ridley's massive wings spread wide above, that's your cue to get anywhere but between him and the wall. Seconds later Ridley will charge towards the wall, make sure you're not in his way. Keep your distance as his spins around.
Watch Ridley's head closely - naturally that gaping maw is his only weakness. Keep firing at the beast's face to inflict minor damage every time the mouth opens. Sometimes Ridley simply opens wide to roar at you - don't pass these moments up to give him plenty of your Nova Beam. Eventually you'll temporarily stun Ridley, leaving him fallen in a heap with his armour vulnerable. Whip out the Grapple Lasso and tear the armour chest open. Your reward is surging blue energy pouring forth from his chest - fire up Hypermode and empty everything you've got into the chest to inflict critical damage. Use a Charge Beam shot to help inflict damage as quickly as possible before the chest armour seals again.
When fighting Ridley you'll possess all the major upgrades required to find every Missile Expansion and Energy Tank in the game, so it's probably a good idea to bring every Energy Tank to this battle (it goes without saying on Hypermode). Once Ridley commences his regular attack patterns keep your own attacks up on his open mouth to eventually re-stun the target (remember to draw in any health refills appearing when shooting down the red fireballs).
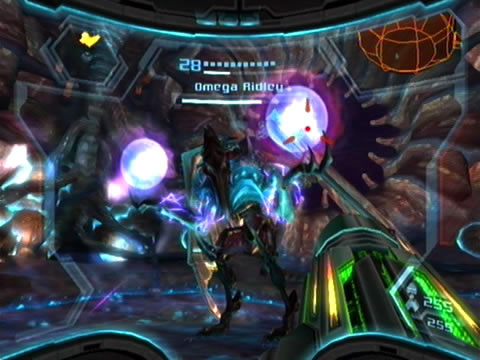
Eventually with enough punishment Ridley's armour will fail, breaking completely off. Sadly this won't stop Ridley from creating his own replacement Phazite armour. Scan Ridley again to learn that two shoulder joints are your only viable points of attack.
Watch out for two new attacks among Ridley's standard offensive abilities. He may deploy a dual Flame breath / Tail sweep attack, improve your chances of evasion by backing as far away as possible while hopping madly to avoid the fire and his tail as they sweep around (you only need a single jump to avoid the tail). Avoid the Flame breath at all costs, don't worry too much if the tail catches you.
Also keep an eye out for his Phazon orbs trick. If two large Phazon orbs appear in Ridley's claws, don't waste any time in shooting them apart. If you can't break them in time a huge web of interconnected energy pillars will arc across the floor towards the walls. If the entire web appears, try to leap through one of the gaps in the horizontal beams. Try to shoot one orb down at least, if you do so only the vertical pillars will appear - simply strafe left or right to avoid a collision.
Now to keep the pressure on. Stun Ridley again to render his armour vulnerable. Quickly fire up the X-Ray Visor to see three highlighted targets on his body. The two red shoulder sections either side of the core should be your focus of attention right now. Tear into one quickly with the Nova Beam before Ridley recovers. Keep your routines up once Ridley recovers to stun him again and continue your barrage on the shoulder sections till both break off (you might be here a while on Hypermode). If Ridley ever lobs his red fireballs you're in luck, remember to draw in any health they drop.
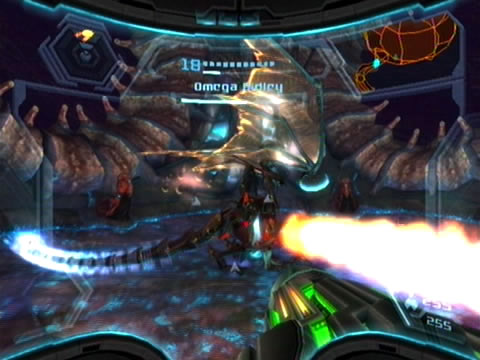
Notice that as you strike the shoulder sections Ridley's health decreases? At half remaining the Phazite armour will finally break off, revealing the pulsing blue energy core. Except Ridley won't simply give you an easy target. He'll now take off and exit the chamber via one of the huge pulsating openings on each wall.
Immediately enter Morph Ball mode and begin boosting around the chamber. Ridley will eventually return and deploy a torrent of bombs right at you, keep your movements fast to avoid serious health loss. He'll continue these bombing runs for a few more rounds, but watch out if he flies to the center of the chamber and stomps a shockwave. Try to see which opening Ridley appears from - if you don't immediately hear the sound of bomb deployment quickly stand up to ready yourself for the potential shockwave.
Eventually Ridley will return to ground and attack more furiously than before. You'll need plenty of health reserves here, so watch for him launching a plethora of red fireballs. Once the fireballs launch into the air, release your lock on Ridley and back away around the chamber while shooting down the projectiles. With all targets clear sweep back the way you came with the Charge Beam active to draw in any health refills.
Watch out for faster attack patterns, be especially wary of his constant Hyper charge (watch the wings, if they move up into formation strafe madly). Don't try to attack Ridley's core until you've stunned him again, once you do immediately fire up Hypermode and let rip. Ridley may recover before your Phazon meter empties; keep firing till it runs dry. Right after recovering Ridley will stomp forward taking swipes at you - but his chest remains up and vulnerable, so try to activate Hypermode again and keep your attacks going before he returns to normal. Enter Corrupt Hypermode if you can and prolong its use to either chip in a few more attacks on the core or to attack his mouth to quickly stun him again.
His bombing runs will surely return, use the Morph Ball's boost to escape and stand quickly if you don't hear the whining bombs to ready yourself for the shockwave. Remember to keep shooting down the red fireballs to recover health and don't hesitate to use Hypermode when Ridley's stunned (sneak in a Hyper Missile or two if you can). Add this latest incarnation of Ridley to your kills count to recover the Hyper Grapple and bring Dark Samus one step closer to defeat.

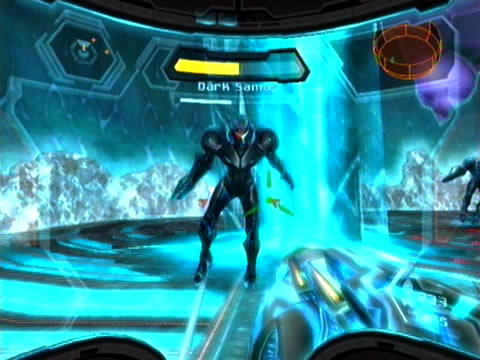
Dark Samus
- Location: Phaaze (Sanctum)
- Attacks: Phazon Beam, Phazon Missiles, Dark Echo clones, Ballistic shield, Phazon regeneration, Shockwave, Plasma Beam
- Weakness: Hyper Beam, Hyper Missiles, Charge Beam, X-Ray Visor
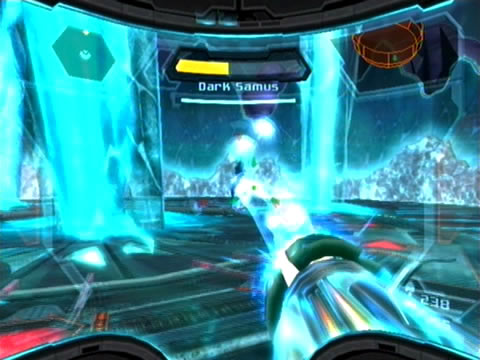
This is it, at last your final one-on-one with the grand mastermind has arrived. Never one to waste old tactics, Dark Samus will utilise some of its offensive abilities from Aether, but expect to see new tricks on its home turf. Initially, ensure that you draw in all the anti-Phazon units back upstairs in the Leviathan's chamber to drop your Phazon meter to zero. Scan the creature immediately to learn that Dark Samus can generate multiple copies of itself while drawing energy from Phaaze into its body - coupled with the fact that you need to finish this fight before your Phazon meter fills this certainly doesn't bode well.
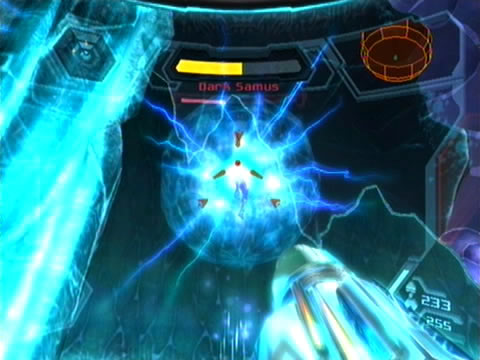
Lock on and open up with your Hyper Beam; if you lob a Hyper Missile at Dark Samus that nasty ballistic shield will active, deflecting the round harmlessly. But that shield isn't always perfect, always try to sneak in Hyper Missile attacks as they can break through to send Dark Samus recoiling (quickly rip into it more as it recovers) and help slow your Phazon meter's ascent. Watch out as Dark Samus sends a pulsing beam skyward, moments later massive pillars streak down - use them for cover. Don't be worried if the pillars land on your head - they simply push you aside.
Take care if the target whips out a scattershot Phazon Beam, simply keep a pillar between yourself and Dark Samus to avoid unnecessary damage. Fire a Hyper Missile to disrupt the scattershot as Dark Samus raises its ballistic shield in defense. Watch out for a volley of homing Phazon missiles as well - try shooting them down if you can (also fire a Hyper Missile at the beast as it launches its missiles to sneak in a hit). I should probably remind you now that evasion really is key here, every hit you take increases your Phazon meter - let that max out and it's all over.
Don't stop firing to relieve some pressure from your Phazon meter at all times. As you dodge the Phazon missiles some may strike and dismantle one of the looming pillars, watch for any Anti-Phazon health refills appearing and be sure to snag them. You can also dismantle the pillars with enough firepower (a single missile usually does it), destroy them if you need to and grab any appearing Anti-Phazon units to drop your meter (draw them in with your Charge Beam then release the blast on Dark Samus). Also remember to give yourself plenty of room from the target; wander too close and its ballistic shield will send you reeling.
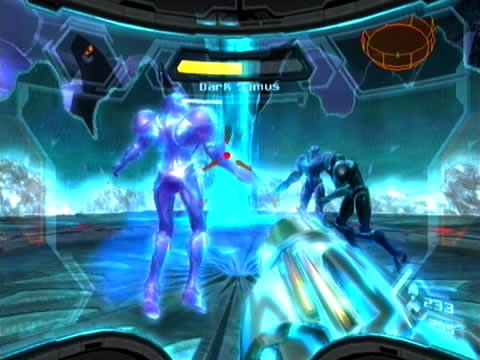
You'll feel a fair amount of nostalgia as Dark Samus flirts about, damage the beast enough and it'll try a new trick. Watch as Dark Samus rises into the air and slowly begins drawing Phazon energy into its body. Once you regain control you'll see its energy bar flash red as it literally regains lost health from the planet. Lock on and open up - that spherical shield won't hold for long. Continue attacking Dark Samus as it returns to the ground, eventually you'll witness the weirdest acrobatic maneuver as Dark Samus literally tears itself in two.
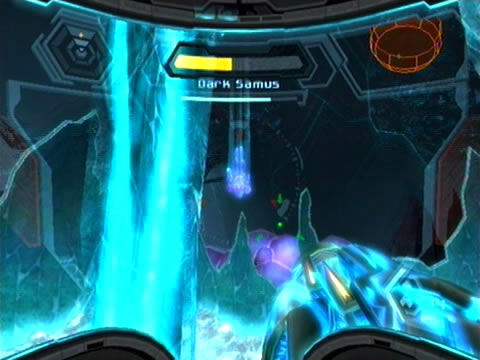
For all intents and purposes Dark Samus' first clone (or Dark Echo) looks almost exactly like the real thing, except it won't take much of a beating to burst. A great way to tell the real deal and fakes apart is to simply activate the X-Ray Visor - the real Dark Samus appears bright red (the clones also don't have a bright blue visor on their helmets). Try to eliminate the clone as quickly as possible, don't dawdle as Dark Samus may travel into the air before slamming into the ground to create your typical shockwave. Watch it coming and Space Jump to avoid the blast. Conquer the clone and grab any health it might drop.
Keep your routine up against Dark Samus and watch for its regular attacks. Always take out any pillars and grab health they may leave behind. Inevitably Dark Samus will regenerate another clone, but be wary of a truly odd attack formation. The duo may travel to the center of the chamber and begin rotating around each other quickly before three Dark Samus' sprint out to the boundaries of the arena. They'll all take to the sky, quickly switch on the X-Ray Visor and open up on the real one to stop it from recovering too much health from the planet.
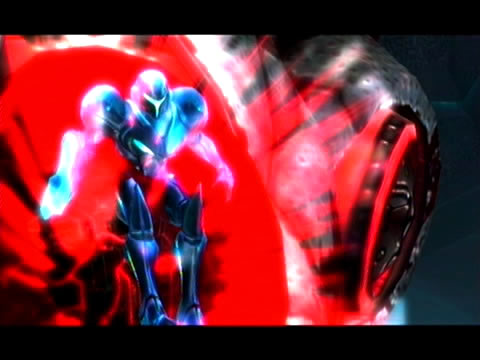
Once the trio cease their health regeneration they'll skirt around the chamber attacking you individually before combining for an alpha formation. You can use the X-Ray Visor quickly to see which is the real one, but on Hypermode you should learn to spot the real Dark Samus by its primary attack patterns (and its visor glows blue while the clone's visors don't) and concentrate all your fire on it. Leave the clones be and focus on Dark Samus, only attack the clones if you desperately need to lower your Phazon meter as they may drop health units. Eventually with both clones dead or after a time Dark Samus may generate a glowing purple impenetrable shield - don't stop firing as the shield will eventually fall (try to sneak in a Hyper Missile blast just as the shield lowers).
Now the battle really heats up. Upon reviving the clones, if the trio form up and scatter dance around in the most ridiculous pattern they're going to eventually try to smash into you, quickly activate the Morph Ball and keep boosting around the chamber's boundary until they stop - this should allow you to escape unharmed (don't forget to hold fire as you boost to slow your Phazon meter's ascent). If two of the targets meet back-to-back and spin around while unleashing a nasty yellow Plasma Beam each, quickly counter it by rolling between them and unleashing the Hyper Ball (simply activating the Morph Ball will allow you to roll under their beams).
By now Dark Samus' health should be down to half - but things are about to get excruciatingly hard. Watch out if the clones stand either side of Dark Samus as it slowly rises up from the floor, lock on and strafe immediately to avoid a head-on collision as it rams straight at you. The worst alpha attack you'll see is the trio hovering above while unloading a single homing missile each. These pains are going to hurt hard and are near impossible to dodge. So instead, stand right back, release your lock and hold the Charge Beam right before the missiles launch. Release fire and sweep across the projectiles to hopefully destroy all three before they reach you. Concentrate and continue using Charge Beam blasts to down the missile salvos till they cease - also be sure to draw in any health units the missiles leave behind.
You must avoid taking any damage at all as your Phazon meter has a very nasty habit of filling up quickly, but the repetitive cheap attacks the trio throw at you should ensure that Samus doesn't go without a belting every few seconds (ballistic shields, scattershot Phazon Beams, ramming charges - you name it). Your biggest worry as they attack individually are the scattershot Phazon Beams, these have a nasty tendency to raise your Phazon meter significantly. Dark Samus may also zip into the air alone and emit a directed Plasma Beam at the ground, if it does simply lock on and strafe to avoid the blast while keeping an eye out for rogue clones.
Try your best to learn their attack patterns and avoid hits while destroying the clones and pillars to pick up desperately-needed Anti-Phazon units, but never forget to focus on the real menace. Most of their attacks are avoidable, but it takes incredible concentration and stamina. You will definitely need to collect as many health units as possible throughout the battle. Dark Samus will continue to use its invincible purple shield during all this madness, so don't pass up a chance to attack it when the shield disappears.
Playing on Hypermode is nothing short of a nightmare, of all the experiences across the entire Metroid Prime series across all difficulty settings - this is the worst of them all and chances are you are flatly not going to enjoy it in any way shape or form. So try not to waste time with the clones - take the real target down as fast as you can and don't forget to keep sneaking Hyper Missiles in while Dark Samus is distracted performing an attack. Always knock out the giant pillars with Hyper Missiles and draw in any Anti-Phazon refills they drop.
Evasion is absolute key here, learn the attack patterns and how to escape unharmed. Just don't be alarmed if you need thirty tries at the Hypermode setting - please resist the urge to eject the disk and reduce it to a fine dust. If you lose, after forcing you through an ugly cutscene the game will drop you off back in Dark Samus' chamber ready for another try. My best advice - if you can't beat it simply turn it off and walk away - the insane craziness of it all is not worth it for two more yellow credits. You should have enough credits to unlock everything else, just don't unlock the Soundtrack items to give yourself enough extra change.
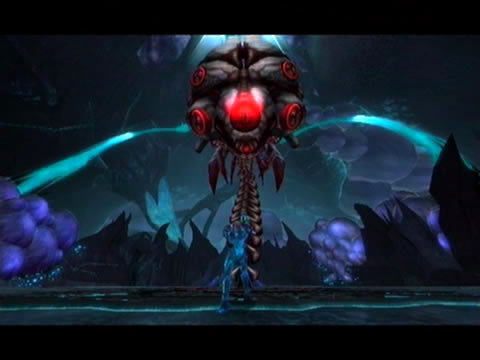
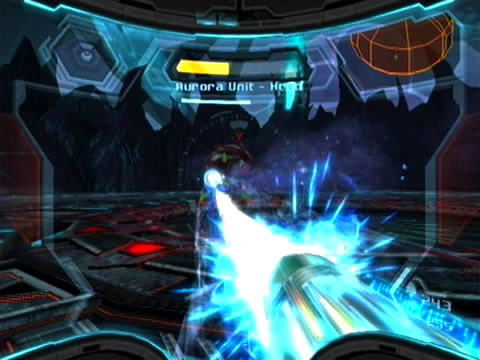
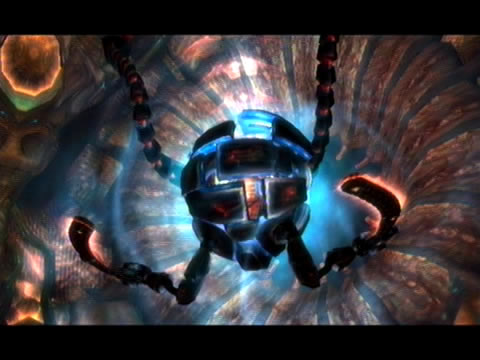
Aurora Unit
- Location: Phaaze (Sanctum)
- Attacks: Tentacle pulse projectiles, Dark Echo clones, Phazon precision beam, Meteor barrage, Multiple-point laser, Spinning vortex, Homing missile, Shockwave
- Weakness: Hyper Beam, Hyper Missile, Charge Beam, Screw Attack
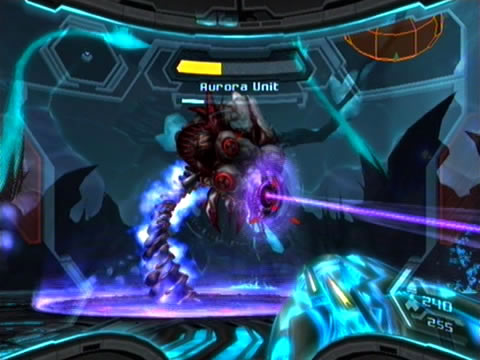
With Dark Samus repulsed it has one final ace up its sleeve. The gigantic former Aurora Unit now serves the foul Phazon and Dark Samus.
Immediately scan the colossal monster to learn a boatload of info, most interesting of which is the creature's symbiotic link to Phaaze. All your shots harmlessly bounce off the exterior of the giant brain, so you'll need to find a way to expose its vulnerable core.
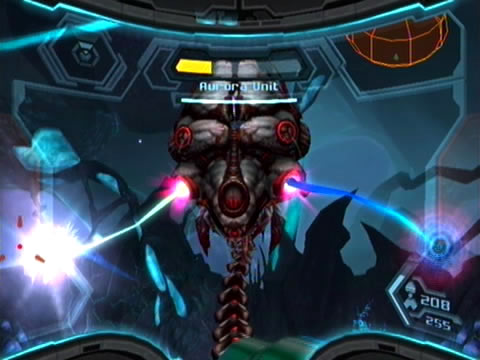
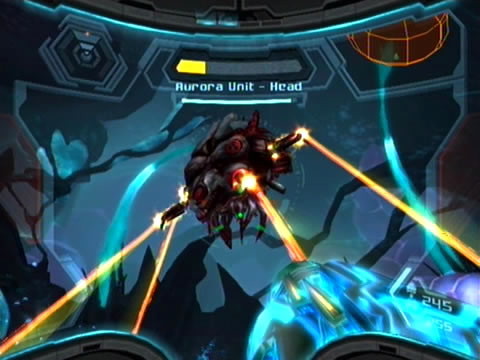
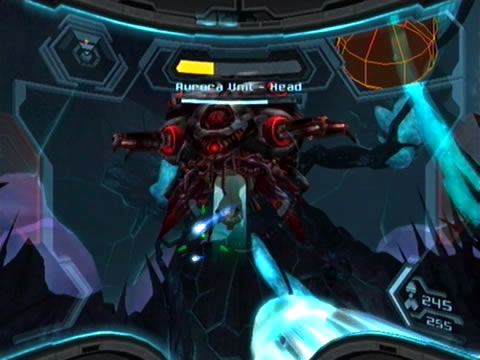
See those four red pods atop the beast's head? Often the Aurora will deploy a weird sensor-like appendage from any port before a pair of long blue tentacles issue forth. Lock onto the head, stand well back to keep them in view and focus on one tentacle, quickly firing upon the glowing pulse at the tip to promptly send the tentacle reeling back inside the head. As it does so the open port will emit a yellow hue, very quickly fire at the port and watch as the entire beast flashes yellow. Once the port seals quickly focus on the second tentacle to expose its port to attack. You may also find health and missiles dropped as you disable each tentacle, make absolute certain you don't miss picking up any of them - draw them in once both tentacles have retracted and sealed their ports. Don't delay in attacking the tips of the tentacles as eventually those pulses become projectiles flung right at you.
Watch out if blue energy courses up the entire neck and head structure - precipitating an attack. Three Dark Echoes may promptly pop out from the head to give you trouble. Now if you barely scraped through the previous battle with Dark Samus and have your Phazon meter almost full, this is going to be one ugly sight. Don't worry too much though, as these clones simply launch a single missile at you from across the chamber, giving you plenty of time to evac your location. Target each and blow them down - don't forget to draw in any health units or missile refills they may drop. If you fail to eliminate the clones after a time they'll automatically vanish. When playing on Hypermode you may also wish to purposefully prolong the battle here and goad the Aurora into sending the clones out, quick exposure to the Charge Beam is all it takes to bring each down and they tend to drop health quite often.
After coursing up blue energy the monster may also generate a circular purple energy field around itself while emitting a thin purple energy beam your way. Simply lock on and don't stop dash-strafing to one side to keep clear of the tracking beam - but on Hypermode be certain not to take a hit from this beam, it will seriously increase your Phazon meter and can end it for you very quickly.
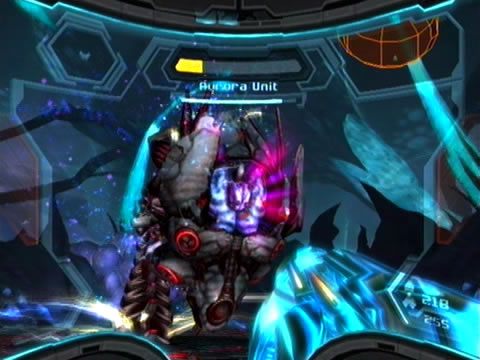
Remember those weird sensor appendages popping out from the head as the tentacles appear? If you manage to strike one the head will drunkenly loll about while the four ports rapidly open and close. Use this time to sneak in as much of a beating as you can. Keep focusing your attack patterns on the tentacles and their subsequent exposed ports, with enough of a beating the Aurora will roar before crashing to the floor; momentarily stunned.
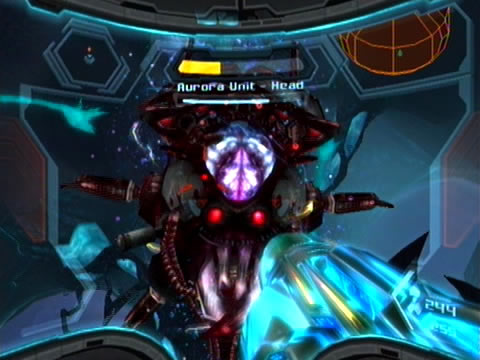
Very quickly run around to face the top of the head - see the Grapple Beam icon? Don't delay in locking on and sending out the Grapple Beam, rip back hard to completely expose the Aurora's mutated inner mess of a core. The beast will regain is composure slightly and hang its head in the air while still stunned, except this time sporting a nasty opening in its skull. Lock on and tear into the exposed flesh (or whatever it is in there) to inflict critical damage. Use rapid fire from your Hyper Beam and sneak in a Hyper Missile or two. Concentrated Charge Beam blasts will work quite well too.
Eventually the hatch will seal shut as the unit resumes its regular attack patterns. This time you know what to do. Wait for the tentacles appear, then open up on one of the tips before tearing into the resulting yellow exposed port. A good trick is to fire up the Charge Beam and let rip on the tip of the tentacle, when it blows simply aim at the exposed port to unleash the rest of the Charge Beam's rounds into it.
Watch out for the Dark Echoes this time though, as one will finally make use of the Boost Ball and bounce around trying to crush you. Keep an eye on it and deal with the other two quickly, then keep Space Jumping and try to score a Hyper Missile hit - normal Hyper Beam fire won't work. Remember to pick up any health dropped by the tentacles or the Dark Echoes at absolutely all times.
Eventually you may witness the head retract into the ground while a number of mortar launchers rise into position around it. Remain locked onto the head and don't stop dash-strafing in one direction to avoid all the meteors the launchers deploy around the chamber. With its health almost drained you'll see two of the Dark Echoes initiate a Boost Ball run, so very quickly to take them out with Charge Beam blasts out as they initially appear (don't forget the health units they drop). As you draw its health near zero make certain your Phazon meter is comfortably low; if it isn't simply attack the tentacles as they appear and prolong the battle to recover as much health units as possible.
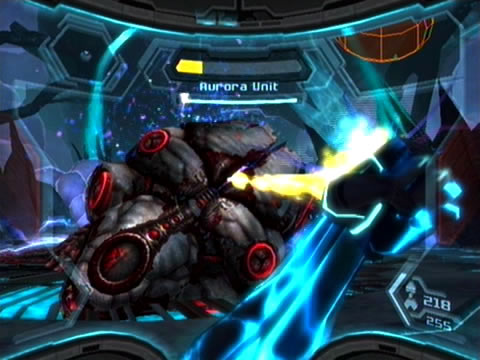
Keep your routines up to finally drain the sucker's health.... except this ain't over yet. With all its health drained the Aurora Unit will literally tear itself free from the ground and hover above the arena. With its health revitalised you'll have one last battle before Phazon is done. Scan the floating monstrosity to learn that the now-exposed cable junction is vulnerable to attack. Only problem is that weakness lies directly under the head, so you'll need to move quick to bring it into view.
Don't waste any time in locking on and dash-strafing underneath the target. As you travel towards it activate the Charge Beam, there's a bounty of health units at the base of where the Aurora's cable once dwelt. Watch out for a nasty point laser attack as the Aurora sends out four laser streams- they don't cover its direct underside so keep moving yourself there to keep safe. It will move around rapidly to try and bring you into its sights, concentrate on staying underneath - or stay far away.
See the large glowing sector on the head's underside? Fire at will to inflict critical damage with each blast. Only abandon your position when the Aurora brings itself down to ground level (usually after using the four point lasers), upon doing so the unit will initiate a rapid spinning attack as it careens around the chamber. But with such a large arena you should have plenty of time to move clear before it strikes a wall.
Screw Attack weakness:
Very special thanks to Kent Wakeford for this tip. When the Aurora Unit lands and spins its erratic dance around the arena, try striking it with the Screw Attack. It won't be easy, but if you manage to collide with it mid-flight, the Screw Attack's charge will send it straight into a stun cycle and sucks some of the Aurora Unit's health down for good measure. Quickly land and pummel the underside weak point before the beast recovers. This will work wonders on the Hypermode difficulty.
If the Aurora charges up glowing blue energy on its front immediately activate the Morph Ball and boost away to avoid the incoming missile, or simply remain locked on and madly dash-strafe left or right. If you see a weird cannon extend below the head be ready to Space Jump an incoming shockwave - or try to shoot out the cannon to stun the AU (you might not be able to on Hypermode). After firing a homing missile or two the AU tends to stun itself, so be sure to take advantage. Unfortunately at this point you can't pick up any Anti-Phazon units to lower your meter, so you must end this battle as quickly as possible. Don't stop firing at the Aurora Unit and be sure to take advantage of the situation if you manage to momentarily stun the beast.
Playing this on Hypermode difficulty is one of - if not the - hardest experiences in any Metroid game to date. Sadly it can ruin the entire experience - the difficulty spike from Veteran is annoyingly high, so be absolutely warned. If you lose now you're forced through the failure cutscene - but if you continue you'll be snugly shunted back to the beginning of the Dark Samus fight - never fun. If your Phazon meter is high upon tackling the Aurora Unit, a good tactic is to delay injuring it and grab as many Anti-Phazon health units as possible from the tentacles and Dark Echoes to prepare yourself for the final battle. If you can beat the game on Hypermode - you're an absolute master. Either way, sit back and enjoy the finale - you've certainly earned it.