


Chapter 1: GFS Olympus
We link up with Samus as she awakens from a well-deserved rest.
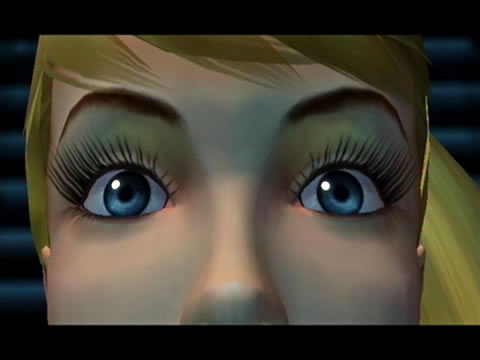
Good morning Ms. Aran. We begin the game inside Samus' gunship as it performs a routine diagnostic of the bounty hunter while en route to planet Norion. But before long a glitch sends the system on a crazy loop (look for a quick flash of "Wii Format" among the garbled text). You might be wondering what it means, but by then that familiar theme from Echoes oozes in... watch as a vision of Dark Samus emerges from what can only be a Phazon container at an unknown location. The creep floats up towards the camera before the nasty vision is replaced with Samus suddenly awakening in her ship.
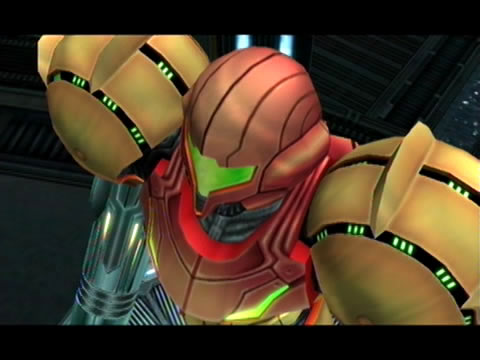
With Samus jolted awake its business as usual. We see a brief view of her Zero Mission outfit before the Varia Suit activates, magically appearing over her body. You'll immediately take control and find yourself seated in the cockpit of Samus' flashy new gunship. Take a look around at all the pretty buttons before pushing the center panel (use the Scan Visor to learn the functions of all the ship's controls). As you push the center panel her ship moves about, bringing into view something we've never seen before in Metroid.
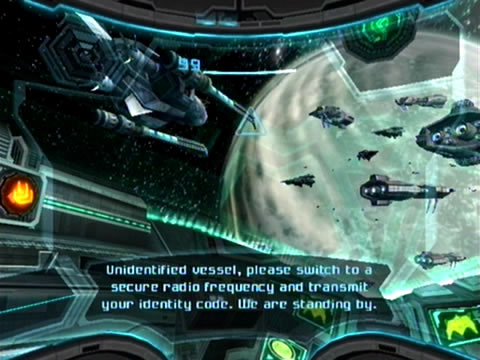
A vast Galactic Federation fleet stretches out before her ship, all in high orbit above a glowing jewel of a planet below. Samus' ship announces the approach of Federation fighters, so get ready to hear the first proper spoken words of the series (from a human). A pilot then requests immediate identification (don't worry, they won't shoot). The game prompts you to activate the ship's communications system, so hit the switch above to summon the terminal. Press the switches in the given order shown to communicate with the GF pilots and identify yourself (silently of course).
Welcome to the Federation's military presence on Norion.
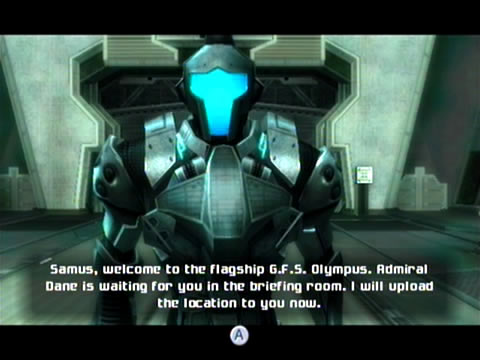
Once registered, the pilot will grant you permission to dock with the GFS Olympus - one of the largest vessels among the fleet before you. Follow the directions on-screen to activate the ship's thrusters (by pushing the Wii Remote toward the screen - your initial and simplest exposure to the motion controls). Watch as Samus' gunship maneuvers toward a huge elongated vessel bearing massive engines on its aft side and a huge downward spike on the bow.
As Samus lands aboard the Olympus, you'll see the obligatory introduction camera sweeps as she emerges from the underside of her ship. Take a moment to marvel at the pretty visuals before getting started. Once in control, your adventure begins.
First things first, the controls. Aim around the screen to get acquainted with the Wii Remote's sensitivity. By default it's set to Standard, so switch to Basic or Advanced via the Options screen if you find your aim too slow or not fast enough. Also remember that certain button functions can be swapped, although you should find the standard settings just right.
After twirling around and finding your feet, activate the Scan Visor by holding Minus and pointing at the top of the screen. A general rule of thumb when visiting new areas is to always fire up your handy Scan Visor and scan your surroundings for clues on how to proceed, weaknesses of hostile lifeforms and general informative trivia (and it's always nice to see Samus' eyes reflected in her visor).
Docking with the GFS Olympus, Samus finds herself aboard a grand flagship.
Spin around and scan Samus' gunship for your Logbook along with one of the four landing beacons surrounding it. Return to the Combat Visor and step forward across the connecting deck bridge.
Two Galactic Federation Marines (so good to see them alive and well this time) will greet you with a simple calibration exercise. Aim at the four locking pods on the panel ahead and fire at each to proceed. With the panel lowered a Marine will announce that Admiral Dane - the Olympus' commanding officer - is waiting for you in the briefing room. Feel free to then chat with each Marine (step in front of them and press A to listen to what they have to say).
You'll notice that as you step towards friendly units your arm cannon will lower down - don't worry, even if you manage to squeeze off a shot there's no friendly fire so you can never harm your GF buddies. Although if you do whack them too much a ceiling-mounted turret activates nearby and warns to stand down - so you'd better take notice.
Scan one of the Marines for your Logbook, as you do you'll receive your first red credit; plenty more where that came from. A GF Mechanic is also present working on a number of crates in the backdrop, scan him as well for your Logbook.
Just after the bridge on the right you should notice a large glowing yellow panel set on the floor in front of a data-readout terminal. Scan the panel to learn that this system is used for target practice - step atop the panel to summon two small pods. Shooting either pod will send the object into the air, see if you can score repeated hits without allowing them to fall back to ground level. Score 10 hits to receive a gold credit, then score up to 20 hits for a Friend Voucher - and don't forget to scan one of the training drones for your Logbook.
Federation Marines point Samus in the right direction.
Once you've had enough target practice take a look around the rest of the docking bay. The huge docking bay door on the west side can't be opened, instead look for an exit up a ramp nearby (be sure to scan the inactive Halberd-class turret near the door). Scan the blue-shielded door for your Logbook before firing a single shot to open it wide.
Step inside the Docking Bay Access chamber and look for a pair of GF Fleet Troopers nearby. Listen to their chat about gearing up for a potential Space Pirate attack - all those fighter craft travelling along the access corridor outside the viewport should give you an idea that something big is about to happen. Be sure to scan a Male Fleet Trooper for your Logbook, as well as one of the Stiletto fighters outside the viewport and the lone Female Fleet Trooper nearby.
Speak to each Fleet Trooper, they'll either courteously greet you or stress the urgency of their on-duty business. Look around the chamber, see a lone Fleet Trooper working at a terminal on the other side? Speak to him to learn about a malfunctioning ramp nearby. Luckily for this trooper Samus is always handy with mechanics. See the two red ports above on the wall? Send a Charge Beam shot into each to release the clamps and lower a pair of ramps nearby, granting you access to the floor above.
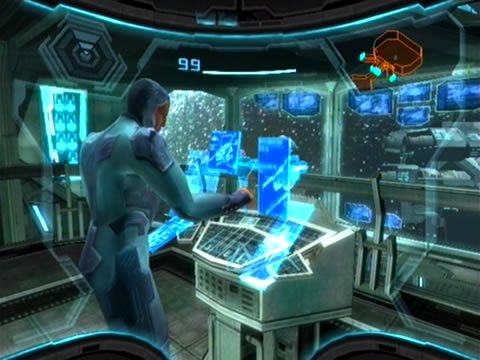
Climb up and scan the diagnostic terminals along the way to learn more about the Olympus' systems. Exit the chamber ahead to discover another docking bay, this one home to an impressive troop transport. Scan the vehicle and feel free to look around the chamber. Scan the terminals around the two Fleet Troopers as well.
Security is tight near the command bridge.
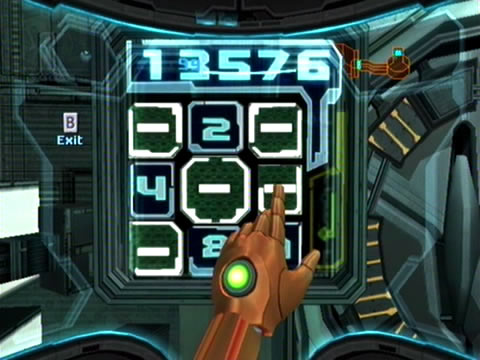
Now let's move on further into the bowels of this technological marvel. Look for a sealed door nearby, beside it lies a terminal interface. You'll need to punch in a security code in order to unseal the door - thankfully it won't be too far away to find. Directly opposite the door is a large computer terminal - press A while standing in front of it and select the rather obvious "Press for access code" option to be given Samus' unique passcode: 13576.
Feel free to select the other items surrounding the code for oral descriptions of key components of Federation technology (you may remember some of them from the videos offered on the Metroid Prime 3 preview channel). Once you're finished hearing all about the PEDs, Aurora Units and planet Norion, step over to the terminal beside the door and input your new code to gain access (some trivia: the Olympus turns out to be the first of its class, as well as the first GF starship carrying its own Aurora Unit).
Step inside the Security Station to find that someone's already ahead of you in the containment chamber. Look inside for your first glimpse of Ghor, a tall yet rather skinny robotic hunter. Scan him for your Logbook along with anything else you can find here. Once Ghor's been cleared for the bridge it'll be your turn for the medical scan.
Use the terminal beside the containment chamber door and follow the on-screen instructions to open it. Step inside and wait for the Fleet Troopers to initiate their scan, then exit the chamber upon its completion and be sure to scan the terminal nearby for the Olympus-Class Battleship entry for your Logbook (and a handy blue credit too for your trouble). Exit the chamber and step through the following observation corridor (enjoy the view outside). Move past the GF Mechanic working here (they sure do look odd with those welding masks) and be sure to speak to the GF Marine at the end for a unique statement.
The bridge is a flurry of activity.
Beyond the Security Access corridor you'll discover a large cargo lift. See the nearby hand scanner? Activate the scanner to power the lift, then simply walk into the hologram to ascend the shaft. Exit the lift at the top and head through the next chamber. Through a window on the left you'll spot a number of Fleet Troopers; but that door on your right leads straight into the command bridge.
Step through to the enter the bridge and a grand view of the action outside. Take a look around and scan all the command stations for interesting intel on the state of the ship (see the pair of unmanned gunnery stations either side of the bridge? Pity you can't take them for a spin). Once you've taken a moment to admire the scenery, climb up to the balcony overhead and look for a GF Marine blocking a hallway.
Speak to the soldier and he'll direct you to a nearby save station before granting access to the briefing room. Follow his directions down the opposite corridor and step inside. Shoot out the crates in the following darkened hallway (feel free to scan any health refills popping up). The door down the far end of the corridor is sealed, instead you'll discover the save station hidden behind a few crates. Step inside the chamber and scan the save station before using it.
Chapters:
- GFS Olympus
- Meet the Hunters
- The Liberation of Norion
- Heroes Corrupted
- A Broken World Ravaged by War
- The Deadly Phazon Threat
- A Fallen ally
- Samus' Gunship on the Frontlines
- Disabling a Leviathan's shield
- Heart of the Phazon Corrupter
- Chozo Paradise Among the Clouds
- Restoring Aurora Unit 217
- Hunting the Rogue Machine
- Uncovering Bryyo's Secrets
- Ghost Ship
- The tip of the SkyTown Iceberg
- Piecing together the Leviathan's Bane
- The Metroids Arrive
- Save the Second Chozo World
- The Pirate's Homeworld Unveiled
- Rescue operations in Enemy Territory
- The Final Chozo Gift
- Repositories of Chozo and Pirate Worlds
- Phazon Mines Part 2
- Breaking out the Heavy Weaponry
- Storming Pirate Command
- Join the Federation's Leviathan Strike
- Return to Norion
- Excavation of the Bryyo Ruins
- Bryyo's Final Bow
- Charting out the Ruined Valhalla
- Aurora 313's Final Message
- Ridley's Final Phazon Fight
- Opening the Wormhole
- The Source of the Poison
- The Masters of Phaaze