


Chapter 11: Chozo Paradise Among the Clouds

Elysia - home of an ancient Chozo settlement.
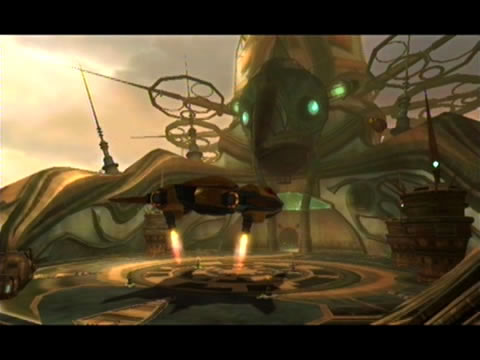
No time to worry now, we've got another planet to save. Press the central terminal and select Elysia - Main Docking Bay as your next location. Watch as Samus departs Bryyo, arriving in Elysian orbit to a view of a magnificent orange and brown orb. As Samus travels into the atmosphere you'll spot the Leviathan in clear view; embedded in the surface among the clouds, and once again in possession of a protective energy shield.
The view of SkyTown is magnificent - a huge cluster of ancient pod structures floating forever among the clouds. As Samus touches down at the welcoming Main Docking Bay and the peaceful SkyTown tune kicks in, you know this place is going to be very special (after all, the Chozo built this realm so it holds a special place in Samus' heart).
In a word, SkyTown is gorgeous. Step over to the edge of the Main Docking Bay and peer down at the cloud cover - constant storms flash among the clouds as turbulent winds keep the atmosphere moving (pity you can't smell the fresh air). The Leviathan Seed is clearly visible from here, a handy reminder to your ultimate objective.
Samus touches down at a serene docking bay.
Aurora 242 chimes in momentarily, urging you to proceed to Aurora Unit 217's location to administer the vaccine. Before leaving the landing pad, be sure to scan the SkyTown storage units scattered about for your Logbook, and try to scan one of the Transportation Drones carrying storage units to and from the docking bay. Also scan the massive elaborate Chozo bust above the exit to learn more about one of SkyTown's key architects.
Enter the small door in the main structure and look at the ceiling to spot a small maintenance bot hovering about performing its automated duties. Scan the bot to reveal it as an Aerial Repair Drone - even though your cross hair registers red, these little bots won't give you any trouble. Climb up the winding ramp nearby and enjoy the intricate architecture and texturing of such a simple structure.
Up the top of the ramp resides an observation window with a grand view of the docking bay and your ship. Look about the ceiling nearby for a different bot hovering near an Aerial Repair Drone. Scan this docile being to reveal it as a Databot - these units possess Elysian Lore entries. Shoot the target (it won't break) and watch as it emits a small holographic panel covered in hieroglyphs. Scan the Databot again to receive the lore entry, in this case the Creators entry. Written from the hand of a Chozo-built mechanical life-form, the Elysian entries detail the Chozo's activity on this planet up to a whopping 1500 years ago.
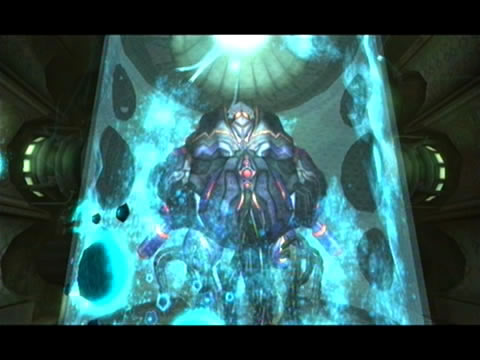
Once you're ready, scan the door bearing a striking resemblance to the doors back on Tallon IV before exiting the docking bay. Now you might be wondering what could've stopped you from originally heading for Elysia before Bryyo - the answer to that question lies right beyond the door. Ahead in the Main Docking Access corridor lives a huge Chozo Elder statue - literally covered in twisting Phazon vines.
Phazon corruption threatens to end this peaceful world.
See the small opening in the gate covering the statue? Use the Morph Ball and hop onto the outstretched palm of the statue. Engage Hypermode and use your new Hyper Ball to eradicate the Phazon growths on the vines, purging the statue of its shackles. With the statue free of obstruction the entire unit will sink into the floor, revealing an elaborate corridor beyond.
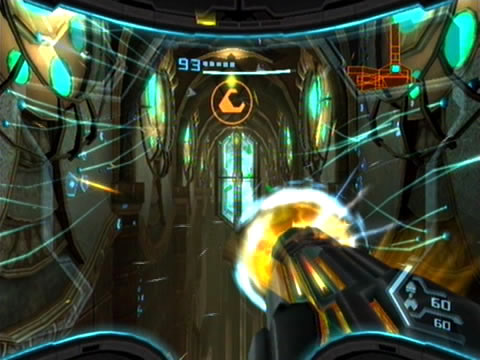
Take care here however, as that massive chasm lining the corridor is quite deep (but looks pretty down below). Ahead of you lies a Grapple Point hanging from the ceiling, but take care and dismantle the hanging panels blocking the corridor first (use a Charge Beam blast). Shoot the second panel down before swinging across the chasm.
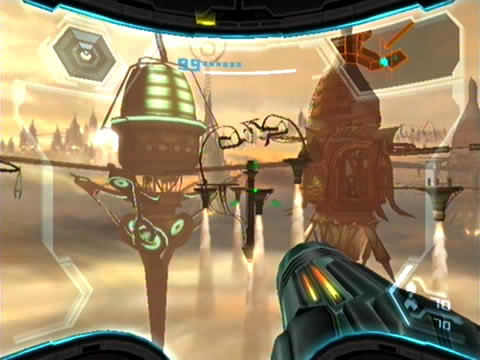
Grab some supplies from the storage units beyond the chasm before stepping outside to a breath-taking sight. You're now standing among the main community of the SkyTown pod structures, and an infinitely complex scene stretches as far as the eye can see. The camera pans out, offering sweeping views of the pods and their interconnecting cables. Take a moment to for the view to sink in; you're going to see plenty of gorgeous views like this here in SkyTown.
The Chozo complex stretches as far as the eye can see.
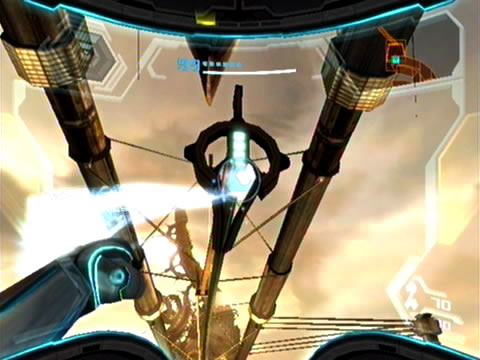
Once you're ready, take a look at your end of the winding cable snaking over to the pod structure far south. Scan the end of it to reveal this structure as a Zipline Cable. Using the Grapple Swing, you'll be able to hitch a ride and sail over to the connected pod. Watch for the C-icon appearing over the cable and grapple it to initiate travel (but don't let go). Keep your wits about you along the trip however, as sneaky shutters block some of the junctions along the way. Shoot them open to pass through safely (if you fall you'll have to start the sequence over).
Upon arriving safely at the next pod, head inside and around the corner. This is the Arrival Station, and you're not alone. Two humanoid robots promptly come to life and slowly stomp towards you, firing odd green energy pulses. Scan one to reveal them as Tinbots - these are likely the mechanical Elysians the Chozo created, but they've since been corrupted by Phazon and are now nothing more than lifeless weapons. Knock them down very easily before moving on.
Step through the following corridor to find yourself at a balcony overlooking a massive free-floating satellite (scan the structure to learn that it's been looping the same signal for roughly 200 years!). If you leap up to the visible Grab Ledge you'll discover an inactive cannon unit, so there's not much you can do about it now.
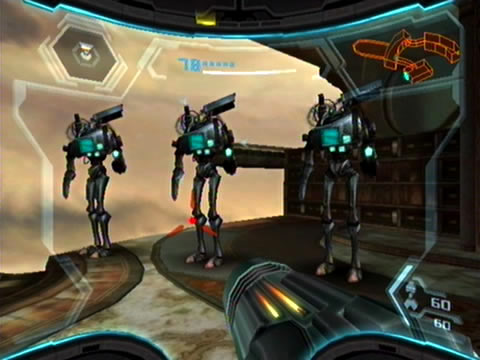
The local mechanoids now serve Phazon.
Instead, step around the balcony to meet three more Tinbots. Target the center bot and send a Missile its way to easily clear all three. Head inside and follow the corridor around to a chamber housing an elaborate battery unit and a lone Databot. Shoot the Databot and scan the Gift lore entry (this one describes the Chozo finding a need to build the first Elysians to aid in the upkeep of the facility).
Take a close look at one of the many circular holographic panels fixed to the ceiling... that's Ghor pictured on the displays! Scan one to indeed confirm that Ghor's image is displayed - he's watching your every move on SkyTown. Exit the chamber to find yourself in a curving hallway lined with pillars, pistons and populated by more Aerial Repair Drones (there's plenty of chambers like this here). Except you've got another inhabitant watching you from the center of the corridor. See the floating robot leering down at you?
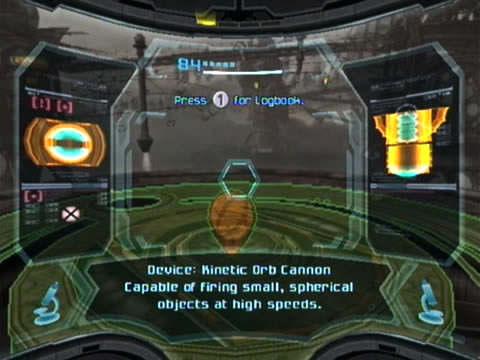
Step forward and watch is it eerily moves away and promptly vanishes. Now that was certainly unsettling. If you managed to scan it before moving forward you'll discover its identity - a Steamlord. Move through the corridor and exit the building to find yourself at a balcony overlooking the rest of SkyTown. This time you've got a handy device allowing transit to the next pod - a Kinetic Orb Cannon (remember these from Echoes?). Scan it first for you Logbook, then enter the hologram while in Morph Ball mode to find yourself promptly launched across the skies to the next pod.
Just one of many Chozo technologies left intact.
Landing safely in a counterpart orb cannon's safety shield, you'll find a narrow pipe network on the wall up ahead. Climb up through the structure and be sure to pick up Missile Expansion ST.01 trying to hide in clear view. Travel through the pipe and stand up at the exit. Facing you at the far end of a short platform lies a huge multi-lock unit - scan it to reveal that five locks must be shot simultaneously to disengage the lock (there's only one upgrade we know of capable of doing that...). Remember this location for later.
Turn right and look back at the balcony you arrived on, there's an odd Chozo bust above on the wall which can't be referenced by the GF database... Leap across the short gap nearby to the next balcony where a Zipline Cable awaits. If you turn around and face the multi-lock unit you'll see what it holds in place - a large round donut-shaped object resting atop the platform. Scan the object to learn that this Theronian containment unit contains highly volatile amounts of nuclear substances - interesting....
You'll also discover another handy orb cannon in the corner of this balcony, but the launch tube is blocked by a number of shimmering red metal panels. Your current weaponry can't deal with the metal debris, so take a trip along the Zipline Cable instead. Watch out for a pesky drone dropping off energy orbs along the cable's path - collide with one and you'll plummet below. Shoot them down along the way and watch out for the odd shutter.
Zipline Cables aren't as safe as you might believe.
Arrive safely on the next pod and enter the structure. Inside is the Barracks Access, another curving hallway with a few surprises. See the red energy beams roving across the corridor up ahead? That Steamlord is hovering menacingly there, goading you to follow. Step forward to find it vanish again. Use the Morph Ball to squeeze under the hazardous energy beams, and don't forget to pick up Missile ST.02 along the way.
Beyond lies the Steambot Barracks and an inactive elevator (notice the Missile Expansion visible through the window ahead?). Use the hand scanner adorned with a Chozo hand to reactivate the lift, then ride it down to the floor below. Step around the corner to find your path abruptly blocked by a wall of thin gears - unfortunately the control unit is on the other side, so no luck passing through here yet. Head back to the lift to find an alternate route: a narrow tunnel leading inside the wall.
Roll through here and move through the following tunnel network, watching out for hazardous pistons and using bombs to blow out any obstructions along the way (notice the Missile Expansion hiding above a Spider Ball track?). Eventually you'll find yourself deposited down into a large chamber possessing a number of sealed container pods. Scan the central pod to learn that faint mechanical sounds are coming from within - looks like you've found the lair of that ghostly Steamlord.
What could be hiding out among these platforms?
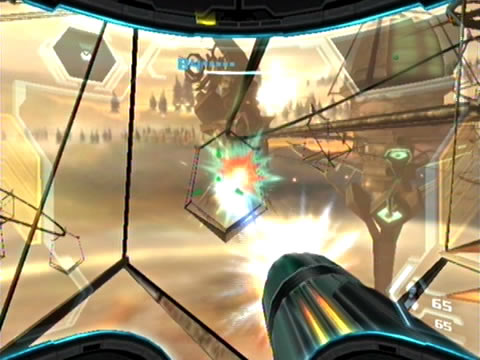
Sure enough, step towards the exit nearby to find yourself sealed in (again) as the Steamlord emerges from its chamber. It'll summon a pack of orange Tinbots before the entire group attacks (to a funky tune). Scan one of the orange Tinbots to reveal them as Steambots - these guys won't be such easy pushovers. The Steamlord itself should be your primary target, so refer to the bosses guide for tips to corner and destroy it.
With the Steamlord utterly defeated and its cronies rendered nothing more than a pile of scrap metal, your reward will be a handy Energy Tank (ST.01). Pick it up and take a look at the security bars still in place keeping you from accessing the exit. See the small pipes running along the floor towards the bars? Each pipe leads around to one of the now-open Steambot chambers. Simply use the Grapple Lasso to damage the three safety release valves to retract the security bars. Take note of the big device opposite the door before leaving, you'll be making use of that on the return trip.
Exit the chamber and look for a Databot in the following corridor. Scan the Discovery lore entry it offers to learn that this entire facility was once devoted to studying the cosmos - the Chozo learnt plenty about the universe from here. So much in fact, that one day a satellite sent brief intel of an incredibly distant planet which was unmistakably sentient, despite being a heavenly body. Very interesting.
Your own Chozo-based abilities will be right at home.
Further down this corridor lies a large inactive elevator - simply activate the hand scanner beside the control circuit panel nearby to restore power. There's also an exit in the corner, but this leads outside to the Hoverplat Docking Site, and without transit equipment you can't get very far there. So let's take a ride on the elevator back in the Barracks Lift. Head outside once above one floor to discover another Zipline Cable stretching out into the horizon.
Hop aboard and ride along the cable to the following pod structure. This cable line has a new surprise however, as small objects appear and streak out ahead of you. Eventually they'll begin to move backwards along the cable - allow them to touch you and it's a one-way ticket below. Try to shoot them down quickly, but it won't be easy with your turbulent movement along the cable so don't get disheartened if you fall a few times.
Once safely across you'll find another orb cannon - the counterpart of the one you saw earlier blocked by metal debris. This one possesses an intricate multi-lock system covering the launch tube, so once again you won't be able to use it for now. Before you enter the pod structure, take a look at the hologram above the door. Notice the image of an Aurora Unit at the base of the display? Almost there.
The incapacitated Aurora Unit desperately needs a vaccine.
Enter the pod and look for a small mechanical critter rolling along the ground. Scan the little guy to reveal it as a regular Repair Drone, the precursors of their flying cousins. Down the end of this corridor lies a save station beyond a white blast-shielded door, so be sure to save your game on the way through. Power up the inactive lift via the nearby hand scanner, then hitch a ride down to the lower floor.
Below on your left lies another group of metal debris, so let's head right. Exit the corridor to find yourself in the Aurora Chamber, home to Unit 217. Step around the corner and watch as the camera sweeps over to the inactive supercomputer, housed cosily in its liquid tank. Phazon growths spurt all over the tank and around the walls, so that vaccine you're carrying is 217's only hope. Except there's a large security gate in place blocking access to the inner chamber.
Scan the circular gate to learn that a kinetic charge is required to energize and open the seal. Notice that only the Morph Ball can fit inside the gate? You should have an idea now which upgrade will come in handy here.
Chapters:
- GFS Olympus
- Meet the Hunters
- The Liberation of Norion
- Heroes Corrupted
- A Broken World Ravaged by War
- The Deadly Phazon Threat
- A Fallen ally
- Samus' Gunship on the Frontlines
- Disabling a Leviathan's shield
- Heart of the Phazon Corrupter
- Chozo Paradise Among the Clouds
- Restoring Aurora Unit 217
- Hunting the Rogue Machine
- Uncovering Bryyo's Secrets
- Ghost Ship
- The tip of the SkyTown Iceberg
- Piecing together the Leviathan's Bane
- The Metroids Arrive
- Save the Second Chozo World
- The Pirate's Homeworld Unveiled
- Rescue operations in Enemy Territory
- The Final Chozo Gift
- Repositories of Chozo and Pirate Worlds
- Phazon Mines Part 2
- Breaking out the Heavy Weaponry
- Storming Pirate Command
- Join the Federation's Leviathan Strike
- Return to Norion
- Excavation of the Bryyo Ruins
- Bryyo's Final Bow
- Charting out the Ruined Valhalla
- Aurora 313's Final Message
- Ridley's Final Phazon Fight
- Opening the Wormhole
- The Source of the Poison
- The Masters of Phaaze