Data
Guides and strategies
Media
Chapter 3: The Hunt for Kraid
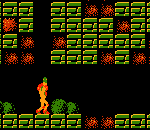
You can now finally depart Norfair. Head back to the main elevator and ride it up to Brinstar. Before we travel down to Kraid's Hideout, there's a few more handy items to be found. Go back to the large orange shaft and climb up to the very top. Go through the door at the top to find yourself in a green corridor filled with Wavers flying about. You shouldn't have any trouble dealing with enemies in this area due to the Screw Attack.
Head right until you reach a blocked-up wall, then bomb or shoot open the crumbling block to get through. Just beyond here you'll find a series of gray pipes leading right, but which one do you choose? Jump up to the top one, blast the Geemers crawling around inside, then activate the Morphing Ball and crawl through.
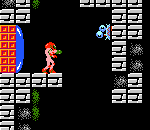
Watch out for enemies along the way, once you reach the end pop out and keep going right. Head through the door just ahead to find a small room with two Wavers. Stand in roughly the center of the room and shoot up at the roof to reveal a hidden tunnel leading up. Jump up to the top to find a door high up on the left wall. Watch out for the pit concealed below the door, use the High Jump Boots to reach the door. Cross the next corridor and shoot open the red door with missiles to find the Varia inside. This is one of the more important items, as it'll greatly enhance your survival in battles.
Go back down to the green room and head right to find another corridor. Eventually you'll find a Missile Tank, grab it and keep going. Once you reach the dead-end, shoot up at the roof in the corner to reveal a hidden passage. Jump up and walk through the wall to find another small room. Go over to the right wall, activate the Morphing Ball and plant bombs to propel yourself up to the small opening in the wall. Crawl through to find another Energy Tank.
Now there's only two more items to find. Keep going right to eventually find yourself at the top of the shaft containing the door that led to the Bomb power-up. Drop down to the bottom and head down the long corridor filled with yellow quicksand. Along the way, be sure to pick up the Ice Beam, after grabbing it the first time you should know where it is. Just in case you've forgotten, bomb through the ground in the first small room you'll find connecting the large corridors and descend the shaft to find your way to it.
With the Ice Beam in hand go left through the long corridors to reach the gigantic blue shaft and drop down to the bottom. Head left and use the Morph Ball to crawl through the narrow tunnel below the large rocky overhang in the following corridor.
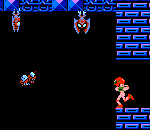
Watch out for the diving Skree beyond the tunnel. Once it's about halfway down the screen freeze it with the Ice Beam, then jump on top of it. Shoot at the second block in the roof along from the overhang to reveal an Energy Tank - you should easily be able to reach it from here. Once you've scored it keep going left and go through the door to find a room with crumbling blocks in the floor - you should have passed through here at the beginning of the game. Bomb the blocks away to get down below, drop down the shaft and head right. Ride down the elevator in the next room to reach Kraid's Hideout.
This complicated maze of an area contains many dead-ends and empty corridors, so follow these precise (but hopefully not misleading) directions to find everything here. To top it off there's also a fake version of Kraid, you may as well just avoid going to face it all together. Drop down below the main elevator and blast through the first red door on the right. In this corridor you'll find a Missile Tank atop a pillar, once you get it turn back and go back to the main shaft - there's nothing to be found further on. Drop down the shaft and go through the next red door on the right.
Once you reach the solid wall, bomb your way through to find a room containing an Energy Tank. climb back up the main shaft and head through the blue door just below the elevator. Cross the corridor, then blow your way through the solid wall to find a Missile Tank. Keep going left to find a shaft leading down. At the base of the shaft, drop through the fake lava to fall down a much longer shaft. Head right to eventually find another Missile Tank. Continue going right until you reach a small shaft leading up.
From here, you can take one of two paths to reach Kraid's room. For one path, head back up to the main shaft to eventually find a red door leading off the right wall of the shaft, through there you'll eventually reach Kraid and a Missile Tank along the way. The other path you'll also be able take to go straight to Kraid's room, you'll have to try to bomb-jump up the narrow shaft to reach the door on the right.
If you manage to get through, go through and down a short shaft to reach two green rooms with Sidehoppers in them. In the second green room, bomb your way through the floor to reach the room below just outside Kraid's room. If you kept going left you would've found the fake Kraid. Once you reach the room outside Kraid's, blow open the red door and head inside to face this first mini-boss.
Mini-boss: Kraid
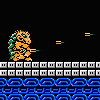
Kraid will be standing in the center of the room moving back and forth, he'll also be firing out a multitude of projectiles. He'll often fire out three spikes from his chest that fly straight forward, you can easily freeze these with the Ice Beam to buy more time before they launch. Kraid will also spew out two spinning spike projectiles from his head, they'll fly up and down, try to stay close enough to Kraid to avoid taking damage. You can easily hit Kraid with Missiles, but instead we'll get our hands dirty. Activate the Morphing Ball, then plow into Kraid while constantly planting bombs around him. You'll probably take a lot of damage, but you should have enough Energy Tanks to survive. Keep dropping bombs all over Kraid and don't worry about his projectiles, after a pounding he should explode and you'll be rewarded with an extra 75 Missiles.
Just before you leave, drop down into the quicksand on the right side of the room and shoot open the blue block in the wall to reveal an Energy Tank. The easiest way to score it is to jump up to the right side of the hole and activate the Morph Ball. Then drop down into the hole while hugging the right wall and you should snugly touch the Energy Tank. Once you've got it leave the room and head right to eventually reach the long shaft leading up. Climb up the long pillar of crumbling blocks, near the top you'll find a door leading to a Missile Tank (you might have already grabbed this one if you came this way to Kraid's room). Once you've got you'll have found everything here, so it's time to track down the second mini-boss, Ridley.
Chapters:
- Samus' Entrance
- The Bowels of Norfair
- The Hunt for Kraid
- Ridley's Hellhole
- Final Confrontation


