Data
Guides and strategies
- Techniques Guide
- Power-up locations
- Bosses Guide
- Mini-bosses Guide
- Search View Guide
- Obstacles Guide
- Walkthrough
- Game endings
- Secrets and tips
- Game maps
Media
Bosses Guide
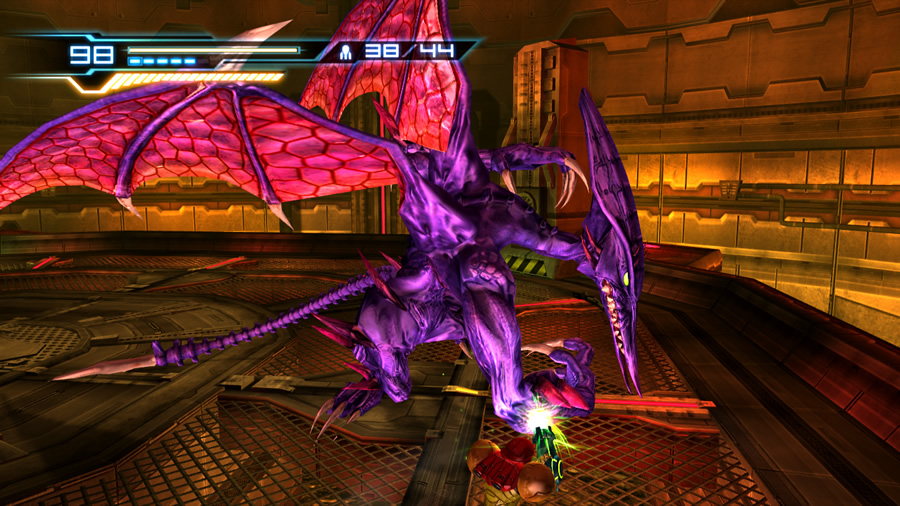
Ridley

- Location:
Sector 3 - Geothermal Power Plant - Attacks:
Flame breath, Claw swipe, Claw grab, Tail lash, Meteor shockwave, Tail stab - Weakness:
Plasma Beam, Super Missiles
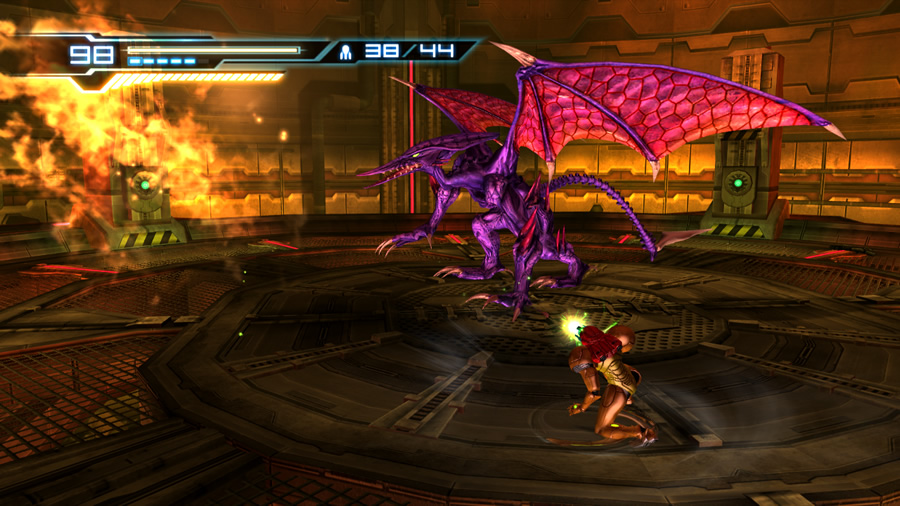
With such an epic (and infamous) intro cinematic, this is one Ridley encounter you won't forget in a hurry. You'll be confined to the central platform for the duration of the battle, and thanks to the guard rails there's no danger of falling into the lava below. However, Ridley will offer a different take. Ridley's array of offensive attacks mirrors similar techniques he's used in the past, but thanks to the Sensemove you'll have a fantastic method to avoid damage.
Ridley doesn't waste any time attacking Samus. He tends to open up with a fire breath attack or claw swipes, simply Sensemove to the left or right (two are usually needed to leap clear), or run and jump away from the fire keep safe. His claws and tail are trickier to avoid - if he advances towards Samus be ready to Sensemove away from any claw swipes (he tends to swipe twice before pausing), and especially watch out for a potential follow-up tail whip. The tail is usually lightning-fast so you'll need to be ready for it - a quick sequence of Sensemoves should work.
With such fast attacks it might be tough to time a Sensemove properly, if in doubt just keep hitting the D-Pad in any direction when Ridley moves in close. Samus might look ridiculous when you rapidly press the D-Pad but it's a minor trade-off to keep her safe. Ridley also tends to roar right before unloading any type of attack, so listen for your cue to Sensemove.
While Ridley's claw swipes are generally survivable if they make contact, be extremely careful if he lunges at Samus from afar with a claw extended. If he manages to snatch Samus mid-strike, he'll grab hold and leap into the air, smashing and grinding her against the walls of the chamber. Your health will slowly drop from the carnage, and while Pikachu isn't here to help Samus this time, you can still charge up the Plasma Beam and eventually let loose into Ridley's face to break free.
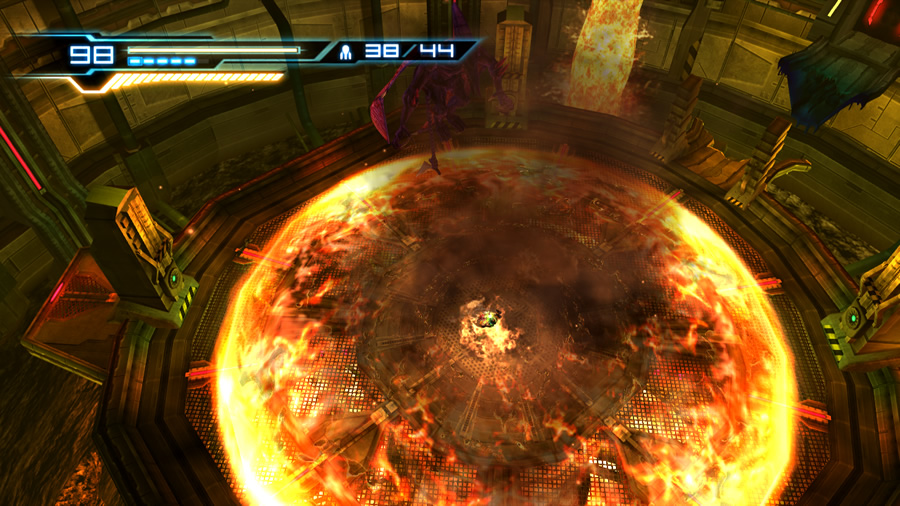
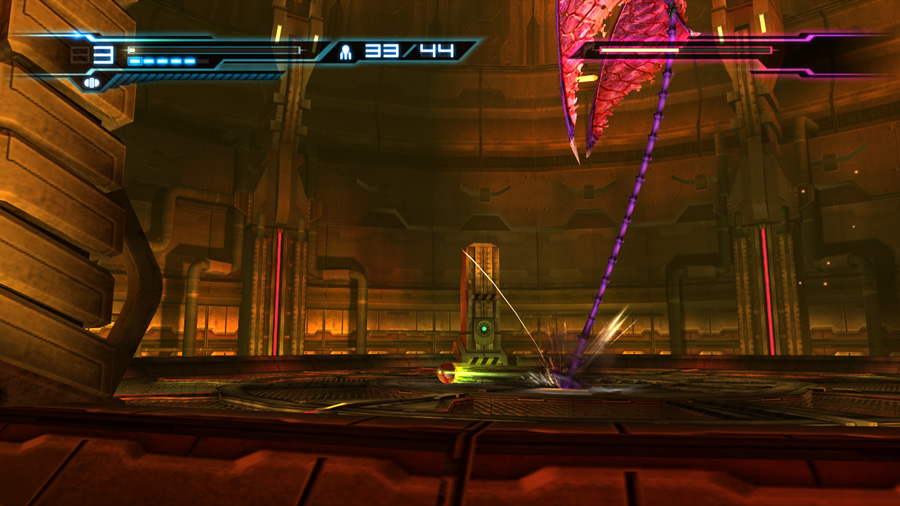
Ridley's airborne attacks are just as nasty. If he leaps into the air and lobs a massive fireball towards the ground, the impact will create an expanding shockwave all over the floor. Simply time your movements and leap over the shockwave as it passes to clear it. Try to keep Samus away from one of the tall pillars bordering the platform, as they tend to block your view slightly if she's obstructed by one.
Ridley can also utilise his tail in the air; if he flies directly above Samus he'll stab the tail straight into the ground at her position multiple times. The game tends to slow down ever-so-slightly before he strikes, giving you a chance to Sensemove away. The tail strikes will bother you for a while, so keep up your Sensemoves. To time your Sensemoves properly, listen very closely for Ridley's shrieking. He'll shriek right before each tail stab, so if you press the D-Pad in any direction as soon as you hear him shriek, you should be fine (thanks Lars!).
However, another trick is to activate the Morph Ball and simply roll around. Roll at an angle toward the arena's railing and follow it around (but don't directly touch the boundary). The camera will make it hard to keep rolling along the boundary, but keep it up to ensure that you don't stop moving or hit something and slow down enough for Ridley to strike. So long as you keep up a solid momentum, Ridley's tail stabs should completely miss!
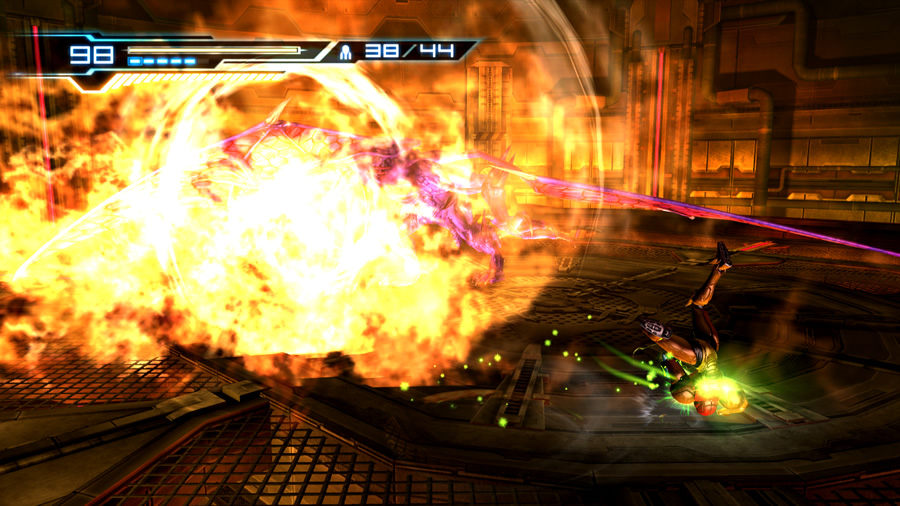
Rapid-fire shots from the Plasma Beam work well against Ridley, but try to use charged shots as much as possible, especially right after using the Sensemove and as Ridley pauses between attacks. As you deliver hot streams of green plasma into Ridley's face, you might be lucky and momentarily stun him (he'll lurch back and lower his head while remaining motionless for a while). Don't pass your chance up - quickly move in for a Lethal Strike to take a larger chunk of his health away.
After taking enough punishment, Ridley will deploy some sort of Plasma Beam-resistant shielding (his body will become a dark purple/blackish colour). He tends to raise the frequency and ferociousness of his attacks in this state, so your Sensemove skills will surely be tested. To break his shield you'll need to score a successful hit with a Super Missile.
Normally when you enter first-person view, you'll need to lock-on and charge up your weapon before unloading a Super Missile. Instead, if you charge up your beam first and hold the 1 button as you enter first-person view, the charge will remain and you can lock-on and release 1 to launch the Super Missile straight away. It's a bit awkward but can help speed things up. Otherwise you'll need to time your switch to first-person view when Ridley is some distance away, as you usually won't have enough time to charge up and release a Super Missile if he's bearing down on you with claw and tail attacks.
If he releases some good old flame breath or just airs his lungs, this is also the perfect time to send a Super Missile his way. Keep your distance and fire away (remember that the game will slow down slightly as you enter first-person view to give you a chance to Sensemove if he attacks too quickly). With a successful strike, Ridley will reel back and return to a healthy shade of purple.
Use the time he takes to roar at you to quickly replenish missiles with the Concentration move. As Ridley's health continues to drop he'll generally move around and attack faster than before. He'll also periodically summon the shield again so you'll need to Super Missile him a few more times. Keep the cycle up, hone your Sensemove skills and you'll have him defeated yet again in no time.
That is however, if you're playing the game on Normal mode. For Hard mode, this is the point in the game where it literally becomes Ninja Gaiden. You can only survive a hit from Ridley's claw swipes and barely against his claw grab when he scrapes Samus along the walls. Everything else is lethal in one hit. ONE hit.
This is by far one of the most challenging boss fights you'll see in a Metroid game. You'll need to perfect the Sensemove and learn the cycle of every one of Ridley's attacks. Here's some general tips for Hard mode (they work well on Normal mode too):
- Attack Ridley with Charge Beam shots as fast as you can - don't give him a chance to attack first
- If you stun Ridley, use Concentration to restore Missiles or health before using a Lethal Strike on him
- If Ridley leaps into the air, anticipate his tail stab or Meteor strike attacks. If he hovers over Samus, activate Morph Ball mode and keep rolling along the boundary to avoid his stabs, or time your Sensemoves and press the D-Pad each time Ridley shrieks. If Ridley opts to use the flaming Meteor shockwave instead, quickly jump over the shockwave (while either standing or in Morph Ball mode)
- Ridley usually deploys the Meteor shockwave immediately after activating his Plasma Beam-resistant shielding. He tends to follow up with another meteor strike, so charge up your beam while avoiding the first shockwave and quickly deploy a fast Super Missile as he winds up for the second round. Abort your Super Missile if he hovers over Samus instead, intending to use his tail-stab attack
- Try to stay far away from Ridley at all times. If he ever lands within physical range of Samus, stop moving and tap the D-Pad madly for a Sensemove. Otherwise his tail swipe can very easily catch you off-guard
- Once his health is almost gone while his armour is deployed, Ridley tends to lunge at Samus more than before without first using the Meteor shockwave. Be willing to Sensemove a few times before winding up a Super Missile
When you finally break through and conquer the dragon, don't be surprised if you did it without taking any damage at all.
Keep trying and persisting - the Game Over screen won't take away the option of trying again as many times as you wish. But chances are you'll be seeing it many, many times. On the bright side, defeating Ridley on Hard mode means you'll never lose to him again on Normal mode (ahh the soft cushioning convenience of Energy Tanks).