


Data
Guides and strategies
Media
Chapter 15: More Surprises
This area curiously resembles Tourian, or is it an Aurora complex?
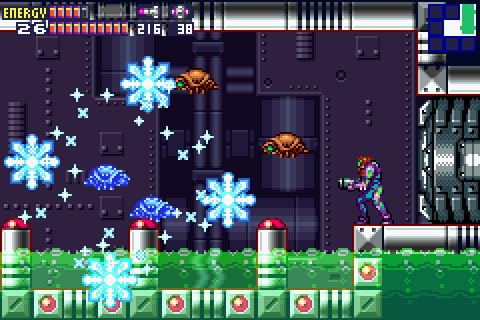
At the top of the elevator shaft you'll find yourself back in Sector 1 (SRX). We now need to get out of here as fast as possible. Go right to find yourself in an area that bears a striking similarity to Tourian in Super Metroid, but of course there's no real Space Pirates here. Space Jump up the small shaft and use a charged missile to freeze all the Rippers down in the next shaft, you'll also reveal Energy Tank S1.02 in the wall ahead.
Keep going through this room once you've grabbed the item and go through the door on the right. Space Jump through the following corridor while watching out for the blue creatures and stay out of the acid on the floor. In the next shaft you'll find a Save Room straight ahead, and don't forget to shoot out the floor and drop through to eventually find Power Bomb S1.01.
With the item in hand and your game saved, climb up the shaft to the very top (use bombs to break open the wall above to reveal a ladder). Go through the door at the top to find a long corridor with a wall blocking the way halfway through. Lay a Power Bomb to destroy the wall, you'll also take out the creatures down in the floor. Quickly grab any non-flashing X that appear and finish off any more creatures that didn't explode. Some of the X will reform into yellow Zebesians, pound them in the back with missiles to take them down.
With all the enemies cleared out the sealed door on the left will unlock. Go through to find another shaft. Up through the door above you'll find another Save Room, so save your game again. Descend the shaft to the bottom and head left (don't worry about the right door, it leads to a dead-end). Cross the next acid-filled corridor and use charged missiles to freeze the Rippers flying about. At the end you'll face an Eyeball Door so something nasty is waiting beyond.
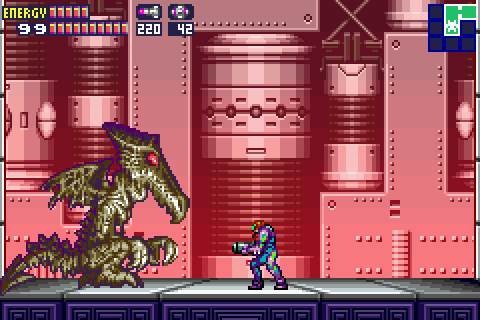
Ridley! You old fossil...
Fry the door and go inside. Once through you'll drop down into a tall room where you'll meet an ugly sight, Ridley! The creature will remain still in the corner for a second before opening its red eyes. It'll then shimmer and change into an even larger and uglier form of Ridley (and a noisy one at that too). Refer to the bosses guide for tips on taking down this classic foe.
Upon sending this form of Ridley to the grave you'll recover the final ability - the Screw Attack! Now you'll be able to damage enemies while Space Jumping and you'll also be able to break through Screw Attack blocks. Before returning to the Navigation Room, we'll go about each sector to pick up all the remaining Missiles, Energy Tanks & Power Bombs. Leave this room and go back to the shaft leading up.
Cross through the corridor where you faced the yellow Zebesians and go down the adjacent shaft. Near the bottom of the shaft just above the door leading to the Save Room, go through the door concealed within the alcove. Blast open the shutter in the following room and continue on. Break open the blocks in the floor of the next room with the Screw Attack and drop down the shaft.
Screw Attack through the following acid-filled corridor to break through each wall, once you reach the shutter shoot it open before going through. Ascend the following shaft you'll find while knocking down the purple Zebesians on the walls. Up at the top you'll find yourself back in the main area of Sector 1. From here we'll now go around this sector picking up the remaining items. Firstly, head right and go through the large room with the atmospheric stabilizer.
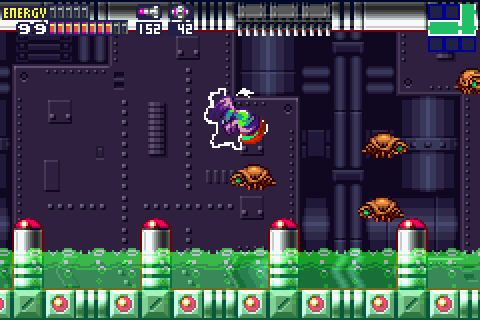
The Screw Attack makes quick work of these Ripper.
As you go through Sector 1 now you'll find something quite interesting, a lot of the enemies present have mysteriously disappeared and massive empty Metroid shells are littered everywhere - it seems some of the hatchlings managed to escape from the Restricted Lab and have begun devouring the X here, serves the X right.
Keep going right and climb up through the next shaft. Go left at the top and head through the water-filled corridor. You'll now be just outside the room where you recovered the Charge Beam, from here you can find Power Bomb S1.02. Once you've grabbed the bomb you can also track down Energy Tank S1.03 with some tricky Shinespark maneuvering.
With these items in hand make your way back up to the long corridor that's directly above the small room on the map where you found Energy Tank S1.03. Once there go through the door on the left side to reach the top of a huge shaft leading down, then go left again to find a massive lava-filled cavern. In here you'll find three Missiles, S1.04, S1.05 & S1.06. With all three missiles safely tucked away, go through the green door down in the lava and ascend the following shaft.
Go right at the top to find yourself back in the large yellow room near the entrance of this sector. From here you'll be able to find Power Bomb S1.03. With this item in hand you'll have successfully cleared out Sector 1's items. We'll now find an access port to reach Sector 2 without using the main elevators.
Note:
If this is your first play-through of the game, keep away from the Recharge Rooms near the main entrances of every sector, as you'll be locked out of all the main sectors next time you visit one!
In the same room where you found the Power Bomb, jump up into the right corner of the room and crawl through the hidden tunnel there to reach a door. Go through and cross the access tunnel to reach Sector 2.