Bosses Guide

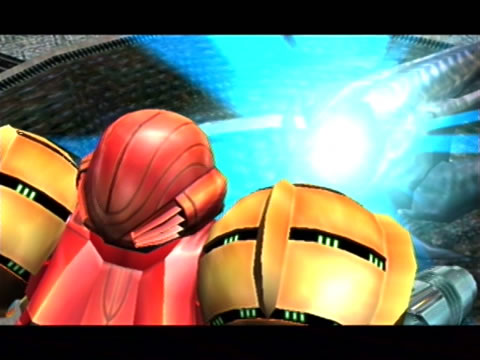
The Ing horde's biggest and ugliest minions lie in wait for Samus, itching for a chance to stop the Luminoth's last hope. These guides below will help you turn the tide to the Luminoth's favour. These monsters aren't to be trifled with, as you'll be facing foes a lot tougher than the beasts of Tallon IV.
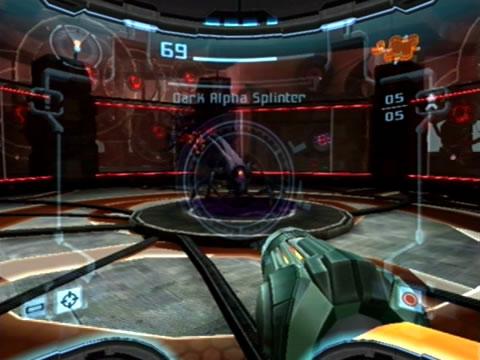
Just remember to scan a foe whenever you enter its lair as you'll only get one chance at it. Some bosses have multiple forms so remember to catch these later forms as well for the Logbook. Bosses also bear twice as much health in Hard mode as they do in Normal mode (or Hypermode and Veteran mode respectively in the Metroid Prime Trilogy version of the game), so don't expect an easy trip on Hard.
When engaging major bosses an energy bar appears at the top of the screen, so you'll be able to tell how much health they have left.
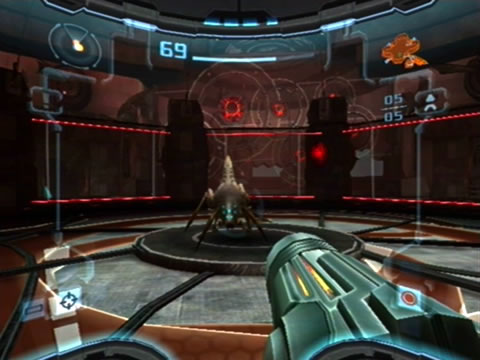
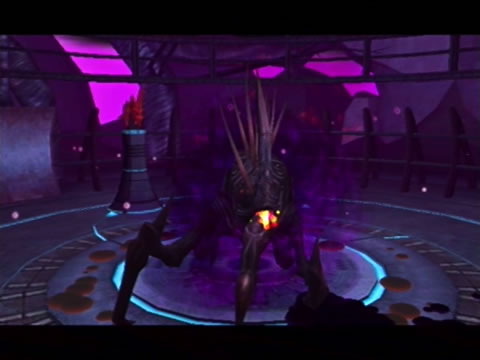
Dark Alpha Splinter
- Location:
Great Temple (Temple Sanctuary) - Attacks:
Purple plasma breath, Lunge attack - Weakness:
Missiles, Charge Beam
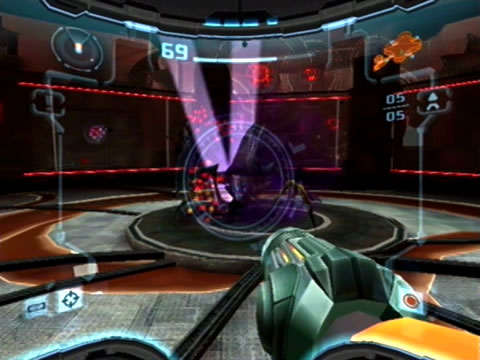
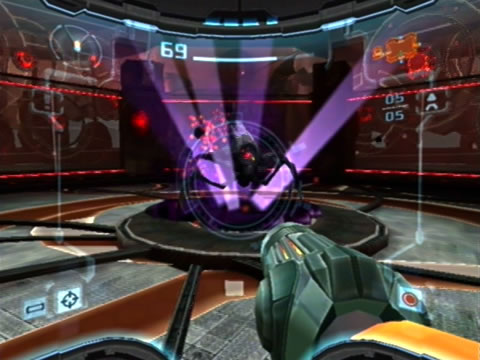
Above all else keep your distance from this nasty fiend. It'll spend most of its time in the center of the room, pacing back and forth before striking. Stay well back and keep the target locked on at all times. The Splinter will only use two forms of attack, it'll first begin with a charged energy blast before lunging straight at you.
Like my old manager used to say, the best place to be during a fight is not there. So keep your distance and keep strafing to avoid its purple breath of death. Keep strafing immediately after the blast in anticipation of its lunge attack, as you don't want to be on the receiving end of it (especially on Hard/Hypermode).
Just keep your distance and dance around the target to keep safe. Unload everything you've got into the monster to finish it off, upon yielding it'll give up the precious Energy Transfer Module, something very valuable indeed.
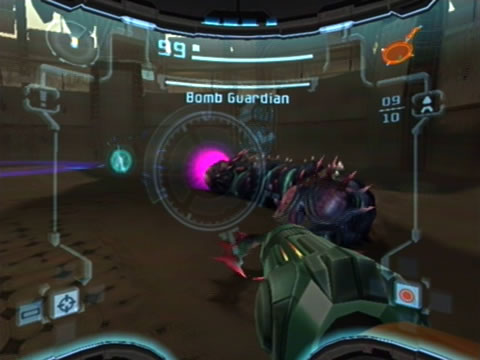
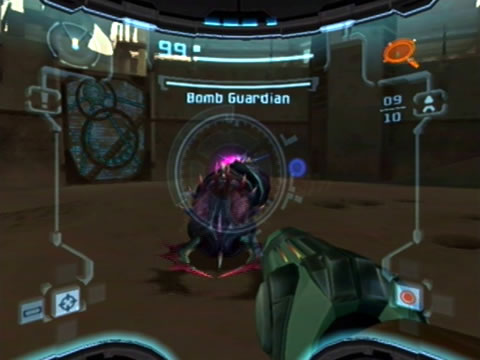
Bomb Guardian
- Location:
Agon Wastes (Agon Temple) - Attacks:
Morph Ball Bombs - Weakness:
Missiles, Charge Beam
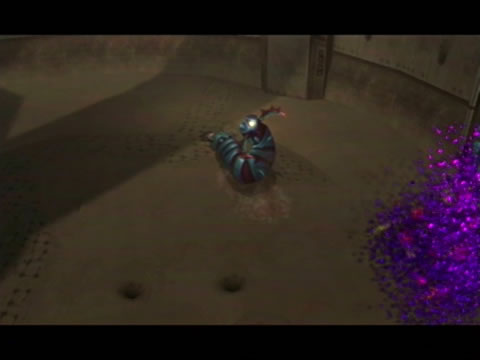
This Ing-controlled Alpha Sandigger loses its tail head in favour of a Morph Ball Bomb-launcher. Keep well back from the creature as it'll be constantly dropping bombs in its wake. As it wanders around the arena the head will occasionally reel back and launch a single homing bomb or several spread bombs all over the area, so keep your eyes open. Keep away from the head as well, those pincers aren't just for decoration.
Target the tail and try to get behind the creature for a clear shot. Open up on the tail when in range, you'll know you've scored a hit when the creature flashes bright yellow. Keep strafing around the opposite direction the creature is turning to get a clear shot. Eventually the Bomb Guardian will stop moving and the tail ceases fire. As it does the head will reel back and emit a spout of purple plasma. This is your cue to make a striking blow. Strafe around to the head and open on it with a Charge Beam shot, you'll now inflict critical damage.
Eventually the creature will recover and carry on roving around the arena deploying bombs, just target the tail again and disable it to make the head vulnerable. Repeat this a few more times to finish the monstrosity off. Upon blowing the creature's head off the rest of it will perish, before the Ing parasite gives up the ghost and rewards you with your lost Morph Ball Bomb ability.


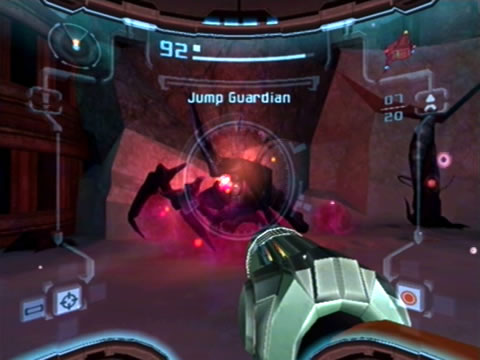
Jump Guardian
- Location:
Dark Agon Wastes (Judgement Pit) - Attacks:
Jump shockwave, Dimensional-rift beams, Force field - Weakness:
Missiles, Charge Beam
This deluxe Warrior Ing possesses unnatural jumping abilities thanks to the Space Jump Boots. Stay where you are within the safe zone and make sure your strafing doesn't draw you outside the field. Keep the creature in your sights as it roams about the arena, watch your radar if it jumps out of view. The Jump Guardian will often generate an impenetrable force field around itself, if it does so remain locked on and watch for its next leap. When it lands on the ground it'll unleash a nasty purple shockwave stretching out across the floor.
Aim down and time your jump to clear the wave as it passes by. Try to avoid touching it as the force knocks you outside the Light Crystal's life-giving reach. Watch out for any lancing beams the monster hurls at you, the small blue dimensional rifts are a telltale sign of the impending attack. If you can, try to get the Light Crystal between the two of you when the beams start flying, as often they'll strike the Crystal and dissipate. Don't be deterred if it jumps up to a ledge above, keep firing when the force field disappears.
Rarely the monster will charge through the light sphere, just keep back and don't give it a chance to strike. Throw everything you've got at it, especially just after the shockwave attack and during the dimensional rift laser attack when the force field isn't active. Remember that as long as you're inside the sphere your health will slowly regenerate, so the longer you stay out of trouble the better. As you weaken the monster it'll rely more and more on the shockwave attack, so keep moving and watch your radar to see where it lands. Finish the beast off to recover the handy Space Jump Boots ability.


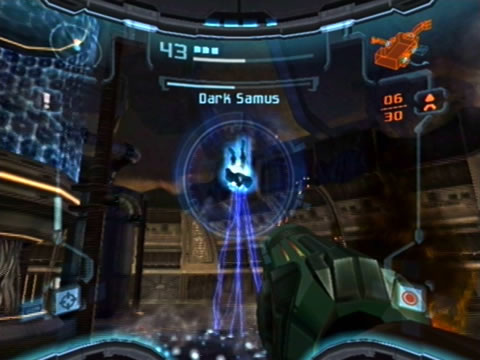
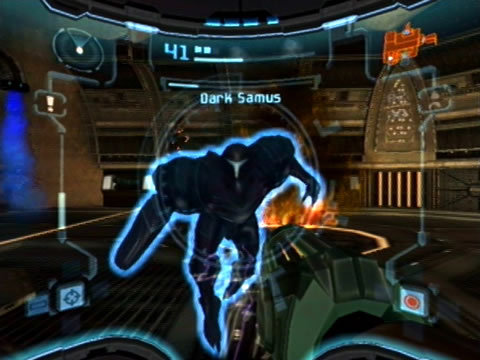
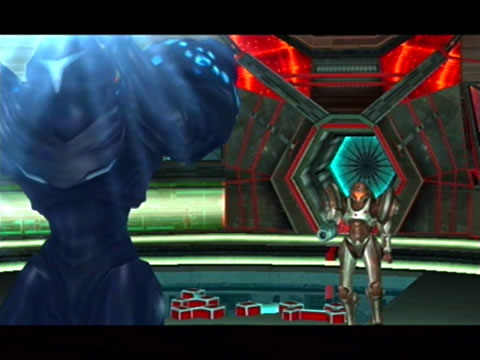
Dark Samus 1

- Location:
Agon Wastes (Main Reactor) - Attacks:
Missiles, Super Missiles, Scattershot Power Beam, Phazon shields, Phazon dive-bomb - Weakness:
Power Beam
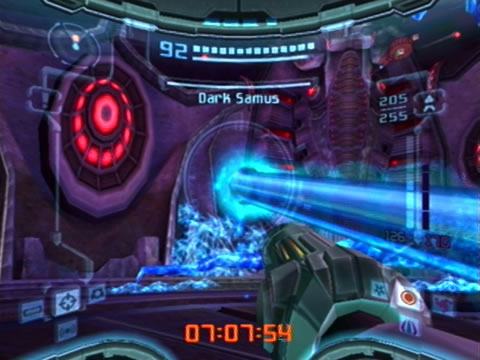
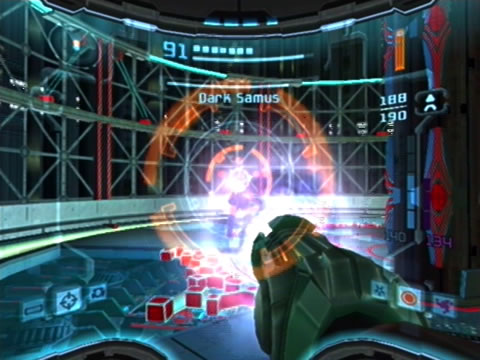
You first showdown with Dark Samus won't be easy. The Main Reactor is littered with pylons and columns so you'll have a hard time tracking Dark Samus as it flits around the room. It moves very quickly, so try to keep a lock and watch your radar if you lose it. Start by picking off rapid-fire hits with your Power Beam, Dark Samus moves too fast to score a Charge Beam hit and often missiles can't track it.
Stay right away as in close proximity Dark Samus will unleash a Phazon shield capable of knocking you across the room. If it stops and hovers for a moment get behind a pylon and strafe around as it unloads a missile or two at you. Watch out for its Scattershot Power Beam, if it stops and charges up energy stay right back and take cover as the stream of Phazon energy can be hard to avoid.
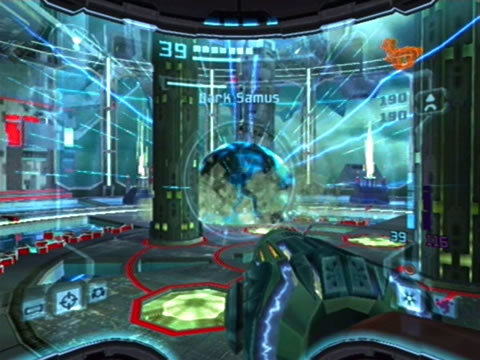
Once you've sapped half of Dark Samus' energy, it'll summon a burst of Phazon to energize itself. Emitting a constant blue glow now, you'll have a new attack to worry about. If Dark Samus stops in mid air and turns upside down to face the floor, move right back and be ready to strafe, as after a second to charge itself the monster will launch itself directly at you in a nasty ball of Phazon. Time it right and as soon as it launches dive out of the way. It tends to break all the Space Pirate's toys in the room now if any stand in the way, so don't be alarmed by all the falling debris.
As the pylons blow they'll leave behind a flaming wreckage, stay away from the flames to avoid any irritating damage. Also watch out for a Super Missile attack the monster may deal you. Keep yourself moving at all times and stick to rapid-fire to score successful hits. This will be your first real boss challenge, especially on Hard mode. Just keep Dark Samus in your sights often and try to pick off Charge Beam shots whenever it slows down.

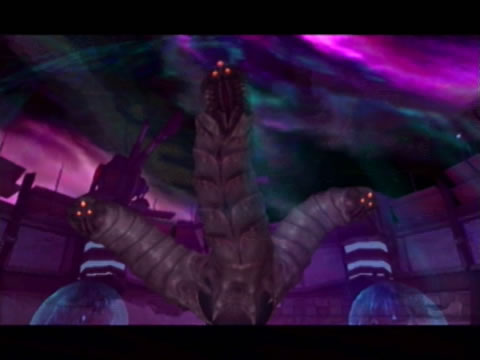
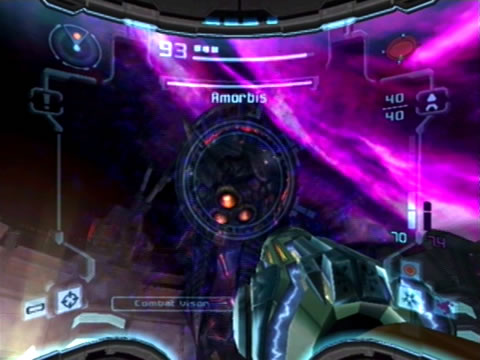
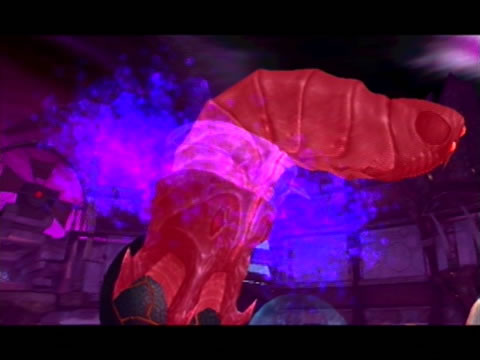
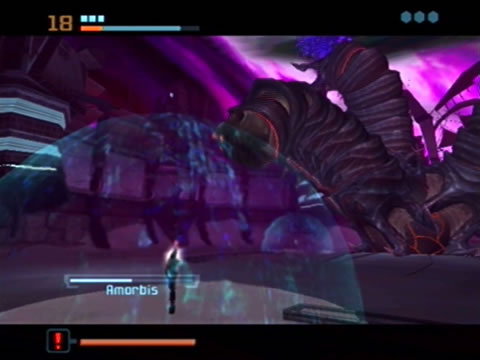
Amorbis
- Location:
Dark Agon Wastes (Dark Agon Temple) - Attacks:
Earth ram, Dark energy projectiles, Head lash - Weakness:
Light Beam, Charge Beam, Missiles, Morph Ball Bombs
Amorbis is a massive triple-slug monster tied to a central energy sphere. As you begin the battle quickly scan the massive motionless ball in the center of the arena to discover it's the power source of the creature, but for now is impervious to any weaponry. A single Amorbis slug will begin the attack, firstly from underground. Watch your radar and wait for a dot to appear, when it does so a second later the creature will emerge from the ground and dive through the air, slamming back into the ground soon after.
Stay well away from the exit and entry zones as the shockwaves are strong enough to damage you. As the creature emerges quickly scan it for your Logbook, then lock onto the head and open up with missiles or the Light Beam.
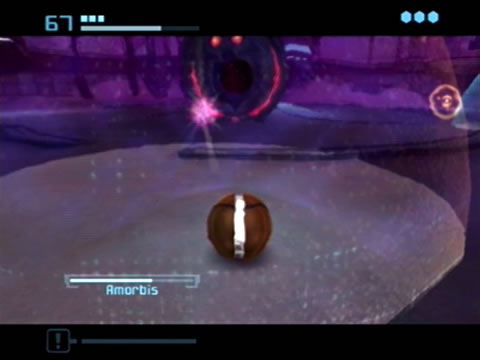
Keep in mind that there's a number of Bladepods scattered around the arena, shoot them with the Dark Beam to recover Light Beam ammo. As you damage Amorbis, the armor on the slug will slowly peel off. Once it's all gone the creature will emerge and attach itself to the giant sphere, growing horns and turning darker in the process.
Scan it now to reveal its current form as Dark Amorbis - this time it has a few more tricks. The beast can spew globs of dark energy at you, if these projectiles strike a Light Crystal they'll disable it for a while and you can't clear the field with your weapons, so make a run for another safe zone. Lock on and pelt the face with everything you've got, just keep strafing to avoid its relentless pursuit. Eventually the horns will fall off the face and Dark Amorbis will drop to the ground, sucking in air as it does so.
Now's your chance - quickly activate the Morph Ball and roll into the suction vortex. The beast will inhale Samus and damage her if you're not quick. Lay a bomb to give the creature a nasty sore throat - just like old times with Flaahgra. It'll regurgitate Samus before writhing about - in the process it pulls the dark sphere into the air and crashes into back into the earth - visibly cracking and damaging it in the process.
Now you know how to damage this thing critically, so there's only a few more rounds to do. Except now as Amorbis detaches from the sphere and resumes crawling around under the ground a second slug will join it. Grab any health and ammo power-ups you see appear, then quickly make a break for a safe zone.
Watch your radar carefully for two dots appearing this time, just make sure you're not directly above one when they show up. Select a target when they emerge and open up - try to grab any power-ups they drop as you peel off their armour. When both creatures are armourless they'll both attach to the dark sphere and become a double Dark Amorbis. Keep yourself moving and open up on one of the heads with the Light Beam.
When the slug drops to the ground quickly fire up the Morph Ball and roll into the vortex, dropping a bomb when it sucks you up. Deal with the second Dark Amorbis and drop a bomb into its mouth to inflict damage once again to the dark sphere.
With the creature's health at half now, you should be getting the hang of things. Three Amorbis slugs will now attack you from underground, keep your distance once again and watch your radar. Try to avoid using up Light Beam ammo for now, so stick with missiles and the Power Beam. With all three slugs stripped of armour they'll all take up positions on the sphere.
As their first act as a trio they'll charge up immense amounts of dark energy and emit three lancing beams around the arena. Quickly enter Morph Ball mode and zip around the beams, avoiding them as they move past. Once the attack relents, open up on the heads and take each one out with bombs when they suck you in. With the third and final slug dealt an explosive blow, the creature will ram the dark sphere one too many times and lose its life, destroying the dark sphere and revealing a very nice prize in its wake - the Dark Suit.

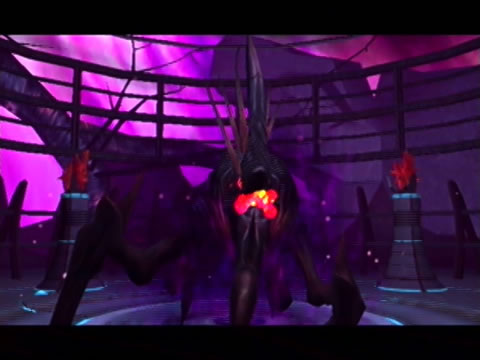
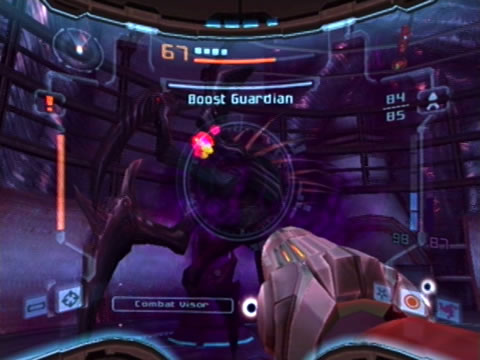
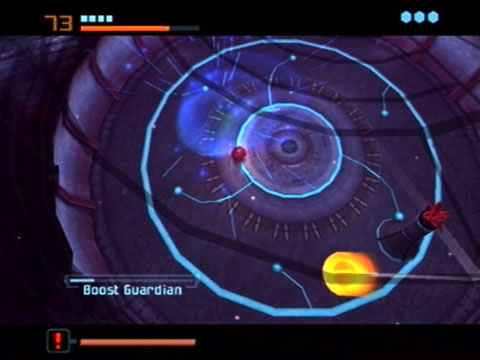
Boost Guardian
- Location:
Dark Torvus Bog (Dark Torvus Arena) - Attacks:
Claw swipe, Boost attack, Dimensional-rift beams - Weakness:
Light Beam, Missiles, Charge Beam
This monster has a very nasty advantage. The room where you face the Boost Guardian lacks any safe zones, so the faster you destroy it the better. It'll begin by trying to possess you. Jump aside to avoid it (but don't worry if it grabs hold, it'll just cause some damage before letting go). As it wanders around it'll try to take swipes at you, so keep back and use the pillars for cover. Time to break out the Light Beam. Shoot it from afar to inflict some decent damage, and keep firing at it when it enters puddle form to keep it occupied.
Eventually it'll reel back and break out a new attack. It'll glow a solid red before entering puddle form and becoming a small sphere. It'll then charge up energy and launch itself on a pinball run around the room. Quite frankly, if you don't know how to deal with this monster now, you're not going to make it. So read on and follow these directions carefully to send this thing to oblivion.
Stay standing at first and try to estimate where the creature will bounce around, as you don't want to get in its way. If the Boost Guardian slams straight through one of the pillars around the room they'll explode and leave behind an Ultra Energy refill - make certain you pick it up.
Small Inglets will also turn up, just blast them with the Light Beam and make sure to grab any health they drop. After a few rounds of boosting around the Boost Guardian will enter puddle form but emits a red hue instead of the usual black. Stand back and activate the Morph Ball (you'll need to time it right as the creature will come straight at you), then lay bombs in your path to stun the creature.
Don't get caught in the puddle as you enter Morph Ball mode. Remain in Morph Ball mode now when it boosts around, just keep laying bombs to deal with the annoying Inglets (if the Boost Guardian slams through them they'll also explode). Grab any health that appears and make certain you don't get caught in the boost attack (especially on Hard/Hypermode). Use the Spring Ball in the Metroid Prime Trilogy version of the game to help avoid any collisions. After enough stunning the Boost Guardian will re-form and stand up.
Keep your Light Beam equipped and rip into the monster as soon as you can, pulling off Charge Beam hits to speed things up. Once it breaks out the boosting again re-enter Morph Ball mode and lay your bombs in its path when the red puddle form appears. Upon standing again it'll probably start using the standard Warrior Ing attack by shooting long dimensional-rift beams at you. Just spin around behind it and don't stop firing. If you run out of Light ammo just resort to missiles (also give the Super Missile a go).
Its attacks tend to increase in severity the lower the health bar declines, just keep your wits about and you and don't worry about restarting if you have to (remember that last Save Station is close by). Finish the beast off to send it packing and finally recover the Boost Ball ability.


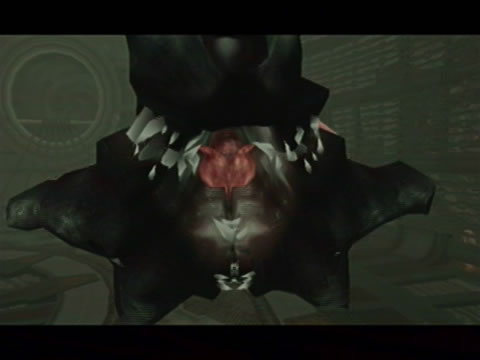
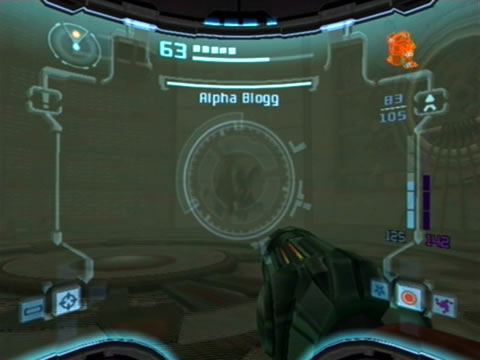
Alpha Blogg
- Location:
Torvus Bog (Main Hydrochamber) - Attacks:
Sonic water blast, Underwater ram - Weakness:
Super Missiles, Missiles, Charge Beam, Dark Beam
This massive undersea creature won't be happy to see you. It'll spend its time swimming about the chamber before either ramming you suddenly or unleashing a number of sonic-powered water projectiles. Watch out for the projectiles, if one scores a hit your vision will blur and you won't be able to fire for a few seconds. Keep the creature locked in sight and strafe around easily thanks to the Gravity Boost.
Fire missiles at the creature to grab its attention, then lob more missiles at it or Dark Beam blasts when it charges at you. Just don't be too eager and make sure you get out of the way before it reaches you. You can also try to score a Super Missile hit, but it won't be easy. They will sap a considerable amount of health from it, so try your best to score hits with it. You'll need to hit the creature just before it strikes you though, so don't be surprised if you can't get away fast enough.
If you're low on health or missiles, just take it slow and jump away from the creature after dealing it a little damage when it charges (try sneaking in a Charge Beam blast as well). Keep this up and you'll finish the fight in no time.


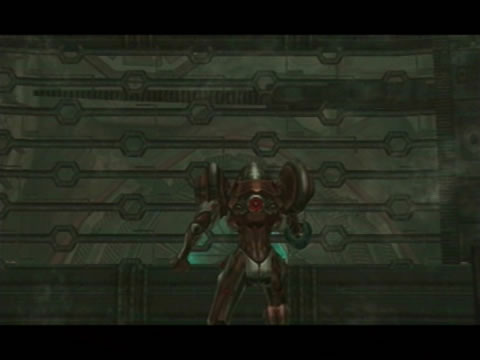
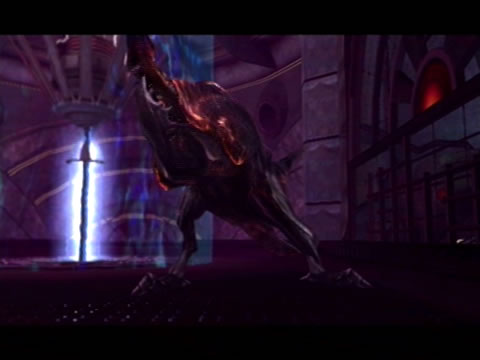
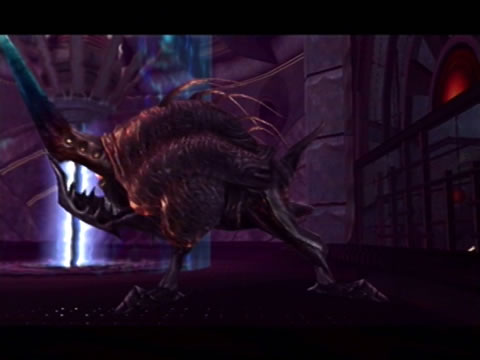
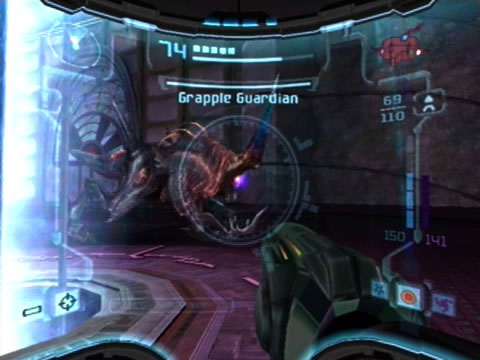
Grapple Guardian

- Location:
Dark Torvus Bog (Sacrificial Chamber) - Attacks:
Horn swipe, Bite, Grapple beam - Weakness:
Light Beam, Missiles, Super Missiles
This freaky monster (just check out that hole in its jaw!) possesses your Grapple Beam ability. It'll stomp around the room and try to swat you with its large horn if in close proximity. The eye of the monster is susceptible to attack, but seeing as this thing is a Grenchler-type monster, the back of it is where the real weakness lies. Lock on and shoot the eye madly to eventually stun the beast. When it stops flashing yellow with each blast quickly spin around it and unleash either missiles, a Super Missile or the Light Beam into its back to inflict critical damage.
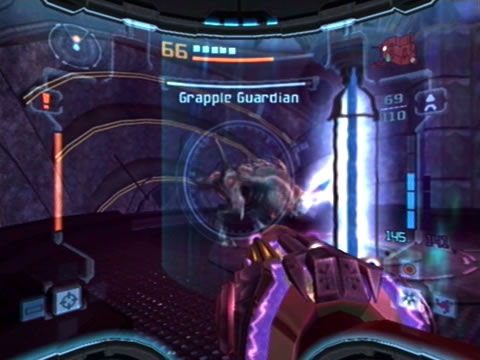
Watch out when it regains movement, as it'll likely go straight for you. Watch out for the sequences when it utilises the Grapple Beam. It'll send the beam across the room from its head, trying to ensnare you. If you're caught just keep firing at the head to break free. When you stun it again with repeated hits you'll notice that it recovers a lot faster this time. So you'll need to distract it some other way to inflict damage on the back.
Those two energy pillars in the chamber are key to this. Stick close to them and watch for the creature to extend its Grapple Beam. Once the beam is caught on one of the pillars, quickly spin around behind it and unleash everything you've got.
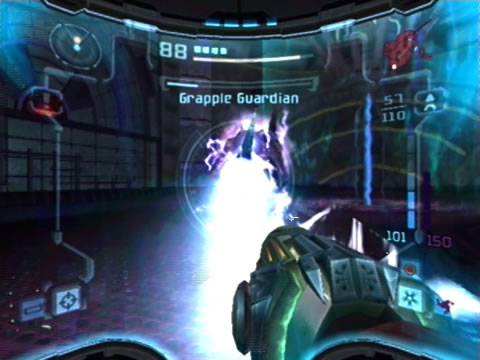
With only a tiny bit of health remaining the Grapple Guardian's outer back carapace will fall off, revealing its vulnerable nerve center. Scan the creature again to learn that it'll use the Grapple Beam to protect its nerve center. The creature will move a lot faster now, so you'll need to be quick. The two pillars will also lose much of their pulsing energy, so its Grapple Beam won't become caught on them again. Fire away at the creature's eye, waiting for it to reel back.
It'll only be stunned for a few seconds while the protective energy disappears from its back. Spin around and send Light Beam shots into the exposed back to damage it. Keep this up to finish the monster off, with your reward being the Grapple Beam itself.
Chykka
- Location:
Dark Torvus Bog (Dark Torvus Temple) - Attacks:
Belly flop, Dark water projectiles, Tongue grab, Wind shockwave, Chykling swarms - Weakness:
Light Beam, Dark Beam, Charge Beam, Super Missiles, Missiles
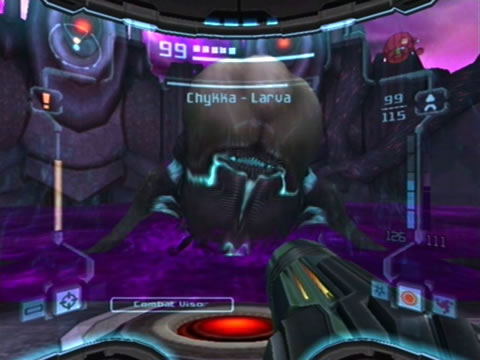
The Chykka beast will begin in its Larva form. The huge mass will spend its time swimming around your platform before attacking. Watch out for a number of Dark Shredder emerging from the water, scan one for your Logbook before ripping into them with the Light Beam. Begin by scanning the monster quickly for your Logbook. Watch it carefully and check your radar when it dives below. When a dot appears on your scope spin around to face the larva, if it lurches into the air then belly-flops back down the dark water will surge up over your platform, so time it right and Space Jump to avoid getting caught.
The Chykka will also spit a large glob of dark water at you as it launches above, lock on and strafe to avoid it. Lock onto its belly/mouth and try to score a hit or two with the Light Beam before it slams down. It'll be too quick for a Super Missile so stick with concentrated Light Beam shots, or rip into it with the Power Beam. Stay within your safe zone at all times to slowly recover energy, and watch out for any more rounds of Dark Shredder emerging from the water. If Dark Shredder do turn up, blast them with the Dark Beam to recover Light ammo (and grab any health they drop).
Eventually the monster will lunge up and flop itself down on one side of the platform, tilting it as it does so. Stay back and rip into the creature's face. It'll lash out a long tongue and try to ensnare you, if it grabs hold just rip into its face with the Light Beam (don't fire missiles as they'll harmlessly bounce off).
With enough damage dealt it'll let go and remain motionless for a moment, take this opportunity to deal out more pain (use charged Light Beam shots). From now on use the Power Beam as it swims around and belly-flops, save the Light Beam for when it jumps atop the platform.
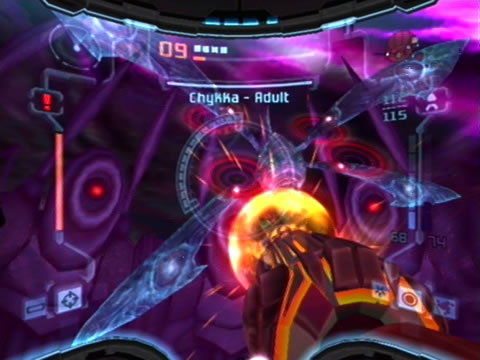
Once you've drained the monster's health, the larva will flop back underwater. Your platform will split off into three separate sections while the water level recedes. Revealed on the wall is a large cocoon, no doubt the next stage of this battle. The Chykka will burst forth from it, now in its adult form. This creature resembles a seriously overgrown dragonfly as it flies about the chamber.
Scan the creature for your Logbook quickly before it attacks. It'll spit a rapid-fire dark water attack, just time it right and Space Jump over them as they pass by. Don't get hit as they'll push you back into the sickly water and seriously clog your visor's view. Target the beast and open up with either the Power Beam or the Dark Beam, as this creature is susceptible to dark energy attacks. Don't use your missiles just yet.
With enough damage dealt the creature will freeze while four large red circular energy waves appear behind each wing. Quickly switch to the Power Beam and use the Grapple Points scattered about to swing around behind the creature. Target one of the red circular waves and send a Super Missile directly at it, damaging the wing and inflicting critical damage. So now you know how to hurt this thing. Stay on your current platform and wait for the beast to spin around. You can also lock onto all four targets at once with the Seeker Launcher, but the damage inflicted won't be as much as a single Super Missile.
Open up on it again with the Power Beam or Dark Beam (stop using the Dark Beam if you have trouble hitting it). Keep going and destroy all four red circular waves to send this thing diving into the water below (jump up as it slams into the water to avoid the tsunami it generates).
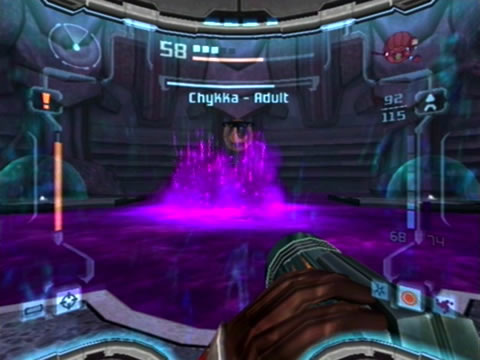
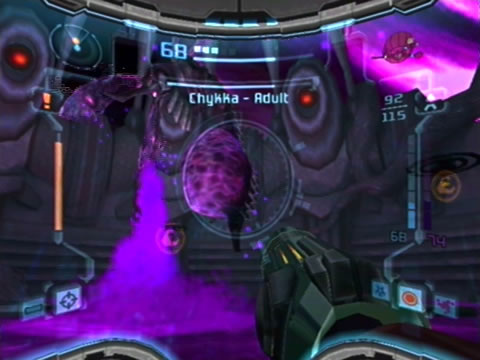
Before long the Chykka will launch up out of the water, sucking the foul stuff into its egg sac and turning a purple colour at the same time. Scan it to reveal it's now a Dark Chykka, that surely can't be good. That fat bloated egg sac is its only weakness, so switch to the Light Beam and fire away (use charged shots too). If you're running low on ammo, fear not. The Dark Chykka will most likely aim its butt up and deploy a swarm of small Chykling offspring. Scan one of the small beings for your Logbook.
Run away from them to avoid a hassle, but open up on the swarm with the Dark Beam to score some serious Light ammo. Also grab any health they drop too, those small safe zones won't protect you forever.
Watch out if Dark Chykka slowly rises higher into the air, it'll snap forward and try to blow you off the safety of your platform. As it's flapping its wings and you see small puffs of the dark water flying about in the wind quickly abandon your platform for another. Be patient and use the Chyklings to recover health and ammo if you need to. Dark Chykka will also continue to use its dark water projectiles, just not as often as before.
If your target is on the other side of the chamber, charge the Light Beam to send homing shots straight to it (or use rapid-fire from the Power Beam to strike it). Don't bother with Missiles or Super Missiles as the egg sac will very disturbingly shrink to avoid the blast.
Upon draining half the creature's health it'll revert back to the normal adult Chykka. Proceed to stun the monster (stick with the Power Beam as it'll strafe too quickly for the Dark Beam) and swing around behind it to deliver a Super Missile into each red circular wave just as you did earlier. Just escape to another platform if you spy the creature reeling back, preparing for a strafing run. Blow off all four red circular waves to send the creature back into the bog (jump to avoid the tsunami again).
Upon emerging it'll re-enter its dark form. But with very little health left, open up on the egg sac again with everything you've got and use charged shots from the Light Beam to send it to a watery grave in no time.

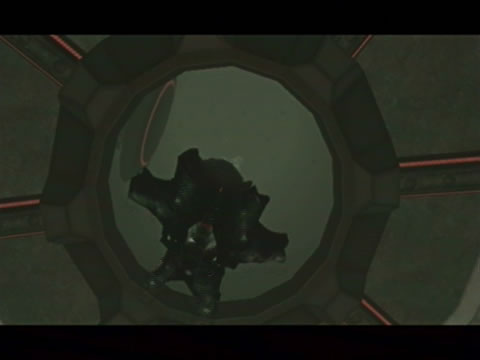
Spider Guardian
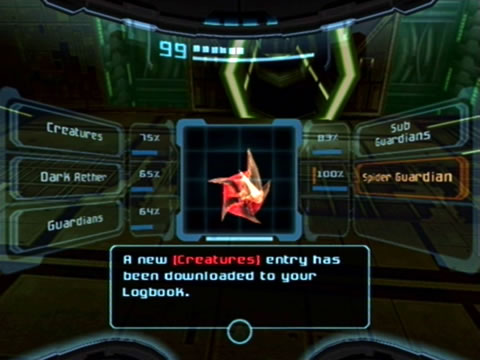
- Location:
Sanctuary Fortress (Dynamo Works) - Attacks:
Energy aura, Spider Ball-powered ramming - Weakness:
Electrified energy modules
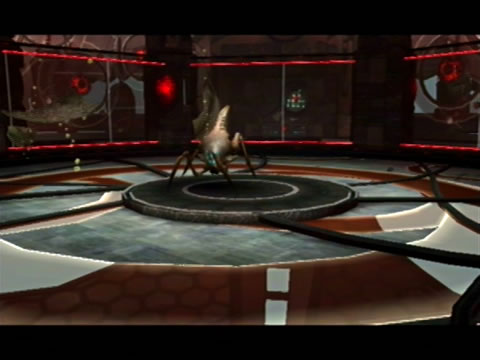
Size certainly matters not where the Spider Guardian is concerned. Make certain you scan it before the battle for your Logbook, as it's your only chance to do so. You'll fight this creature entirely while in Morph Ball mode, and to top it off your bombs can't hurt it. So there's got to be a way to harm it thanks to the environment. Thankfully, on Hard mode this boss won't have twice as normal health, rather touching it will simply harm you more (which still isn't good, I know).
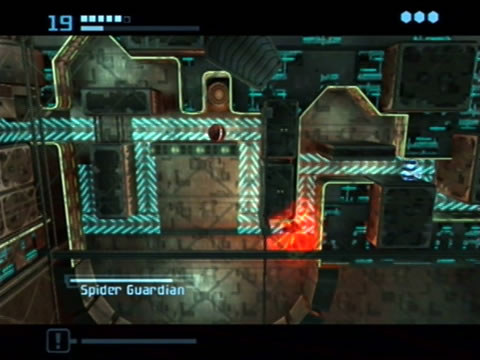
The battle will take place in three separate sections of the Dynamo Works' tunnel network. Within the first section, you'll notice that the Spider Guardian can only travel along the blue tracks. That blue aura it emits can harm you if you touch it, so keeping your distance is key. Look closely at the tunnel section, see that small blue object blocking a part of the track ahead? If you can get the Spider Guardian to roll right into that energy module it'll shock the monster and inflict critical damage.
The trick is to get the creature to move up close and personal with it. Look directly above the energy module, see that Bomb Slot? Make your way to up it, just make sure you stay well clear of the blue aura emitted by the creature or you'll suffer damage. Use X to zoom in and out to see where the creature's lurking (or C in the MPT version).
Once near the Bomb Slot, carefully roll over to the edge of the track and wait for the Spider Guardian to move close. Right before it hits you lay a few bombs and dart off, the bombs will stun the beast for a second. After a few hits its energy aura will change from blue to red. Strike it with bombs again to further stun the creature before it takes off. The aura will now change to green and the creature will slow its movement. This reaction will power up the Bomb Slot for a short time.
Wait for the Spider Guardian to pass by the tunnel leading to the energy module, then quickly energize the Bomb Slot before it powers down. Doing so will open a small wall section previously blocking access to the tunnel.
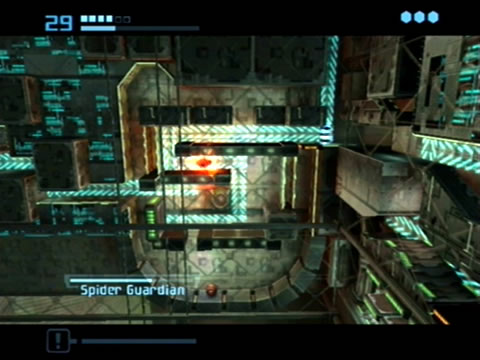
The creature will then follow the track and slam right into the energy module, destroying it and suffering damage at the same time. It'll then move onto the next section of the tunnel network, follow it through quickly. This second region is a lot tougher than the first, as a half-pipe below the Spider Ball tracks acts as your only way to reach the platforms above. The Bomb Slot can only be accessed by boosting up the left side of the half-pipe.
You'll need to boost up the side of the half-pipe and drop bombs when the Spider Guardian draws near, but it'll take some practice to time your boosting to hit it successfully. Don't worry if you lose health here, as long as the bombs score a hit.
As soon as the creature's aura turns green and the Bomb Slot above powers up, quickly boost up the left side of the half-pipe to reach the platforms above. Just be careful when rolling up the right side of the pipe as you can easily get caught and fly up into the tunnel where the energy module resides. Quickly reach the Bomb Slot, taking extreme care to avoid touching the Spider Guardian's energy aura.
Quickly energize the Bomb Slot as the creature is travelling to the right, the panel blocking the tunnel to the energy module will open up and the creature will plow straight into it. This will definitely take some practice, but once you've snagged the hang of it you should be right. Just be very, very patient.
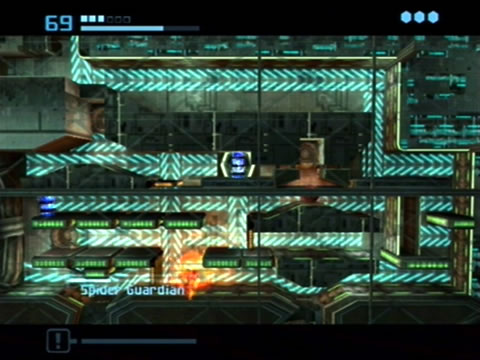
Follow the Spider Guardian along to the third section of the tunnel network. This one also contains a half-pipe, but shouldn't be as tricky as the previous to navigate. The Bomb Slot lies right inside among the Spider Ball tracks, and once again you'll be boosting up the left side of the pipe to reach it. Boost up there, then wait for the boss to move close. Drop down the hole and lay a number of bombs to catch the Spider Guardian off guard. Go up again and stun it further to energize the Bomb Slot. Platforms will extend, allowing you to reach the Bomb Slot. Quickly head down and energize the slot before it shuts down.
With more damage inflicted to your foe it'll be down to 50% health. This thing really doesn't know when to quit. Follow it to the next section of the tunnel network. Along the way destroy the three Luminoth crates to recover any lost health. Down below is the final section of the tunnel network, three remaining energy modules await an introduction to the Spider Guardian.
But it sure won't be easy. For the first energy module, stun the Spider Guardian and quickly head over to the Bomb Slot in the left corner (don't worry if you lose health, as there's nowhere you can really find sanctuary from the monster here). Wait until the Spider Guardian rolls to the right of the opening in the platform then hit the Bomb Slot and take cover as the Spider Guardian moves up a level and crashes into the energy module.
Now things become even tougher. There's two remaining energy modules, and a pair of Bomb Slots to go with them. So you can probably guess that to get the Spider Guardian up to the energy modules you'll need to activate first two, then all three Bomb Slots.
So let's do it. This is going to be very tough, so try to be patient. Wait for the Spider Guardian to travel to the right, then once it passes the first moveable panel, stun it until the Bomb Slots power up. It'll move slowly now so you've got some time up your sleeve. Very quickly activate the first Bomb Slot, then travel further up the platforms and quickly power up the second nearest slot before the first powers down. Activating the second in time will send the Spider Guardian up the tracks and straight into the second last energy module.
One to go. By now you should have the feel of how to do this, you'll just need to be incredibly fast to reach the final Bomb Slot. Wait for the Spider Guardian to travel past the first moveable platform again before stunning it to power up all three Bomb Slots (make sure it hasn't hit the right wall yet). Very quickly bomb-jump up to the first Bomb Slot and energize it. Make a mad dash for the second, then rush for the third and final in the top left corner.
That sounds far more easier said than done, as you need to be incredibly quick here. Patience is definitely a virtue in this case, especially when navigating the Morph Ball around. The Metroid Prime Trilogy version of the game gives you a much-needed ability with the Spring Ball (flick the Wii Remote up vertically), so be certain to use it instead of bomb-jumps.
Upon successfully energizing the final Bomb Slot, the Spider Guardian's aura will turn blood red, the creature will speed up, and ultimately meet its end by slamming into the final energy module. Give yourself a serious pat on the back for eliminating this tough-as-nails competition.


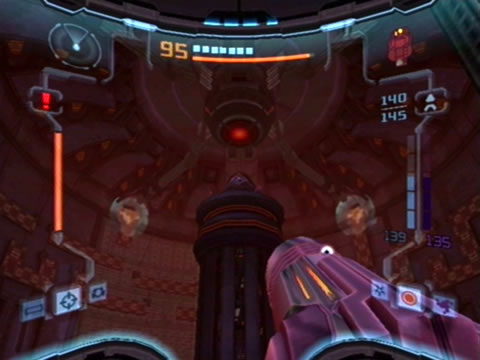
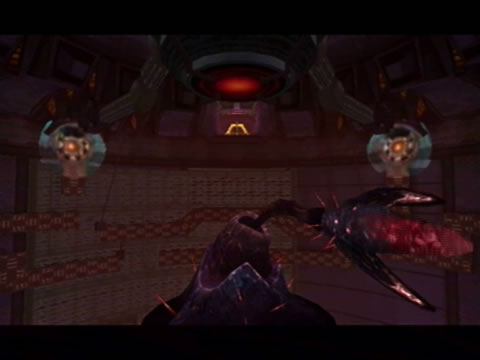
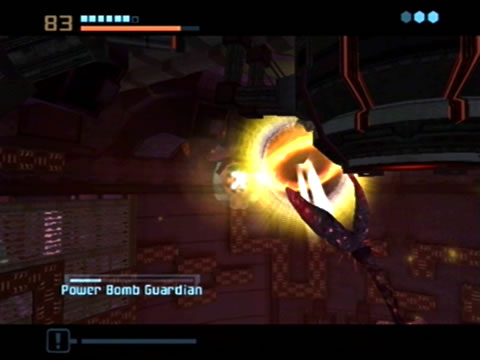
Power Bomb Guardian
- Location:
Dark Torvus Bog (Undertemple) - Attacks:
Power Bombs - Weakness:
Massive kinetic force from above
This giant Sporb possessed by an Ing Darkling can generate its own Power Bombs and lob them anywhere in the chamber. The creature won't move at all, it'll live atop the tall central pillar the entire battle. Scan the monster first for your Logbook, revealing that only a massive kinetic energy force can finish the creature. Look around the room, those four Bomb Slots way up at the top of the walls must have something do to with it.
Just like the Spider Guardian, this boss will only be taken out fully by energizing every Bomb Slot in the room, causing the environment to inflict damage on it. Your only problem (besides Dark Aether's atmosphere) are all the Power Bombs it hurls at you, so you'll need to be quick. Look for a Spider Ball track near the ground leading up the wall, that's your way up to the track network above. Activate the Morph Ball and climb up.
As you traverse along the tracks, keep moving and stay clear of the Power Bombs. If you can, move away from the direction you need to go, stay still, then run off when a Power Bomb's launched at you.
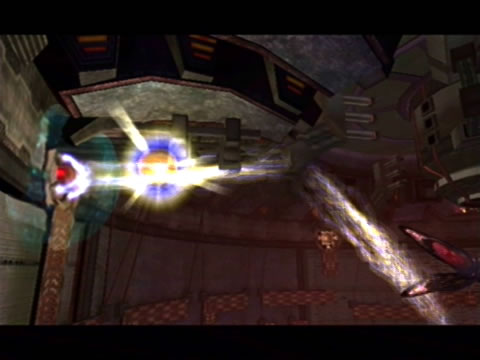
Watch out for annoying Inglets entering the room to trouble you. Go for the nearest Bomb Slot, then energize it to cause a pylon in the ceiling to retract, generating deadly electricity charged straight at the Power Bomb Guardian. With that it'll have lost a quarter of its health. Only three to go. Keep holding R (Z in the MPT), if you're lucky Samus will remain attached to a Spider Ball track and you can already go for another Bomb Slot.
Otherwise, look for the Spider Ball track attached to the floor again and climb on up. Go for a second Bomb Slot, then watch as the creature's health drops to half.
The final two Bomb Slots will be trickier to reach as they're further away, just be patient and don't worry about losing health from the atmosphere. Energize the third slot to weaken the creature further. Finally, reach the fourth slot and energize it to completely drain the creature's health. But that's not what takes it out, now that you've retracted all four pylons connected to the huge heavy central node up in the ceiling (positioned directly above the Power Bomb Guardian), nothing's holding it back from the effects of gravity. Splat.


Dark Samus 2
- Location:
Sanctuary Fortress (Aerie Transport Station / Aerie Access / Aerie) - Attacks:
Charge Beam, Phazon Beam, Multi-missile launcher, Super Missiles, Boost Ball, Invisibility generator, Phazon dive-bomb - Weakness:
Darkburst, Charge Beam, Dark Beam
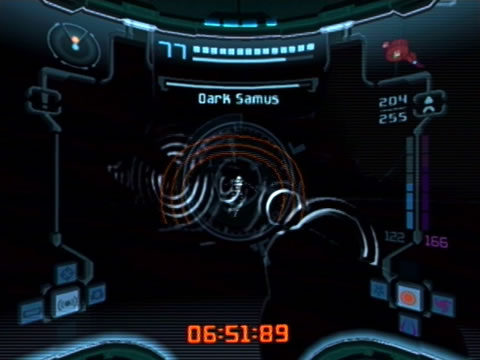
Just after filling up on a vein of Phazon, Dark Samus' second confrontation will take place on a giant elevator. There's plenty of room to move around and a few pillars to provide cover, so you should be right for movement. Quickly scan Dark Samus for your Logbook before engaging.
Watch out if it immediately draws in a huge sphere of Phazon around itself, as that's a pre curser to a Boost Ball-charged attack. Watch the blue ball of death as it streaks around and try to stay clear. Grab any health refills from the crates scattered around the lift if they blow open.
As it stands up, watch for any one of four attacks as it skirts around - a charged blast of Phazon, a sweeping stream, a scattershot or a horde of missiles. Keep your distance to avoid it deploying a Phazon shield capable of inflicting damage from afar. Open up on the beast as it hovers around, try to score Charge Beam hits and use the Light Beam as much as you can, but don't bother with missiles as it'll just deflect them with its Phazon shield. Eventually the lift will reach the summit of the tower, but don't let this jar your concentration.
If you've managed to pick up the Darkburst and Sunburst before entering this battle, you're in luck. Break out the Dark Beam and charge it up, waiting for the moment to strike. If you see Dark Samus standing still and firing any of its Phazon Beam attacks or missiles at you, hit Y (Down on the D-Pad in the MPT version) and let rip the Darkburst. Watch as the deadly vortex streaks towards its target, all the while sapping a serious chuck of your opponent's health!
The Sunburst has a similar effect, but the Darkburst tends to be easier to score a hit and seems to cause more damage. Don't use it too often as if you miss you'll have wasted 30 Dark Beam ammo.
Keep up your attacks on the beast, and always keep an eye out for any ammo or health refills if it takes out any of the objects in the area. Eventually with enough damage inflicted Dark Samus will break out a new ability, invisibility. You know what that means. Quickly activate the Dark Visor to keep the monster in your sights. Easily strafe out of the way to avoid its Charge Beam shots, and watch your radar in case it zips out of view.
Once you've sapped half the creature's health your view will suddenly turn bright white. That's you cue to return to the Combat Visor. Dark Samus will now emit that eerie blue glow, meaning it'll break out some stronger attacks. Watch out for the Boost Ball attack, retreat up against a wall and jump out of the way if it moves too close.
Watch out for the dive-bomb attack just like in your first encounter, once again lock on and dive out of the way just as it launches at you. Try to score Darkburst hits against it when it stands still to use either a Phazon Beam or missile attack to seriously drain its health.
When at critical health, Dark Samus will rapidly appear and disappear, so simply switch on the Dark Visor again to see it. Finish the beast off and watch as it breaks an opening in the side of the chamber before plummeting off the tower to another apparent death.


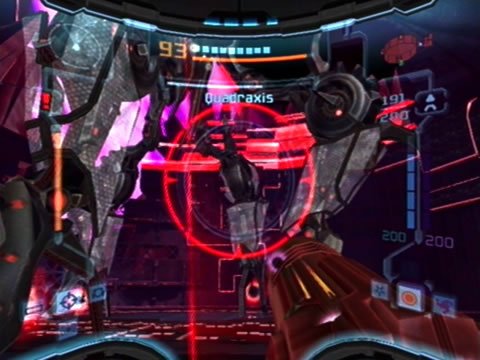
Quadraxis

- Location:
Ing Hive (Hive Temple) - Attacks:
Matter-antimatter bursts, Rapid-fire cannon, Lock-on laser, Shockwaves, Missiles, Dark Quad drones - Weakness:
Boost Ball, Light Beam, Super Missiles, Spider Ball, Morph Ball Bombs
You'll fight the Quadraxis rogue drone unit in a huge environment, so no need to worry about running out of space. There's absolutely no safe zones to be had in the temple, so speed is definitely your best friend here. Scan the beast for your Logbook first, you'll learn that the foot and knee joints on its four legs are viable weak points. Notice those large red energy spheres at the base of each foot?
Just like the Quad drones, those units are used to stop the legs from overheating. Watch out if large red/orange sonic waves emerge from them, as the drone will jump into the air and come crashing down, generating wide shockwaves along the floor.
Dodging its cannon bursts should be easy enough, so let's enter Morph Ball mode and start damaging this thing. Get close to a foot's energy ball and boost into it. Eventually the ball will explode, leaving behind health or ammo refills no doubt (make sure you grab them eventually). Keep boosting around until all four red spheres are taken out.
Quickly stand up and look for one of the knee joint trims flashing blue. Lock on and shoot the knee with either the Light Beam or Super Missiles. If you're not fast enough another knee will glow blue, go for that one if it does so. With enough damage the knee will buckle and cause Quadraxis to stumble and fall, losing some health at the same time.
Now we've got it on the run. Repeat the same procedure again and keep grabbing health whenever you see any floating about. Watch out for two new tricks the drone will try. If you see a number of red lasers slowly homing in on your position, either get underneath the head of the drone or use the Morph Ball's boost to run away, as you don't want to be on the receiving end of the resulting laser attack. Also watch out if it performs a vortex spinning attack similar to the Quad drone's.
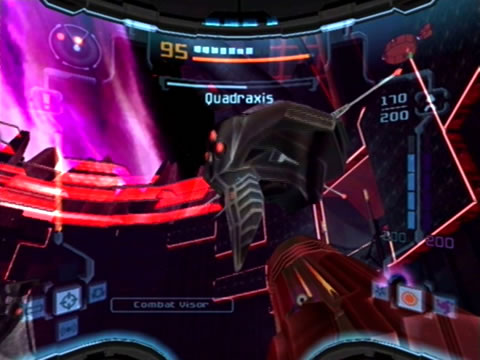
Eventually with enough damage dealt the main body of the drone will collapse into a heap as the head unit detaches and floats about the room. Quickly scan the head for your Logbook, this Shielded Head Module can't be attacked until that blue shield is taken out.
Your Visor will inform you that tactical data is being sent to the head via the body through a sonic emitter - you know what that means. Scan the damaged body of Quadraxis for your Logbook, then fire up the Echo Visor and look for the sonic emitter at the center of the body. Send a Super Missile or two straight at it to disrupt the comms link to the head.
The head's shield will drop and it'll remain motionless in the air for the time being. Quickly scan the Stunned Head Module for your Logbook to learn that it's now vulnerable and that it'll produce drones to protect itself while the link with the main body is being re-established.
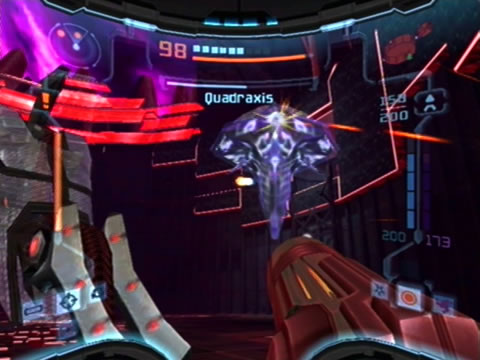
The Dark Quad drone it generates can be very annoying, concentrate on the head for now. Switch on the Echo Visor again and look for four long antennae jutting out from the head. Lock onto one and take it out with a Super Missile. Doing so will remove the antenna and inflict critical damage to the drone. Don't worry if the sonic link is then restored, simply destroy the sonic emitter again on the main body (and deal with any annoying Dark Quad drones bothering you). While the head is active, always look out for it locking onto you. If it locks on quickly enter Morph Ball mode and boost away to avoid the strike.
Once you manage to take out all four antennae on the head it'll permanently lose connection with the main body and take a crazy dive around the room, shattering the glass covers on the legs, uncovering a set of Spider Ball tracks running along each. The glass covering on its head will also explode, revealing a Spider Ball track and two Bomb Slot-type recesses. Scan the Final Head Module for your Logbook, learning that laying a bomb in each of those sockets is all you need to do to finish this crazy contraption off. Now you just need to find a way to get up there.
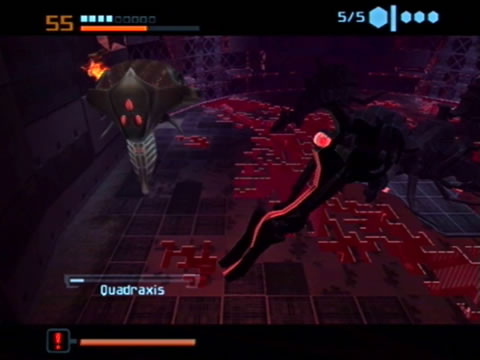
Lock onto the head and open up with the Light Beam. Your shots will eventually stun the target, causing it to drunkenly float around the room circling the main body. Watch where it's travelling and rush ahead to the next leg it'll pass. Activate the Morph Ball and climb up the leg to the very top of the track. Wait there and time your boost right so that the head passes by as you boost away from leg. Keep holding R to magically attach yourself to the top of the head. From this very odd vantage point roll into one of the two recesses and lay a bomb, seriously damaging the head. Drop down and grab any health or ammo refills falling from above.
Stand back and wait for the head to regain its composure, this time with a nasty fiery blaze coming from that recess you just bombed. Watch out for its regular missiles and beam attacks, remember to boost away if it tries to lock on. Blast it again with the Light Beam to stun the drone, then activate the Morph Ball, judge which leg it'll pass by next, climb aboard and boost yourself onto the head. Don't worry if you miss, just try again.
Don't take too long, remember your health is constantly dropping. Lay a bomb in the second recess on the head to deal the final blow, then watch as the maniacal robot plunges to the ground, exploding in a fiery blaze, leaving in its wake your newest and latest weapon - the Annihilator Beam.

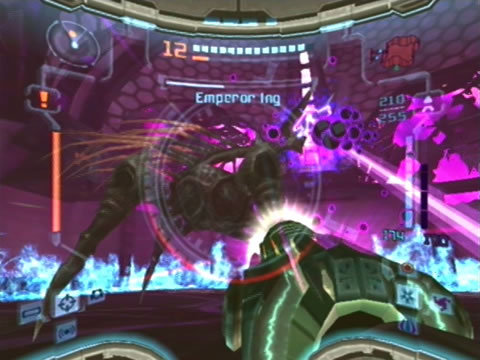
Emperor Ing
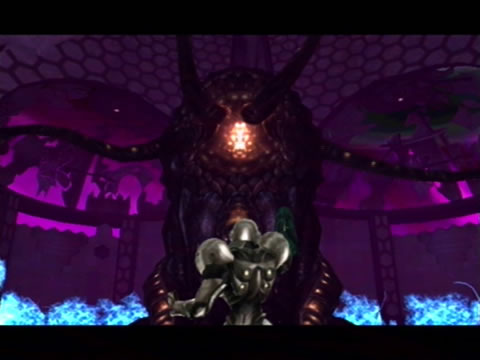
- Location:
Sky Temple (Sanctum) - Attacks:
Mutated tentacles, Dark energy bursts, Eye laser, Dimensional rifts, Poison mist, Dimensional-rift beams, Dark energy shockwaves, Nightbarbs, Light particles, Berserker charge - Weakness:
Seeker Launcher, Missiles, Annihilator Beam, Morph Ball Bombs, Power Bombs, Super Missiles, Light Beam, Dark Beam
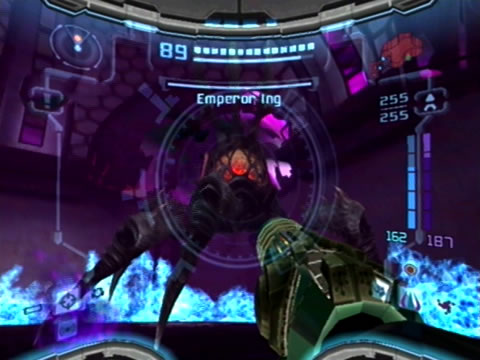
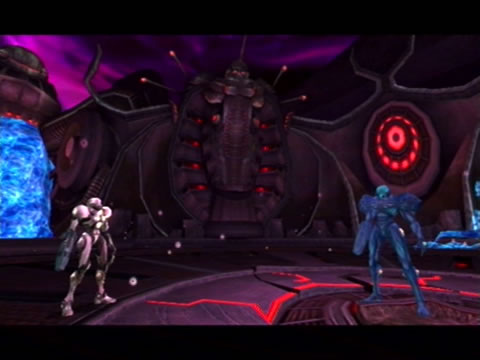
The Emperor Ing will enter the Sanctum from below and promptly absorb the Energy Collector sphere into its body. That can't be good. There's no way the monster will give up its power source, so you'll have to retrieve it the hard way. As soon as you regain control move away from the creature (just don't touch the walls as the enter chamber is surrounded by Phazon deposits).
Scan the creature's first form to learn that the Emperor Ing Head will generate those nasty large tentacles for defense. Quickly scan the lower Emperor Ing Body for your Logbook as well to learn that it's drawing massive amounts of energy from Phazon and the Energy Collector.
Those tentacles are your biggest worry right now, as they're big enough to whack you from most areas in the room. They'll swarm about above you and take lashes at you often, keep moving and don't stay still as these creatures sap a chunk of health with each hit. If you see dark energy swarming up the tentacles, enter Morph Ball mode and immediately boost away as they'll launch a huge ball of dark energy straight at you. The tentacles will also often lower to the ground as the Head spins around, sweeping them around the room.
When you see the tentacles sweep around along the floor, it's time to fight back. Space Jump above them to avoid a serious beating as they sweep through. Targeting the tentacles while they're above you can be very hard as they lash about so quickly. But notice that they tend to flock close together... so let's use the perfect weapon. Don't stand underneath the tentacles, try to back away from them. From afar, aim up and hold Y to initiate the Seeker Launcher (Down in the MPT version).
Wave the reticule over as many as possible and send your payload away. Eventually you'll see some of them shriek and retract into the Head. Keep using the Seeker Launcher and missiles on the remaining tentacles to clear them all out (make certain to pick up any health or ammo they drop - even though you're not using the Dark or Light Beam they tend to drop ammo for those weapons anyway). Trying to aim up at the tentacles is a whole lot easier in the MPT version of the game thanks to the Wii Remote.
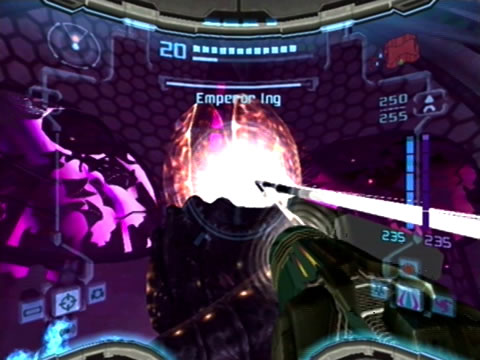
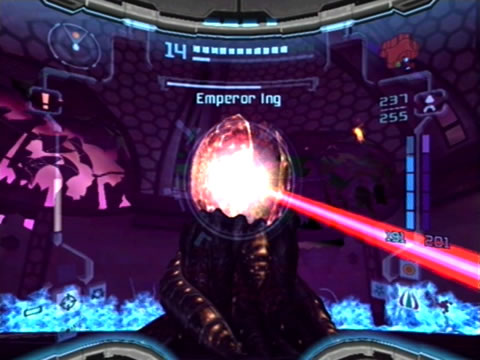
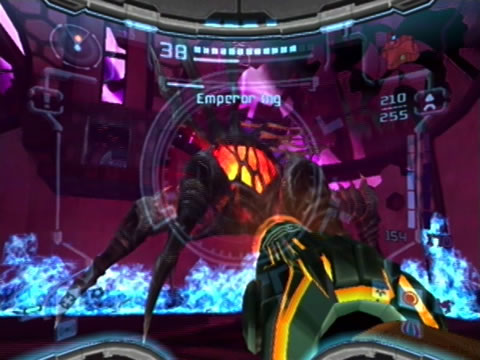
With the colossal tentacles dead, the Head will instantly shrink, revealing the Emperor Ing Eye. Scan it quickly for your Logbook to learn more. The Eye can fire a nasty red beam at you, lock onto the monster and continuously strafe around the pursuing beam to avoid it. That rotating shield protecting the Eye isn't completely solid, so you can pick off shots through the open sides.
Quickly break out the Annihilator Beam and lock onto the target. Stay close to the Eye and spin around to line up with one of the openings in the shield and balance your shots at the Eye. Don't rapid fire as if you clip the shield you'll have wasted too much ammo. The evil shield will try to move the openings away from you, try to send in shots when it expands slightly as it delivers the red laser. With each strike the monster will sustain critical damage, so you've found it's first weak point. Stay close to the monster to avoid the beam and keep ahead of the rotation of the shield to allow your shots through.
Eventually the Head will return and spawn more tentacles. Break out your defensive moves again and use the Seeker Launcher once more to pick off the tentacles. There'll be a fair few more of them now so you'll need to unleash all the missiles you can spare. Watch out for the tentacles unleashing the dark energy burst again. This time, also keep an eye out for them using a light-based attack. They'll create a number of rift portals around the room to shoot through, try to keep your distance.
As the Head reappears, if the tentacles pound the ground nearby before sweeping around, try to lay a Power Bomb before they move to seriously hurt their numbers.
With each round after delivering blows to the Eye more and more tentacles will pour from the Head, so the challenge just doesn't end. Keep the cycle up, just remember to lay a Power Bomb as the tentacles pound the ground initially, and stay close to the Eye to avoid the red laser beam and sneak your shots through the shield.
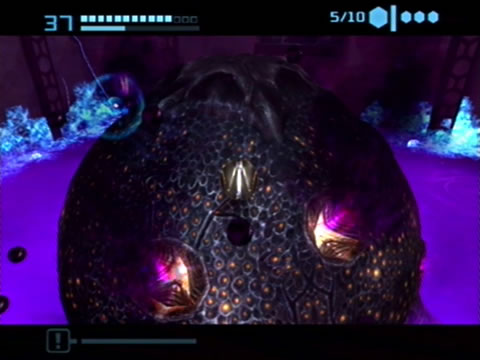
With its health drained, the Head will literally eat the body, closing over the putrid mass and hardening to become a giant cocoon. The entire Sanctum will then fill with poison gas not even the Light Suit can withstand. Quickly scan the Emperor Ing Chrysalis for your Logbook, learning that the surface is charged - allowing Spider Ball travel.
Eleven weak points cover the shell, so quickly enter Morph Ball mode and climb onto the shell, grabbing hold with R (Z in the MPT version). See the small glowing ports covering the shell? Take them all out to keep delivering the pain to this monster. Watch out when closing in towards one as each possesses a very nasty smaller tentacle capable of knocking you off the shell into the poison mist below. Roll over a port and lay bombs like mad, darting off before the tentacle emerges.
If you time your bombs right the tentacles should take a blast or two as it emerges. Wait for them to retract before rolling over and laying another salvo. Or if you've got any spare, lay a Power Bomb to send the tentacle packing straight away (and any others in close proximity). As you destroy each tentacle a small burst of purple exhaust erupts from the port, indicating that it's dead. Keep it up with the rest to finish them off.
One thing to note while on the shell is that Inglets will randomly spawn and travel towards you in their puddle form. If you're playing on Hard mode and desperately need health, be patient and take out the Inglets, grabbing any health they drop. Also watch out if the poison mist raises altitude in the room, just roll to the top of the shell and wait for it to subside. Build up your health as much as possible before destroying all eleven ports.
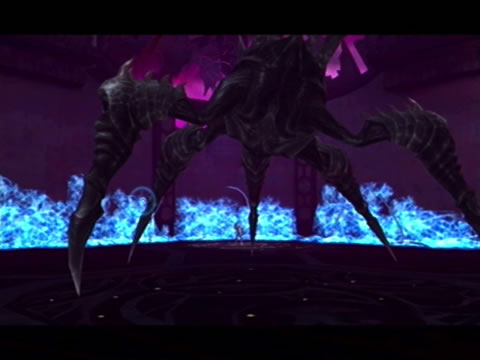
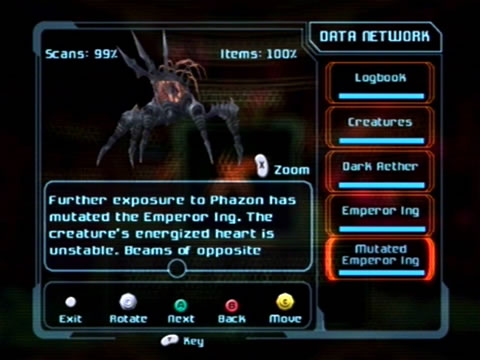
With all eleven weak points down, the mist will disperse as the shell promptly explodes, revealing a very ugly mutated beast inside. The Mutated Emperor Ing now looks like an overgrown Warrior Ing and can freely move around the chamber. Your visor will inform you that the Emperor Ing's final form can only be harmed when that giant heart inside its rib cage is either Light or Dark. Lock on and open up on the rib cage to see the beast flash yellow. Watch out for a multitude of dimension rifts its opens to fire piercing beams from, try to strafe around behind the rifts to avoid them.
If the beast reels back and jumps across the chamber, Space Jump as it lands to avoid the massive shockwave it produces across the room. Now to turn that heart a different colour. As long as it's red, your shots will only serve to stun the beast. Don't shoot at it if it rapidly opens and clamps the rib cage shut; wait for it to move around before opening up.
The Power Beam takes an eternity to bring the beast's defenses down, so try to poke a Super Missile into the cage to speed things up, or use the Annihilator and watch as it tears the creep a new one. The giant ugly legs tend to get in your way (unless you use the Annhiliator, its blasts are smart enough to sneak around the legs), so keep strafing as you fire. Scoring Super Missile hits in the MPT version seems to be easier with Lock On / Free Aim switched on. With enough damage dealt, the beast will lurch back as the heart changes colour.
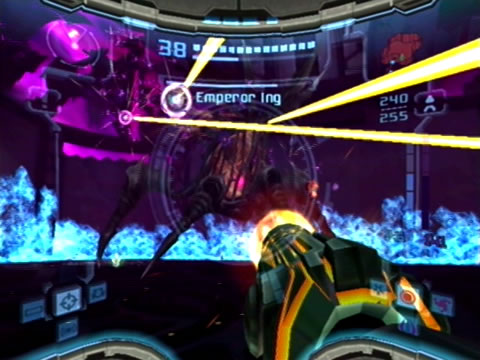
If the heart becomes a dark purple, the Emperor Ing will summon a swarm of Nightbarbs. They won't attack you, so open up on them and drag in any pickups they drop with the Charge Beam. Primarily you'd use the Light Beam when the heart turns dark purple, but the Annihilator also works great as it locks on automatically and works no matter what colour the heart is. Try to pull off charge shots with the Light Beam too as the blasts will home in on the target.
If the heart turns white, the Dark Beam would do the trick here, but its slow fire rate won't do much against this agile target - instead try to pick off a charged shot. Don't bother using Charge Combos as it's incredibly easy to miss and waste a chunk of ammo. When the heart turns white the Emperor Ing will emit a large swarm of light-based particles to attack you (strange that this abomination can harbour light energy as a weapon). Shoot them quickly and retrieve anything they drop.
Once the heart returns to a red colour break out the Power Beam and Super Missiles again. Watch out if the beast shudders and growls while standing still, this is a pre curser to a charge attack as it'll try to ram you against the Phazon-covered walls. Activate the Morph Ball and quickly boost away to avoid it. Keep up your attacks to alter the heart's colour again.
Keep your distance from the beast to avoid meeting one of its razor-sharp legs, and watch out for an immobilizing purple beam it breaks out when the heart is purple (hit B rapidly to break free if you're caught). It'll use a light-based beam to try and freeze you when the heart is white as well.
To sum up, use Super Missiles to change the heart from red to either white or dark purple, then break out the Annihilator on the heart or use the opposite-polarity beam (stick to charged shots). You'll find that using the opposite beam will work better on Hard mode as you're going to need a boatload of ammo to finish this thing off. Suck the life out of the ruler of the Ing and watch as the beast crumbles to the ground, spectacularly exploding and relinquishing the final Energy Collector - sealing the fate of Dark Aether.


Dark Samus 3 (and 4)
- Location:
Sky Temple Grounds (Sky Temple Gateway) - Attacks:
Phazon Beam, Phazon shielding, Cloaking field, Super Missiles - Weakness:
Echo Visor, Super Missiles, Annihilator Beam, Phazon Beam
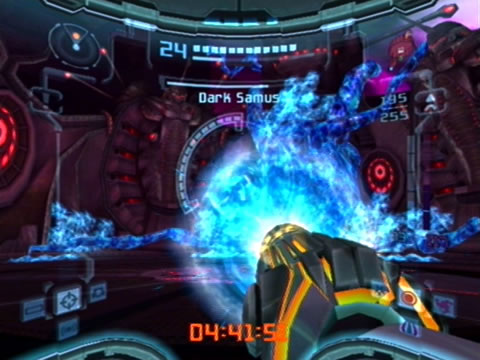
This final form of Dark Samus is completely supercharged with pure Phazon, so you know it's going to be tough. The escape timer won't stop during the battle, so you absolutely must destroy this thing before it reaches zero. Scan the beast for your Logbook and to learn that it'll deploy destructive blasts of Phazon and shielding to vent its immense Phazon payload. To be honest, while that glowing blue energy shield around it is active, Dark Samus is completely invulnerable to all your weapons.
Everything you throw at it simply bounces off. Watch out if your nemesis hovers into the air and charges up a large spherical round of Phazon, as it'll discharge a massive beam straight at you. Lock on and strafe around the monster to avoid the sweeping beam. Eventually after zipping about Dark Samus will disappear, deploying a stealth field. This field can't be countered with the Dark Visor, so there's only one other choice. Break out the Echo Visor and watch you radar to see where Dark Samus is. Lock on and open up on the beast, while it's invisible you can inflict all the damage you want - use Super Missiles (this time they work a treat).
Use the Annihilator Beam and rip into it, only stopping when your attacks no longer work. Wait for the beast to unload its Phazon Beam again and watch for it turning invisible once more. Switch on the Echo Visor again and quickly open up on the target with the Annihilator. Eventually Dark Samus will reappear and move to the center of the arena. From there it'll hover into the air and generate a large Phazon energy sphere around itself.
Quickly scan the monster to reveal it as Dark Samus 4 - a being of pure Phazon energy. In this state Dark Samus will expel Super Missiles and rounds of Phazon energy at you. None of your weapons can hurt it, but your visor recommends using the Charge Beam to draw in the Phazon rounds it discharges at you and returning them to sender.
The blasts of Phazon will only appear when the sphere enlarges and shrinks back to normal, every other time dash to the side to avoid a Super Missile. As you see the sphere expand, quickly stop moving and aim upwards (disengage locking onto Dark Samus). If the blasts scatter you'll miss and they'll hit you, so you need to get them to travel straight at you to grab them successfully (so stay still and only strafe if Dark Samus fires a Super Missile). With the free aiming system in the Metroid Prime Trilogy version, you might find gathering the Phazon blasts much easier.
With a handful of Phazon energy drawn into your Charge Beam, quickly lock back onto Dark Samus and unleash the torrent to sap some of its health. But be warned, make certain you're delivering the Phazon blast back at the target while the sphere is still active. If you strike it as the sphere is diminishing, the blast will actually heal Dark Samus.
When Dark Samus drops to the floor its shield will be temporarily disabled, so quickly take out the Annihilator and pick off as many shots as possible (you can try to use the Darkburst, but with a very little window of opportunity to inflict damage it's not worth it). Eventually Dark Samus will enter its pure-Phazon state and unleash Super Missiles and Phazon blasts at you. Drag in the Phazon blasts again and unleash them back at the source to keep inflicting the pain.
You'll need to be very persistent on Hard mode / Hypermode to win this and don't stop, even if you're under one minute remaining. You can still score victory with literally seconds left on the clock. Finish the monster off once and for all and sit back and enjoy the finale, you're earned it!