


Chapter 21: Subterranean Conquest

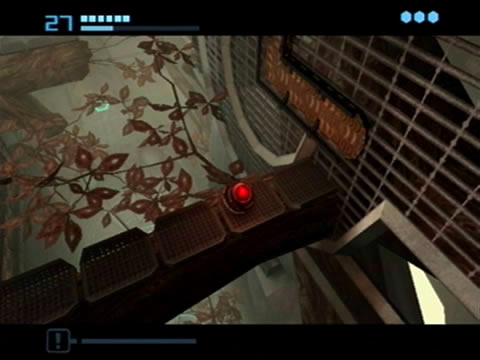
The Spider Ball is a sight for sore eyes.
Travel back through the Dynamo Works tunnel network, using your new toy to attach to the Spider Ball tracks. Ignore the two Pillbugs taking up residence and head up to the tracks at the highest part of the network. From here you may hear that familiar humming sound, look closely in the roof to see an opening. Bomb-jump up there and follow the tunnels around to locate Missile SA.02. With this item snagged follow the chute behind it to drop out into the main chamber of the Dynamo Works. From here you can now climb up the track to the door above beside the body of a fallen Luminoth warrior.
Inside is a similar elevator transport to the one you used earlier in the Ing Hive. Bust open the stacked Luminoth crates beside the door to recover precious health, then take the lift down below. Beyond the door ahead you'll find yourself back in the Hall of Combat Mastery in a glassed-off enclosure you previously couldn't access.
Scan the Luminoth Lore Projector on the wall nearby before using the Spider Ball to escape the chamber (scan the Spider Ball track first for your Logbook). Once back in the main chamber, look for another Spider Ball track nearby leading up into a narrow tunnel network lining the inner walls. Go inside and make your way through the (long and tedious) narrow confines of the tunnels to retrieve Missile SA.03.
With this item in hand, exit the Hall of Combat Mastery and return to the Reactor Core (watch out for the Harmony Class Drones taking up residence above the powered-down gyros in the Minigyro Chamber). Descend the Reactor Core and save your game at the Save Station nearby before moving on (to ultimately secure your victory over that no-good Spider Guardian). Exit the Save Station and swing around to the other side of the Reactor Core where the cobalt translator gate resides.

Dark Samus makes a mess of the bridge, but there's still a way across.
Scan it to lower the gate and open passage to the door beyond. Inside you'll locate a room containing the Sanctuary Map Station and a tall beam of yellow light similar to the one in the Fortress Transport Access area up in the Temple Grounds. For now, remember that the beam's here. Grab the map to reveal that a good portion of the upper levels of the fortress are left unexplored, including a really, really tall shaft up at the northernmost point of the map. Upon returning from Torvus that tall shaft is our next major target.
Return to the Reactor Core and proceed through the lone door on the southern side of the area. Travel through the Reactor Access to the tunnel beyond. As you step into the Power Junction tunnel, listen closely. Yep, Dark Samus' theme is playing again, so it must be nearby. Move through the tunnels to find them thick with those tiny blue particles. Exit the tunnel ahead to return to the Sanctuary Entrance. The bridge ahead is clear, but for only a split second.
Dark Samus will appear and slam onto the bridge, summoning a massive energy burst and utterly destroying it, cutting you off from the exit ahead. But all is not lost as you see the bridge pieces falling into oblivion. See those overhead rails above? A number of Spider Ball tracks runs below them, so that's our ticket across. Turn left at the door and look for a small alcove beside it, right there is a Spider Ball track linking up with the overhead rails. Activate the Morph Ball and hold R to attach to the track, then follow it along to clear the chasm.
When you reach the end of the first track the game will inform you that the Boost Ball can propel you at a right angle away from the track you're on, so hold B and release to jump across to the other track. Follow it over to the cliff side and head through the door there. Follow the corridors through to the Transport to Temple Grounds and ride it up.
Once back in the Temple Grounds, make your way back up to the Great Temple by way of the Sacred Path (watch out for Luminoth Turrets in the Fortress Transport Access corridor). Up at the Great Temple, proceed through to the Temple Sanctuary, saving your game on the way if you wish. Take the western exit on your right and use the transport there to travel down to the Meeting Grounds. Down below, emerge from the transport and deal with the trio of Dark Pirate Commandos outside. With your position clear make your way across to the Torvus Transport Access and ride it down.
Don't forget to search for new items as you revisit earlier locations.
We've come back to the (now rainless) Torvus Bog to claim your Power Bomb ability back from the final Sub Guardian of the game. Along the way we'll also pick up a few items here and there now accessible to you. Firstly, head forward to the Torvus Lagoon and deal with the two Grenchlers you find there. With the annoying beasts dead, descend into the water and look for a tiny alcove high above an underwater wall directly below the body of the Luminoth warrior. Use the Gravity Boost to reach the alcove, inside you'll find Missile TB.09.
With this item in hand, turn around and emerge from the lagoon (but first, while standing atop the missile's alcove, turn around, look down and switch on the Dark Visor. See that creepy red outline of an object appear directly in front of you? You'll find out what that is soon). Head towards the Forgotten Bridge area.
From there, proceed through the Plaza Access room to the Torvus Plaza. In here, you can now use the Boost Ball to reach the complex network of Spider Ball tracks above. Get yourself up there, work your way along the network of tracks (watch out for the annoying Sporb along the way), eventually you'll reach a Kinetic Orb Cannon. Jump in to be launched across the room, right to a platform where Energy Tank TB.03 resides. With this item tucked away, move on to the Torvus Temple and ride the transport down to the Hydrodynamo Station.
Once there, save your game nearby at the Save Station first before moving on. Descend into the depths of the Hydrodynamo Station and make your way down to the Main Hydrochamber where you faced the Alpha Blogg some time ago. Down here on the northern side of the room - directly opposite the door of the chamber where you found the Gravity Boost - exists a Spider Ball track running up the wall. Climb up there to discover an inactive Dark Portal. So fire up the portal and step inside.
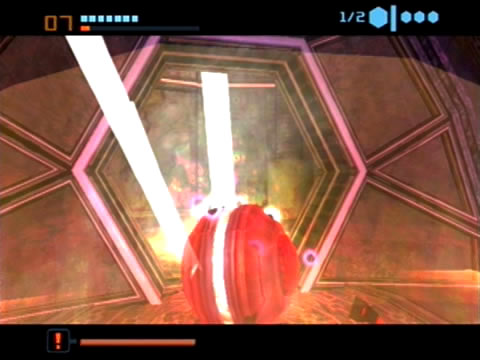
Once in Dark Aether, you'll find the chamber completely without water. See those two funny wall sections on the walls ahead of you? Scan one to reveal that without an "advanced movement system" you can't access the walls. Let's drop down and face the Power Bomb Guardian now. Drop below and walk forward into the main chamber to disturb the creature from its slumber. Refer to the bosses guide to send this final Sub Guardian to wherever you sent all the others.

Samus picks up her first Power Bomb.
With this creature now the flattest monster in the game, your prize awaits you atop the pillar above. Climb up the Spider Ball tracks again and look for a track leading to a platform connected to the pillar above. Up above, walk over to your first Power Bomb and claim it. With that, you'll have now reclaimed all your lost abilities from the vile Ing, so consider all the remaining items a bonus. See that yellow door up ahead as your only exit? Let's open it up.
Stand beside the door, activate the Morph Ball, and drop a Power Bomb beside it to instantly blow the yellow blast shield right off the door. Up in the Undertemple Shaft, energize the inactive Light Portal there and transit back to Aether.
We'll now return to the Sanctuary Fortress, but via a now-accessible path nearby. Save your game up at the apex of the Hydrodynamo Station first before moving on. Our target is the nearby Training Chamber, but first we'll go grab an item from the Gathering Hall. Exit the Hydrodynamo Station via the white door and follow the tunnel through to the Gathering Hall. Once inside you'll see that industrial laser is still powered up. See the missile enclosed within an energy field way across under the wall the laser is striking?
You'll need to find a way to power the shield down. Look around the ceiling to spot a number of Spider Ball tracks and an upside-down Bomb Slot hanging from the roof. But there's no apparent way to access the tracks. Or is there? Descend into the water below and stand atop the large cracked glass panel in the center of the chamber. Lay a Power Bomb there to break through the glass.
Down under the glass in the underwater half-pipe lies a drain cover, but you'll need to lay a second Power Bomb to crack it open. If you're out of ammo, transit to Dark Aether in here and see if any of the Ingsphere Cache drop one. Make sure you recover two Power Bombs.
Use Power Bombs to break yellow blast shields.
Use a second Power Bomb to take out the drain cover, and watch as the water level quickly recedes. Now you can use the half-pipe to reach the Spider Ball tracks above. Traverse the tracks on both sides of the room and energize both Bomb Slots to lower the containment shield. Jump atop the newly-extended platform to easily reach Missile TB.10. With this item secure we can now head back to Sanctuary.
Take the Transit Tunnel West to the Training Chamber. Once there you'll see three Blogglings swimming about. Gravity Boost over the caged wall ahead to witness three Ing Darklings appear and possess the trio of creatures swimming about. Scan one of the these Dark Bloggs for your Logbook, then ignore them as there's not enough room to deal with them properly.
Instead, look for a Spider Ball track running up the wall on the left side of the tall Luminoth statue. Follow the network of tracks around to easily reach the Bomb Slot below the head of the statue. Energize the slot to cause the statue to move forward, revealing a Spider Ball track behind it leading up to a yellow door. Drop down below (the Dark Blogg magically disappear) to find an extra bonus - Missile TB.11 awaits right where the statue once stood.
Now unfortunately you need another Power Bomb to breach the yellow door up atop the Spider Ball track behind the statue, but if you recovered two from the Ingsphere Cache back in the Crypt in Dark Aether, you should have one to spare (otherwise head back to refill your payload). Use it to blow the blast shield off the door and enter the chamber beyond.
Chapters:
- Planetfall
- The World Divided
- Fate of the Federation Troopers
- The Plight of the Luminoth
- The Sands of Agon
- Dark Aether
- The Space Pirate's Lair
- Samus vs Dark Samus
- Unlocking the Dark Agon Temple
- Restoring the Energy Controller
- The Journey to Torvus
- The Everlasting Deluge
- Restoring the Flooded Temple
- Taking the Fight to the Ing
- Expanding Samus' Arsenal
- The Underwater Temple
- Securing the Dark Torvus Temple
- The Path to Sanctuary
- The Mechanical Marvels of Aether
- The Sub Guardian Nightmare
- Subterranean Conquest
- Searching the Fortress
- Retrieving the Charge Combos
- Following the Echoes
- The Screw Attack Returns
- The King of all Mechanoids
- Gearing up for the Finale
- Unlocking the Sky Temple
- The Final Treasure Hunt
- Ending the War