Data
Guides and strategies
- Power-up locations
- Shinespark Guide
- Bosses Guide
- Obstacles Guide
- Walkthrough
- Game endings
- Secrets and tips
- Game maps
Media
Chapter 8: The Mechanical Madness
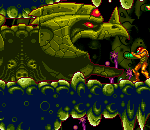
On our way up through Norfair we'll pick up the trusty Screw Attack. Once back up in Norfair the wall adorned with the two statue heads on the right will promptly crumble, revealing an opening beyond. Move in to find a chamber containing the wreck of a Chozo Statue - this one would've directed you to Tourian if it were still standing (well, it is, but it doesn't have a head).
Move on beyond the statue and climb into the small alcove ahead. Shoot down through the floor and drop down below to discover a hallway running left. Just on the right you should've spotted a Morph Ball Launcher behind a wall, that leads back up to the room directly above but we won't be using it. Instead, walk left and jump up onto the raised platform. Begin running left without releasing Left.
You'll run through a tube set into the background of the previous elevator shaft and the tunnel Imago created, before emerging into a long narrow corridor. Shoot your Beam constantly as you run to blow down small walls in the way, you'll then smash through Speed Booster blocks covering up a Morph Ball Launcher in the corner. Jump in a lay a bomb to be launched right up through the tall shaft broken up into smaller chambers that you've trekked through a while ago.
Once you hit the roof at the apex of the shaft you'll discover that you're in a hidden room above the Save Room below on the right (check the map). Go left to discover a tunnel filled with enemies flying back and forth. You'll also spot Missile NO.12 in the center up in an alcove, but you can't break in without the Screw Attack. Freeze the flying fiends and break through the red door at the end to discover the Screw Attack waiting in a room beyond.
With your newfound power head back into the previous corridor and clear out the flying enemies before picking up the Missile Tank. Go back into the segmented shaft and break through the floor to drop back down below. Head right and save your game before leaving. From here you should now backtrack to the Brinstar elevator and return there for the trip to Tourian.
If you've been picking up all the items mentioned so far in this walkthrough, you should be loaded and more than ready to tackle Mother Brain. Use the Screw Attack often to clear out enemies, you'll find it also saves a lot of time and hassle. Once you return to the giant green shaft on Norfair's eastern side, jump up to the Speed Booster blocks barring the way.
Around both of the two floors you'll find there's a range of Screw Attack blocks hidden within the terrain, break through these to easily bypass the Speed Booster block-floors. Once you've made it back to Brinstar, trek up to the Gold Statue room up in the north-western area (check the map and you'll notice what appears to be two small flames hovering over the room). Make your way up there to find yourself locked inside upon entering the room.
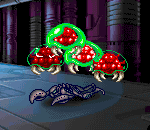
Walk over to the huge face of Kraid in the statue. The eyes on both faces will promptly flash before both maws open up wide, allowing you to pass. Walk through and go left to discover an elevator. Ride it down to enter Tourian, Mother Brain's lair. Sit back and watch as another cutscene plays, this time showing several Metroids feeding off a dead Space Pirate - those morons really don't care about collateral damage.
The familiar groaning tune welcomes you to the this mechanical maze, where you'll be facing quite a number of Metroids before reaching the big brain. You won't be able to descend this first shaft upon entering, instead go right to discover a Save Room where it's a very good idea to save now.
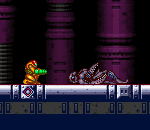
Going beyond the Save Room you'll discover a small chamber with a dead Space Pirate - but not a single Metroid in sight. Proceed right again and descend the short shaft beyond. Watch out for the turret emplacements in the walls and floor, they'll emit small circular projectiles which often drop items when shot at. Go left at the base of the shaft to find yourself locked inside a long seemingly empty corridor. Walk forward to witness a Metroid emerge from the depths of the background.
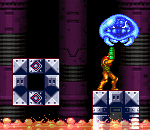
Quickly freeze it before it lunges at Samus, then fill it with five Missiles or a single Super Missile to blow it apart. If you ever happen to be caught by a Metroid, quickly lay bombs to shake the creature off, then freeze it while it's still recovering from the blast. Proceed through the left door to find yourself in the main shaft again, but lower down. Keep your eyes peeled in here for two Metroids lurking in the background; you can see them as tiny Metroids hovering around before it lurches into the room.
Descend the shaft while taking each Metroid out, make sure you only face one at a time. Try to shake off the annoying red circles, they'll often fly between you and the Metroid. With both Metroids cooked go right at the base of the shaft. The following lava-filled corridor is home to several more Metroids, you'll have to beat them all to unlock the doors at either end of the hallway. This corridor's littered with dead Space Pirates, I guess they must be one of the Metroid's favourite delicacies.
Take your time proceeding down the hall as you take out each Metroid, and again try to avoid the annoying projectiles fired from the turret emplacements. Enter the next large chamber and drop down the opening ahead. Watch out for a Metroid lurking down below in the corner, then proceed on taking down any Metroids in your path. Beyond in the next small room you'll see a platform covering up a hole below.
The door ahead leads to a Save Room, but there'll be another one before Mother Brain's lair so you don't have to save now. Shoot out the platform covering the hole and drop down below to discover a door on the right. On the left wall is a turret which fires green circles, these ones move faster than their red counterparts but also drop items more frequently. Upon entering the next room you'll discover that it's a tall shaft going straight down.
Yet more Metroids lurk in the shadows, watch out for them as you proceed down through the winding platforms. Take care near the base of the shaft, you don't want multiple Metroids ganging up on you. Proceed left at the bottom to find a narrow empty corridor. Once again the blasted doors will lock you in, so you'll know there's more Metroids to hunt. Bomb the floor to open up a huge opening revealing a second corridor below.
Watch out as there's two Metroids waiting at either end of the corridor. Stay atop the floating platforms below and wait for two of the Metroids to give chase. Jump back up to the corridor above and lure them up there before freezing and frying both. Clear out the other two Metroids on the other side before bombing the floor again. You'll reveal yet another corridor below, where two Metroids lurk among a mass-grave of dead Pirates.
Lure them up to you above and finish both off to unlock the doors. Upon exiting this huge room via the left door you'll find the last Save Room before Mother Brain, so I'll state the obvious - save your game now more than ever.
Proceed left to find a long empty corridor filled with turrets in the ceiling. Now's a good time to Screw Attack the circles to fill up on energy/ammo before the big battle. Once you've refilled your payload, go back and save just in case you have to come back and do it again. Blow open the red door at the left end of the corridor to finally locate Mother Brain's lair. You'll feel right at home in the familiar surroundings - the hallway is designed just like MB's lair in the original Metroid.
You'll have a heap of turrets firing circles in every direction, as well as smaller turrets firing tiny laser beams in multiple directions. Large glass tubes will block your path to MB itself, so you'll need to fill them with Missiles or Super Missiles to blow them apart, just try to keep firing as if you stop they'll slowly regenerate somehow and you don't want to waste ammo.
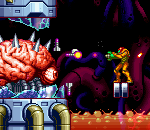
Further on down the corridor you'll find lava filling the bottom part of the screen, try your best to stay out of it as it's a major hassle trying to get out while projectiles rain down from above. For the lava section, try staying on the rightmost block, from here you'll have a good chance of firing at the glass tube while avoiding the persistent laser beams. Beyond the final glass tube you'll see a narrow opening up on a wall, roll through it and drop down to finally come face-to-face with Mother Brain itself, sitting snugly within its glass chamber. Refer back to the bosses guide for tips to finally defeat this loathsome monster.
Deal the final blow to MB and watch as it ultimately explodes along with the two gun turrets. You'll then be informed by the game that you need to escape right now before the time bomb goes off, taking out the entire installation. You'll now have 2 minutes to get back up to Samus' ship in Crateria (you only get 1 minute on Hard), so put on those running boots.
The frantic alarm and music gives you more than enough of a hint to get out of there, so proceed through the door beyond MB's remains. Just like in the original Metroid a tall gargantuan shaft greets you beyond. Climb up the floating blocks and platforms as fast as you can and try to avoid falling down. Watch out as the single blocks will slowly begin to crumble as you step on them. Upon finally reaching the apex of the shaft you'll discover an elevator waiting.
Quickly jump on to be taken up to Crateria. Now for the final run. Go right and ascend the rocky shaft amid all the explosions rocking the screen. At the top shoot through the walls blocking your path and frantically jump over them to reach the right side of the corridor. When you reach the edge of a raised platform, there's a door ahead. Begin running right from here and shoot open the door.
Go through to emerge back out in the landing site where your ship awaits, but there's a wall covered in Speed Booster blocks barring the way. Keep running to build up the Speed Booster's charge and you'll easily smash through the wall. Jump atop your ship to finally escape from this doomed place before everything goes to hell, then sit back and watch as Samus takes off and escapes from the planet. Congratulations, you've done it! Or have you?
Chapters:
- Ridley's Magma Pit
- The Mechanical Madness
- Didn't See That One Coming
- Childhood Memories
- The Hunt Isn't Over
- Final Run


