


Data
Guides and strategies
- Power-up locations
- Shinespark Guide
- Bosses Guide
- Obstacles Guide
- Walkthrough
- Game endings
- Secrets and tips
- Game maps
Media
Chapter 6: Just Can't Keep Out of Norfair

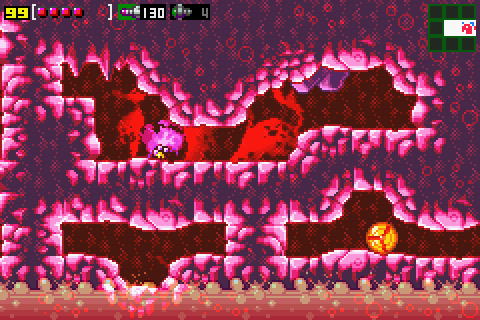
These acid pools can't harm Samus' Varia Suit.
Back down in the lower corridor, head right to save your game. Proceed right again past the Save Room to find another long corridor. Not far in you'll discover Missile BR.09 atop a pillar, pick it up as you go through. Now you'll need to do some exploring to proceed further down this corridor. Right at the end of the hall you'll find a tall cylinder covering a small alcove where a bunch of parasites dwell.
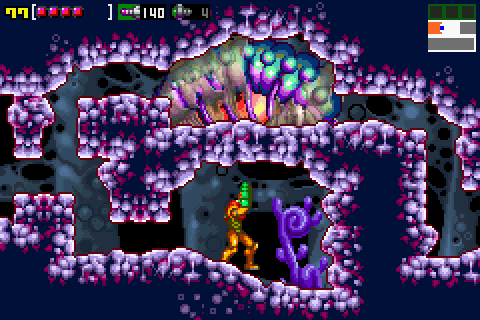
Inside the alcove you'll find a gray pipe in the wall, exploration of that tunnel will take you to a room where a Chozo Statue's blocking the path, so you'll need to find another way around. Back in the previous corridor, visit the parasites and allow them all to attach to Samus' body (they won't bite). Go back over to where you located the Missile and take a dip in the acid.
You'll discover a hidden underwater tunnel, so take a look further down. Another of the large purple balls blocks the way down below. Touch it and wait for all the parasites to latch onto it. Once the parasites devour it roll through the gray pipe ahead. Jump up out of the acid in the following corridor and jump onto the Chozo Statue's hands to be shown where the Wave Beam is located, once again down in the depths of Norfair.
Trek right through this corridor and descend the following shaft. From here make your way back down to Norfair, taking a slight detour to pick up Missile BR.10 along the way. Once you're back in Norfair, proceed over to the tall green shaft on the eastern side. From there ascend the shaft and go left at the top to find Missile NO.05 in a super-heated corridor. With that in hand head back down to the lava cavern adjacent to the shaft and use it to build up the Speed Booster's charge.
The Varia protects against extreme heat as well.
Break through the Speed Booster blocks in the floor of the shaft and head left below. Cross the corridor and blow open the green door at the end with a Super Missile. Beyond you'll eventually locate Missile NO.07 and Super Missile NO.01 (just watch out for the dragons spewing fire from the lava in Missile NO.07's corridor). Once you pick up the Super Missile, exit the room and re-enter it to restore the Bomb Block alcove.
Use the flat open space to build up the Speed Booster's charge to Shinespark back through the previous corridor, it save a lot of time and hassle. Once back in the corridor adjacent to the eastern green shaft, use the open flat space to build up the Speed Booster and break through the floor in the shaft. Descend the shaft and return to the Hi-Jump Boots' room. Once there roll under the statue and through the narrow tunnel in the left wall.
Proceed through the next small room using the Wall Jump trick when needed. In the next giant heated cavern, you'll need to clear the scattered blocks on the floor away to clear a path for the Speed Booster. Waste all the enemies and head back to the door once all the blocks are gone. Run up the slope to the left and jump at the cliff to smash through the wall of Speed Booster blocks ahead. Trek into the next corridor to find a nasty large Sidehopper waiting in ambush.
Pummel it with Missiles or Super Missiles and move on to find a Save Room ahead. You won't know it yet but the next room is part of a tall shaft heavily broken up into smaller chambers. The Screw Attack is up above, but to save time we'll pick it up later. Proceed left through the next heated corridor to find a shaft leading down. Go through the red door at the bottom to find the Map Room, where you'll quickly discover that there's plenty more rooms to explore here.
The Wave Beam should do the trick here.
Go back outside and jump into the lava below (it won't hurt). You'll find that it's fake, and that another hidden shaft lies below. Descend the shaft and head right at the base. Cross the next large cavern to find yourself in a small room. From here you can break through the floor and descend the hidden shaft below to eventually locate Missiles NO.09 & NO.10.
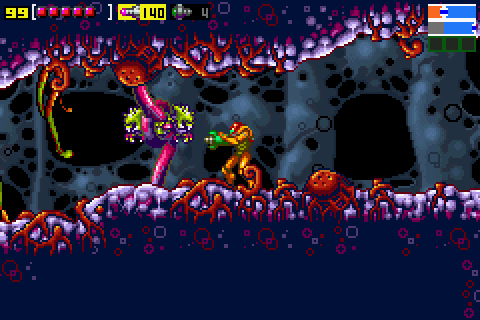
With both Missiles in your possession go back up to the room above the hidden shaft and proceed right. Cross the following corridor while blasting away the weird vegetation (some of enemies are caught in it!). Beyond you'll find another small room, shoot through the floor near the left door and drop below into the fake lava. Proceed left and clear out the large Sidehopper in the following corridor.
Take the left door at the end of the corridor to finally locate the Wave Beam, a handy and practically vital addition to your arsenal. We'll now go down to the south-eastern quadrant of Norfair to find access to Ridley's lair. Backtrack up to the corridors above (try out the Wave Beam on the large Sidehopper) and head right to find a Save Room.
The road to Ridley's lair is a strange one indeed.
Cross through the next heated corridor and run along the open floor to build up the Speed Booster's charge, as there's a wall blocking the path you'll need to smash through. Enter the next corridor to face an unusual sight - you've just entered the lair of two Kiru Girus, huge larvae/caterpillar creatures. Both are blocking your path and seeing as the door just behind you sealed you'll need to take them out. Check the bosses guide for tips to clear each one out.
With both larvae cooked, grab Energy Tank NO.01 before leaving. Run over to the left side of the corridor and run back to build up the Speed Booster's charge. Beyond the door you'll find yourself back in the giant green shaft, and you'll promptly break through the floor ahead clearing a path to the door below and Missile NO.11. Travel through the door down below and save your game in the room beyond.
Cross the next corridor while clearing out the vegetation and enemies caught in the vines. You'll now face one more challenge before gaining access to Ridley's area. The following room is home to the Ensnared Kiru Giru, a huge Spore Spawn look-alike (it even has a remake of Spore's theme). Check the bosses guide for tips to finish it off. Once the creature crashes into the floor writhing and squirming, drop down through the hole it creates and proceed right.
You'll now locate the elevator descending deep down into Ridley's area, so hop on and ride it down. During the ride you'll watch a cutscene exhibiting Ridley landing the massive Space Pirate ship on Zebes' surface before taking off for his lair, so it looks like he knows you're coming.
Chapters:
- The Hunter Returns
- Familiar Territory
- Where's My Ship?
- The Wingless Dragon
- Heating Things Up
- Just Can't Keep Out of Norfair