Bosses Guide

Huge bosses lie in wait for Samus, hoping to be the lucky one to claim victory against her - this section will help you make sure that never happens. Mastering the controls and Samus' skills is vital for your survival against these behemoths, as many boss battles are far more challenging than the game's predecessors.
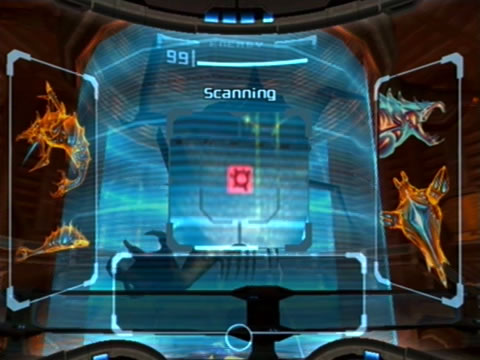
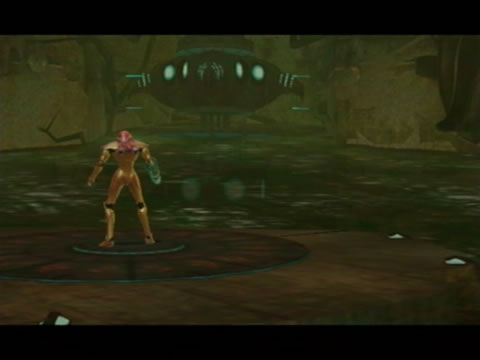
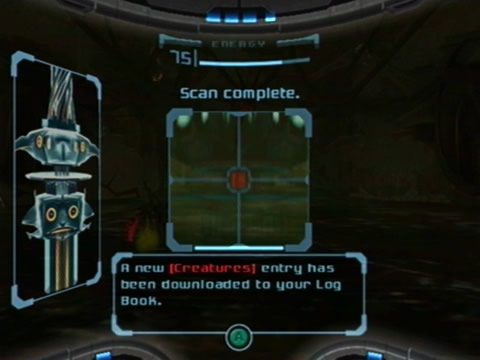
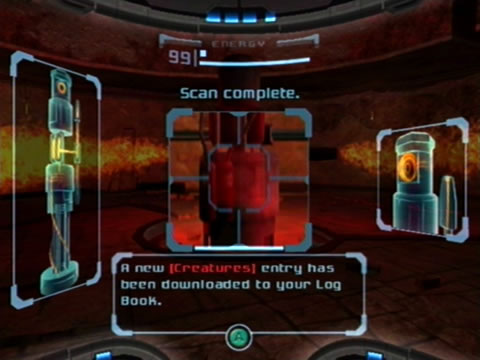
Keep in mind that whenever entering a boss' lair, scan the creature with the Scan Visor before engaging it, as you'll only get one chance at adding it to your Log Book. Also keep in mind that bosses have twice as much health in Hard Mode as they do in Normal Mode (or Hypermode and Veteran respectively in the Metroid Prime Trilogy), so don't expect an easy victory. For the Metroid Prime Trilogy version of the game, defeating each of these bosses (and the first Plated Beetle) will reward you with an orange credit.
For most major bosses an energy bar appears at the top of the screen, so you'll always be able to tell how much health they have left.
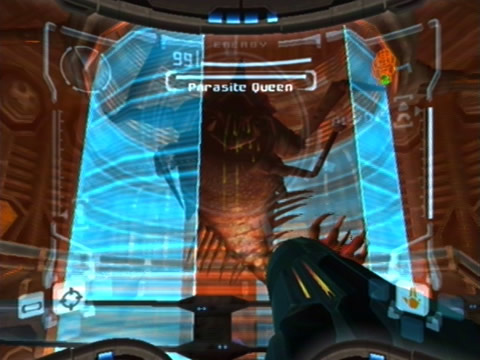
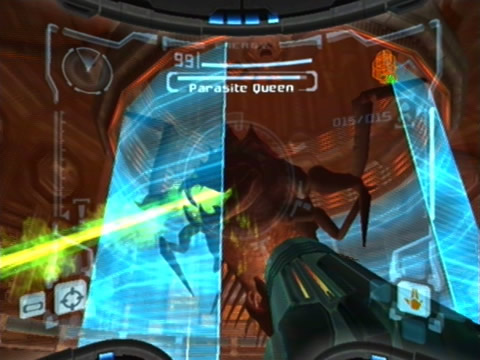
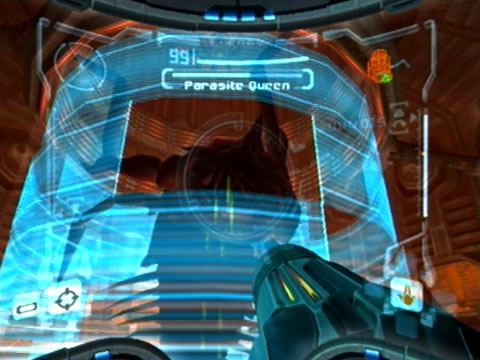
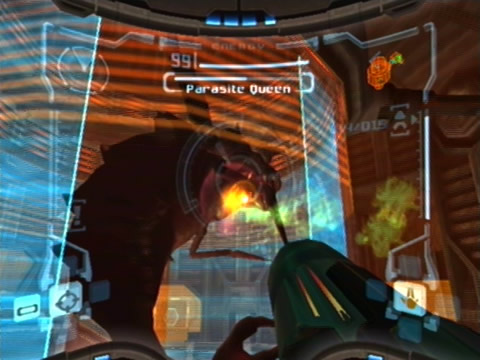
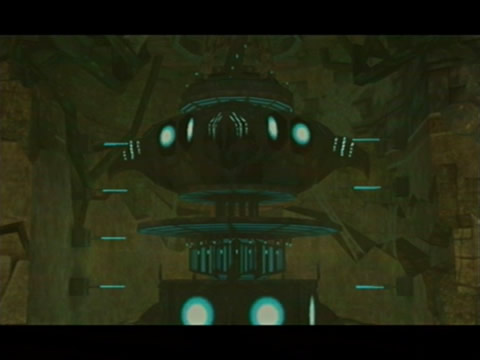
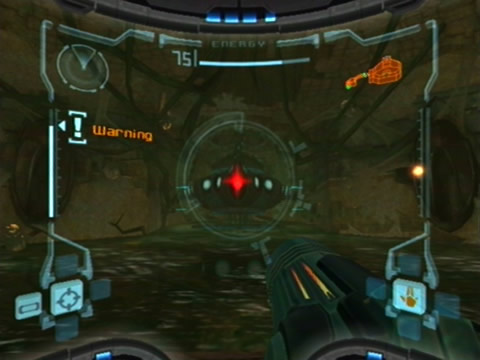
Parasite Queen
- Location:
Space Pirate Frigate Orpheon (Reactor Core) - Attacks:
Energy beam - Weakness:
Charge Beam, Missiles
The Queen will stay within the confines of the reactor core, shielded by a circular rotating energy field. You'll need to find a gap in the shield to get a clear shot at the mouth - its weak point. Watch out for the laser attack, dash-jump to the side whenever it's about to fire. Pummel the mouth with missiles and use the Charge Beam often.
When the energy fields begin spinning around rapidly wait for them to stop before finding a gap again. The room's circular shape gives you an easy strafing solution around the Queen, as you'll never have any annoying objects in the way. Keep pounding it with missiles and it'll go down fairly quickly.
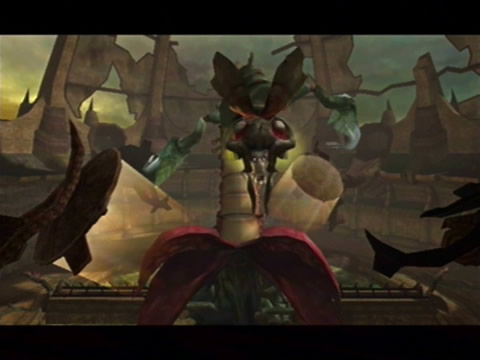
Hive Mecha
- Location:
Chozo Ruins (Hive Totem) - Attacks:
Ram War Wasps - Weakness:
Power Beam
The only form of attack the Hive Mecha has are its Ram War Wasps that pour out from the drone itself and the two large openings either side of the drone. The Ram War Wasps will constantly circle Samus on the dais, so you'll have to rotate around quickly to catch them. Don't forget to scan the drone and the War Wasps for your Log Book, this is your only chance to scan them.
Wait for the War Wasps to stop moving (they'll chirp when they stop circling), then quickly blast them before they try to ram into Samus. Once all the War Wasps are gone and the Hive Mecha opens up its mouth to fire out more Wasps, lock on and plow into the red section of the mouth to damage the drone. With enough damage inflicted the mouth will close and the drone's head will rotate.
It'll open up another mouth and fire out even more Wasps than before, so do as before to whack them all (if multiple Wasps fly at Samus at once, strafe and jump around to avoid them, but don't go swimming). Once all the Wasps are gone the drone will open its mouth again. Plow into it and the head will rotate one more time and spew out more Wasps. After this round is clear, finish off the final mouth and the mecha will shut down for good.

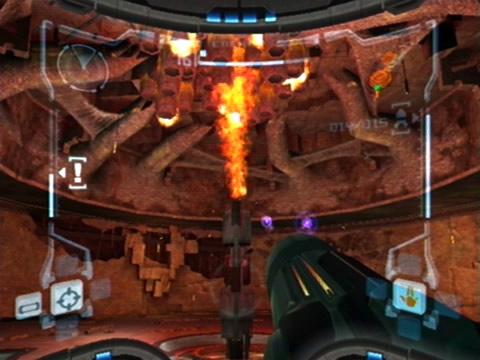
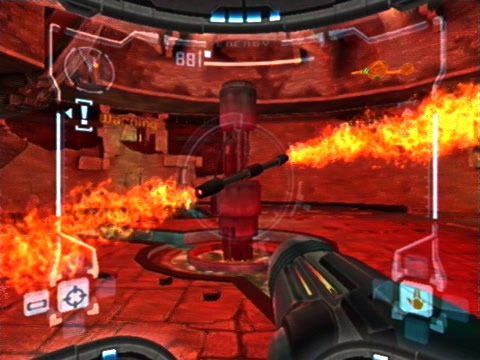
Incinerator Drone

- Location:
Chozo Ruins (Burn Dome) - Attacks:
Barbed War Wasps, Double flamethrower - Weakness:
Missiles, Charge Beam
This drone's far more dangerous than the Hive Mecha as it possesses a twin-mounted flamethrower which rotates constantly, spreading fire throughout the circular room. Scan the drone then lock onto it and strafe around with the flames to avoid being caught. If the arms stop rotating, they might begin rotating in the opposite direction so watch out. Eventually a small head will pop up out of the drone's cylindrical body with two red objects on either side of the head.
Lock onto one and blast away with anything you've got (missiles really help). With enough damage dealt, the head will retract into the body and the flamethrower arms will spin into a vertical position. Flames will erupt out of the arm, burning away the massive War Wasp hive in the roof, this'll summon several Barbed War Wasps into the room.
Watch out for these bugs as they can launch their stingers at you as a projectile weapon, try to avoid them while concentrating on the drone (don't forget to scan one). If you're hit by one of their stingers Samus' visor will become clogged with slime, clouding your vision for a second - you'll also lose your lock-on function for a second. The arms will move back to the horizontal position and resume their rotating flame attack, but they may tilt up a little leaving a gap under one of the flamethrowers, use this to sneak under the fire without taking damage.
Wait for the head to show itself again and blast away at it. It'll send flames into the nest above again, so get ready for more irritated War Wasps to appear. Repeat the process a third time and you'll notice that the nest is almost completely on fire now. A fourth shot at the head will cause the flamethrower to completely destroy the nest, the drone will then explode, revealing the Morph Ball Bomb as your prize.
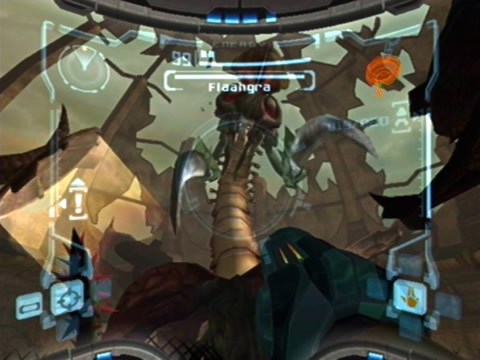
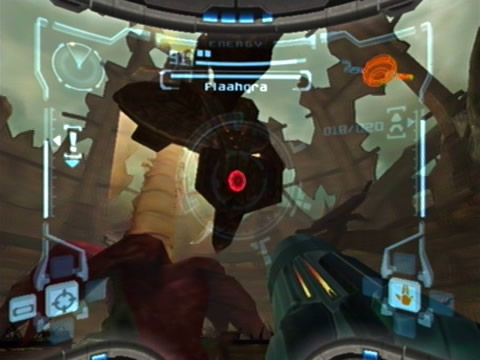
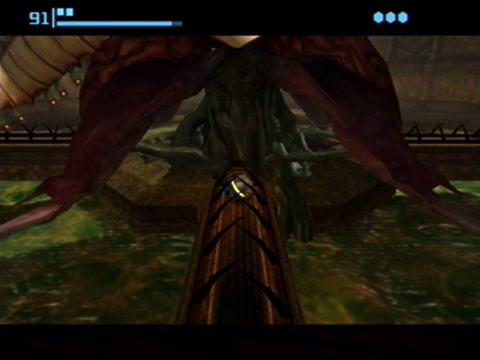
Flaahgra
- Location:
Chozo Ruins (Sunchamber) - Attacks:
Plasma projectiles, Weed traps, Claw lunge - Weakness:
Morph Ball Bombs
This nasty-looking bug will take some strategy to bring down. Before attacking it, scan Flaahgra and one of its four tentacles for your Log Book. Watch out for its weed attack where it'll sprout up a range of weeds and spikes on a part of the floor section surrounding its pond, but you shouldn't have trouble keeping away. Also watch out when it lunges and spits plasma projectiles.
You'll notice that one of the four sun reflectors must be active for Flaahgra to remain active, if all four are inactive the creature will collapse. If you lock-on and blast away at Flaahgra it'll eventually become stunned and won't move for a few seconds, giving you time to act fast. Quickly go over to the rear side of the active sun reflector and you'll spot a red button on the back.
Lock on and rip into the button (a single missile does the trick) and it'll shut down. Flaahgra will clumsily collapse and its tentacles will retract into the main body - exposing narrow tunnels leading to Morph Ball slots. Quickly activate the Morph Ball and roll into a tunnel, then plant a bomb in the slot to critically damage the creature.
You'll need to do this three more times to finish Flaahgra off, but each time another sun reflector will activate, so by the time there's only one tunnel left to bomb, all four reflectors will activate. Try to stun Flaahgra as much as you can, as it'll often try to whack one of the inactive reflectors to turn it back on. Use the Morph Ball to move around the room quickly, and grab the power-ups left at the entrance of each tunnel when you blow them up.
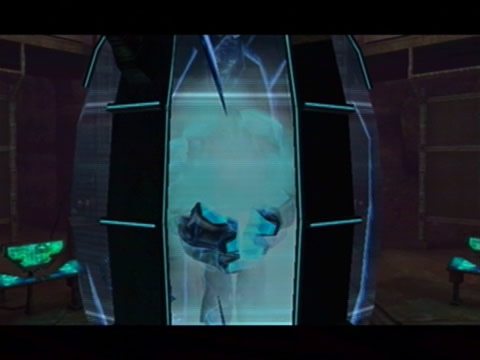
Once all four tunnels are bombed the creature will slowly wither away into its giant flower and the poison in the pond slowly erodes away, replaced by clear running water - you've now cleared the source of the poison, so now all the poisoned areas in the ruins will be back to normal! You'll also be presented with the ultimate prize - a spinning 3D Samus logo! What's this you ask? None other than everyone's favourite Varia Suit.

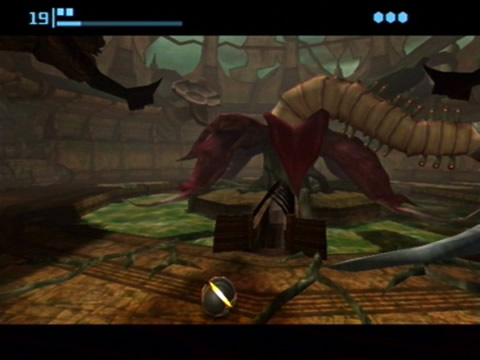
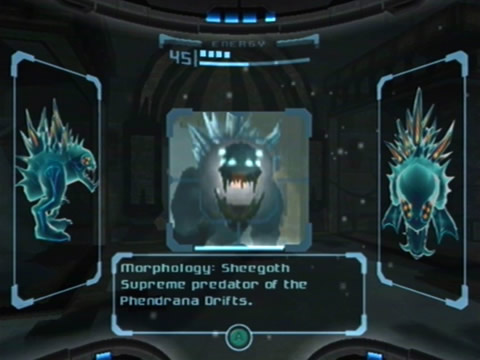
Sheegoth

- Location:
Phendrana Drifts (various locations) - Attacks:
Ice breath, Ice projectiles, Charge attacks - Weakness:
Missiles, Charge Beam, Plasma Beam
You'll be encountering several of these supreme predators of the Phendrana Drifts. Try your best to stay right back from the behemoth, as it often tries to charge straight at you. Watch out for its ice breath, tap A and B if you become frozen. Also watch out for its projectiles, a quick dash to the side should be enough to avoid it.
You'll only be able to injure the creature when it uses its ice breath or fires a projectile, once it does lock onto its face and fire a missile. After several strikes it'll reel back, once it does keep firing and your shots will continue damaging it. Stay back often and fire at the right times, you should take it down fairly quickly. Oh, and once you get the Super Missile combo (and Plasma Beam), try to use it as much as possible to speed things up a bit.
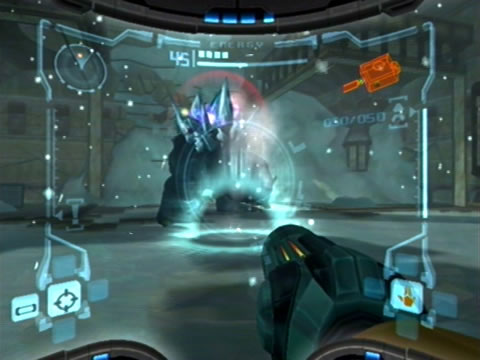

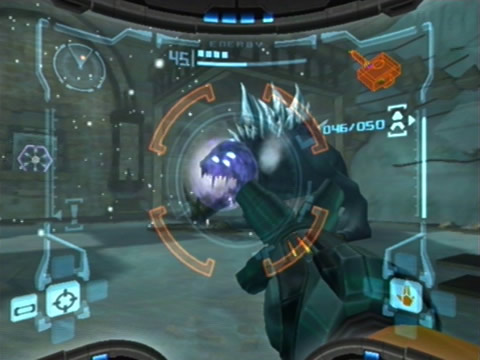
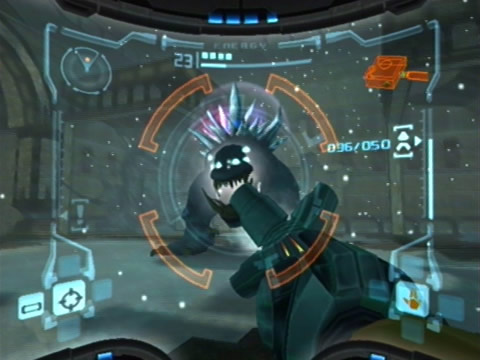
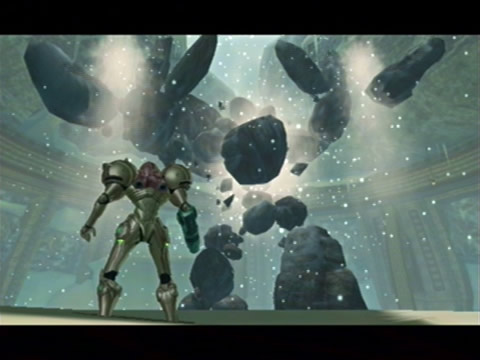
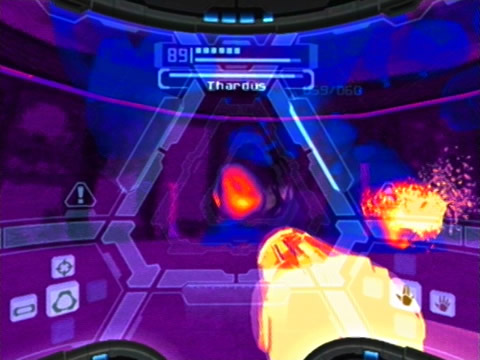
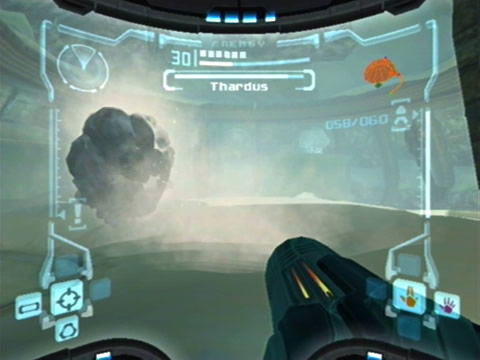
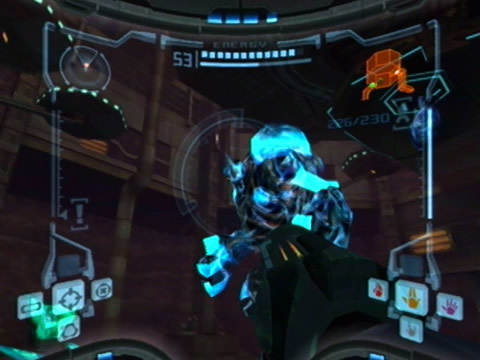
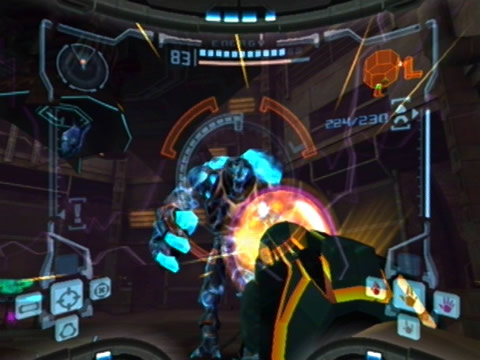
Thardus
- Location:
Phendrana Drifts (Quarantine Cave) - Attacks:
Ice blast, Rolling thunder, Lightning strikes, Ice/rock projectiles - Weakness:
Thermal Visor, Missiles, Charge Beam
For a giant bunch of rocks brought to life by Phazon, I'll never understand how Thardus manages to growl all the time. Anyway, this huge toughie boasts a range of attacks. Both his ice attacks in the form of ice projectiles and his ice barrage which shoots out ice spikes along the ground can be dodged with a quick strafe to the left or right.
Thardus' main weakness is the Thermal Visor, and you'll see why when you switch it on. One of the many rocks on its body will show up as red, lock onto it and blast away with all you've got. Eventually with enough damage the rock will turn a blue Phazonish color and you'll be blasted with bright light. Switch back to the Combat Visor and continue plowing into the same rock.
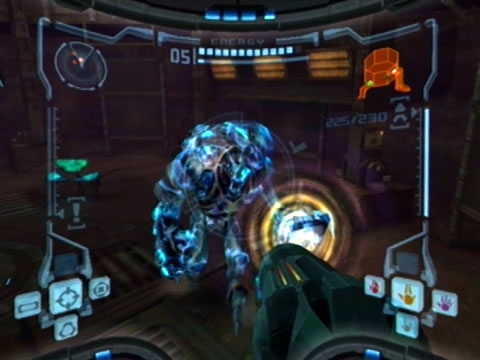
Once the rock explodes, Thardus will roar out its frustration at you before curling up into a massive ball. It'll then start rolling around the room trying to crush Samus, quickly activate the Morph Ball and boost around to avoid Thardus. Watch out if Thardus summons up two boulders, as they'll fly straight at you. If you get caught in his ice barrage and become frozen tap A or B to break free.
If Thardus raises its arms and summons lighting, it'll create a massive blizzard that fills the room with bright light, you'll need to rely on the Thermal Visor to see. As you shoot out each rock from Thardus' body, its health will slowly drain. Keep dodging its relentless attacks while blasting away at the weak points, eventually the center rock in its chest will become the weak point, this is the last one to blow apart to finish off Thardus for good.


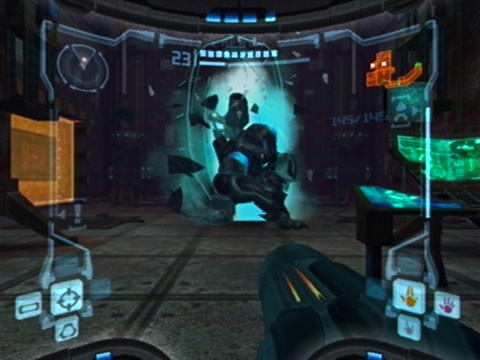
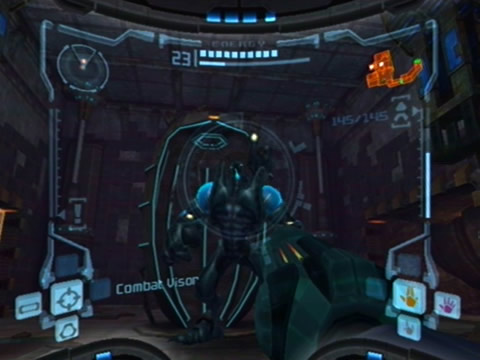
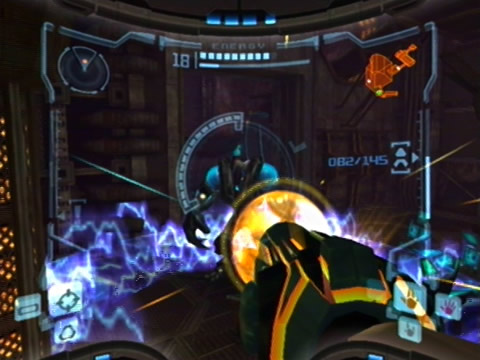
Elite Pirates
- Location:
Phazon Mines (various locations) - Attacks:
Shoulder-mounted plasma artillery cannon, Wave-quake projector, Wrist bayonets - Weakness:
Missiles, Super Missiles, Charge Beam
These monsters are the first successful Phazon-infused Space Pirate specimens. They'll be stomping around the room often, they'll also often fire projectiles from the cannons mounted on their backs. If you switch on the Thermal Visor you'll be able to target the cannon, pummel it with missiles to blow it off.
The Elite Pirates will also often charge up energy in their hands and stomp the ground, sending a massive shockwave in all directions, just double-jump at the right time to avoid taking damage. Try to stay away from them as they'll often try to swat you if you're too close. When you lock onto its face you'll be able to send it packing with missiles and shots from your Beam Weapons, but stop firing if the Pirate raises its hand and absorbs the shot.
When you successfully score a hit the creature will flash red. If it catches your shots and charges energy in its left hand, wait for it to release the shockwave attack before firing again (use Super Missiles to speed up the process). Keep pummeling it and you should take it down without much trouble.

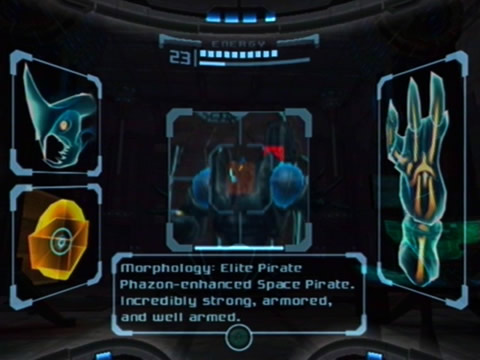
Phazon Elite
- Location:
Phazon Mines (Elite Research) - Attacks:
Wave-quake projector, Wrist bayonets - Weakness:
Missiles, Super Missiles, Charge Beam, Plasma Beam
This advanced and very ugly Elite Pirate has Phazon infused directly into its body. This creature doesn't carry a shoulder-mounted cannon, so you won't have to worry about dodging bombs, but it will often use the quake projector to send shockwaves around the room, so keep jumping to avoid it. Stop shooting if it absorbs your shots, wait for it to release the shockwave before firing again.
The Plasma Beam is really handy here, and of course Super Missiles help as well. Stay well back from the creature or it'll slash out. Due to the deadly nature of Phazon, this creature has a short life-span, so save it the trouble and put it out of its misery. Defeat the Phazon Elite and you'll be rewarded with the Artifact of Warrior.


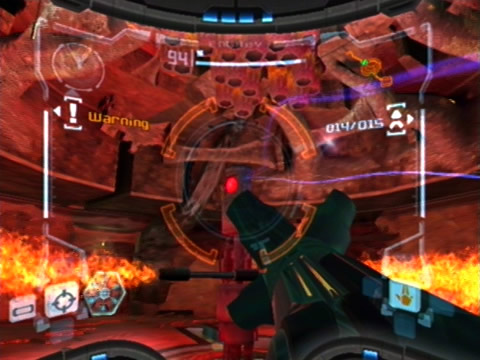
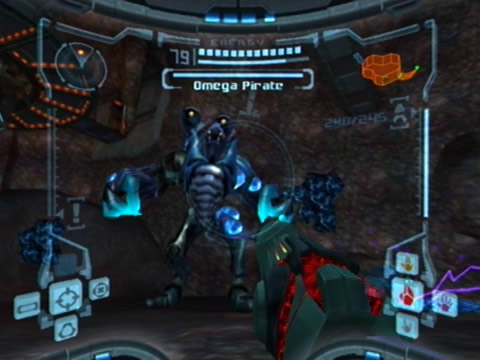
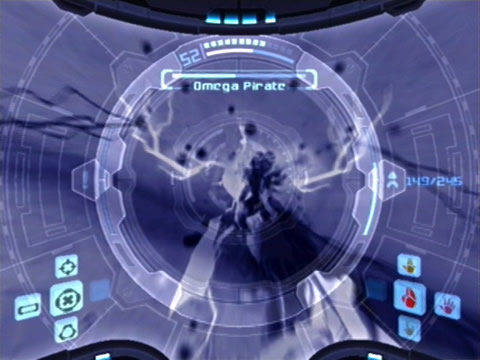
Omega Pirate
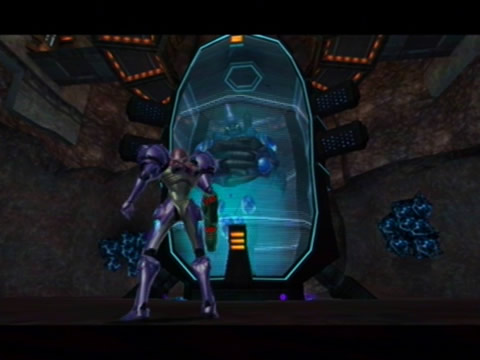
- Location:
Phazon Mines (Elite Quarters) - Attacks:
Double shoulder-mounted plasma artillery cannon, Wave-quake projector, Wrist bayonets, Pirate Troopers - Weakness:
Missiles, Super Missiles, Power Bombs, Plasma Beam, Flamethrower
This monster will be far tougher to beat than your regular Elite Pirates and the Phazon Elite. It'll be using a wide range of attacks, a lot of them will be tough to dodge. Always remember to stay away from the Phazon pools scattered around the room, you'll take damage if you bump into them. Try to always stay right back from this monstrosity, it'll often try to run you down and slash away - use the Boost Ball to make some distance between you and the monster.
Watch out for the bombs it fires out of the two massive cannons on its back. It'll also often use the shockwave attack, but you'll have had too much experience dodging this for it to be an effective attack. Often the Omega Pirate will hold up its left hand and begin absorbing energy, just like the other Elite Pirates wait until it releases the shockwave before firing again otherwise it'll absorb your shot.
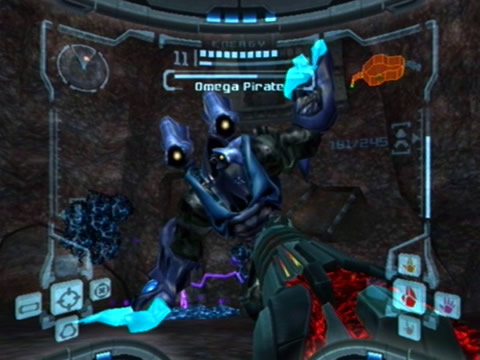
Now for some really handy hints on defeating this crazy creature. Whenever you try to lock onto the beast you'll lock onto one of its legs or arms, before actually damaging it you'll need to blow off the four Phazon shields on its limbs. The simple way is to just pummel each one with missiles until they blow, but there's a super trick I managed to figure out by pure luck.
Activate the Morph Ball and roll through the creature's legs. Quickly plant a Power Bomb and stand well back to see the effect. The resulting explosion will shred all four shields instantly! This is why you'll need to make sure you've got a full payload of Power Bombs before fighting this boss (especially on Hard). If some of the shields remain after the explosion just shoot them off with missiles. This trick won't work in the original NTSC version of the game, but it will work in all versions of the Metroid Prime Trilogy.
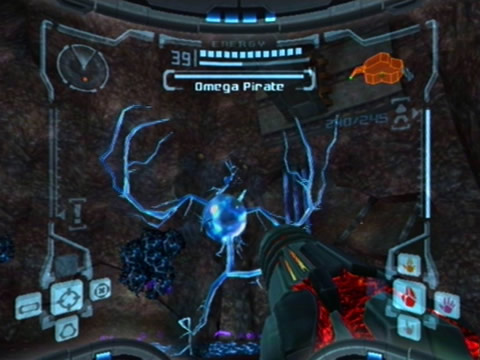
Once all four shields blow, the Omega Pirate will keel over and summon down several Pirate Troopers (often they'll be Plasma Troopers), these guys will be really annoying. Don't worry too much about them unless they gang up on you too much, use a Power Bomb to knock them down if they surround you. The Omega Pirate will then cloak itself, all that'll be visible is an ugly-looking Phazon skeleton.
Use the X-Ray Visor to see the creature while it's cloaked. The Omega Pirate will then teleport away and completely disappear for a few seconds. Listen closely for the zapping sound that indicates the Omega Pirate reappearing, and quickly track it down standing on one of the three Phazon pools.
From here the creature will use the Phazon to restore its shield plating, very quickly run up to the Omega Pirate and unleash the Flamethrower into its face (remember to keep the X-Ray Visor on to lock-on successfully). After a few seconds of taking a pounding, the energy bar at the top will begin to drop, so you'll be finally inflicting real damage.
The creature will teleport away again after taking a beating, once it reappears on another pool try to keep your attacks up, but eventually it'll restore all four shields and return to normal. Turn off the X-Ray Visor and use a Power Bomb again to shred its shields. If the Pirate Troopers are still bothering you, wait for the Omega Pirate to unleash its shockwave attack, if the Troopers don't jump out of the way they'll be fried by the blast!
Remember to pick up anything the Troopers drop, often they'll drop an Ultra Energy - always handy. Keep repeating the attack cycle while tying to avoid the Pirate Troopers.
Eventually with enough of a beating the monstrous "pinnacle" of the Space Pirate troopers will become just another statistic at the hands of Samus. If you're playing on Hard Mode though, this battle will be extremely tough, and energy preservation is the key to survival.

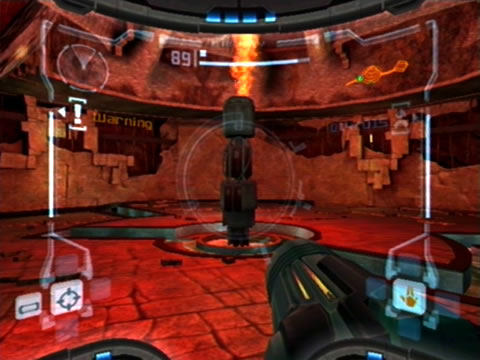
Meta Ridley
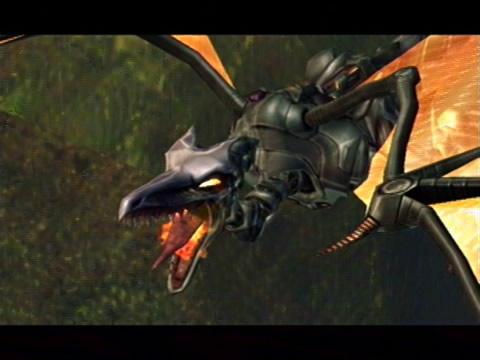
- Location:
Tallon Overworld (Artifact Temple) - Attacks:
Multi-missile system, Kinetic breath weapon, Meson bomb launcher, Ultrathermal flamestrike projector, Charge attack - Weakness:
Missiles, Super Missiles, Plasma Beam, Boost Ball
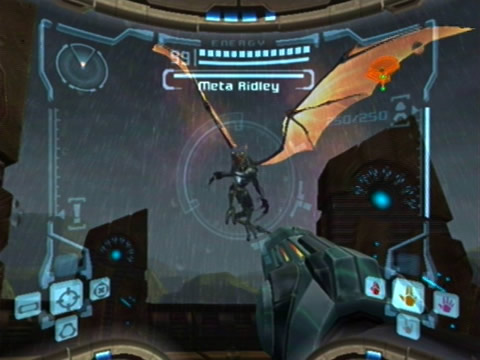
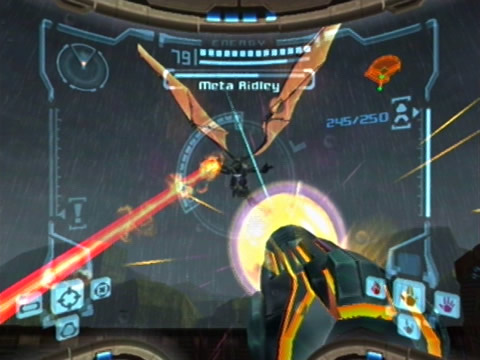
You'll be facing Meta Ridley in the Artifact Temple, so there'll be plenty of room to move around. Ridley begins by flying around above the crater below, so you'll have to wait until he swoops in close to attack. Strangely enough Ridley doesn't have any Phazon in him and yet he's far stronger than the Omega Pirate.
When Ridley swoops in and hovers above the edge of the platform, he'll often fire a continuous beam of red energy, quickly lock onto him and strafe to the sides to avoid it. If he folds his wings over his body and opens up, missiles will launch, flying straight at you. Quickly dash to the side to avoid taking multiple damage hits. As Ridley's hovering about, lock onto his chest and fire a Super Missile to inflict heavy damage.
If Ridley flies far away he'll come back for a bombing run and drop several bombs all over the platform, use the Boost Ball and speed around the perimeter of the platform to avoid being hit. When he comes back keep attacking with Super Missiles. As Ridley drops bombs and missiles at you several of them may hit the pillars and blow them apart, energy and missile refills often appear where the pillars stood so don't forget to pick them up.
If Ridley flies right over the top of the platform, stand well back and be ready to jump when he stomps down onto the ground. He'll slash out and take apart a few pillars, grab any items they reveal. Keep firing at Ridley's chest before he takes off again. He'll come and stomp the ground again a few more times before executing another bombing run. Also watch out for his beam weapon attack as he deploys bombs.
Keep pummeling away at his chest with Super Missiles, eventually when you take his health right down to about 1/5th he'll land on the platform and his wings will burn apart - rendering his flying ability useless.
Alternate method:
This opening stage of the fight can be drastically shortened if you make good use of the trusty Boost Ball. Normally Ridley's vulnerable chest is well out of range as he flies about, but landing on solid ground leaves him open for a quick melee. Watch for Ridley as he's about to stomp the ground before leaping clear to avoid the shockwave.
Don't waste any time once the dust settles - immediately activate the Morph Ball and charge up the Boost Ball. Pound Ridley as quickly as possible (don't be phased by any damage you suffer) - if you manage to sneak the Boost Ball's charge under his legs and strike his chest, watch as his wings burn off instantly. Stand up to find his health amazingly down to 1/5th already!
Note: Unfortunately it appears that this trick no longer works in the Metroid Prime Trilogy version of the game.
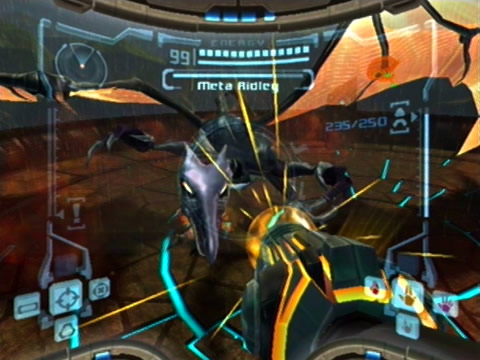
Now is the long and tough part of this battle, especially if you're playing on Hard Mode / Hypermode - don't expect this to be easy. Often Ridley will jump up into the air and stomp the ground, double-jump at the right time to avoid the shockwave. He'll always jump three times in succession before executing another attack.
He'll also unleash his beam weapon and sweep it across the platform, time your jumps to clear the beam. His third attack is the most deadly, and you'll have to concentrate hard to avoid it. If Ridley faces you and fire appears to come out of his mouth, his head will slowly rise up. Stand well back and watch closely, the second he opens his mouth dash to the side as Ridley will lurch forward incredibly fast (faster on Hard Mode) to try and ram you against the wall. If you dash at the right time when he opens his mouth you'll just make it out of the way.
Also watch out if Ridley then spins around, his long tail will whip around and try to catch you, jump at the right time to avoid it. Using the Plasma Beam, keep firing rapidly at his mouth - each scored hit will cause Ridley to flash yellow. After pummeling him enough he'll reel back and be stunned for a few seconds with his chest wide open. Pummel the chest as much as you can to inflict critical damage to Ridley.
He'll recover after about two or three seconds, so you'll have to keep striking him in the mouth to get him to reel back again. Even though Ridley only has a small amount of health left this battle will take a long time - if you're playing on Hard Mode it could take somewhere between 20 minutes to half an hour to beat him, so be ready for a tough endurance run.
Alternate method:
Special thanks to Josh Pehl for this tip. Instead of wearing down Ridley's health with the Plasma Beam, try also sticking with the Power Beam and alternating between normal and charged shots. As soon as Ridley reels back, let loose a Super Missile to chip his health down faster (you should have time to warm up the Charge Beam and fire a Super Missile).
Eventually with enough damage inflicted Ridley will partially explode and stagger about for a bit. After this he'll keep performing the same attacks as before, but he'll be moving around much faster so your timing is critical to avoid taking damage, especially from his charge attack. Become a master at dodging his attacks and eventually with enough of a pounding Ridley will once again find himself on the losing side.


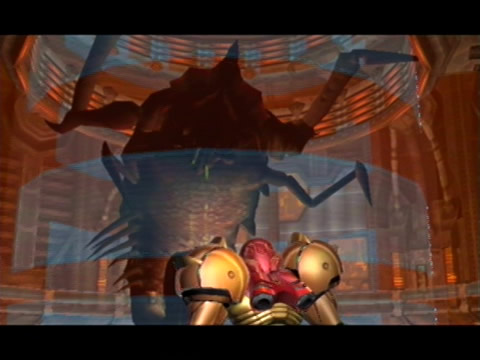
Metroid Prime (1)

- Location:
Impact Crater (Phazon Infusion Chamber) - Attacks:
Ultrafrigid breath, Multi-missiles, Snare beams, Particle wave projectors, Claw attacks - Weakness:
Beam Weapons, Combo Attacks
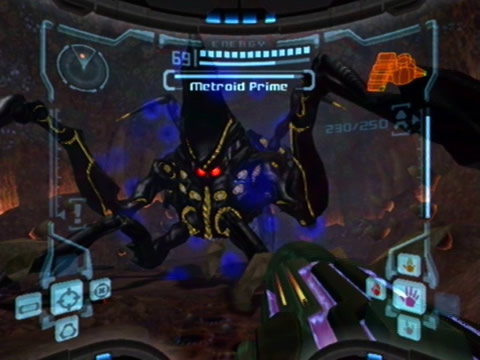
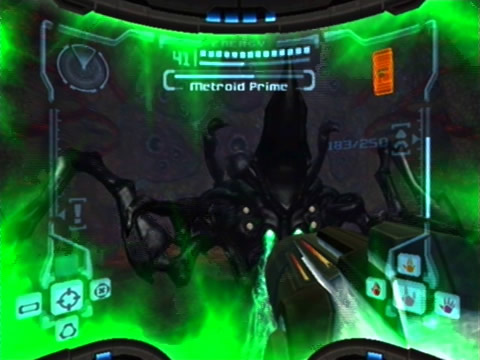
The first thing this giant crab does when you wake it up is retreat through the wall behind it, so chase after the monster for the ultimate showdown. Samus will leap down into the room to face Metroid Prime, scan the monster before engaging it. Now this creature will always be a certain colour, each one corresponds to the Beam Weapon you need to use to inflict damage.
It also boasts a large range of attacks for each different colour. If the creature turns yellow use the Power Beam and pummel its face - the only weak point - with Super Missiles to cause heavy damage. Watch out for the massive energy beam it fires from its huge mouth, and always be on the lookout for its multiple missile attack, quickly time a dash to the side to avoid them as they strike the ground.
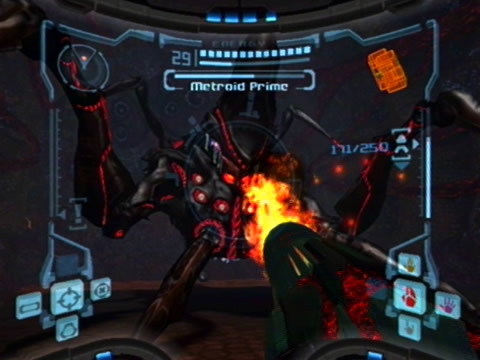
With enough damage from the Power Beam, Metroid Prime will reel back and change to a black colour. After a few seconds it'll jump forward and change again. If it turns purple, use the Wave Beam to inflict damage. Watch out for its beam attack here as it'll cause extreme visor interference on contact and you'll lose your lock-on function for a few seconds. Time your dash just before it releases the beam or Space Jump above the blast to avoid a hit.
You can use the Wavebuster to deal out some serious damage, but it takes too long to weaken the beast and it wastes too many missiles so just use the Charge Beam. After enough of a pounding the creature will reel back and its energy bar will lower, it'll then promptly crash through the floor down into another chamber. Samus will automatically pursue and jump down to follow.
This time there's three narrow trenches running along the ground, you'll need these in a bit. If Metroid Prime turns white use the Ice Beam - a well-aimed shot with the Ice Spreader will knock it back straight away (you need two shots on Hard Mode / Hypermode). Watch out for MP's frigid ice attack and ice beam, if you become frozen tap A or B to break out. As soon as Metroid Prime reels back, activate the Morph Ball and get down into a trench in the ground.
Boost forward as soon as MP charges ahead, then turn around to keep attacking. Use whatever weapon corresponds to the colour MP turns, but watch out for the two homing energy balls it launches. These annoyances will slowly try to fly into you - don't let them. Use missiles and lock onto each one before blasting away to destroy them. Each ball might drop a refill item, pick it up before it disappears.
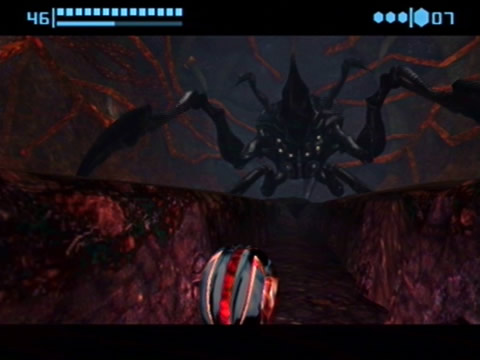
After a few more rounds MP will drop through the floor again into a deeper chamber. In this next one there's two trenches along the floor of the chamber, you'll be needing to use them again. If Metroid Prime unleashes two green energy beams they'll grab hold of you and try to reel you into MP's grasp. Break out by activating the Morph Ball and using the Boost Ball, once you're free quickly boost back to the opposite end of the room.
If MP turns red use the Flamethrower to tear a chunk from its health. A few more rounds and MP will descend into Subchamber Four. This room has a single trench in the center, use it to avoid MP's charge attacks. Here MP will constantly be changing colour, keep up with the colour changes as best you can. It'll also randomly charge forward, use the trench to avoid it.
This is the final subchamber, watch out for MP's relentless attacks and don't worry about using loads of missiles. Finish off the monster and watch as it clumsily rolls through a side wall and down into a giant pit - this isn't over yet.
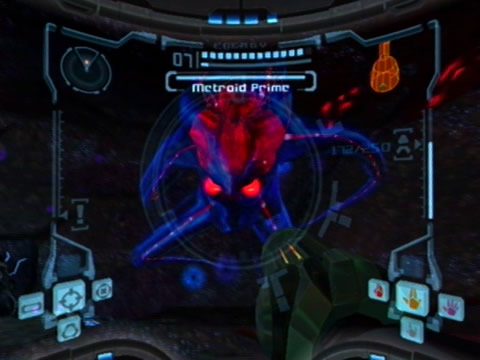
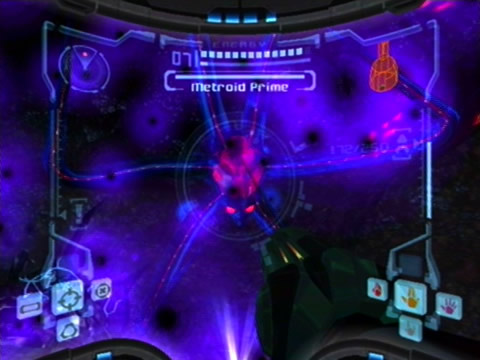
Metroid Prime (2)
- Location:
Impact Crater (Metroid Prime Lair) - Attacks:
Shockwave, Metroids - Weakness:
Phazon Beam
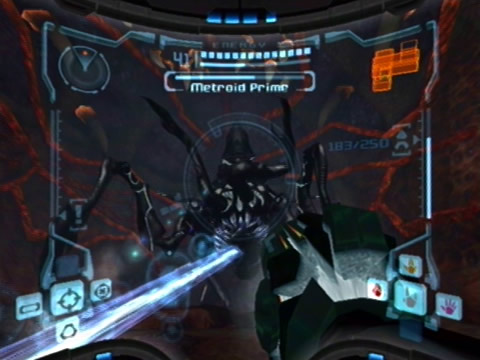
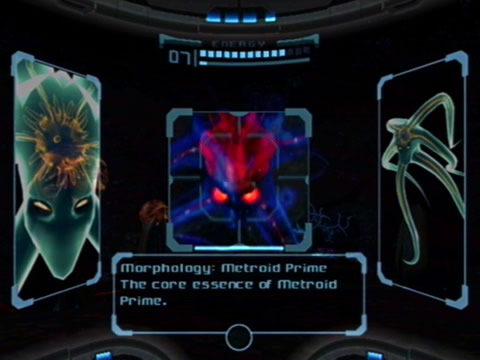
This is your final battle on Tallon IV - destroying this monster will finally purge the planet of all Phazon corruption. Scan the giant tentacled brain before attacking, if you've scanned everything else in the game you'll now have a 100% Log Book entry rate - well done! Now we'll deal with this weirdo.
None of your weapons - Beam Weapons, Missiles or Combo Attacks will harm this beast, only a charged Phazon Beam will do the job. The creature will very often release a shockwave blast all around the chamber, but it's extremely easy to dodge with a double-jump. When all the pillars around the room explode from the shockwave they'll release items, pick them all up.
This form of Metroid Prime won't be as tough to beat as its first form, but it'll still be a challenge. If MP points its tentacles down into the ground it'll create a small pool of Phazon on the ground. MP will then promptly disappear, switch on the X-Ray Visor to see it. Quickly run over to stand on the Phazon pool and turn around to face MP.
Your arm cannon will glow with blue energy seeping through it and the Phazon Beam will become active. Blast away at the monster to inflict serious damage, it'll reel about wildly as you sap its energy away. Once the Phazon pool dries up MP will resume normal attack patterns again. Keep the X-Ray Visor on to see the creature. If MP creates another pool or disappears again, switch to the Thermal Visor to see it.
Wait for it to create another Phazon pool then stand on it and use the Phazon Beam to inflict more damage. When MP disappears while you're using the Thermal Visor, switch back to the Combat Visor to see it. The visor cycle always rotates like this: Combat Visor, X-Ray Visor, Thermal Visor, so memorize this cycle as you battle the creature.
The third time MP creates a Phazon pool it'll also summon two Metroids, they could be either regular Metroids, Fission Metroids or Hunter Metroids. Quickly rush over to the pool and waste the Metroids instantly with the Phazon Beam, or immediately enter Morph Ball mode and drop a Power Bomb to clear them instantly. Grab any power-ups they drop and fire away at MP.
Always stay back from the creature as it likes to growl and lunge forward, and dodging the shockwave attacks should be easy. Repeat the tactics described above and you'll take this beast down in no time (but it's a long battle on Hard Mode / Hypermode). Crush this monster to finally complete the game!