


Chapter 6: Excavating Alinos
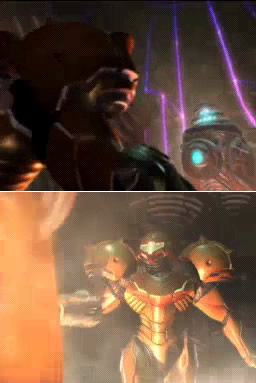
Samus confronts the odd Cretaphid defense system.
We'll now head for Alinos. Upon arrival, if you check your map you'll see a lone purple blast-shielded door in the High Ground area, so that's our target. Make your way there either via the teleporter or normal route, just watch out for any rival hunters along the way. Once at the High Ground region, take out any opposition you find there before looking for the purple force field.
But firstly, take a trip down to the lower tunnels under this region and look for a small purple force field blocking a tiny hole. Break it open and fall through using the Morph Ball - below here lies the Magma Drop and UA Expansion AL.01. With that item secured (and yourself saved from a fiery end in that molten spa), climb back up and look for a tall purple force field barring a path just behind where you discovered an artifact here some time ago.
Use the Judicator to easily break through. Just beyond here you'll discover a door bordered by two pillars. Before moving on we'll take a trip through there to discover something important (but first scan the Thermal Regulator opposite the door for your Logbook). Through the corridor beyond lies the Combat Hall - don't be surprised if you encounter rival hunters here and/or Guardians.
Clear the area if you need to, then take a look around and be sure to scan Alimbic Pride 05, Blast Shield, Combat Hall and Sniper Shield. Look for a door tucked away in a corner and proceed through.
Inside is an odd sight - a circular tunnel ending at a shimmering force field. Step forward and pass through the field, inside you'll discover a large round perfectly preserved chamber with an ornate sculpture in the center. Step forward into the blue dais in the center and watch as the camera pans out around the small stone objects lining the chamber. A message will inform you that eight Octoliths are required to power this room... so there you have it.
The eight Octoliths are all needed for this room... and whatever purpose it serves. Step off the dais and look for Alimbic Lore scan entries Alimbic Cannon 01, 02, 03 and 04.
Read these carefully and you'll learn of this room's purpose - it powers the Alimbic Cannon, a device capable of opening access to another dimension known as the Infinity Void, or more specifically, Gorea's prison. So it looks like you'll eventually wind up meeting this Gorea creature after all, but there's plenty more to learn about it before then.
Leave the chamber and return to the High Ground area (don't be alarmed if you're attacked by a rival hunter or Guardian in the Combat Hall, after all, that is what the room's for). Back at the High Ground area you'll likely have yet another annoying Guardian to deal with out in the open area.
Finish the pest off and head up the ramp next to the door leading back to the Alimbic Cannon. Watch out for the turret above, then scan the History 02 entry there before moving on.
Step outside to find yourself atop a balcony. Look for a control switch nearby, scan it to summon a moving platform over to you. Step aboard and wait for it to draw you towards the purple door up ahead. Scan Alimbic Prophecy 06 atop the door before using the Judicator to break through.
Beyond lies the Alimbic Gardens. As you enter quickly look skyward and scan the Red Barbed War Wasp flying about. Watch out for its magma blasts, once dealt with climb up over the rocky terrain while watching for Zoomers and the odd Blastcap at the top.
As you step towards the second half of this region you'll witness Sylux's ship passing by overhead. Don't worry, you won't have to deal with it again. Quickly take out the second Red Barbed War Wasp ahead and look for scan entries of Alimbic Garden, Gorea 01, Gorea 02 and Alimbic War 02. From these you'll learn that Gorea... wait for it... arrived in the form of a meteor. I wonder if this thing has any relation to Phazon or our old buddy Metroid Prime?
Carry on beyond the gardens to locate the Thermal Vast - a perfectly described vast underground chamber complete with a lava lake. The only way through is to ride atop the moving platforms, just watch out for Petrasyl flying about. More of the creatures will respawn from thin air if you shoot them, so don't bother with them too much.
The platforms don't know the meaning of teamwork, as they tend to stop moving away from each other and rarely line up. Be patient and wait for the right moment to leap across. If you fall just quickly hop back to the beginning and try again. From the first platform you can take either the left or right path, as both will lead to the same location.
Clearing these annoying platforms will bring you to a ledge complete with a small opening in the wall. Tunnel through there and follow the path to reach the back end of the lava lake sealed off by the metal fence.
Step forward but take care as two spawning units either side of the chamber will spring to life, each one spitting out Psycho Bits v3.0. Don't get hit by their magma blasts, quickly scan one and deal with the spawning units first. Use the Judicator to make quick work of them.
Climb up the winding rocky path when your position's clear and roll through the narrow tunnel you find to reach the exit. Beyond lies the Alinos Perch, a massive sand canyon. The usual welcoming committee will greet you, these ones use Magmaul projectiles so break out the Judicator against them.
With all three targets down, a door nearby will unlock. Before exploring the canyon we'll go through there first. Inside is the elaborate Council Chamber - a ruined complex of small chambers. Fire up your Scan Visor as you enter and scan the Glyph Pattern on the wall ahead.
Turn the corner and scan the Wall Scroll on the next wall covered with hieroglyphs. Bust open the two crates here if you need refills. See the orange force field covering a door nearby? Step through to find yourself at the shore of a small lava pond.
Without warning a large red beast will spring forth from the lake, you can bet this one's definitely not friendly. Scan it for your Logbook, this Fire Spawn will hurl blobs of magma at you unless you can convince it otherwise. Avoid taking damage as the fire will continually hurt you for a few seconds more. Break out the Judicator quickly and fire at the beast's excuse for a mouth when it opens. Take cover behind the damaged wall section nearby if you need to.
Stay behind the wall and peek out to fire at the beast. It'll often dive back under the lava before emerging again. Finish the beast off for a handy reward - the Magmaul! Pick it up from atop the wall section you've been using for cover. With this new piece in your arsenal, you'll be able to break down those orange force fields blocking you in here.
Turn right and take out the one nearby, through there you'll discover Energy Tank AL.02. Remember that UA refills will continuously appear where the Magmaul was so fill up if you need to.
Scan the Council Chamber log entry above the lava lake before moving on. See the inactive jump pad in the corner? Shoot the switch above it to power it up, but for now a force field above blocks you from launching yourself anywhere. Break open the remaining orange force fields and head through the one beside the entrance.
Would you believe it, but another Guardian will attack as you enter the side tunnels. Fry it with the Judicator and head through the passage it emerged from. Inside you'll discover a control terminal; scan it to lower a pair of force fields guarding a jump pad. Before launching yourself up the shaft, be sure to scan Alimbic War 07, Gorea 05 and Alimbic War 03 here.
Hop on the jump pad and watch out for a pair of Shriekbat roosting on the ceiling ahead of you as you land. Scan Alimbic Pride 04 here before moving on. Around the corner you'll discover an open chamber possessing two spawning units. They'll jump to life as you enter, one will produce Magma Voldrums, while the other delivers Ice Voldrums. Quickly scan them for your Logbook and use the right weapon for the job against the different variants and their spawning units.
With your position clear the door ahead will unlock, granting you access. But before you head through there, see the other opening on one side of the chamber? Go inside to locate the ship deck teleporter. Fire it up, but before going back to save, spin around and go towards the opposite alcove.
Look above to spot an artifact above a force field, if you look below you'll notice that jump pad you activated a while ago lies directly below. Clear the swarm of Petrasyl appearing from nowhere, then simply scan the lone control terminal nearby and grab the Shield Key to power down both force fields.
Drop below and hop on the jump pad to launch yourself up to Alinos Attameter Artifact 02. Now feel free to return to your ship for a quick save. Before going through the door up in the chamber where all the Voldrums lived, we'll head back to the Alinos Perch canyon. Once there feel free to poke around.
You'll find the Celestial Charms scan over on the far rock wall, as well as three platforms controlled by projectile-sensitive switches. There's a locked door high above up on the canyon wall, to reach it you'll need to power up all three platforms.
Activate the first two then make your way across to the far side of the canyon. Climb up the terrain there to discover two Magma Voldrum-spawning units and a lone turret sending shots your way. Clear all this opposition out and climb up to the orange force field visible from here. Break it open with the Magmaul and step inside.
Turn left to find Missile AL.03 hiding in an alcove. Climb up this area and deal with the pair of Psycho Bits you find. Look for the final platform switch here, shoot it to align the third platform.
Go back the way you came and hop aboard the now-active jump pad. As you land on the plateau look right and scan the lone terminal there to unlock the door you're about to pass through. Fall below to the nearest platform to be launched across to the other one, this final one will send you up to the door.
Beyond here is the Crash Site - a tiny chamber completely ruined from an impact (from Gorea's arrival??). Take out the Blastcap you see and scan any of the Structural Debris entries for your Logbook.
See the Shield Key sitting atop a ruined pylon just on the left? Sneak your way through the rubble to reach it, if you miss just climb back up and try again. You'll now be clear to retrieve the artifact, but first drop to the floor and look for the scan entry for Alimbic Pride 03. Step forward beyond the Blastcap to retrieve Alinos Cartograph Artifact 02. Step through the door there to find yourself back at the Alinos Perch.
Now there's only one artifact left, you can probably guess which way it is.Go back to the Council Chamber where you scored the Magmaul, then take a trip back to your ship for a quick save (you'll see why soon). Back in the Council Chamber, exit the region via the upper door. Inside is the Processor Core - home to the Stronghold Portal. So that final artifact must be nearby.
Leap across to the opposite side of the chamber and head left to locate UA Expansion AL.02 waiting for you there. Turn around and scan Alimbic Pride 02 atop the platform you just leaped across. Fall below and scan Lava Processor 01 and Lava Processor 02 on the large silo near the door.
Spin around and scan the Backup Processor on the other silo. Now for a supremely tricky trip through one of the most trying parts of this title. You'll find a jump pad inside one of the silos, use it to return to the upper region of the chamber.
Leap inside the other silo from here to land atop a platform rising up and down Activate the Morph Ball and wait for it to lower to the base. As it does so you'll spot a small tunnel revealed there, quickly roll through before it rises again. Now for a real nightmare. Follow the tunnel to find yourself in the Piston Cave, site of the final artifact but sheer hell in between. Refer to the Artifact Locations for tips to make it through, as this is nothing short of borderline torture.
Thankfully the ship deck teleporter wasn't that far behind so you won't waste much time restarting if you lost a life (which believe me is going to happen here). Once you've conquered this hellhole you'll be given the grand prize of Alinos Binary Subscripture Artifact 02. With that the Stronghold Portal will fire up, but you might want to take a quick trip back to your ship to save and lock away your victory with that last artifact.
With your game saved return to the Processor Core and dive into the portal. Cross the elaborate hallway once in the void and enter the Octolith's chamber. This time you'll be introduced to Cretaphid v3. This fight won't be easy, so refer back to the bosses guide for tips to survive long enough.
With this drone history, there's only one form of each type left. Grab any health refills appearing before securing your sixth Octolith. "...lost...we are all..." is your telepathic message reward. Well the Alimbic Order might be lost but Samus is certainly a different story. Exit the chamber and head for the hallway, this time you'll have 5 minutes to make it back to your ship in one piece.
Run ahead and leave the void. Back in the Processor Core you're likely to be assaulted already by a rival hunter, quickly deal with them and use the jump pad in the open silo to reach the exit above. Head back to the Council Chamber and defeat any opposition you find there, be it Guardians or a hunter. Backtrack to the Alinos Perch once you're clear and run straight for the exit ahead, don't worry about the annoying Guardians here.
Run inside the Thermal Vast and stand up straight away after rolling through the narrow tunnel. Quickly leap across to the jump pad directly ahead, it'll take you right across to the exit way over on the far side. Quickly roll through the tunnel beyond and exit this region, returning to the Alimbic Gardens. Zip through here and ignore the local wildlife.
Back in the High Ground region you may encounter a rival hunter, deal with them then quickly drop through the hole in the floor and go for the lower exit.
Back in the Echo Hall you may meet one last hunter, but if you encounter a Guardian inside the upper chamber where you first battled Weavel, make sure you take it out now as it's keeping the doors sealed and you don't want to have to backtrack through the tunnels if you leave it behind. Otherwise clear the area to unlock the doors and make a break for the Alinos Gateway and freedom.
Chapters:
- Excavating Alinos
- Conquering the ice world
- The final Octolith
- The secret to Ultimate Power