Energy Tank locations

Energy Tanks give Samus' Power Suit vital extra energy desperately needed for survival. There's a total of 12 to be found in your explorations. Each one adds 100 extra units of energy in Easy and Normal, but only 50 in Hard - so energy preservation is a must.

Samus' upgrades | Missile locations | Super Missile locations
Power Bomb locations | Energy Tank locations

Brinstar

1.

You'll need the Morph Ball and Bomb to reach this tank. Just like in the original Metroid this Energy Tank is hidden up in the ceiling of the long corridor containing the first Chozo Statue (you'll see it early in the game). The tank itself is located a little to the left of the large protrusion of rocks in the roof where all the Skree hang about.

Upon revealing the tank, use Morph Ball jumping (slowly tap B to lay bombs repeatedly - but not too fast) to ascend and grab your prize. If you're having too much trouble leave it be and return once you've scored the Space Jump.

2.

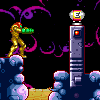
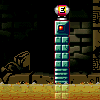
Nice and easy, you'll find this Energy Tank waiting atop a pillar above the acid pool in the long corridor where you'll encounter Deorem a second time if you didn't finish it off in the first round.

3.

This tank's hidden cleverly in the large acid-filled corridor adjacent to the Varia Suit's room. Once you've gained the Varia Suit ability, go back into the previous corridor and take a dip in the acid (it won't hurt). You should see the tank tucked away in a small alcove in the corner. Break into the alcove by way of a hidden tunnel near the center of the region. Blow through the ground and reveal a narrow tunnel to clear a way to this tank.

Norfair

1.

Not long after tracking down the Wave Beam you'll find yourself in a long corridor with two huge larvae/caterpillar creatures blocking the way. Check out the bosses guide for tips to clear them both out, then you'll be clear to find this tank hidden up in the ceiling near the second larvae's dead skin.

Kraid

1.

You'll find this tank hidden within the same room as the Zip Line charging station (check the walkthrough for details). With the Zip Lines charged up, use the one up on the ceiling to zip over to this Energy Tank waiting atop a tall pillar.

2.

Before snagging this one you'll need to beat Kraid and claim the Speed Booster. On your way out of Kraid's area, go through the second red door down on the right below the main elevator. Inside you'll find a long corridor filled with flying bugs further in. The Energy Tank right at the end of the corridor's protected by Speed Booster blocks, so begin running to the right from the door.

Quickly crouch before flying off the edge of the platform into the acid and Shinespark to the right. You'll crash through a multitude of bugs and break open the blocks, giving you a clear shot at the tank.

Ridley

1.

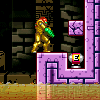
Not long into Ridley's area you'll find this tank sitting innocently in a small corridor. But don't go walking straight over to it or you'll fall down through fake blocks planted in the center of the room. Instead, stand on the block four blocks to the left of the door you entered via, then jump left and you should make it easily to the tank's position (you might still not make it, but the Power Grip lends a helping hand).

2.

This tank's hidden in the same room as Unknown Item #3 right beyond Ridley's den. You'll find it over to the left beyond the Chozo Statue hiding behind an Unknown Item block.

3.

Upon defeating Ridley, backtrack and keep going right to eventually reach a long green corridor full of pipes flying bugs spew forth from. What you can't see first off is that there's a hidden tunnel below the pipes, use bombs to break through near the entrance of the corridor and you'll find this tank hidden inside the narrow confines of the tunnel.

Chozodia

1.

Try catching this tank on your way to Mecha Ridley's room as it's nearby and can save you precious minutes if you're playing for a fast time. Head all the way up to the room right next to Mecha Ridley's domain. Stand up against the wall blocking your path and run back into the corridor on the left. Charge up the Speed Booster and spin jump over to the slightly raised platform in front of the door on the left.

If aimed properly you'll blow through a group of Speed Booster blocks in the floor, revealing a large corridor below. Now for the tricky part. The tank's waiting down in the right corner of the corridor, but the entire tunnel's filled with green laser alarms. Trip one of these menaces and a shutter will seal off the tank, so don't trigger any alarms.

A good (but still tricky) way to grab the tank is to Shinespark from the left end of the corridor to sneak past all the alarms and go straight into the tank. Build up the Speed Booster in the corridor above and drop down below before the charge runs out. To aim yourself properly you'll need to hop off the platform slightly and hit A before touching the horizontally-aligned alarm below.

Don't go too far though or you'll hit the edge of the platform the tank lies on. Aim the Shinespark correctly and you'll soar right into the tank. Phew.

2.

Recover Samus' Power Suit, then proceed down to the glass tunnel connecting the Mothership to the ruins. Blow the glass open with a Power Bomb and go down to the bottom left corner of the cliff. Break through the wall there with another Power Bomb and descend through the hole in the floor of the following room. Descend the shaft and go left to find a sloping room filled with the small creatures you would've seen in Kraid's area.

Clear them out and run back down the slope to build up the Speed Booster's charge. Run back into the shaft and crouch. Quickly walk over to the center of the shaft and Shinespark straight up. You'll blow through a few Speed Booster blocks hidden up in the cave above and snag this tank on the way up a long narrow shaft.

3.

Watch out, you're looking at probably the toughest item to pick up here. If you're not a fan of Shinesparking be warned, the Speed Booster's the only way you'll find this tank. Follow these directions closely and with practice you should manage to track this sucker down without much frustration. Firstly, go back up to the large room connected to the Chozo Warrior boss room (where you recovered Samus' Power Suit).

Head into the underwater part of the room and make your way up to the tall shaft through the right door. At this point you'll want to break through both Missile blocks right below you as you'll need to use the narrow tunnels they conceal to get around the wall ahead covered in Screw Attack Blocks. With both blocks destroyed, go back down underwater in the previous large chamber.

At the very bottom you'll have enough room to run around to build up the Speed Booster's charge. From the left corner, run over to the right and crouch when Samus begins flashing. Quickly jump up to the next platform and Shinespark into the slope on the left to give yourself more charge time. Space Jump right up to the platform at the very top and activate the Morph Ball (use the slopes on the platforms on the way up to prolong the Speed Booster's charge).

Shinespark to the right and you'll hit another slope before going through the door. Press down *just* before going through the door and roll through. Release the D-Pad as you go through the door. You'll emerge in the shaft and land right on the edge of the pit, hold left to fall down into the tunnel and roll through to bypass the Screw Attack Blocks. Descend further down the shaft to a tiny alcove along the left wall.

Stand up quickly and Shinespark into the tiny slope up against the left wall and press down just as Samus hits it to earn yourself more charge time. Then fall down and hug the right wall to land on another small platform. Shinespark into the right wall and you'll soar through a long corridor before finally reaching the Energy Tank at the far end. Good luck with this one, you'll rightly need it.