


Chapter 15: Mining Operations
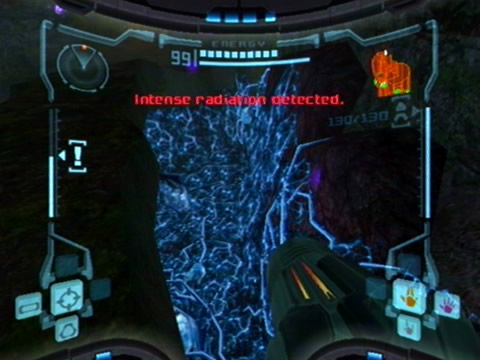
Avoid these deadly intense Phazon deposits.
This place is by far the dingiest part of Tallon IV, as this area is filled with the highest concentrations of pure Phazon on the entire planet. Naturally, the Pirates have set up mining operations everywhere here to harvest the deadly substance, so you'll be coming up against some pretty heavy opposition here.
We've also got a long and tough journey through these mines, so get ready for a challenge. Go through the door ahead to find another tunnel filled with the deadly Phazon. Cross the corridor to reach the Main Quarry, a huge area filled with several Pirates wandering around. Over in the far corner of this area above a force field are two Mega Turrets, these guns are far stronger than their normal counterparts.
Scan one and use Super Missiles to blow them apart. Two buttons near the force field must be scanned to deactivate the field. Before going through, climb up the metal ramps to reach the structure high up on the steel pillars. Deal with the Space Pirates that attack, then from here you can find Missile PM.01. Once you've grabbed the missile, go over to Save Station Mines A below to save your game before proceeding on.
Go back out into the Main Quarry and head through the door beyond the force field. The next corridor houses two more Mega Turrets in the roof, quickly scan the console to the right of them to switch them off. Behind you is a missile hidden behind a wall but you'll need a Power Bomb to break through anything containing Bendezium.

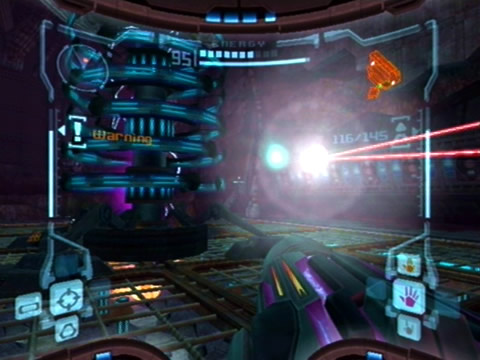
The Phazon Mines present a very gritty environment.
If you look down below the gratings on the floor you'll see small streams of Phazon running through the room below, but you'll be safe from it here. Go through the door ahead to reach the Mine Security Station. Go down the corridor but watch out for Shadow Pirates, use your Thermal Visor to easily see them.
Don't worry about the force field blocking the red door you'll find, keep on going down the winding corridors. Walk up the ramp and proceed around the corner. Down this next corridor several Space Pirates wearing purple gear will drop down out of the ceiling. Scan one to reveal them as Wave Troopers, the only way to injure them is to use the Wave Beam.
Clear them all out and go to the end of the winding corridors to find a door in the roof. Go up and head through the next corridor while watching out for two Shadow Pirates. At the end of the corridor go up through the door in the ceiling. You're now in the large room called the Elite Research. Deal with the two Pirates wandering around then look around the room.
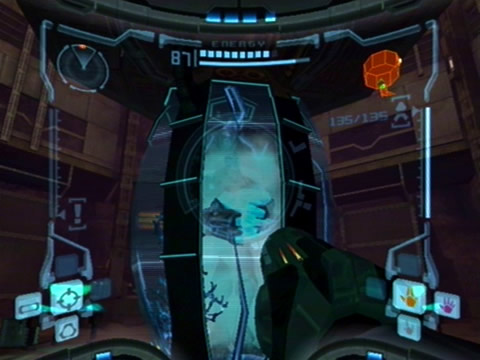
In the center is a huge stasis tank containing the Phazon Elite, a hideously ugly Space Pirate infused with pure Phazon - the Pirates are now trying to infuse themselves with Phazon and are getting pretty foul results.
Scanning the tank reveals that it contains Bendezium alloy, but you won't be able to break it open yet without Power Bombs. One of the consoles around the tank has the Elite Pirates Pirate Data entry, another console will lower down the three platforms on the wall so you can climb up. Up the next level of this room you'll face more Wave Troopers, finish them off and lower the next trio of platforms via the console behind the retractable shields.
The Pirate patrols of the mines won't be happy to see you.
There's also an interesting console to scan alongside the platform-activating one, the information there is a security alert which notifies all the Pirates of your presence on the planet - so their command now knows you're here. Climb up the platforms to reach the top level of the room. At the top behind a range of consoles you'll see a yellow Space Pirate, this one's a Power Trooper, so use the Power Beam to take it down.
From here you can now use the Pulse Beam in the ceiling to find Missile PM.03. Use the Spinner to rotate the beam (eject yourself out of the Spinner by planting a bomb), and scan the console to fire it. Once you've got the missile, use the beam to fire open the wall opposite to uncover the next door.
Make sure you don't fire the beam while it's facing you at the console, the Pirates have no concept of Occupational Health & Safety, so you have to be careful. Descend the next shaft via the Spider Ball track, and be careful of the electrified pylons down below.
The next room is the giant Ore Processing area. Two Power Troopers will greet you here, try to defeat them without taking too much damage, as they're energy weapons can fire quite rapidly. Now this room has a puzzle to solve. You'll need to use the Morph Ball slot behind the giant pillar in the center of the room to rotate each section of it.
The hologram next to the slot shows the current positioning of each pillar section. There's three different colored Spider Ball tracks leading up the pillar, you'll need to align them to reach the upper parts of the room. First, bomb the slot once to rotate the pillar so the blue track lines up with the floor above you. Climb up there and walk around the walkway to the next Morph Ball slot.
Bomb it twice to line up the red track with the floor above you, then drop down to the ground floor. Bomb the first slot three times to align the lower pillar section's red track with the middle section. Climb up the red track to reach the second floor. Go around to the door on this walkway, beyond a gap here is the third slot machine, but it's blocked by a pile of rubble and you won't be able to access it now.
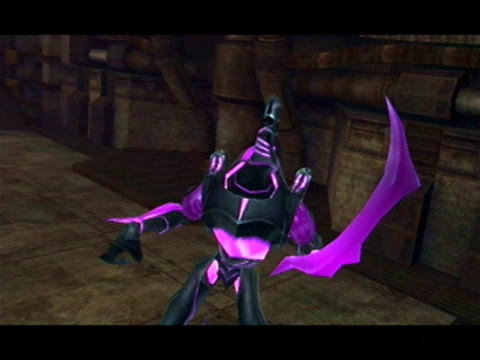
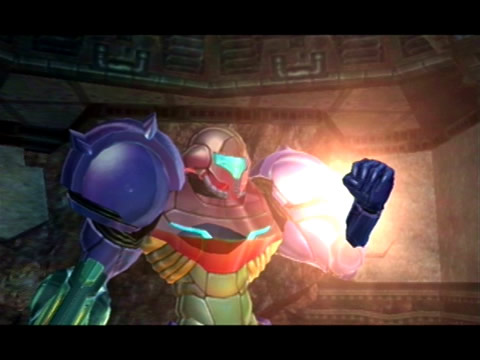
Elite Pirates are never a good sight.
Instead go trough the door to reach another shaft leading down filled with Scatter Bombus. Destroy as many as you can then climb down the Spider Ball track. The following room contains an elevator leading down to Phazon Mine Level Two. Scan the button and jump on to ride it down (look out the window as you descend to have a great view of the massive Impact Crater). Once at the base of the shaft blow open the crates to find energy/missile refills then head through the door.
In this next corridor, you'll spot a small crate resting atop a ledge around the corner (where the yellow gas is seeping out). Shoot the crate and it'll explode, knocking down two Pirates hidden in roof sections ahead. You'll also reveal Missile PM.04 just behind the crate, jump up there to claim it.
Go through the door at the end of the corridor to reach the Elite Control - this room contains a heap of scannable consoles and Pirate Data so you'll be here a while. Walk around the corner ahead to spot a large stasis tank ahead. This time the Pirate inside the tank will break out to attack you! Scan the massive creature to reveal it as an Elite Pirate.
You'll be encountering several of these monsters throughout the mines, check the bosses guide for tips on taking them down. Once you down the Elite Pirate it'll explode, destroying the force fields blocking off passages around the room. You'll now be assaulted by white Space Pirates - Ice Troopers. Use the Ice Beam to finish them off, if you manage to freeze one use a missile to blow it apart. Ascend the room via the ramp in the corner to beat all the Ice Troopers.
Once they're all gone, go back to the bottom floor and start scanning all the consoles for a wealth of info. The door behind the Elite Pirate's stasis tank leads to a blocked-up tunnel, so don't worry about it for now. The force field blocking the door at the top of the room can be disabled by scanning the right console along the wall near the field.
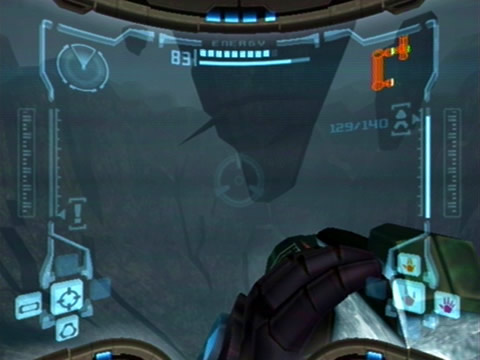
The Impact Crater is clearly visible from this elevator shaft.
Throughout this room you'll find the Metroid Prime/Impact Crater, Chozo Studies, Prime Mutations/Gate System, Chozo Ghosts, Prime Breach/The Key, Chozo Artifacts/Artifact, The Hunter & Hunter Weapons Pirate Data entries - lots of reading to do. Once you've cleared everything go up through the door in the roof on the top level.
In this next room, drop down into the half-pipe ahead. Puffers will float down into the room and fill the air with their poisonous gases, quickly run over to the next door before you take damage from the poison. The next huge room is the Omega Research, where you'll face more Wave Troopers and Power Troopers. Deal with the two Wave Troopers that drop down into the shaft on the right.
Scan the button there to deactivate the force field, then deal with the Power Troopers in the area beyond. Way up opposite the door you entered the room via is the Map Station room, but the door's blocked by rubble. Down below in the area where all the Elite Pirates are standing in their stasis tanks, you'll find the Omega Pirate Pirate Data entry.
Scan the remaining consoles before exiting the room via the door in the floor. Go through the next corridor past the sleeping Elite Pirate to find the Central Dynamo. This room contains your first Power bomb, but you'll need to defeat a cloaked Sentry Drone before finding it. Jump down into the main open area of the room to face the drone.
You won't be able to lock onto the drone, instead just fire away at it with the Power Beam and try to pull off a few missiles or charge shots. A well-aimed Super Missile will take it down (or use the Wavebuster if you've picked it up early), but try to stay away from it to avoid visor interference. Once the drone explodes it'll blow open a small supporting beam of the central dynamo structure, giving you access to the lower part of the floor below the grating.
Defeat the cloaked Sentry Drone to uncover your first Power Bomb.
Go down there and use the Morph Ball to wind your way through the electrified maze, blowing up the small objects along the way to open up new paths. When you reach the center you'll finally have found your first Power Bomb! Samus will then drop a Power Bomb which takes out the entire dynamo structure above you so that you can get back above the grating.
At one end of this room you'll find a door leading to a Save Station, the other blocked-up door (destroy the rubble with a Power bomb) leads to a corridor where four Mega Turrets wait to fry you. Quickly activate the Morph Ball and drop through the small hole on the right, then roll along the lower section of the floor to the other end of the corridor (the Turrets will keep firing at you even though they can't breach the floor).
Go up through the opening at the end and quickly scan the console just ahead to switch off the Turrets. The next room is the Metroid Quarantine A room. In here the Pirates keep Metroids in a cavern full of Phazon. You'll spot several Pirates below standing near the force field keeping the Metroids in the cavern, but if you scan the right console the field will go down and the Metroids will attack the Pirates!
Once they've finished them off deal with the Metroids using Super Missiles, or remember to use the classic trick of freezing them with the Ice Beam before firing a missile. Scan the remaining consoles in the room and keep an eye out for a Power Bomb refill appearing, scan it for your logbook. Out in the cavern of the Metroid holding area, you'll find an uncrossable canyon filled with Phazon.
Invisible platforms are hovering around over the Phazon, but you'll need the X-Ray Visor to proceed so we'll head back now. Go back to the Central Dynamo, but once there you'll have to deal with four Ice Troopers.
Deal with them and save your game before heading back to the Omega Research room. Once back there one of the Elite Pirates in cryosleep will have broken out of its tank. Use the same tactics as with the first one to take it down.
With the Elite Pirate down, go up to the top of the room and destroy the rubble blocking the door opposite the one leading back to the Ventilation Shaft to find the Map Station waiting inside. The map reveals that the mines has three levels, so there's a lot of exploring to be done.
When you reach the Ventilation shaft, use a Power Bomb to blow open the small grate ahead so you can reach the controls for the fan system, once on it'll blow the poison gas and Puffers away so you can reach Energy Tank PM.01. Use the half-pipe to boost to return to the Elite Control room. You'll have a pack of Shadow Pirates waiting in here, deal with them all before leaving.
Now you'll be able to destroy the blockage in the narrow tunnel through the door behind the Elite Pirate's cryotube, this way leads to an elevator leading down to the third level of the mines, but there's not much you can do there so don't bother going down just yet. Instead go back up the elevator to level one. Once there head back to the Ore Processing room.
Inside you'll find a pack of Metroids flying around, if one grabs you drop a Power Bomb - they'll be incinerated by the blast. Go over to the highest slot machine and use a Power Bomb to clear the rubble. Bomb the slot twice to line the yellow track up with the top level, then go down and line up the other two pillar sections with the upper section's yellow track.
Samus receives her Grapple Beam ability.
Use the tracks to climb up to the very top of the room, here you'll find more rubble blocking a door. Blow it up with a Power bomb and go inside. Here you'll find another vital and classic item - the Grapple Beam! Once you claim it you'll then be able to use all the Grapple Points to swing around on, just like Tarzan. Go back outside and scan one of the Grapple Points on the roof for your logbook, then press and hold L to swing onto one.
Swing over to the door opposite you and head inside. Use the Morph Ball in the next room to enter the Waste Disposal chute, work your way down the room to the door below and head through. You'll now be back in the Main Quarry, where a ton of Space Pirates are waiting.
Try to stay up on the platform as you deal with them, because when you scan the console on the left the crane will swing around and you'll be able to swing around on the Grapple Point it carries. Have some fun swinging around before saving your game and returning to the Tallon Overworld.