


Chapter 4: Restoring the Power Suit
Use Map Stations to help navigate the game.
Once the Hive Mecha shuts down the bridge will reappear and you'll have a clear path to the Missile Launcher. Grab your prize, then blow open the Blast Shield on the door ahead and go through to find your very first Energy Tank (CR.02) waiting inside. Blow open the crates on either side of the Energy Tank and scan the missile ammo you'll find inside.
A small opening in this room leads off to the unknown, but you'll need the Morph Ball to get inside - that's the next powerup we'll be tracking down. Go back through the Hive Totem and the Plazmite-filled tunnel to reach the Ruined Gallery again. Fire a well-aimed missile at the War Wasp Hive in the roof to destroy it, then jump down to the safety of the ledge below the door on the opposite side of the room.
Before you do though, listen closely and you'll hear a humming sound indicating that there's an item nearby. Jump over to the ledge suspended above the acid water and turn around. Shoot the Blastcaps, then blow open the wall behind them to reveal Missile CR.07. In a corner of this same room you'll spot a door with a Blast Shield on it. Blow it open and head inside to find the Map Station for the Chozo Ruins - after downloading the map you'll see just how big this entire area is.
Go back to the Ruined Nursery and save your game in the small room behind the tree. Now it's time to go back to the Main Plaza room. Go over to the door with the Blast Shield you saw earlier and blow it open. Head inside and go through the next winding corridor, stopping at each Scarab swarm to clear the way. The next room - the Ruined Shrine - is where you want to be now.
These beetles live everywhere in the ruins.
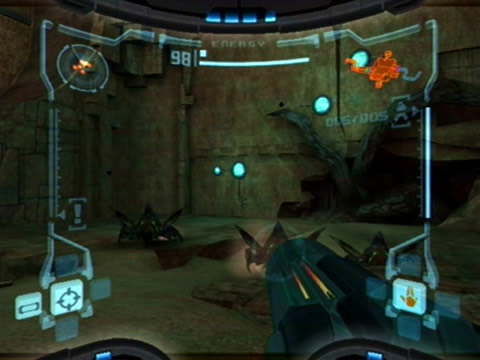
Jump up over the large elevated half-pipe and you'll easily spot the Morph Ball up on a ledge across the room. There's always a catch though - when you walk up to the ledge a wall will rise and block your path. An entire army of Beetles will jump up all around you and attack, use missiles as well as the Power Beam to knock down several at once.
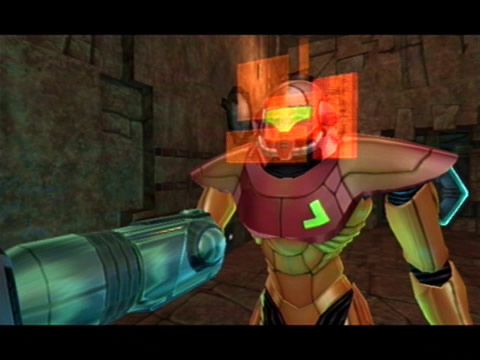
After several rounds of Beetles come through, there'll be a pause and a giant Plated Beetle jumps up to attack. Scan the monster before attacking it, but watch out when it rams, strafe to the side to avoid it. Frontal attacks just bounce off the creature's thick hide, so you'll need to get behind it and rip into its red tail.
Strafe around it and when it lunges, quickly get behind and rip into the tail, a few well-aimed shots will knock it down for good. Once the Beetle's dead the wall lowers down, leading you to your next prize - the Morph Ball.
Roll through the small opening under the half-pipe and journey back to the Main Plaza. Once back outside, go over to the left side of the room beyond the half-pipe and climb up the ledges there. Cross over the rocky platforms and walk over the giant vine-entwined bridge. Watch out for the War Wasps emerging from their nests, quickly go through the door you'll find across the bridge.
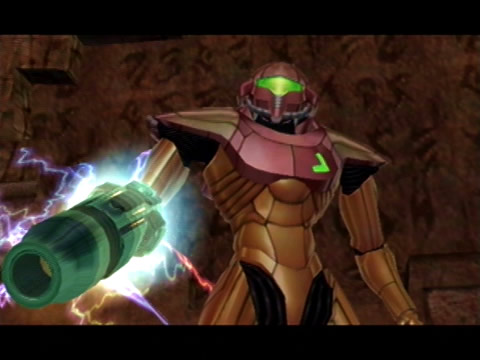
The Morph Ball is vital for the success of this mission.
Use the Morph Ball to navigate through the small openings in the next winding corridor. You'll then reach a large room filled with poison - the Ruined Fountain. It'll be quite dark in here so don't shoot the Plazmites flying around - they're the only source of light and one false step you'll go swimming in acid. Work your way around the right side of the room to reach the door on the left side, and scan the shimmering wall behind the fountain to record the Hatchling/Purification Chozo Lore entry.
In the next corridor, slowing creep around the corner as there's a bunch of Shriekbats at the far end, quickly scan them and blast away before they fly straight at you. If you look up in this open-air corridor you'll witness a magnificent looking structure just ahead - you're looking at the outside of the Arboretum. Blow open the Blast Shield on the door around the corner and head inside.
This room has a gargantuan sized tree in the center winding its way up the tower and into the walls. For now we need to get to the other side of the tree. Turn left and scan the Reaper Vine lashing out of the wall ahead. Shoot the eye and it'll retract into the wall, quickly jump across the platforms above the poison and watch out for a second Reaper Vine.
Enjoy the detailed architecture of the ruins and take in the sights.
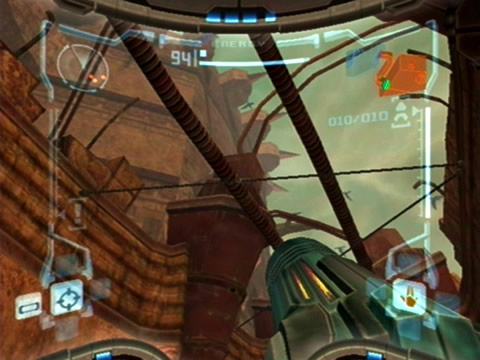
Climb up the circular platforms to reach a wooden bridge, cross it to reach the other side of the room. Head down the walkway, watching out for two Reaper Vines and blow open the Blast Shield on the door to head through (there's a lot more to do in the Arboretum, we'll be coming back later). Trek through the next corridor (marvel at how the steam gushing out of the pipes fogs up Samus' visor) to reach a tall room - the Gathering Hall.
Blow open the Blast Shield on the door up the ramp on the right to find a Save Room. Once your game's saved, go back to the Gathering Hall and head across to the door beyond the cluster of Blastcaps. Inside you'll find a tunnel leading to a room with Shriekbats, Blastcaps and a pair of staircases leading down into a pond of poison.
You'll also hear the blaring humming sound nearby, so go down to the base of the stairs and blow open the wall on the left to find Missile CR.13. Go up the stairs and around the winding corridor to find a door ahead with Shriekbats above waiting to strike. Fry the Shriekbats and blow open the Blast Shield. You'll now be in the Watery Hall.
Samus recovers her trusty Charge Beam ability.
Around the corner of this room is a large gate structure blocking access to an item you'll need, but you have to scan four special runic symbols in this room before opening it up. The first one is on the wall just to the left of the door you entered via, each symbol has a distinct shape so they won't be tough to find. Jump across the platforms in the poison (not the elevated ones) until you spot a bunch of Blastcaps on top of one. Fry them all to reveal the second symbol hiding beneath.
Keep going to reach the base of the gate - where the third symbol awaits on the wall. Once it's scanned, go back to the entrance of the room and climb up onto the elevated platforms. Watch out for the Reaper Vines along the way, then once you reach the platform closest to the gate, look at the wall on the right to find the fourth symbol. Scan it and a new symbol will appear on the center of the gate.
Scan that symbol and it'll open, clearing your path to the Charge Beam lying in wait in the alcove ahead. Don't forget to first scan the shimmering wall behind it for the Meteor Strike Chozo Lore entry.