Data
Guides and strategies
Media
Bosses Guide

Within the depths of Zebes you'll face mighty Space Pirate bosses before finding the Metroid hatchling and confronting the resurrected Mother Brain.
Hidden within Crateria lies the entrance to the Mother Brain's hideout - Tourian - but a huge statue stands guard at the entrance and will only yield passage once the four bosses represented on the monument are defeated.
Read on for the list of bosses and tactics to use against them (the "Go to walkthrough" links under each boss will take you straight to where they're encountered in the walkthrough).
Ridley
- Location:
Space Colony Ceres - Attacks:
Fire blast projectiles, Tail lash, Charge attack - Weakness:
Power Beam
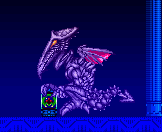
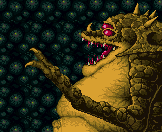
You'll locate Ridley hiding away at the rear section of Ceres. You'll see the hatchling sitting on the floor just before Ridley appears from the shadows. He'll begin to fly around the screen performing one of several attacks, including spitting fireballs that spread out once they strike the walls or floor. He'll also fly about lashing his tail around, try to stay clear as he hovers around.
Whenever he spits out the fireballs, jump up above them and stay clear of the ground or wall when they strike, as the fire will spread out. The battle can end in one of two ways, if you shoot Ridley enough that he becomes a heavy red colour, he'll fly up above the screen before swooping down and fly into the screen and away with the hatchling. If you take too much damage and your health drops below 29 he'll automatically leave. Once Ridley escapes you'll have only 1 minute to escape from the space colony before it completely rips itself apart.
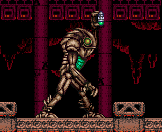
Torizo (Chozo Statue)
- Location:
Crateria - Attacks:
Arm lash, Sonic beam, Spore bombs - Weakness:
Power Beam, Missiles
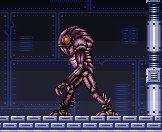
As you grab the Bomb power-up and try to leave the room, the only exit will rudely seal and you won't be able to open it. The statue holding the Bomb power-up will promptly come to life and attack. It'll march back and forth across the room, try to jump over it as it passes. If it stops in a corner it'll either emit large sonic beams or it'll spit out small bombs that spread across the room.
You can easily destroy the bombs with a few shots, but for a quick victory go with using Missiles against the statue. Blast away at it whenever you can, but don't fire at it when it turns around, as your shots will go straight past without striking the target. Hold out for as long as you can, once the statue's head begins to crumble and fall apart victory will be just around the corner. Once it blows the door will unlock so you can safely leave.
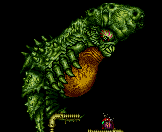
Spore Spawn
- Location:
Brinstar - Attacks:
Swing motion, Mini spores - Weakness:
Power Beam, Missiles
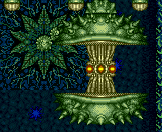
The Spore Spawn will only swing around the room in an effort to crush Samus against a wall or floor, so make sure you don't let it make contact. The huge main segment is connected to the background, so it won't be able to move around freely. Crouching down will easily allow you to avoid hitting it, but mini-spores will be floating down from pods on the roof so you'll need to shoot at them to avoid damage and gain energy and missile refills. After Spore Spawn has a few swinging rounds back and forth it'll open up and reveal the inner core. Now you'll have a shot at its weak point. Fire a Missile (or two if you're quick) into the core to damage it.
Once Spore closes up again it'll begin swinging around the room again, wait for it to open before unloading more Missiles into the core. After a few direct hits Spore will begin to swing around faster than normal, but it shouldn't give you much trouble. Watch the colour of Spore, the darker it becomes the closer you are to victory. After enough hits Spore Spawn will move to the center of the screen and oddly turn to stone, you can then move on up the shaft above the room to freedom.
Kraid Spawn
- Location:
Brinstar - Attacks:
Needle projectiles - Weakness:
Power Beam, Missiles, Super Missiles
This tiny form of Kraid will confront you just before you face the real Kraid. It won't be much trouble to deal with, only spike projectiles and small fireballs are your biggest worry. Pound it with Missiles to finish it off and don't forget to grab all the refills it drops.
Kraid
- Location:
Brinstar - Attacks:
Thorn projectiles, Fireballs - Weakness:
Charge Beam, Missiles, Super Missiles
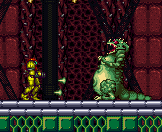
The real Kraid is the direct opposite of the tiny form. The giant is so enormous that you'll only see the top part of it initially. Once Kraid rises up out from the spikes fully he'll begin firing thorn projectiles around. If he opens his mouth he'll shoot out fireballs, but the more he opens his mouth the better. Whenever Kraid opens his maw unload as many Missiles or Super Missiles into his mouth as you can. Try to avoid his arm as it'll be moving up and down, sometimes it'll be hard to avoid hitting it with a Missile while aiming for the mouth.
If you manage to strike Kraid with a Super Missile or a number of Missiles, he'll completely rise up out of the ground and fill about half of the room. Jump up to the platforms above and keep attacking his mouth. The trouble is, loads of thorn projectiles will fly out from his chest and stomach, other thorns will also be bouncing around the room, so you'll have a tough job dodging them all. If Kraid doesn't open his mouth, fire a single Missile at his mouth and he'll open it partly, he should then open it fully after a second. Keep pounding Kraid and you'll send him back into the ground in no time.
Crocomire
- Location:
Norfair - Attacks:
Charge attack, Plasma balls - Weakness:
Charge Beam, Missiles, Super Missiles
When you drop into Crocomire's fiery corridor head right to find him. This large eight-eyed beast can't be defeated by any of your weapons, instead you'll need to push him into the lava below to finish him off. On the far left of the corridor the wall will be lined with spikes, so you'll need to make sure that Crocomire doesn't corner you into them. Before taking him on it's a good idea to have at least 15 Super Missiles ready.
If Crocomire stomps the ground with his legs and arms, he'll either charge forward or fire a multitude of flame balls from his mouth. Just like Kraid, Crocomire's weak point is his mouth. Every time he opens up, fire a Super Missile down his throat to cause him to step back a fair distance (if you hit him with Missiles he won't back up as far). Try not to waste any Super Missiles, if you run out of Missiles entirely keep pounding him with the Charge Beam.
After a while you'll see the cliff edge behind Crocomire, push him onto the weakened floor and he'll fall into the lava. You'll then witness a gruesome scene where Crocomire tries to climb back up but ends up melting in the lava. When he sinks down and the music changes, go back left all the way to the wall lined with spikes. The boss theme will kick in again, the wall will break down and Crocomire's skeleton will promptly jump up out of the lava, land, and break apart all over the floor.
Phantoon
- Location:
Wrecked Ship - Attacks:
Blue plasma projectile attacks - Weakness:
Super Missiles
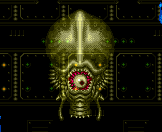
After exploring the derelict Wrecked Ship you'll find Phantoon skulking around in one of the lower rooms. He'll warp in before floating around the screen. He'll be semi-transparent for most of the battle so you won't be able to hit him with anything until he becomes fully solid. Phantoon will open his performance by dropping large blue plasma flames around the screen. He'll be firing these flames out all the time, you can either avoid them until they disappear or blast them with your Beam weapon to extinguish them.
After floating around for a while Phantoon will open his eye and vanish. If you're quick you can hit him while the eye's open before he disappears, try to score a hit with a Super Missile to add an extra punch. Phantoon will continue to drop flames while invisible, at this point get a Super Missile ready to fire. As soon as Phantoon appears his eye will be open, starting straight at you.
He'll also become solid so now it's time to fire a Super Missile at him. Be careful as when he appears a row of flames will descend from the ceiling. Once you hit Phantoon he'll disappear and reappear at the top of the screen. From here he'll fire several more blue flames that travel down in a circular path across the room, first from his right side, then his left. He'll repeat this for a while before going back to hovering around the room dropping flames.
A good way to avoid the circular-moving flames is to stand below Phantoon and to one side, fire away straight up and hopefully your shots will destroy the flames before they get too close. Another great trick is to fire up the Charge Beam - hold the charge - and somersault jump through the flames as they travel across the screen to harmlessly pass straight through them. Yet another method - and by far the easiest - is to simply activate the Morphing Ball, roll to the right corner of the chamber and wait for the first wave to strike. After the flames harmlessly pass by, roll over to the opposite corner to avoid the next wave. Keep this up until the barrage ends.
Wait until Phantoon becomes solid again before firing (he'll become solid after dropping out flames while he's invisible), and you shouldn't have much trouble beating him. You'll know once he's dead as he'll stop moving and flash for a few seconds before exploding and performing a flashy warp-out self-destruct.
Botwoon
- Location:
Maridia - Attacks:
Charge attack, Green fireballs - Weakness:
Missiles, Super Missiles
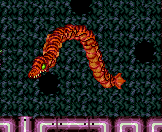
About halfway through the subterranean water caverns of Maridia you'll confront this water serpent. It'll be swimming around the screen often while weaving in and out of the four holes in the background. If the serpent tunnels down a hole and pops its head out it'll fire a few green fireballs, they shouldn't be too difficult to avoid. You'll need to score a hit on the head to inflict damage, try scoring as many hits as you can with Super Missiles but be careful as once you deal out enough damage the serpent will go wild and stream around the screen much faster than normal. It'll be tougher to hit the head now, but keep pounding away at it, once it blows the wall on the right will crumble and allow you to proceed.
Draygon
- Location:
Maridia - Attacks:
Gun turrets, Sting/Grab attack, Bomb spores - Weakness:
Grappling Beam
When you enter Draygon's room he'll take his time wandering in from the left wall. As you enter the room, drop down below and wait for the four mini-Draygons to swarm past. You'll eventually notice two gun turrets on each side of the room, quickly destroy them with Missiles before Draygon appears and try to avoid the energy balls they fire. When Draygon finally turns up he'll swim around the screen trying to ram into Samus. If he slows down and spews out small grey blobs, they'll land on the ground and slow Samus down if they grab hold of her.
Draygon's weak point is his yellow belly (ironic, he is a bit of a coward). You can fire as many Super Missiles into his belly as you can, but there's a much easier and quicker way to finish the crustacean. If Draygon lowers down to the ground and manages to grab Samus, he'll swim around while stinging Samus often. Notice how the remains of the gun turrets on the walls are sparking electricity? This is the key to Draygon's demise.
Switch to the Grappling Beam and fire away at the turrets, eventually Draygon will bring you close enough to one. When you manage to strike one of them, the Grappling Beam will draw the electricity from the turret through the beam and Samus to damage Draygon. Samus will also take damage while the beam connects, but it pales in comparison to the beating Draygon will receive. Keep holding out and eventually Draygon will let go and sink down into the ground below.
Golden Torizo (Chozo Statue 2)
- Location:
Norfair (Ridley's Lair) - Attacks:
Arm lash, Sonic beam, Spore bombs - Weakness:
Charge Beam, Missiles, Super Missiles
Not long after you enter the extreme temperature of Ridley's Area in Norfair you'll find a door in a large room that you can't open (it'll be grey in colour). Walk up to the door and another live Torizo (Chozo Statue) will promptly fall down from above. This one is a shade of gold, and as you damage it it'll slowly turn a duller grey. This one will be tougher than its Bomb power-up buddy, but it'll bear similar attacks.
The statue will march and jump around the room, it'll also fire the sonic beams and smaller energy balls. If it spews out the bombs quickly blast them to receive energy and missile refills. You might want to use the Charge Beam to deal out damage, as you'll need all the Super Missiles you have for the next two boss battles. The statue tends to avoid your missile volleys and actually snatches your Super Missiles out of the air before hurling them back at you, so keep all your beams active and stick to Charge Beam shots. Finish off the statue and head through the flashing door to find the Screw Attack.
Ridley Guards
- Location:
Norfair (Ridley's Lair) - Attacks:
Arm projectiles, Jump/Charge attacks - Weakness:
Charge Beam, Missiles, Super Missiles
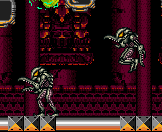
Just before facing Ridley you'll have to deal with these two grey bodyguards. You won't be able to damage them while they're grey, instead jump up above them and Space Jump back and forth while waiting for one to jump. When one jumps over the other it'll flash and become yellow, quickly fire a Charge Beam shot to inflict damage (save your concussive weapons for Ridley). Watch out for the arm projectiles they throw, once you conquer one wait for the other one to jump then fire away. Once you finish both off keep going left to eventually face Ridley.
Ridley
- Location:
Norfair (Ridley's Lair) - Attacks:
Fire blast projectiles, Tail lash, Claw grab attack - Weakness:
Charge Beam, Missiles, Super Missiles
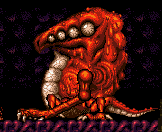
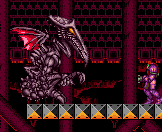
This time facing Ridley it'll be a fight to the finish. Once again he'll materialise from the background and begin flying around. Your biggest worry here is Ridley's flight pattern, as he'll be flying around the room randomly - try to avoid a collision as much as possible. Ridley will also swing his tail around and fire a range of fireballs. The best way to finish Ridley is to just pummel him with Missiles and Super Missiles. Unload all your remaining Super Missiles into him then let rip with either Missiles or Charge Beam shots. The Charge Beam appears to deliver heavier punishment when compared to Missiles, but has a slower rate of fire. Full Reserve Tanks will also certainly help here in case you take too much damage.
Try to avoid striking his tail as it won't cause any damage, go for the head and main body has much as you can. As you damage Ridley he'll slowly turn a heavy shade of red, once you finally finish him he'll explode and break apart, leaving you clear to find the capsule that contained the Metroid hatchling broken open and empty (don't forget the Energy Tank hidden under the door).
Mother Brain (1)
- Location:
Tourian - Attacks:
Gun turrets - Weakness:
Charge Beam, Missiles, Super Missiles
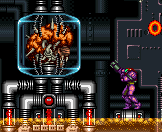
Near the heart of Tourian you'll enter a hallway filled with gun turrets and lava. At the far end of the hallway is your final target - Mother Brain - awaiting the final battle. Break through the energy barriers barring your path with Missiles, once you reach Mother Brain you'll find it encased in a glass container, just like in the original Metroid. Hammer away at the glass with Missiles to break it open, then fire away at Mother Brain itself with everything you've got. The only trouble you'll have is avoiding the gun turret's fire and the circular energy balls. Keep holding out and after a few rounds Mother Brain's container and defenses will crumble and it'll fall down to the floor, but don't breath a sigh of relief just yet.
Mother Brain (2)
- Location:
Tourian - Attacks:
Laser projectiles, Bombs, Energy-draining beam - Weakness:
Hyper Beam
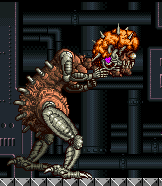
Once Mother Brain falls to the floor and the platforms in the room crumble, it'll slowly begin to rise up out of the ground with a massive T-Rex dinosaur-type body attached. You won't have any trouble avoiding a collision, as Mother Brain will stay on the left side of the room. This part of the battle will certainly be much more trickier than the first part. The head is the weak point, unload Missiles, Super Missiles and the Charge Beam into it. As you attack the head it'll fire a range of deadly projectiles, including a bomb, fireballs and a continuous beam from its arms. Stay low and quickly jump up as it fires at you.
If a bomb deploys quickly jump up as upon exploding it'll send out a shock wave along the floor. There actually isn't much point in firing at the head, as you won't be causing the Mother Brain any real damage. Keep firing anyway, as when your Missiles begin to run low Mother Brain will begin charging up energy in its brain, it'll then fire out a massive beam that completely paralyzes Samus and slams her against the wall while draining your energy, Missiles, Super Missiles and Power Bombs. When it releases the beam, Samus will drop to the ground and slowly attempt to stand up, but once your energy drops below about 200, Mother Brain will charge up its brain, ready to deal the final blow, but the last thing Mother Brain would expect occurs.
Just before Mother Brain can finish Samus, the fully grown Metroid will zoom into the room and attack Mother Brain, attaching itself to Mother Brain's head. It'll begin to suck Mother Brain's energy away, after a few seconds the Metroid will release itself and Mother Brain will obediently sit down in the corner, completely drained. The Metroid will then hover down to Samus and amazingly begin restoring her life energy. As the Metroid restores Samus, Mother Brain will drool (the slimy thing) and oddly come back to life. It'll begin attacking the Metroid, then once your energy is fully restored, Mother Brain finishes off the last Metroid in the galaxy (or so was thought).
Its remains will rain down over Samus and she'll begin to flash. When you regain control Samus will now possess a new beam weapon, the Hyper Beam. This devastating beam is far more powerful than any other, fire at Mother Brain's head and you'll see why. Each shot will send Mother Brain's head screeching and reeling back, keep pummeling away and you'll notice it'll begin to turn a red colour. After a few more final shots Mother Brain's body will explode, the head will plummet to the ground and disintegrate, ending the Space Pirates evil scheme once and for all. But there's no time for cheering yet as a timer will appear on-screen and you'll have 3 minutes to get back to your ship and escape before the entire planet explodes.


