Data
Guides and strategies
Media
Chapter 10: The Final Confrontation
Now that Ridley's gone for good, you'll finally be able to enter Tourian and face the Mother Brain. Before leaving Ridley's room, go through the door on the left to find Energy Tank no. 4 (Norfair). You'll also finally find the Metroid hatchling's container in this room, but alas, it's broken open and the hatchling is nowhere to be seen. Leave this area and head back to the long shaft containing the Save room and the red Keyhunters. Once back there, head to the top of the shaft and go right. In this next shaft, you'll be able to find Energy Tank no. 3 (Norfair).
Once you've got it, head up to the top of the shaft (watch out for the boulders), but instead of going through the door on the right, walk through the wall on the left to find a hidden door. In the next room you'll be able to find missile no. 14 (Norfair), you'll also be able to reach Power Bomb no. 3 (Norfair). Once you've found them, head through the door on the left of the room containing the missile to find another corridor with rising and falling lava.
At the far end of this corridor below the shaft leading up you can find missile no. 15 (Norfair), once it's secured head up the shaft, but watch out for the Keyhunters. At the top, go through the door, then head through the long corridor to find yourself back in the main Norfair area. From here, head back up to Brinstar.
Back in Brinstar, before you head back up to Crateria, you'll be able to pick up Energy Tanks no. 4 and 5 (Brinstar). You can also pay the Dachora (the creature that shows you how to perform the Shinespark move) a visit if you feel like it. Go back to the area where you first entered Brinstar to pick up Power Bomb no. 3 (Brinstar), if you haven't already, you'll also be able to find missiles no. 9 and 10 (Brinstar) and Energy Tank no. 3 (Brinstar).
Once you've found everything head back up the elevator to Crateria. Now you should only have missile no. 3 (Crateria) and Super Missile no. 1 (Crateria) left to find. Once you've found them, head back to your ship to refill your weapon payload (if you want to), then head down to the room containing the boss statue. Once you get there, while the creepy music plays in the background, each statue's eye will explode and a spirit will fly up out of the statue. One by one they'll all do this, once all the spirits have left the statue, it'll sink down into the floor below and open up a passage in the floor. Drop down to find the main elevator leading down to Tourian.
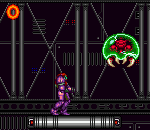
You'll notice that Tourian will be full of pipes and metal terrain, quite a technological area, which also has a lot of defenses. Down the first shaft, you can save your game in the Save room on the right, but once you're ready go left. You should also notice that you'll already have most of Tourian's map, so you can see where you're going. Throughout the next few corridors and shafts you'll have to fight against several Metroids, make absolute sure that they never grab onto Samus, as they'll begin draining her energy fast. If one grabs hold quickly leave the room to break free.
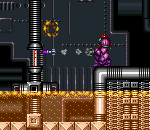
To destroy each Metroid, freeze it then fire a Super Missile at it to finish them. Also watch out for the circle beams that appear from the red and blue turrets in the floor and ceilings. Eventually you'll drop into a room with light brown walls, you'll notice that the warning theme will begin playing. Watch out for the giant Sidehoppers in the room, you can only destroy them with Super Missiles. Go through the door on the left of the room to enter a corridor with a mini-boss Chozo Statue straight ahead, but wait!
You'll be thinking to yourself, isn't there only two Chozo Statues listed in the bosses guide?! Don't worry, you won't have to fight this one, just walk straight through it and it'll turn to dust and crumble into the ground. You can probably guess what killed it, can't you? Go into the next corridor to find it filled with dead forms of Ripper, Skree and Geemers that crumble to dust if you touch them.
It's now time to find out what's going on. Go to the left side of the room and the screen will stop moving about halfway through. Wait a few seconds, then a blue Sidehopper will hop into the screen. You'll then hear a growling sound and the Metroid hatchling, now a fully grown Metroid, will fly into the room and grab hold of the Sidehopper. It'll begin draining the Sidehopper's energy, before detaching itself from the Sidehopper's drained body.
The screen will then move to the left, but you can't get away from the Metroid. It'll cling to Samus and begin draining her energy, but once it drains your energy so that all you have left is 1 unit of energy, it'll let go and seem to remember that Samus was its "mother" that watched it hatch back on SR388. It'll fly around for a bit before leaving the room. Go left and blast open the debris blocking the door, then head through and descend the shaft. Shoot through all the debris, then head through the door on the left at the base of the shaft to find Energy/Missile Reload stations. Once you've filled up, go through the door on the right of the shaft.
Go through the next corridor to find a guard door at the end. Blow it open and descend the shaft in the next room. You can save your game in the Save room down the shaft but keep in mind that you won't be able to leave Tourian, the door in the Metroid's room earlier will have sealed off. Drop down to the bottom of the shaft and blow through the door there to find the Mother Brain's new hideout.
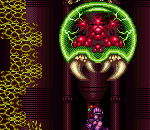
In this room lava will slowly rise up from below to cover the floor, you'll have to break through several barriers before facing the Mother Brain. Use Super Missiles to break through, just watch out for the gun turrets firing projectiles around the room. Eventually you'll reach the Mother Brain encased in glass, refer to the bosses guide to finish off the maniacal leader of the Space Pirates. Once you've finished both forms of the ugly beast, the time bomb will be set and you'll have three minutes to get back to your ship before the entire planet explodes. The wall on the left of the Mother Brain's room will blow open, so quickly go through.
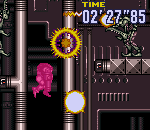
The screen will be constantly flashing with explosions rocking around everywhere, so you'll have to concentrate hard to get out of here. In the next corridor, several pillars will close to try and block you in, just blast them with the Hyper Beam to break through. Drop down through the door in the floor to find yourself in a shaft leading down with Zebesians on the walls. Ignore them and drop down to the door at the bottom. Head through to enter a large corridor filled with more Zebesians. Jump up to the platform with the first Zebesian you'll see and run over to the right.
Once you reach the end, jump up through the hole there and go left. Once you see another hole in the roof jump up and go right to eventually find a door. Go through to find yet another massive chamber filled with pipes and Zebesians. Use the Space Jump to fly to the top of the room, then head through the passage on the right. Drop down the hole ahead and go left, then fall down the long shaft leading down. Once at the bottom, go into the large area and climb up to the top left corner to find an opening in the roof. This next part you'll be able to use the vertical Shinespark jump to fly up the next shaft ahead.
Through the door on the right you'll end up back in Crateria and find the "Old Tourian" shaft that'll begin filling with lava, so you'll have to climb up quickly. While back in the other room in Tourian, begin running towards the door on the right and keep firing to blast any Zebesians along the way. In the next room the Speed Booster will kick in and you'll blast through a few Zebesians and the wall leading into the shaft.
As soon as you enter the shaft, press down, quickly run over to the left side of the shaft while Samus is flashing, then jump straight up. You'll fly straight up the shaft and make it to the top in seconds. Head through the door in the roof and climb up the rocky shaft. Once at the top head right, but along the way you can help the Etecoons and Dachoras escape from Zebes by heading down to the room that contained the Bomb power-up.
Once inside you'll see them running around, shoot open the wall on the right of the room to allow them to escape. Quickly head back up to the rocky cavern above and go out to the open area where your ship is.
The entire surface will be utter chaos, with explosions everywhere while the background continually flashes. Tear over to your ship and hop in to escape from Zebes before it blows, then enjoy the finale and credits, you've earned it!
Finale
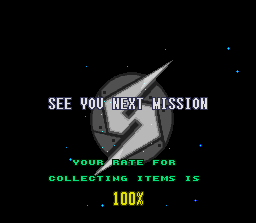
Well, that's it. With this (spoiler-filled) walkthrough you should have managed to get 100% of all the items in the game, and if you're fast enough you should get a time somewhere between 2:20 hours and 3:00 hours. This way you'll be privileged with having the best ending available (see game endings) as well as having a 100% item collection rate.
Chapters:
- Into the Fire
- The Haunted Ship
- Dive into the Deep Blue
- A Journey to the Center of Zebes
- The Final Confrontation


