Data
Guides and strategies
Media
Chapter 8: Dive into the Deep Blue
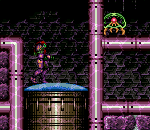
Once you send Phantoon back to the grave the ship's power will be restored and you'll be able to explore to your heart's content. Leave Phantoon's room and go over to the far left side of the corridor to find the Map room. Watch out for the walking robots (they occasionally fire energy balls) and the floating green spheres. Once you've downloaded the map, go back up to the main shaft of the ship.
You can find Super Missiles no. 1 and 2 (Wrecked Ship) not far up the shaft, once you've found them climb up to the very top of the main shaft and head through the door in the roof. Blast all the Keyhunters and green spheres in the next corridor to open the doors, you can find missile no. 2 (Wrecked Ship) through the door on the right, once you've found it go through the door on the left side to reach the open area in Crateria. Out here you can find missiles no. 4 and 5 (Crateria).
Once you've found them, go over to the left side of the area and find the breakable blocks in the ground. Blow them open then head down below to find a door on the right. Go through the enclosed room and head back into the Wrecked Ship.
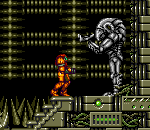
At the end of the corridor you'll find the statue that takes you down to find the Gravity Suit. Once you find the Gravity Suit you can also find missile no. 3 (Wrecked Ship) and Reserve Tank no. 1 (Wrecked Ship). Head out through the door in the Gravity Suit's room to land back down in the open area in Crateria. You'll be able to find missile no. 6 (Crateria) in the corner of the area, once you've found it head back inside the Wrecked Ship.
Go through the door below the Save room's door to find a corridor partly filled with water. Head through the door on the right-hand side and go through the hallway lined with spikes. You'll then find yourself in a shaft leading up, at the very top blow open the roof to find the room containing Energy Tank no. 1 (Wrecked Ship), then head through the door on the right to leave the ship and enter a new area of Crateria. Swim through the enclosed lake, eventually you'll reach another door. Head in and descend down the large shaft. Go through the door at the base of the shaft to find yourself in a room with complicated narrow tunnels everywhere.
To get through to the door in the bottom left corner of the room, drop down below the door above and use the X-Ray Scope to reveal a hidden passage behind the terrain. Break through the destructible block to gain entrance, then go through the hidden passage to reach the door. Go through and use a Power Bomb to get access to the elevator leading down to Maridia.
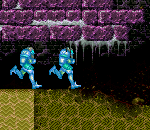
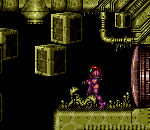
Maridia will be full of quicksand and water-filled caverns, having the Gravity Suit here will allow you to explore freely. Once inside, drop down to the bottom of the long shaft and go through the door on the left. Head through the long underground lake, try to avoid all the enemies jumping around. In the next room watch out for the crab arms in the sand, they'll pop up and try to drag Samus under.
Head through the door to find a huge cavern with the lower part filled with water. Drop down into the water and head left. Go up the shaft you'll find, then head left at the top of the cliff find a door set in the floor. Blow open the door with a Super Missile and jump in. You'll pass through a huge room below via a long vertical pipe, once you come out from the bottom you'll end up in the lower part of Maridia. Go left through the long corridor filled with quicksand and sandfalls.
Watch out for the Evirs (mini-Draygons) in the room, Once you reach a room with a few orange crabs crawling around, instead of going through the open door on the left, activate the Morphing Ball and drop through a hidden tunnel below the small platform.
Down here you can download the map from the Map room on the right, once you're ready go through the door on the left. You'll now be in a long corridor filled with jumping yellow slime balls, go to the far left and open the shutter there with a Super Missile. Drop down through the hole in the corner of the room and you'll end up in the tunnels connected to Brinstar. Go left into the room with the glass underwater tunnel, then plant a Power Bomb to blow it open.
You can go down to the Save room below to save your game, but once you're ready, go up through the door in the roof of the shaft to find a huge underwater cavern. From here you can reach missile no. 1 (Maridia), once you've mastered the Shinespark moves and reached it successfully, climb to the very top of the shaft and go through the door there. You'll now be in a massive cavern with Grappling Hook blocks in the ceiling. From here you can find Super Missile no. 1 (Maridia), but you're main target in this huge room will be the top right corner of the room.
You can swing across the blocks and the puffer fish that swim about the room, but to save time there's a much easier way to reach the door. Drop down to the bottom of the room, blast any orange crabs, then go over to the left side of the room. Run to the right side, once the Speed Booster kicks in, crouch down then quickly jump up the rightmost shaft, jump onto the edge of the left side of the hole, then face right, angle up then jump. If you aimed properly, you'll fly straight up to the door and easily make it.
Once up there, head through to find another shaft leading up and down. Go up the shaft and through the door in the roof to find missiles no. 4 and 5 (Maridia) and Super Missile no. 3 (Maridia). Once you've found them, drop down the shaft and go through the door on the right side of the corridor. You'll now be in the huge room containing the long vertical pipe.
In here you can find missile no. 2 (Maridia) and Super Missile no. 2 (Maridia). You can also reach two rooms containing items from below the sandpits at the bottom of the cavern, but you'll need the Spring Ball and Space Jump to reach them. Once you've found the missile and Super Missile, go over to the top left corner of the room, use the Wall Jump or the Grappling Beam to reach it. Go through the door in the roof to find yourself in a corridor filled with Mochtroids. Don't worry about them, they're a pushover compared to the real Metroids.
Head through the corridor, use the X-Ray Scope to see the destructible walls, you'll need to use the Speed Booster to break through the wall on the far right of the room. Go through the door at the end of the corridor to face the water Serpent (aka Botwoon). Refer to the bosses guide to crush it down.
Once the Serpent falls apart go past the crumbling wall and head through the door there. In the next corridor you'll be able to find Energy Tank no. 1 (Maridia). Once you've secured it, go through the door on the right side of the corridor. In the next shaft, you can break through the wall ahead to eventually reach a Missile Reload room, go up the shaft using the Wall Jump trick or the Grappling Beam and head through the door in the upper right corner.
You'll now find yourself in a massive room filled with Grappling Hook blocks and quicksand along the bottom of the floor. Traverse through the room using the Wall Jump trick or the Grappling Beam to climb over the large pillar platforms, and watch out for the Mochtroids. At the far right of the room a Save room and Energy Refill room awaits through the upper right door, Once you're ready go through the lower right door.
In this next room you'll find missile no. 3 (Maridia) ahead on the right. Drop down below the spikes at the foot of the door to find a hidden shaft below. Drop down, destroy the guard door you find then head through the door to confront the giant crustacean Draygon. Refer to the bosses guide to cook his hide.
Chapters:
- Into the Fire
- The Haunted Ship
- Dive into the Deep Blue
- A Journey to the Center of Zebes
- The Final Confrontation


