Data
Guides and strategies
Media
Samus' upgrades
Samus' upgrades | Missile locations | Super Missile locations
Power Bomb locations | Energy Tank locations | Reserve Tank locations
Morphing Ball
The Morphing Ball grants Samus the ability to morph into a small metallic sphere. While in this mode Samus can easily roll through small openings not normally accessible and plant explosive bombs (once you find the Bomb upgrade and further Power Bombs).
Found in: Brinstar
Hands down the easiest power-up to find. When you first enter Brinstar at the beginning of the game go left from the main elevator to find the Morphing Ball in plain sight behind a large cluster of rocks.
Bomb
The Bomb power-up allows Samus to lay small explosive bombs while in Morphing Ball mode (press X to lay bombs). The bombs can dismantle certain small blocks in the environment, damage enemies and can even propel Samus straight up into the air while in Morphing Ball mode.
Found in: Crateria
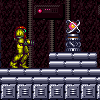
Back near Samus' ship in Crateria, head inside the cavern to the left of the ship. Near the three Skree (the green flyers that dive-bomb from the ceiling), you should see a small opening in the ground. Use the Morphing Ball to descend to the shaft below, then head through the door you find. Go through the next corridor (blast the small enemies here for energy and missile refills), then use five missiles to blow open the purple door at the far end.
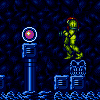
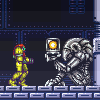
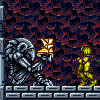
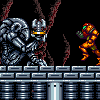
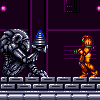
Make sure you've got at least ten missiles before you step inside the chamber, then head in and grab the Bomb upgrade. Once you secure it the door leading out will seal and the Chozo Statue will come to life - refer to the bosses guide to put it down for good.
Charge Beam
The Charge Beam allows you to hold down the fire button to charge up a stronger energy blast. If you hold down the fire button and perform a somersault jump while the beam is charged, you'll perform a simple Screw Attack-type attack, any enemy that strikes Samus will suffer damage.
Found in: Brinstar
Once you reach the large pink room in Brinstar with the falling snowflakes in the background (the room where the top right door leads up to Spore Spawn's room) go down to the very bottom left corner of the room (you'll also find a missile there) and bomb open the two small visible blocks side by side. Descend through the opening to find the Chozo statue below holding the Charge Beam.
Spazer
The Spazer Beam allows Samus to fire three wide-angled horizontal beams with a faster rate of fire and an increased damage level.
Found in: Brinstar
In Brinstar, go to the room to the left of the underwater Maridia area (the room with the two claws resting in the water that lash out and try to grab Samus). Go to the far left side of the room and shoot the cracked block directly above. Jump up through the hole to the ledge high above, if you have the Hi-Jump Boots you'll make the jump easily, otherwise just wall-jump off the wall on the left and higher to reach the platform. Go through the narrow tunnel above to find a green door on the right. Blow the door open with a Super Missile to find the room with the Spazer upgrade.
Hi-Jump Boots
Simply put, the Hi-Jump Boots will increase Samus' jumping height, allowing her to reach greater heights and leap further distances.
Found in: Norfair
From the main elevator in Norfair, descend right down to the bottom of the shaft to where two doors are facing each other. Head through the door on the left to find an Energy Tank straight ahead. Go through this room and navigate down the narrow shaft to reach another door below. Go through and blast the upper part of the wall away in the next room to reach the Hi-Jump Boots.
Varia Suit
The Varia Suit greatly enhances Samus' Power Suit by providing her with extra protection that cuts 25% of the damage inflicted by enemies. The Varia can also protect Samus from extreme temperatures, specifically the melting-point extreme heat found in the bowels of Norfair.
Found in: Brinstar
You'll need to defeat Kraid before finding the Varia Suit (refer to the bosses guide). Once you finish Kraid, simply go through the door on the right side of the room to find the Varia Suit.
Speed Booster
The Speed Booster allows Samus to run incredibly fast while charging up energy in her suit (dash for a while to active it). While the Speed Booster is active any enemies Samus runs through will be completely blown away. Samus can also break through special blocks with arrows printed on them while the Speed Booster is active. Refer to the Secrets and Tips section to learn more about the Speed Booster's special Shinespark abilities.
Found in: Norfair
In the large green room beyond all the lava caverns to the right of the main elevator, you'll need to reach the upper door on the right side of the room - travel down to the door in the floor at the base of this room and follow the path from there to eventually reach it. Once through the upper door, wait for the Skree to crash down into the lava, then blow open the roof section above to reveal a hidden shaft. Climb up and head through the right door.
Run through the long sloping cavern while blasting any enemies along the way. Upon reaching the door on the far right of the hallway (fire up at the roof to reveal a missile), go through to claim the Speed Booster. Once you score it you'll have to use it straight away to escape from the rising lava, go back into the long hallway and dash left to escape.
Ice Beam
This beam grants Samus the ability to freeze smaller enemies to use them as stepping-stones. Once an enemy is frozen, a second shot will unfreeze or destroy them.
Found in: Norfair
From the entrance of Norfair, head through the first door on the left further down the shaft. Run past all the closing shutters with the Speed Booster to the far end of the corridor. Head through the door there and cross the lava pits in the next room. The room beyond will contain a large shaft leading skyward, head up to the top while avoiding the fire- breathing heads on the walls. On the way up you should spot a small opening on the right side where a few small enemies crawl through, that's where you need to go.
Once at the top bomb out the small platform in front of the door to descend below to the small opening in the wall. Activate the Morphing Ball then plummet down the hole and hold right to sneak into the opening. Head through the door on the right to find the Ice Beam inside.
Grappling Beam
The Grappling Beam is an electric chain used to swing Samus to previously unreachable areas. The beam can grab onto small blocks with crosses embedded on them, once attached Samus can swing back and forth before releasing the beam. The beam can also be used to open blue doors.
Found in: Norfair
After you defeat Crocomire in Norfair, head through the door on the left side of the corridor where you fought him. Move through the door in the ground of the next room to locate a tall shaft descending below. Drop down the shaft and go through the door at the base in the floor. You'll now be in an underground cavern littered with crumbling debris. Blast the small fireflies nearby and lay a Power Bomb to clear the rubble.
Go over to the right corner of the cavern and dash to the left, you'll break through a wall with the Speed Booster and open up access to a massive cavern beyodn. As soon as you reach the edge of the cliff just after breaking through the wall press and hold jump. With your forward momentum and the Speed Booster's power you'll perform a massive somersault leap and fly through the cavern. Upon landing you'll be facing a door high up in the top left corner of the cavern. Step inside to find the Grappling Beam.
Wave Beam
The Wave Beam will enable Samus' energy beam projectiles to fly forward in a twirling cylindrical fashion and can penetrate any walls, floors or ceilings.
Found in: Norfair
You'll first need to have the Grappling Beam in your possession before you can find this. In Nofair, from the main elevator go through the first door down on the right below. Keep heading right through all the huge lava caverns and you'll reach a large green environment. On the right side of the room are two doors, you'll need to get through the lower one of the two, but you might have to go around below to reach it, or you can try to use the Grappling Beam to reach the opening above where the red creature that spews spines lives.
On the other side of the door is a shaft leading down full of red bouncing balls and the enemies that leap up out of the ground. Two doors lead off on the right side of the shaft, go through the top one and you'll find yourself in another large chamber full of the floating platforms that slowly fall as you stand on them. Traverse the platforms to the right and you'll reach a shutter. Hit the blue switch to open the shutter and jump up to the ledge to find a missile waiting there. Keep going right and use the Grappling Beam to cross the chasm, then head through the door on the other side to claim the Wave Beam.
X-Ray Scope
The X-Ray Scope allows Samus to scan any currently-visible area to reveal any hidden passages or items. When in use, all other action on-screen will freeze so you can safely scan rooms without enemies attacking. Select the X-Ray Scope, then press and hold B to use it and direct the field of view up and down with the Directional Pad.
Found in: Brinstar
You'll need the Grappling Beam to reach this. In Brinstar, about halfway up the long shaft leading down to Norfair (the one with orange walls and all the Rippers flying around) you should spot a yellow door along the left wall. Blow open the door with a Power Bomb and the wall in front of it to clear a path inside. Inside you'll find a darkened long hallway filled with a sea of spikes. Try to only freeze the floating enemies with the glowing balls, if you destroy too many of them the darkness will completely obstruct your vision.
Eventually you'll need to use the Grappling Beam to cross yet more spikes, swing across and you'll reach a door on the far side of the hallway. In the next room, jump on top of the small ledge and lay a bomb to activate the pillar below. Once you rise up to the narrow tunnel above, go left and drop down to find the X-Ray Scope.
Gravity Suit
The Gravity Suit gives Samus maximum protection against enemy attacks, reducing damage inflicted to 50%. The suit also grants Samus free movement underwater and protection against lava in the upper regions of Norfair.
Found in: Wrecked Ship
You'll be able to find the Gravity Suit once you've done away with Phantoon (see the bosses section). Once he's gone and the power restores inside the ship, head back out to the main shaft and go all the way to the very top. Climb up though the door there and clear all the enemies in the next hallway.
Once all your foes are done away with you can freely pass through the doors on the left and right sides of the hallway. Go through the left door to emerge back outside in Crateria. Go all the way to the left side of this region and use the X-Ray Scope to find a Super Missile block in the ground. Below this block you can find a missile, but further to the right you'll find (with the X-Ray Scope) blocks that can be bombed open. Descend through the narrow crawlspace and head right through the tunnel. Keep going right and you'll find yourself back inside the Wrecked Ship.
Use the Grappling Beam to cross the sea of spikes below, eventually you'll reach a Chozo Statue standing tall without anything in its outstretched hands. Jump on top of its hands and activate the Morphing Ball, the statue will promptly come to life and march down to a secret area below the spikes. From down here you can head right to find a missile and a Reserve Tank, but if you go through the door on the left you'll discover the Gravity Suit waiting inside a small chamber.
Space Jump
The Space Jump allows Samus to perform a spinning mid-air somersault, but it differs from her normal jump. If timed correctly, you can repeatedly press the jump button to send Samus higher in the air while performing this move, this way she can effectively "fly" up high areas or safely fly over dangerous traps below.
Found in: Maridia
Located deep within Maridia, the only thing stopping you from reaching it is Draygon (see the bosses section). Once you finish off the creepy underwater specimen, head through the door on the left side of his chamber to find the Space Jump.
Plasma Beam
The Plasma Beam is the strongest beam weapon available to Samus and can destroy most smaller enemies with a single hit while inflicting heavy damage to larger ones. Keep in mind that when in use the Plasma Beam can't be used together with the Spazer Beam.
Found in: Maridia
You'll only be able to reach the Plasma Beam once you've finished off Draygon (see the bosses section). Once you've dealt with him and claimed the Space Jump, go way back to the first large cavernous room you found on the way from the main elevator (it's the huge room with the door leading down to the massive vertical pipe that takes you down to the lower levels of Maridia).
Once back in the cavern, go to the very top right corner of the room and you should notice a door below on a platform that you can't reach if you just drop down from above (this door used to be sealed when Draygon was still alive). Use the Space Jump to reach the door then head through and up the next shaft. You'll eventually reach a large underwater room full of red Zebesians. Go to the bottom right corner to find the mother of all beams waiting there.
Spring Ball
As its name suggests, the Spring Ball allows Samus to jump while the Morphing Ball is active.
Found in: Maridia
You'll need the Space Jump before you can reach this power-up. In Maridia, go to the bottom of the huge vertical pipe that takes you between the upper and lower levels of Maridia. Once there, head right and go through the sand-filled tunnel until you reach a single-screen room with a lone crumbling Grappling Hook block in the ceiling.
Grab onto the block and wait for it to disappear, once it's gone Space Jump up the large shaft leading skyward. Watch out for the small flying bugs at the apex, then head right and descend the next shaft. Fall down through the purple ledges until you reach a door, then head through. The next long hallway possesses a a unique creature, a two armed robot that slowly progresses around the room using its arms. Quickly lay a Power Bomb to break open the purple wall ahead, the robot will then be able to penetrate through the sand-filled tunnel with its arms.
Wait for the robot to clear a path, then head through the door at the end of the hallway. Phew, nearly there. In the next room, drop down the small hole in the ground and roll down the left passage below. Drop down to the bottom of the area and go right to finally locate the Spring Ball.
Screw Attack
The Screw Attack, when used in conjunction with the Space Jump, causes Samus to charge up deadly energy as she somersaults through the air. She can break certain blocks with this attack and can destroy most enemies that touch her.
Found in: Norfair (Ridley's Lair)
Not long after exploring Ridley's Lair for a bit you'll come across the second Chozo Statue boss fight. Once you take it apart go through the door on the right side of the heat-filled chamber to find the Screw Attack.


