Data
Guides and strategies
Media
Chapter 3: SR388 Replica
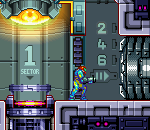
When the game returns to Samus you'll hear an explosion from above just before Samus reaches the bottom of the elevator shaft. The elevator will then shut down, so you're stuck down here for a while. As indicated by the wall in the background of this room, elevators leading down to Sectors 2, 4 & 6 are to the right while the elevators leading to Sectors 1, 3 & 5 are on the left. The number 1 will be flashing, indicating that this sector is your next destination. Head left and through the first door to find the elevator leading down to Sector 1. Jump on and ride it down.
Through the door on the right at the bottom you'll find the first Navigation Room of this area. Uplink to the SC to receive the map of the area and your first objective here. The SC will first tell you of the damaged Main Elevator, hinting at the cause of the damage. The SC will then inform you that the atmospheric stabilizers in this area have been invaded by the X and must be cleared of their foul nests. We now need to move through this area and clear 5 stabilizers to slow down the X's reproduction. Save your game in the following room before continuing.
Use the Recharge Room next door if you need to before proceeding right. This first large yellow room is home to several Zombie Researchers, fry them all and go through the lower right door. Watch out for the flying globules in the next corridor, they'll try to merge together to produce a massive creature, fry them all before they get a chance. Destroy the creature blocking the passage at the end with missiles and head through the door.
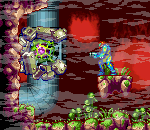
This next large room is home to the first stabilizer. You'll notice that this cavernous area accurately resembles SR388's landscapes. Trek through the cloudy area over to the large X-infested fan. Stand on the floating platform just in front of the fan and fill the nest with missiles to destroy it. Grab any remaining X floating around before going through the door on the right. Fry the Hornoads in the next corridor but watch out as the X parasites will reform into a flying Halzyn, a creature with protective shields. Look up and shoot at them from below, but watch out when they drop down.
At the end of this corridor you'll find Energy Tank S1.01 hidden at the end of a narrow tunnel. Keep going to reach a shaft leading down. Go up through the door straight ahead to find the next atmospheric stabilizer. Make your way up to the fan and pummel the nest with missiles to destroy it. With the fan cleared, leave the room and drop down the adjacent shaft. Go through the first door you find on the left wall. Proceed through the next long corridor while watching out for the Motos (shoot them in the back to inflict damage).
Descend the next massive shaft while watching out for the Zebesians climbing around on the walls (I wonder what the Space Pirates were doing here, no doubt they were up to no good. Such a pity the X got them before they could cause any trouble). Waste the Zebesians with missiles, once at the base of the shaft go through the door and blast the creature in the following room. Go through the next door to reach the third room containing a stabilizer. Use the ladders along the roof to reach the second half of the room, there you'll find the clogged fan. Clear the fan then head through the door on the right, only two more fans to go.
Watch out for the Moto in the next room, past the adjacent room you'll find the fourth atmospheric stabilizer. Climb up the small shaft and use the ladder on the roof to reach the fan. Watch out for the Hornoads below, once the fan's clear go through the door up on the left side of the room to find Missile S1.01 hidden inside.
With the fan cleared and the missile in hand, go through the door on the bottom right of the large room to reach a tall shaft leading skyward. Watch out for the Zebesians on the walls, then head through the door at the top. Open up the shutter in the next room and go through the door beyond. Use the ladder on the ceiling in the following corridor to reach the next door, just don't fall into the water. Fry the creatures crawling along the roof as you go.
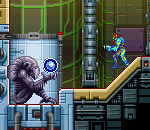
Go through the next door to find yourself in a shaft with a pillar separating you from the Eyeball Door on the left. Drop down to the bottom through the crumbling blocks, from here you can go through the door on the left to reach a Save Room. Once you're ready, jump up to the Eyeball Door and fry it with three missiles to get through, but watch out for its plasma projectiles. Through the door you'll be in another large room, but there's no stabilizer in here. Walk over to the left corner to find a truly unusual sight, a Chozo Statue holding an item! Shoot the item to reveal a glowing ball, but before you can grab it the statue will suddenly change into a large Core X.
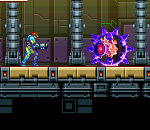
This one's different from the usual mimicked form an X takes, as it'll have a large spiked shell. Whenever you face a Core X like this one, it'll be using a Beam Weapon ability as its primary attack. You'll only be able to strike the creature with missiles when it opens up to fire, when it opens quickly fire and jump out of the way to avoid its fire. These Core Xs aren't as difficult to defeat as the normal ones, just don't take too much damage from its fire. Finish off the creature and absorb the free-floating X to recover the Charge Beam ability! Now you'll be able to charge up Samus' Beam Weapon to fire off a stronger shot.
We'll now go and finish our objective. Go through the door up on the top right corner of the room. In this next room, shoot out the roof and jump up into the next room. From here, grab hold of the ladder in the ceiling and fire missiles over at the wall on the left to open up a hidden passage. Go inside to find Missile S1.02 hidden among all the crawling creatures in the water. With the missile in hand head through the door on the right in the previous room. You'll now have finally reached the fifth and last stabilizer. Work your way down to the fan and destroy the nest to fulfill your objective.
With all the stabilizers online it's time to return to the Navigation Room. Go through the door on the right and head past the shutter in the next room. Climb up the following shaft and save your game up through the door on the right at the top. In this Save Room, look closely at the wall on the right. You'll spot a crumbling block, shoot it open and crawl through. You'll need to jump up above the hole, quickly activate the Morph Ball and push right to crawl into the hole (you need to do this because we haven't found the Morph Ball bomb yet.
Once inside, use the Wall Jump trick (check Secrets and Tips for more info) to reach Missile S1.03 at the top of the shaft. From here, make your way back up to the Navigation Room to learn about your next objective.


