


Chapter 17: Securing the Dark Torvus Temple
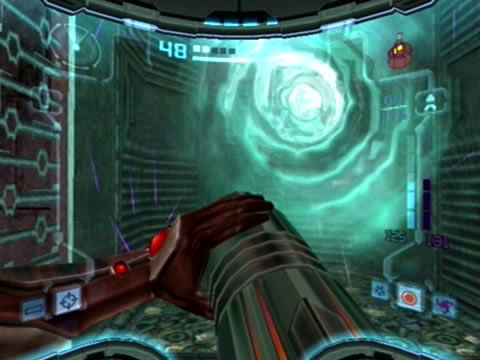
Portals between worlds exist even this deep underground.
With the Alpha Blogg taken care of, we can now head back topside. The two underwater wheels in the shaft will stop spinning and retract, so you can conveniently use their alcoves as platforms. Use the Gravity Boost to reach one, then from there use it two more times to reach the exit above. Back up in the Hydrodynamo Shaft, you'll be able to reach the inactive Dark Portal nearby, so let's do some exploring.
Once in Dark Aether you'll have a positive greeting - the Dark Torvus Temple Key 2 lies directly ahead. Step forward to claim your prize. There's nothing else you can do here for now, as both exits are blocked by yellow doors. So return to Aether and topside to the Hydrodynamo Station.
If you remember from earlier, we spotted the third and final Dark Temple Key up in the Venomous Pond, but in order to reach it you need the Grapple Beam. So that means it must be nearby somewhere. Back in the Hydrodynamo Station, use the Gravity Boost to reach the top and save your game before moving on. We'll now go and access a Dark Portal previously inaccessible in the Catacombs.
Go through the black door and follow the tunnel to find yourself there. Deal with the two nasty Grenchlers emerging from the water before doing anything else. With the area clear, drop into the water and energize the Bomb Slot directly below the inactive Dark Portal to lower the cage surrounding it. Charge up the portal and step in.
As soon as you land in Dark Aether make a run for one of the safe zones surrounding a pillar. You'll see two Grenchlers wandering about, but scan one to reveal them as Dark Grenchlers. These tougher creatures still have their back weakness, so lock on, spin around and fire a Super Missile as its back to break it off, then finish it with more missiles or the Light Beam. With both creatures dead, take the only exit you find.
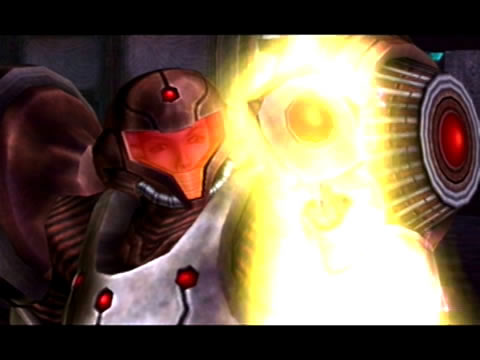
Once the glow subsides Samus will have the Grapple Beam!
Jump into the Kinetic Orb Cannon in the follow chamber to shoot out along the transit tunnel. Take care moving through the tubes and avoid the pistons as you proceed. Beyond this transit tunnel you'll reach the underbelly of the Sacrificial Chamber. Notice that thumping sound shaking the whole room with each beat? Something's pounding around on the platform above you.
Step forward to the purple pond to disturb a Hunter Ing, then deal with it quickly. If you jump atop the ruined statue along the side of this chamber you'll be able to catch a glimpse of the monster above - a very large and very angry looking Grenchler-type creature. For now exit this room via the white door.
Hop in the Kinetic Orb Cannon to shoot through the following transit tunnel. Travel through the pipes you find, and as you reach the left side of the tunnel make sure you pick up Missile TB.06 hidden in a pipe section right next to the left-most part of the safe zone. With the missile in hand leave the transit tunnel and move on.
Beyond in the Crypt you'll find yourself on the inside of the energy shield you spotted while playing with the laser housed here before. Shoot the small visible crystal with the Dark Beam to lower it. Once you do, a number of the platforms inside the walls will extend, giving you a viable means to reach the white door up on the eastern side of the room. Two Dark Pirate Troopers will promptly teleport in, quickly drop below and energize the two Light Beacons to catch them off guard.
Deal with both, then use the platforms to reach the white door (fill up on ammo by destroying the Ingsphere Cache around the room if you need to). Time your jumps carefully as the platforms won't remain motionless. Beyond in the following tunnel you'll encounter a few Darkling Tentacles along the way, just shoot them to send them away for a few seconds.
Beyond here is the Undertemple Shaft. Lacking any water, you're free to move around in here as normal. Drop to the base of the shaft and quickly energize the upside down Light Crystal with the Light Beam when two Hunter Ing appear. Deal with them both before moving on. The door at the base of the shaft can't be opened yet, so jump atop the platform above you and use the nearby Kinetic Orb Cannon to reach the top of the shaft.
The Torvus guardian awaits right above this opening...
Once there, blow the red blast shield off the door directly ahead of you and enter the chamber beyond to save your game. With that done, return to the shaft and drop down to the top of the cage below. Descend to the opening where the Light Crystal lies and enter the cage. Inside you'll discover the remains of a Luminoth warrior beside a Bomb Slot. Energize the Bomb Slot to rotate the cage, granting you access to a standard door.
Proceed through to find the Sacrificial Chamber Tunnel. Destroy all the Ingsphere Cache along the way with the Dark Beam, you're going to need all the Light ammo you can get. After the group of Ingsphere Cache you'll see a patch of Venom Weed - haven't seen this stuff since Tallon IV. Simply shoot at it to cause the weeds to retract below the ground.
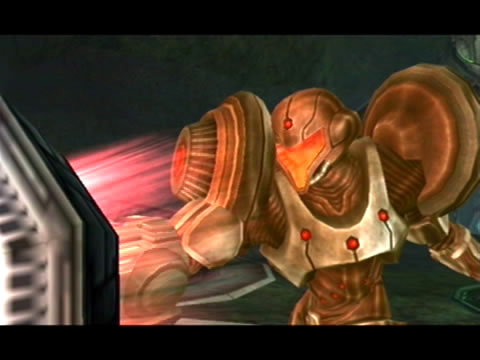
Beyond this tunnel you'll reach the main area of the Sacrificial Chamber. Immediately the Grapple Guardian will lunge from the shadows, intent on having you for lunch. Let's make sure that doesn't happen. Refer to the bosses guide for tips to defeat this monstrous specimen.
With this hideous specimen gone for good you'll have finally recovered the Grapple Beam ability. Once you pick it up the floor of the chamber will lower, opening up access to the two doors on either side of the chamber. But two Denzium panels are blocking both, so we'll need to exit via the way we came in. Run to a safe zone and look up between the two pillars, there's a Grapple Point there. Scan it for your Logbook before using it.
See the Grapple Point icon hovering over it? When it enlarges hold down L to fire the Grapple Beam and swing from it. You'll find in this game you can still fire your weapons while swinging around, which is definitely a welcome feature.
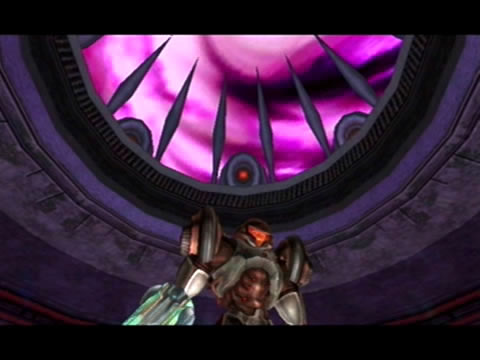
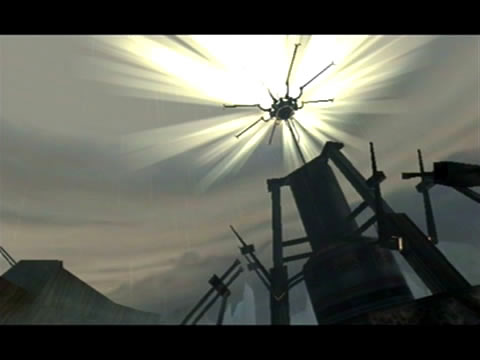
...and here it is, the monstrous Chykka.
Exit the chamber and return to the Undertemple Shaft (blow up all the Ingsphere Cache along the way for Light ammo). Once back in the shaft, there's a few Grapple Points around you can use. Turn right and use the Grapple Beam to reach the white door ahead. Proceed through and use the Light Portal in the Crypt to return to Aether. Once back in the light world, head back topside and save your game along the way.
We're now clear to retrieve the final Dark Temple Key and enter the Dark Torvus Temple. Take the lift back up to the temple and make your way to the Forgotten Bridge area (taking out Bearerpods along the way with the Dark Beam if you need Light ammo). Head through the Abandoned Worksite area on the way to pick up Missile TB.07. Once at the Forgotten Bridge, power up the Dark Portal and travel back to Dark Aether. Head on over to the Venomous Pond, and use the Grapple Point above Dark Torvus Temple Key 3 to reach it easily.
Save your game at the nearby Save Station now before moving on to the temple. With that task done, proceed to the temple and stand within the glowing aura atop the elevator. Drop by the Ammo Station adjacent the temple first to prepare for the coming battle. Step atop the elevator and watch as the three Dark Temple Keys unlock a number of grates along the walls around the room, causing the entire area to be flooded with that purple poisonous liquid. You'll then be taken above into the main chamber of the temple.
Before you on the wall ahead exists a massive cocoon. Within it lies the Guardian you'll need to destroy to reach the Dark Torvus Energy Controller. But right now it's really doing anything. Scan the large object strapping the cocoon to the wall to learn that by taking out the supports the object will release. See those four small targets on the supporting arms? Time to break out the Seeker Launcher.
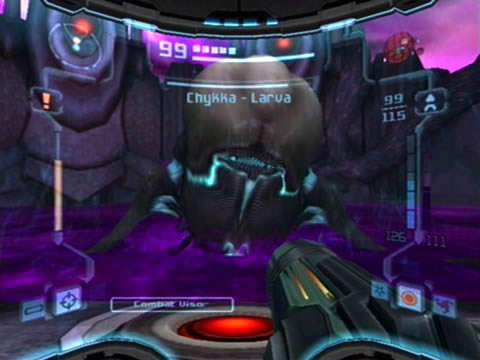
Destroy all four targets at the same time to release the object. The massive cocoon will then fall into the purple sea, releasing the creature within. After a grand entrance you'll face the Chykka Larva, the initial form of this Guardian. Refer to the bosses guide for tips to deal with all the forms it'll throw at you.
Take back the Torvus planetary energy.
With the Chykka taking up a motionless residence on the temple's floor, you'll be clear to access the Dark Torvus Energy Controller. But wait a sec, what's that waiting for you in the center of the chamber? Scan the object to reveal your prize as the Dark Visor! Pick it up and switch it on for a funky new way to see the world. You'll see that there's no elevator to take you up to the door high above, instead a number of platforms will rise from the floor to create an effective staircase for you.
But they'll all magically disappear. Using the Dark Visor you'll be able to see the platforms highlighted in a bright red colour. The Dark Visor will also highlight foes in range and act as a night vision device, illuminating dark regions. You should also spot what remains of Dark Chykka lying on the floor, scanning it reveals that it's completely dead, no Ing is going to revive it anytime soon.
So let's get a move on. Keep the Dark Visor on while you jump atop the platforms, then head through the door at the top. Proceed through the security station to locate the Dark Torvus Energy Controller. Step forward and watch as Samus reclaims the Torvus planetary energy, while just like in Dark Agon the sky turns an angry red. Time to get out of here. Return to the Dark Torvus Temple to find the air in the huge chamber a blood red.
While the swamps remain, the weather finally clears.
Drop below and step into the hologram on the elevator at the center to ride it down. Stop by the Ammo Station to recover your payload before leaving. Proceed back to the Venomous Pond (deal with the pesky Hunter Ing there if you wish), then energize the Liftvine Crystal and use it to reach the door on the north side. Return to the Dark Forgotten Bridge and transit back to Aether by way of the Light Portal there. Back in the Torvus Bog, it's time to stop the deluge of rain.
Return to the Torvus Temple by way of the Torvus Grove. Once in the grove you'll be ambushed by two Dark Pirate Commandos who aren't too keen on you returning the planetary energy. But this time they won't be so pesky. Switch on the Dark Visor to keep them in view at all times - they won't be able to phase out and hide from you now. Deal with both villains then proceed to the Temple. Head up to the Torvus Energy Controller and watch as Samus returns the planetary energy, fixing that awful weather and making U-Mos one seriously happy Luminoth.
Chapters:
- Planetfall
- The World Divided
- Fate of the Federation Troopers
- The Plight of the Luminoth
- The Sands of Agon
- Dark Aether
- The Space Pirate's Lair
- Samus vs Dark Samus
- Unlocking the Dark Agon Temple
- Restoring the Energy Controller
- The Journey to Torvus
- The Everlasting Deluge
- Restoring the Flooded Temple
- Taking the Fight to the Ing
- Expanding Samus' Arsenal
- The Underwater Temple
- Securing the Dark Torvus Temple
- The Path to Sanctuary
- The Mechanical Marvels of Aether
- The Sub Guardian Nightmare
- Subterranean Conquest
- Searching the Fortress
- Retrieving the Charge Combos
- Following the Echoes
- The Screw Attack Returns
- The King of all Mechanoids
- Gearing up for the Finale
- Unlocking the Sky Temple
- The Final Treasure Hunt
- Ending the War