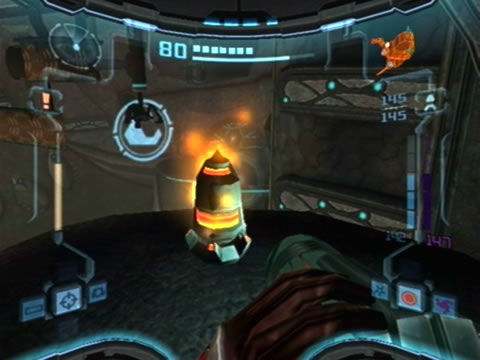
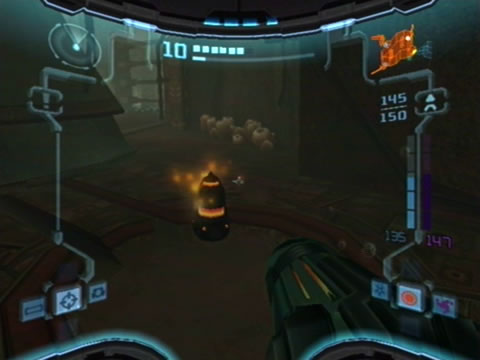
Missile locations

Before amassing your Missile Tank payload, you'll need to discover the Missile Launcher hidden early in the game within the GFMC Compound. Once you've secured it there's 49 more Missile Expansions to find (giving you up to a maximum of 255 missiles, as the Seeker Launcher grants you a bonus extra five missiles), so you'll be discovering them in all sorts of places across the planet.

Samus' upgrades | Missile locations | Power Bomb locations
Energy Tank locations | Beam Ammo Expansion locations | Dark Temple Key locations

Temple Grounds

Click for larger view

1.

(Transport to Agon Wastes)
You'll find this missile hidden behind a Splinter web near the Agon elevator. Blow it open to uncover your prize.

Click for larger view

2.

(Hive Chamber A)
After returning the planetary energy to the Agon Temple, return to the Temple Grounds and fall through the shaft you originally descended at the very beginning of the game. Down in Hive Chamber A you'll encounter a Dark Missile Trooper, defeat it to claim your prize.

Click for larger view

3.

(Hive Chamber B)
Right past the area where the first Dark Portal you encountered existed in Hive Chamber B, you'll find a sealed tunnel beside the one you take to bypass the jammed cargo lift pod. Use a Morph Ball Bomb to crack open the cover plate. Roll inside to find this missile tucked away inside.

Click for larger view

4.

(Plain of Dark Worship - Sky Temple Grounds)
Energize the purple crystal on the column in the corner of the Temple Assembly Site (in the Temple Grounds) to reveal a Dark Portal. Use it to travel to Dark Aether, you'll then find this missile within an Ingworm tower structure over on the western side of the area.

Click for larger view

5.

(Temple Assembly Site)
Once you've picked up the Space Jump Boots, climb atop the cliff side on the western end of the Assembly Site, then follow it around and roll through the narrow tunnel at the end to locate this missile.

Click for larger view

6.

(Communication Area)
With the Space Jump Boots in hand, jump atop the jagged cliff near the entrance of the Communication Area (coming from the Temple Assembly Site). Drop a Morph Ball Bomb atop the stasis chamber in the ground to blow open the cover, revealing this missile inside.

Click for larger view

7.

(GFMC Compound)
This missile waits atop the rear of the GFS Tyr. You can try to Space Jump atop the craft via a crate near the damaged opening on the side of the ship, but it may not be easy. Otherwise use the Screw Attack from one of the cliff edges across from the nose of the craft to climb aboard easily.

Click for larger view

8.

(War Ritual Grounds - Sky Temple Grounds)
Look for a sealed door at the base of the large mutated Ingworm structure here. Switch on the Dark Visor and stand back, looking for five red pods surrounding the door. Use the Seeker Launcher to hit all at once, opening the door to your prize ahead.

Click for larger view

9.

(Phazon Grounds - Sky Temple Grounds)
You'll require either the Dark Visor or the Screw Attack to reach this safely. Travel to Dark Aether by way of the portal at the Sacred Path area and make your way to the Phazon Grounds. Clear the area of the Dark Tallon Metroid colony and look out over the cliff to the tall structure ahead. Your prize is waiting there - either switch on the Dark Visor and carefully cross the chasm via the moving platforms (thanks Brian!), or simply Screw Attack over the chasm to reach it.

Great Temple

Click for larger view

1.

(Transport B Access)
In this Lightflyer-inhabited corridor you'll see a number of large grooves along the walls of the middle section of the corridor. Use the Morph Ball and bomb-jump your way through the tunnels lining the walls, eventually they'll lead you straight to this missile.

Click for larger view

2.

(Transport A Access)
Inside this corridor lies a hidden Save Station. Beside the Save Station is a rock wall containing elements of Talloric Alloy. Lay a bomb beside it to destroy the wall, then proceed down the winding path under the Save Station to find this missile there.

Agon Wastes

Click for larger view

1.

(Sand Cache)
Once you've visited the Agon Temple and been granted access to amber holograms, scan the translator gate in Mining Station A to open up access to the room where this missile hides.

Click for larger view

2.

(Portal Access)
On one side of the tall structure in this room you'll find the remains of a Luminoth warrior. This missile rests directly behind it, sneak around the Kinetic Orb Cannon nearby using the Morph Ball to reach it.

Click for larger view

3.

(Transport Center)
Once you've raised the trans-dimensional gate in Dark Agon in the Portal Site room, return to the light world and head through to the Transport Center. Inside you'll find this missile beyond a half-pipe, encased within a metal cage. Energize the Bomb Slot nearby to raise the gate to claim your prize.

Click for larger view

4.

(Command Center)
On your first visit to the Space Pirate's Command Center you'll be under the floor in Morph Ball mode and witness several Pirate Troopers head through a portal to Dark Aether. Follow the narrow tunnels over to the right side of the room to discover this missile waiting there.

Click for larger view

5.

(Storage B)
Once you've picked up the Dark Beam, return to the Biostorage Station and deal with two pesky Metroids inside. Open up the black door up in the corner of the room to discover this missile hidden beyond.

Click for larger view

6.

(Ing Cache 4 - Dark Agon Wastes)
You'll need the Dark Beam to find this. In the Duelling Range there's a black door on the far western side. Open it up to find a small canyon ending with a dead-end. You'll find this missile hiding in a small alcove directly below the door you entered via.

Click for larger view

7.

(Crossroads - Dark Agon Wastes)
With the Boost Ball in your possession, use the half-pipe in the Transport Center to reach an inactive Dark Portal high above. Energize it and step through to find this missile directly in front of you once in Dark Aether.

Click for larger view

8.

(Ventilation Area A)
Travel to the right side of the main tunnel conduit to see a Pillbug rolling around tunnels up in the ceiling. Defeat the creature and use double bomb-jumps to climb up through the tunnels, eventually locating this item waiting at the top.

Click for larger view

9.

(Main Reactor)
You'll require the Boost Ball and Spider Ball to reach this. In the corner of the Main Reactor lies a Spider Ball track leading up to the ceiling. Climb up to see a piston over on the right raising and lowering itself above a vat of Phazon.

Time your boost over to it to latch onto the Spider Ball track wrapped around the top section. Spin around it and look for the next piston, wait for the tracks to line up again before boosting across. Keep this up to reach a small alcove in the opposite corner of the room where this item waits inside a stasis chamber. Lay a bomb beside it to gain access.

Click for larger view

10.

(Sand Processing)
You'll need the Boost Ball to secure this one. Look for a large half-pipe partially filled with sand in this room. Destroy the two turrets guarding the area, then boost yourself up to a small tunnel above the half-pipe.

Roll through the tunnel to access the enclosed control station overlooking the half-pipe. Scan the terminal beside the Bomb Slot to power it up, then jump inside and energize it to drain the sand from the half-pipe outside, revealing this missile waiting inside an alcove.

Click for larger view

11.

(Storage C)
The Boost Ball and Spider Ball will enable you to reach this one. Inside the Bioenergy Productions room, activate the lone terminal beneath the ledge where a green door resides to raise the three large storage rack units in the center of the room. Then, make your way over to the north-western corner of the room up where the three control stations to move the storage racks live.

A Spider Ball track is hidden in the corner, climb up and make your way along the network of tracks to find yourself up on the ceiling out in the open chamber. Boost across the small structures until you reach the one in the center, looking for a Spider Ball track visible ahead travelling east. Boost over to it, then boost yourself across to the Spider Ball track running around the top of the middle storage rack.

Go around to the other side of it and finally boost yourself across to the green door. Blow the blast shield off with a Super Missile to locate this missile in a hidden chamber beyond.

Click for larger view

12.

(Storage A)
You'll require a Power Bomb to locate this one. In the Mining Station B area, there's a large cracked section of the rock wall on the southern side. Destroy the wall with a Power Bomb to uncover a white door beyond. Go inside to find a cosy grove where this missile waits.

Click for larger view

13.

(Mining Station A)
You'll require a Power Bomb and the Spider Ball to reach this. Look for a weakened wall section at the base of this region, then blow it open with a Power Bomb. Jump in the exposed Kinetic Orb Cannon to be launched high up to a network of Spider Ball tracks above. Follow them along to reach this missile.

Click for larger view

14.

(Junction Site - Dark Agon Wastes)
The Spider Ball's necessary to reach this one. In the center of this tunnel you'll find the missile tucked inside an alcove below you. Climb up the Spider Ball track above and energize the Bomb Slot to rotate the entire circular structure, clearing the way to the missile.

Click for larger view

15.

(Warrior's Walk - Dark Agon Wastes)
You'll need the Super Missile Charge Combo to find this one. At the eastern end of the Judgement Pit (or western end of the Battleground) you'll find a green door. Blow the blast shield off the door with a Super Missile and enter the corridor beyond.

At the eastern end of the corridor you'll see a vein of Phazon running below a group of floor coverings. Just at the foot of the door under the floor lies this missile, use your Scan Visor to find a weakened section and blow through it with a bomb. Jump in and make a run for the missile across the Phazon, making a hasty escape afterwards to avoid taking too much damage.

Torvus Bog

Click for larger view

1.

(Forgotten Bridge)
This missile rests atop a ledge in front of a door, but to reach it you'll need to rotate the large bridge first. Travel to Dark Aether via the nearby portal and energize the Bomb Slot nearby to rotate the bridge. Return to Aether and cross the bridge to claim your prize.

Click for larger view

2.

(Hydrodynamo Station)
At the base of this shaft lies a door sealed by three security locks. This missile lies atop a platform directly in front of a purple door. Descend to the near-base of the shaft, then scan the first lock directly below the purple door's platform to cause a smaller platform to extend from it. Make your way back up there and simply jump across to claim this missile.

Click for larger view

3.

(Underground Tunnel)
Enter this room via the Torvus Temple, then drop off the platform you're standing on. Activate the Morph Ball and roll underneath it, tucked away in a corner lies this missile.

Click for larger view

4.

(Plaza Access)
Once you've recovered the Boost Ball, reach this room by way of the Torvus Grove. Once inside the first section of the tunnel, energize both Bomb Slots to rotate two devices needed to make it through the tunnel. The second device will grant you access to a visible tunnel opening directly above it.

Roll through there to find yourself in a narrow half-pipe tunnel. Charge up the Boost Ball and build momentum; this missile is hiding up on the right side of the tunnel.

Click for larger view

5.

(Portal Chamber)
Look for the Portal Chamber room adjacent the Venomous Pond in Dark Torvus Bog. Travel to the eastern side of it and jump atop the platforms to reach the roof. From there, roll through a narrow opening you find to reach the inactive Light Portal in the main chamber. Power it up and return to Aether to find this missile waiting in the chamber right in front of you.

Click for larger view

6.

(Undertransit One - Dark Torvus Bog)
One the left-hand side of this transit tunnel this missile hides among the pipes. The missile is right next to the left-most part of the safe zone, so experiment with bomb jumps to find the hidden opening in the tunnels to reach it.

Click for larger view

7.

(Abandoned Worksite)
You'll need the Grapple Beam to reach this one. On the southern section of this room you'll see the missile lying atop a tall ledge. Simply use the Grapple Beam on the Grapple Point above to swing over and reach it easily.

Click for larger view

8.

(Path of Roots)
Once again you'll need the Grapple Beam to secure this. Enter the Path of Roots room by way of the Great Bridge. Use the Grapple Point ahead to swing over to the top of a small cage where this missile awaits.

Click for larger view

9.

(Torvus Lagoon)
You'll require the Gravity Boost to secure this item. In the Torvus Lagoon, deal with the two annoying Grenchlers before attempting your search. Travel underwater and look for a tall underwater wall directly below the body of the Luminoth warrior (there's a cluster of Venom Weed at the base). Use the Gravity Boost to reach a small alcove at the top of the wall where this missile waits.

Click for larger view

10.

(Gathering Hall)
The Spider Ball and two Power Bombs are needed for this. Descend into the water in this chamber and destroy the cracked glass below with a Power Bomb. Destroy the drain cover at the base of the half-pipe with a second Power Bomb to drain the water in the chamber.

Then use the exposed half-pipe to reach the Spider Ball tracks up in the ceiling, and traverse to both sides of the room from there, energizing each Bomb Slot on either side of the chamber.

Doing so will lower the containment shield guarding this missile, you're then clear to jump atop a newly-extended platform to reach this item.

Click for larger view

11.

(Training Chamber)
You'll require the Spider Ball to recover this one. Look for a Spider Ball track underwater, to the left of the tall Luminoth statue. Follow the tracks around to reach the Bomb Slot below the statue's head, then energize it to cause the statue to move forward. Right behind the statue, where it once stood awaits this item.

Click for larger view

12.

(Torvus Grove)
Take a close look at the trio of roots holding up the giant tree growing here. Upon closer inspection (and use of the Scan Visor) two are revealed to have been weakened thanks to Phazon exposure, so finish them off with a Power Bomb (or two). Look closely for two rods on the ground protruding from each tree root - lay a Power Bomb between them to destroy both roots with a single blast (thanks Brian!).

With both roots destroyed the entire tree will slam into the rock wall, blowing open a hidden alcove to reveal this missile inside.

Click for larger view

13.

(Transit Tunnel South)
The Annihilator Beam will grant you access to this missile. Travel down to the bowels of Torvus and head for one of either the Gathering Hall or Catacombs chambers. Exit the chamber via the gray door (thanks to the Annihilator Beam) to reach this transit tunnel.

Deep inside you'll find a network of tunnels running throughout the rock walls. See those vents shooting jets of water up and down? You'll need to travel through this area, activating Bomb Slots to reverse the direction of the jets and bomb-jump your way up the streams of water.

After energizing three Bomb Slots you'll be clear to reach this missile at the top of the tunnel network.

Click for larger view

14.

(Undertemple - Dark Torvus Bog)
With the Screw Attack in your hands, travel back to the Undertemple at the very depths of Dark Aether (the chamber where you fought the Power Bomb Guardian). Dispatch the two Hunter Ing snooping around there, then look for a shaft at the northern end of the chamber.

See the Wall Jump Surfaces running up the walls? They're not just there to reach the Light Portal above. Screw Attack up the walls to the very top where you'll discover this missile waiting in an alcove.

Sanctuary Fortress

Click for larger view

1.

(Hazing Cliff - Ing Hive)
Use the portal station in the Hall of Combat Mastery to transit to Dark Aether. From there, exit the portal chamber, turn right, and go through the door nearby. Inside you'll find a large chamber with most of the floor and one wall non-existent.

Deal with the Dark Tallon Metroid greeting you from below, then make your way to the opposite end of the chamber. Fry the two Dark Diligence Drones guarding a small passage to then find this missile tucked away inside.

Click for larger view

2.

(Dynamo Works)
Upon eliminating the Spider Guardian and recovering the Spider Ball, follow the tracks up to the highest point of the tunnel network. From here you'll spot a small opening in the ceiling leading to another tunnel. Bomb-jump up there and follow the path to discover this missile lying in front of a chute leading back to the main section of the Dynamo Works.

Click for larger view

3.

(Hall of Combat Mastery)
You'll need the Spider Ball for this one. Running up one of the inner walls of the Hall of Combat Mastery area is a Spider Ball track. Travel up it and enter the large network of narrow tunnels lining the walls of the entire area. Work your way through the numerous obstacles to eventually reach this missile.

Click for larger view

4.

(Main Research)
The Spider Ball can help you reach this. In the Main Research area, you'll discover a tall blue translucent wall on one side covered with a number of Spider Ball tracks and a number of moving machinery components. Climb up the wall and take care around the dangerous pieces of machinery. Eventually the tracks will lead straight to this missile.

Click for larger view

5.

(Central Area Transport West)
This missile resides inside a network of tunnels running up the side of the shaft in this room. Travel to the top of the shaft and drop into the large pit once at the top. Down below you'll find three tunnels leading below. Take the left tunnel at the top, then take a right, right again, and finally a left to land right on top of the missile.

If you take the wrong tunnel check where you should have dropped through, then make your way to the top of the shaft again via the Kinetic Orb Cannons.

Click for larger view

6.

(Aerial Training Site - Ing Hive)
With the Screw Attack secured, use it to jump up the Wall Jump Surfaces near the inactive Light Portal in this area to grab this missile from an overhead alcove.

Click for larger view

7.

(Temple Access)
The Dark Visor, Seeker Launcher and Echo Visor are needed to retrieve this item. Firstly, make sure that the Kinetic Orb Cannon is active. If it isn't, leap down to the cannon and switch on the Dark Visor. Face the wall containing the door leading to the Sanctuary Temple, and look up. There's four glowing red pods above the door - fire the Seeker Launcher at them to activate the cannon (special thanks to Joe for clarifying this!).

Use the cannon to return to the the entrance of the room. The Kinetic Orb Cannon's target can be seen directly above. Switch on the Echo Visor to see a sonic emitter beaming a signal at it.

Shoot the emitter to cause the target to move forward slightly, then quickly jump down to the Kinetic Orb Cannon. Hop in to be launched into the target where you'll drop to a narrow tunnel.

Fall below to land underneath the floor, then roll forward to find this item waiting for you near the cannon. Use the Spinner right next to it to open up a section of the floor to escape.

Click for larger view

8.

(Sentinel's Path)
The Echo Visor and Annihilator Beam will grant you access to this item. Check your map of the fortress, on the upper floor you'll see a corridor connecting the Sanctuary Temple to the Watch Station. Enter the corridor from either end and make your way to the center.

Take out the two Mekenobites hanging about via the Seeker Launcher, then take a look at the sealed door halfway through the corridor. Three small terminals lie in front of it, switch on the Echo Visor to see a number of icons appear - one on each terminal and four on the door itself.

Target the orange icon on the door and shoot it once with the Annihilator to hear four distinct tones of the lock sequence. You'll then need to shoot the correct terminals to produce the same notes in the same order presented to unlock the door. Once you do, pick up your prize in the small alcove beyond.

Click for larger view

9.

(Sanctuary Map Station)
The Light Suit is key to finding this missile. Travel to the Map Station via the Reactor Core to see a giant yellow light beam down the ramp ahead. Simply step into the beam with the Light Suit equipped to be teleported up to a hidden chamber where this item lives.