Chapter 27: Gearing up for the Finale
For now let's go visit U-Mos to see what he thinks of your adventures so far. Return to the Sanctuary Temple, but instead of going towards the Main Gyro Chamber, proceed through the gray door on the western side of the temple (use the Annihilator Beam to open it). Walk through the following corridor and take out the two Mekenobites hanging around halfway through. Positioned between the two creatures you'll find a sealed door on the right wall with three control terminal posts standing in front.
Like the other sonic security system doors, this one is sealed via sonic locks, but it won't be so easy to unseal this one. Switch on the Echo Visor to see four padlock icons above the door along with an orange icon in the middle. Break out the Annihilator Beam and shoot the orange icon. You'll hear four distinct tones played in a specific order. See those three control terminal posts?
Each one is a tone emitter - shooting one with the Annihilator sends a distinct tone signal to the door. So all you need to do is memorize the sequence of notes emitted from the door and reproduce the correct notes in the proper order via the tone emitters. Shouldn't be too hard. Get the order right to instantly open the door, revealing Missile SA.08 waiting inside the alcove.
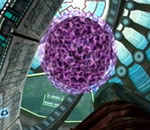
Now that you've got the hang of the Echo Visor / Annihilator Beam combo doors, let's go hunting for another one. Return to the Main Gyro Chamber and descend to the very bottom of the chamber, where you'll discover another sealed door with three tone emitters near the lift (scan the Luminoth Lore Projector nearby if you haven't already). Break out the Annihilator Beam and Echo Visor again, then shoot the sealed door to hear the sequence of tones. Reproduce the sequence via the three tone emitters nearby to unlock the door, revealing a Kinetic Orb Cannon hidden beyond. Jump in to be catapulted straight into the giant purple sphere above, shattering it to reveal Power Bomb SA.03.
With your new toys secured let's return to the Temple Grounds. Travel to the lower level of the fortress and exit via the main entrance. Once there, travel up to the Great Temple by way of the Sacred Path area. Travel up to the Main Energy Controller, where U-Mos will explain that one remaining Energy Controller is sustaining the dark world, and until you secure it Dark Aether will continue to exist.
Not the ungenerous type, as thanks for restoring all three temples U-Mos will grant you the ultimate protection from the Ing - the Light Suit. Step forward to claim your reward and read up on all the funky features it offers besides the slim white look.
With the Light Suit you'll now be completely impervious to the effects of Dark Aether's atmosphere (but can still recover energy inside a safe zone). You'll also be able to travel throughout that murky purple water without taking damage. Lastly, see that small sparky hologram at the center of the now-open Energy Controller behind U-Mos? Touching that will grant you access to a light energy transit system between the four Energy Controllers on Aether.
U-Mos explains that nine keys hold the power to open access to the Sky Temple - and your final battle against the Ing. Now at this point you're completely free and able to retrieve all the remaining items in the game along with the nine keys. But first we'll go visit the gateway to the Sky Temple on Dark Aether to see what it looks like and to gather clues as to the whereabouts of the nine keys.
Return to the Temple Sanctuary below and travel back to the Temple Grounds by way of the western lift (travelling towards Torvus). Once down in the Meeting Grounds, feel free to stop by your gunship for a quick save and ammo refill (watch out for the Dark War Wasps at the Service Access). Scan your gunship to learn that it's been busy all this time - repairs are at 86%, so it should be ready by the time this adventure's over.
Let's now go visit the Sky Temple Gateway. The areas of the Sky Temple Grounds are nowhere near as interconnected as the Temple Grounds, so there's only one Dark Portal leading there. Beyond the Meeting Grounds lies the Hall of Eyes area - the Dark Portal there is your only access point to the Sky Temple.
Travel over there and fire up the portal, step inside to transit to Dark Aether. Once there, fry the Inglets around you and step outside the safe zone. Look at your health - it's not budging. Now that's going to come in real handy up in the Sky Temple, seeing as no Luminoth has ever stepped foot in there to set up any safe zones.
Travel to the southern end of this region, there you'll find a green blast shield covering the door. Blow it off with a Super Missile and step through. Beyond is the War Ritual Grounds, complete with its own half-pipe just like the Meeting Grounds on Aether. Follow the path up to find a huge Ingworm claw-like structure standing where the lift to the Great Temple usually is.
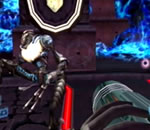
Two Hunter Ing will promptly appear, so let's have some fun with them. See the inactive Light Beacon nearby? Shoot it with the Annihilator Beam - then watch as the creatures are helplessly drawn towards the field and oblivion just like a fly towards a funky flyzapper. Scan the Super Beacon for your Logbook.
See the missile locked behind a door at the base of the mutated Ingworm structure? Simply flick on the Dark Visor, look for five pods surrounding the door and hit them all at once with the Seeker Launcher to open the door and claim Missile TG.08 inside. Exit the War Ritual Grounds via the eastern door and travel through the Shrine Access area. Watch out for Corrupted Sentreyes and pools of Phazon in the main chamber.
Take the purple blast shield off the door thanks to the Seeker Launcher and move through to the corridor beyond. Disable the Darkling Tentacles on the way to avoid trouble. Exit the tunnel ahead to finally locate the Sky Temple Gateway. Step forward to find the main chamber surrounded by ten tall pillars (along with the largest amount of Phazon you've seen yet covering the rear wall - someone you know would sure like to visit this place). The Sky Temple is hovering ominously directly above you, so this must be the place.
You'll notice immediately the body of a Luminoth warrior lying beside a pillar which looks as though it already possess an inserted key. Scan the body to learn of A-Kul's plight and her leadership of the last Luminoth strike force, originally sent to invade the Sky Temple. A-Kul managed to secure her key, but sadly the other nine didn't. You may remember seeing them all as you travelled throughout the other regions of Aether - the nine members were all coloured blue and gave you an entry for your Logbook once scanned.
Look up and scan all the statue heads attached to each pillar for your Logbook. Each pillar grants you clues left by A-Kul as to the whereabouts of the other nine Luminoth, but you should recall where most are (at least when you get to each) as you've seen them all before and have most likely already recorded their entries for your Logbook (especially if you've been following this guide). The clues are fairly vague, but if you look back at the entries of each warrior, a word will be highlighted red. These words relate to the names of the rooms they now reside in, so that should help narrow it down.
Chapters:
- Planetfall
- The World Divided
- Fate of the Federation Troopers
- The Plight of the Luminoth
- The Sands of Agon
- Dark Aether
- The Space Pirate's Lair
- Samus vs Dark Samus
- Unlocking the Dark Agon Temple
- Restoring the Energy Controller
- The Journey to Torvus
- The Everlasting Deluge
- Restoring the Flooded Temple
- Taking the Fight to the Ing
- Expanding Samus' Arsenal
- The Underwater Temple
- Securing the Dark Torvus Temple
- The Path to Sanctuary
- The Mechanical Marvels of Aether
- The Sub Guardian Nightmare
- Subterranean Conquest
- Searching the Fortress
- Retrieving the Charge Combos
- Following the Echoes
- The Screw Attack Returns
- The King of all Mechanoids
- Gearing up for the Finale
- Unlocking the Sky Temple
- The Final Treasure Hunt
- Ending the War


