


Chapter 25: The Screw Attack Returns
Don't forget to pick up the missile hidden in this shaft.
You now have only one more new upgrade to pick up from the fortress before hunting down those last two Dark Temple Keys. Check your map to see a number of large rooms left unexplored on the western side of the fortress. But you can't travel through the Watch Station Access room thanks to that giant chasm, so you'll need to find another way in.
That way is accessed via the Main Research chamber down on the ground floor. Travel back down and make your way across to the Main Research chamber by way of the Reactor Core. Once there, deal with the two Quad drones wandering about first.
Do you hear those pulsing sounds emanating from somewhere in the room? Now that you've got the Echo Visor you can easily spot the sonic emitters keeping that door panel on the southern wall sealed. Shoot all the emitters to open the door, revealing a neat little alcove complete with an inactive Dark Portal. Energize the portal and step in.
WARNING!!
This area of the game is known to have a game-ending bug. Once you begin shooting the three sonic emitters, do not leave the Main Research room until you've hit all three and opened the sonic emitter door. If you leave the room before shooting all three, you may not be able to open the sonic emitter door even if you hit all three sonic emitters.
Once in Dark Aether you'll be greeted by two annoying Hunter Ing. Deal with both targets and head around the central cylinder to find another sealed door complete with sonic emitter locks. Use the Echo Visor to see them and unseal the door. The open door will uncover a control terminal, scan it to raise a section of the floor surrounding the large red cylinder-enclosed area in the center of the room.
Nice view.
There's a door up on the western side of the room you can now reach, but it leads to a shaft where only Wall Jump Surface tracks lead skyward. Instead, drop below under the raised platform, spin around and energize the Light Portal you find, returning to Aether (but firstly, stay inside the safe zone and wait for your health to fully recharge).
Once back in Main Research, you'll find yourself inside the central cylinder where the Caretaker Class Drone resides. Make sure you've scanned it from outside of the cylinder already for your Logbook. Climb up the Spider Ball track ahead of you and bomb-jump up to the horizontal Spider Ball track running around the cylinder.
The drone will then make its entrance, lowering down and extending a number of arms to touch the Spider Ball track. The floor below you will become electrified, so quickly bomb-jump up to the track and grab hold. The drone's arms will be constantly moving around the circular track, so keep moving and boost to the opposite side to avoid being knocked off.
To harm this thing, wait for what looks like a small purple energy ball sensor to lower down from the drone. Boost across the track into the ball to destroy it and disturb the drone. Keep this up for a few more sensors and a large motivator unit will extend from the center of the drone. Boost into this object to send the drone higher up the shaft.
Follow it up to engage it again, but watch out as the horizontal Spider Ball track here is broken into two sections. Continue to deal with the sensors as they appear, and be sure to grab health they drop. If you fall to the floor quickly bomb-jump up to the track again before electricity courses through the floor panel.

Have fun with the Spider Ball in this maze.
Take out the central motivator unit again when it appears to send the drone even higher up. Follow it to find a horizontal Spider Ball track broken into three sections now. Keep zipping back and forth across the tracks and deal with the sensors again. When the final motivator unit appears you'll need to be quick to take it out before it retracts back in the body of the drone.
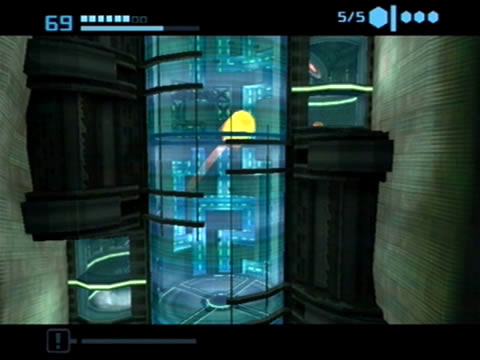
Finish this one off to see the Caretaker drone take a bow and explode, leaving you clear to reach a ventilation shaft at the top of the chamber. Climb up there and follow the narrow tunnel to reach a door. Step inside to discover a tall shaft leading skyward. As you step inside you'll see a containment chamber quickly snap down on top of a Kinetic Orb Cannon on the right. Scan the chamber to reveal that it's sealed via a sonic security emitter, so switch on that Echo Visor again and look for an invisible drone sending the lockdown signal.
Destroy it to raise the chamber, then jump in the cannon. A sequence of cannons will send you to the very top of the shaft, just look closely at the background of the central shaft to see something interesting as you go. When you reach the top of the shaft drop down to the floor section in the pit below. Before you lies a small opening leading to a number of tunnels working down the shaft. Below is Missile SA.05, from the top, take the left tunnel, then right, right again, and finally left to drop right on top of the item. If you miss it, check which tunnel you should have taken and return to the top to try again.
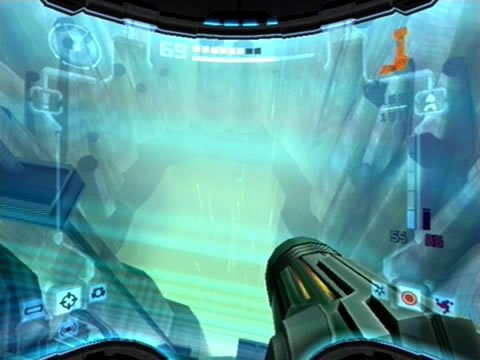
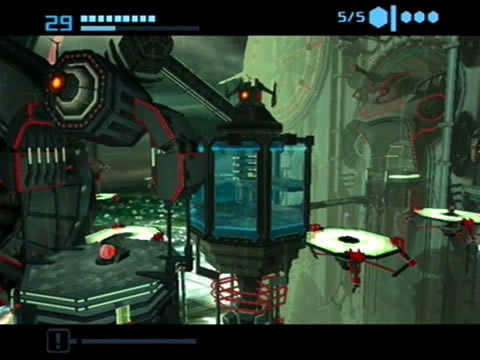
With the missile secured let's return to the top of the shaft and exit the room there (stock up on ammo via the Luminoth crates beside the door first). Inside you'll find yourself back up on the second floor of the fortress, at the immensely huge and intricately detailed Watch Station. Take in the sights around you, at the center of the chamber hovers a platform with lower rotating platform arms used to reach the opposite end of the chamber. Spider Ball tracks run everywhere on the wall opposite, so there's some fun climbing to be had here. Try to take the two Rezbit from here to avoid trouble as you attempt to cross the chasm.
With the area clear traverse the chasm and jump up to the door on the western wall. Inside is the Grand Abyss - it sure lives up to its name. No invisible platforms here either, so you can't cross it for now. Instead, head back to the Watch Station. Back inside, you'll find an inactive Dark Portal locked behind a funky-looking gate on the north wall. Accessing that portal is key to crossing the chasm of the Grand Abyss.
The Dark Aether version of this area thankfully bears Grapple Points.
So let's look around to find a way to open the gate. Around the corner in the north-eastern corner you'll find a Luminoth Lore Projector, make sure you scan it for your Logbook. Now for that gate. Firstly, jump up to the white door on the eastern wall and go inside to find yourself down the other end of the Watch Station Access connected to the Main Gyro Chamber. Except this time you've got some goodies on your side.
Drop down and look inside the alcove on your left, Energy Tank SA.02 awaits you there. With that secured, turn around and scan the control terminal beside the edge of the cliff to lower down two Grapple Points above the chasm - now you can freely move back and forth through here. Return to the Watch Station and turn left. See the Spider Ball track running along wall up ahead?
Climb along it then bomb-jump yourself up to the track running up the crane-like protrusion from the wall. Follow this track to reach the top of the hovering platform where a Kinetic Orb Cannon resides. Jump in and hold R, you'll be catapulted over to the northern wall straight to a Spider Ball track. From there, climb along the tracks, taking extreme care on the moving circular sections (time your bomb-jumps so that you lay a bomb just as you pass between the two small red markers, that way you should launch off the track at the right time).
Eventually you'll reach a large vertical section of track containing two deviating paths - at the base of this track section another track leads down to a Bomb Slot on the wall, while there's also another section of track below the bottom left corner of it. Rather than going for that Bomb Slot, first drop off the bottom-left corner of the track and latch onto the one below.
Follow these tracks around to eventually reach a translucent pipe way up above. Follow the tunnel into the northern wall (don't go down the right-hand tunnel as you'll fall back down to the start) to eventually discover a treat - Beam Ammo Expansion SA.01 hiding inside a tiny chamber.
Unlock this giant vault to score the Screw Attack.
With this item tucked way, follow the tunnel back and drop to the ground by way of the right-hand tunnel (you can also try to get back to the large vertical section of the Spider Ball track but it won't be easy). Jump in the Kinetic Orb Cannon again and climb along the network of Spider Ball tracks, this time going for the Bomb Slot underneath the large vertical track section. Energizing the Bomb Slot will effortlessly open the gate below, granting you access to the inactive Dark Portal. If you wish, return to the Main Gyro Chamber and save your game at the nearby save station first.
Transit to Dark Aether to discover a similar room beyond. Step forward to be ambushed by two Dark Pirate Commandos - deal with them both before moving on. Now take a look around - there's only three doors leading out of here and two of them are inaccessible (note the Dark Temple Key way over inside an alcove beside the door in the corner).
Jump up to the only accessible door and proceed through. Beyond is the Judgement Drop - the Dark Aether version of the Grand Abyss. The good news is that the area is covered in hanging Grapple Points allowing you to cross easily. Just make sure you deal with all the floating Dark Preed first. Once on the other side, jump below to the inactive Light Portal below and travel back to Aether.
Now you're on the other side of the Grand Abyss. But with no portal back to Dark Aether, there must be another way to return to the other side. Jump up above and head through the door you find. You're now in the gigantic Vault - and something very special lives here. Walk forward and deal with the first Rezbit you see ahead.
With the target down cross the long bridge ahead to the central structure to find an item locked inside a cage. Scan the item to reveal it's the Screw Attack! Now you just need to find a way to reach it. Scan the giant cage above to learn that no weaponry can break through it. So instead, drop below behind the Screw Attack to discover a Bomb Slot there.
If you energize the Bomb Slot you'll see four giant laser emitters surrounding the cage fire beams away from the structure. See those four targets above the cage? All you need to do is use the Spinners below each laser emitter to spin them around so that the laser strikes the target. Just need to find a way across to them.

The Screw Attack makes its 3D debut.
Drop to the bottom of the cage and look for an open window next to a control terminal looking back towards the door you entered via. Scan the terminal to lower the long bridge down, granting you access to an inactive Dark Portal way over on the other side. Walk over and power it up, then travel to Dark Aether. Ahead of you now lies a gigantic chasm, with a number of Grapple Points granting you passage to the structure way ahead.
Use the Grapple Beam to reach the inactive portal terminal on the ledge way ahead, just don't stop going when you see a number of creatures emerge. When you land, turn around and scan one for your Logbook - these Dark War Wasps will only give you trouble if you hang around on the Grapple Points for too long. Quickly scan the terminal and travel back to Aether once the portal activates. Back in the Vault, you'll now see a number of floating platforms surrounding the central cage, giving you easy access to the laser emitter stations.
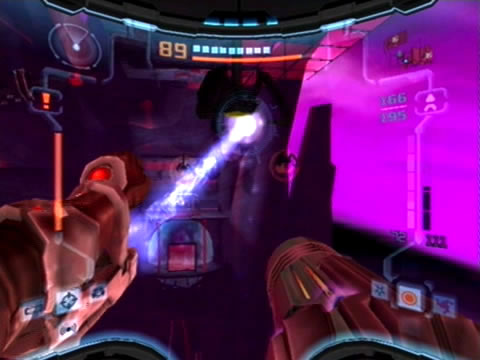
Jump atop one of the platforms to see a Rezbit jump to life on one of the other platforms ahead. There's not much room here to deal with them, so use a charged shot from the Dark Beam to immobilize the target and finish it off with ease. Travel around to each of the four laser emitters, dealing with any ambushing Rezbit and rotate the emitters via the Spinners to face the cage. With all four emitters now facing the cage, return to the portal terminal and charge it up, travelling to Dark Aether. Cross the gigantic chasm, and use the Light Portal at the far end to return to Aether (ignore the Dark War Wasps).
Back in the Vault, cross the bridge and simply energize the Bomb Slot below the Screw Attack to cause all four lasers to hit their targets, lifting the massive cage away from your prize. Step forward to claim your new toy. With the Screw Attack in your possession, we'll already give it a go to exit the Vault. Seeing as the bridge has been lowered and you can't Space Jump up to the door, let's use the Screw Attack to reach it.
Stand at the edge of the bridge facing the door, then jump forward, perform a Space Jump, then continually press B in timed succession to engage the Screw Attack and perform consecutive jumps in the air towards the door. Just like old times eh? You'll need to practice with it to get the hang of the system, just remember that you can only perform a maximum of five consecutive Screw Attack jumps before Samus drops to the ground.
Chapters:
- Planetfall
- The World Divided
- Fate of the Federation Troopers
- The Plight of the Luminoth
- The Sands of Agon
- Dark Aether
- The Space Pirate's Lair
- Samus vs Dark Samus
- Unlocking the Dark Agon Temple
- Restoring the Energy Controller
- The Journey to Torvus
- The Everlasting Deluge
- Restoring the Flooded Temple
- Taking the Fight to the Ing
- Expanding Samus' Arsenal
- The Underwater Temple
- Securing the Dark Torvus Temple
- The Path to Sanctuary
- The Mechanical Marvels of Aether
- The Sub Guardian Nightmare
- Subterranean Conquest
- Searching the Fortress
- Retrieving the Charge Combos
- Following the Echoes
- The Screw Attack Returns
- The King of all Mechanoids
- Gearing up for the Finale
- Unlocking the Sky Temple
- The Final Treasure Hunt
- Ending the War