


Chapter 22: Searching the Fortress

These foes are tough - evade if they give you trouble.
Travel through the Fortress Transport Access beyond to reach an elevator taking you straight up to Sanctuary. Once back inside the hi-tech Luminoth fortress, we'll delve deeper into its depths. Proceed through the Torvus Transport Access ahead and take out the strings of Octopede, looking for Power Bomb refills. You'll need one to penetrate the blast shield on the door down the end of the tunnel.
Beyond this tunnel lies the Main Research chamber, a huge complex centered around a large blue structure in the center of the room. Two Quad drones roam the region, deal with them before exploring. Look for a Luminoth Lore Projector beside the door you entered via and scan it for your Logbook.
Now there's plenty of eye candy in this chamber, so we'll deal with each component one at a time. See the large blue translucent wall on the north side? Missile SA.04 resides way up among all the Spider Ball tracks and moving components of the wall, so patiently climb up there to claim your prize. With the item secured, drop to the floor, stand up and take in the sight of the giant blue cylinder in the center of the chamber.
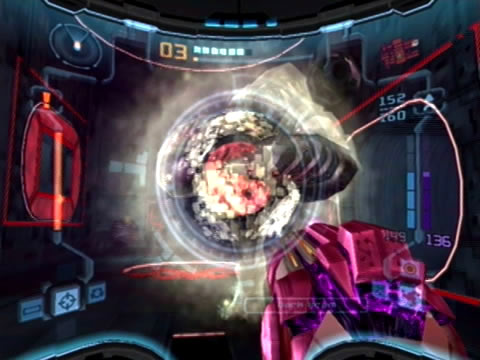
See that odd large machine moving up and down the tube? Scan it for your Logbook, this unique Caretaker Class Drone is guarding the inside of the giant cylinder, of which is lined with Spider Ball tracks. But hear that constant pulsing sound echoing throughout the chamber? That's a sonic security system locking down that large panel on the south side of the room, and until you can interface with it you can't reach the inside of the cylinder.
So let's move on beyond here. Look for a Spider Ball track over on the eastern wall and climb up to the door there. Exit Main Research to find yourself in the Transit Station - a room connecting Main Research to the familiar Reactor Core. Step forward and take out the Luminoth Turret just on your left. Down in the main section of this chamber you'll discover a weakened glass wall on the right.

You'll have a closer meeting with this Caretaker Class Drone soon.
Scanning it reveals that a Power Bomb can breach it, so lay one to open access to an inactive Dark Portal beyond. There's an item to be found in this chamber, but we'll be dimension-hopping back and forth thanks to a number of portals existing throughout the room.
Transit to Dark Aether and step forward to be greeted by a huge drone lumbering into the room. Scan it to reveal it as a Dark Ingsmasher. But this thing doesn't look like it's going to be smashing any Ing at the moment. If it stomps both fists into the ground, stay back and strafe when it launches a nasty grenade at you. Keep your distance and watch for it generating a protective energy shield/vortex from one of its fists. Use the opposite polarity beam to weaken and shut down the shield, then keep firing at the main body with either the Light or Dark Beam.
Watch out if it pounds the ground and sends shockwaves along the floor, simply Space Jump to avoid them. Send a few missiles its way too, in no time you'll have it beat. Grab any energy or ammo refills it drops, then look for an inactive Light Portal at the end of the alcove the Dark Ingsmasher burst from.
Energize the portal and step inside. Once through, walk to the end of the alcove and look for a narrow tunnel opening in the wall. Roll through to find another alcove with a portal at the far end. Power it up and transport to Dark Aether. Once there, climb up the Spider Ball track on the wall to discover the next portal. Back on Aether, climb along the Spider Ball track and across the ceiling (don't fall). Follow the track along into a hidden section of the room where Power Bomb SA.01 awaits.
Phew. With this item in hand, climb back up the Spider Ball track and drop to the floor. Head up through the opening on the left side of the inactive Dark Portal (take out the Luminoth Turret guarding it first), then use a Power Bomb to blow the blast shield off the door you find around the corner.
Inside you'll find yourself back in familiar territory at the Reactor Core. For now, descend to the base of the reactor and save your game at the Save Station nearby (also swing around to the cobalt translator gate on the other side of the chamber and head on through to find the Sanctuary Map Station if you haven't already). Back in the Reactor Core, you'll find an Energy Tank awaiting way up at the very top of the chamber. All we need to do is get up there. Scale the shaft for now and destroy all the Rezbit to avoid trouble.
Use opposite-polarity beams against this Ingsmasher attack.
With the area secure look for a Kinetic Orb Cannon placed in an alcove beside the base of the reactor. Jump in and hold R - the cannon will shoot you straight up to a large orb-like section of the reactor, which is conveniently covered in Spider Ball tracks. Climb your way to the top, watching out for arcing electricity appearing every few seconds. When you reach a smaller sphere with a red node attached to one side, put Samus on top of the node and boost her away from it, landing smack bang onto another suspended sphere. Look for another red node on this one and boost from there to the next sphere.
Keep this up until your reach a Spider Ball track on the wall, just move quickly to avoid rude electricity sparking over the spheres capable of knocking you off. Eventually after a short trip along the tracks you'll find Energy Tank SA.01 waiting patiently.
With the item in hand drop below and travel west to the Hall of Combat Mastery. Once inside, make your way across to the inactive portal station, just don't be surprised if one or two of the inactive Ingsmashers abruptly come to life when you approach. Scan one for your Logbook, then deal with them as you did the Dark Ingsmasher - use opposite polarity beams when it deploys its shield and hammer it with Super Missiles when its vulnerable for a quick takedown.
With the area clear, power up the portal and travel to Dark Aether. Once inside the Culling Chamber, work your way inside to see that first Dark Temple Key inside the wall section again. But this time we can finally get in there and score it.
Move through the corridors, dealing with any Dark Pirate Commandos challenging you (remember to switch on the Dark Visor). Look for a red Spider Ball track running up an inner wall, climb through to reach the entrance of the inner tunnels leading to Hive Temple Key 1. Climb down to it and bust open the crates blocking access with a bomb to claim your prize. With this first key in hand, we'll now return to Aether.
Once back in the Hall of Combat Mastery, you now have a choice to go and pick up some extra items from other regions of Aether before heading up to that huge shaft on the second level of the fortress. I'll direct you to find some of them now, but bear in mind that these items can be picked up at any time from now on, we'll do it now just for convenience (you can always leave it till after when searching for the Sky Temple Keys if playing for a quick completion time).

Grab the map of the Fortress on your way through.
See that blue glass tube connecting the portal to the main corridors ahead? Lay a Power Bomb nearby to shatter it, granting access to a door on the outside the tube. Open it up and head through. Inside you'll discover a long hallway where a Quad drone patrols. Deal with the mechanoid and proceed onwards. Up ahead you'll discover a large round chamber where a transport lift resides.
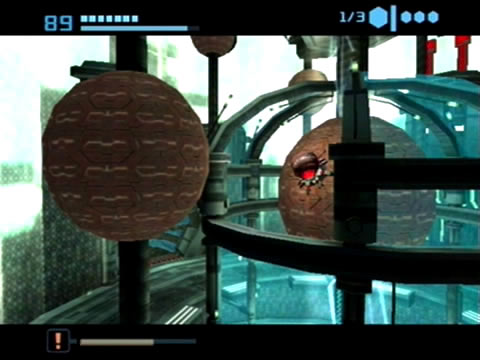
Power it up and ride on down for quick transit to the Agon Wastes. Once there, bust open the door ahead with a Power Bomb to find a narrow network of tunnels in the room beyond. Roll down through to the main tunnel conduit to find your path branching left and right. Go right and take out the Pillbug rolling around the tunnels above you.
Use a double bomb-jump to reach the tunnels above where the Pillbug was rolling around, then use it again to climb the tunnels you'll see above. Right at the top you'll discover Missile AW.08 there. With this item secured drop back down and travel right again. Beyond the door at the end of the tunnel you'll find yourself back in Main Reactor room where you faced Dark Samus initially.
Scan the body of the Luminoth warrior beside you and roll down the Spider Ball track to enter the main chamber of the room. Around the corner on the wall you'll spot another Spider Ball track, so let's climb up there. At the top, you'll see another track over on the right attached to a raising and lowering piston. Time your boost right to make it across, then travel around the piston to see another one.
Wait for them to line up before boosting; if you fall quickly get away from the Phazon vats and go back to the start. Keep going along the row of pistons till you reach the other side of the room, then lay a bomb atop the enclosed stasis chamber in the floor to gain access to Missile AW.09. With this item tucked away, drop below into the main chamber and ride the lift up in the corner. Head over to the eastern side of the room and go through the door to Sand Processing.
In here, take out the two turrets watching over the half-pipe, then use the Boost Ball to launch yourself up to a small tunnel up above. Roll through the tunnel to access that enclosed control station behind the glass window overlooking the half-pipe. Scan the terminal to power up the nearby Bomb Slot, then energize the slot to drain the sand from the half-pipe outside, revealing Missile AW.10 waiting for you in a small alcove.
Now before returning to Ventilation Area A, there's one more item you can pick up over in the Bioenergy Production room. Make your way over there (and save the game along the way if you wish). Inside you'll find the room inhabited by a number of loose Metroids, deal with them all before looking around. See the green door way up on the ledge on the eastern side? That's where we need to go.
An Energy Tank awaits at the end of this tricky sequence.
Go and scan the terminal at the control station below the door to raise all three large storage racks to the same position you left them in on your last visit. With that operation complete, walk over to the control terminals on the far side of the room.
Over in the far north-western corner you'll find a handy Spider Ball track running up the wall. Climb up and traverse the network of tracks there to eventually reach a number of tracks in the ceiling overlooking the open chamber.
Boost along them until you reach the one in the center of the room, then look for another track further ahead leading east along the roof. Boost over there, then boost yourself across to the Spider Ball track running around the top of the middle storage rack. Climb around that to find yourself directly opposite the green door, simply boost from there to land snugly in front of it. Blow the blast shield off the door with a Super Missile to discover Missile AW.11 hidden in the chamber beyond.
Chapters:
- Planetfall
- The World Divided
- Fate of the Federation Troopers
- The Plight of the Luminoth
- The Sands of Agon
- Dark Aether
- The Space Pirate's Lair
- Samus vs Dark Samus
- Unlocking the Dark Agon Temple
- Restoring the Energy Controller
- The Journey to Torvus
- The Everlasting Deluge
- Restoring the Flooded Temple
- Taking the Fight to the Ing
- Expanding Samus' Arsenal
- The Underwater Temple
- Securing the Dark Torvus Temple
- The Path to Sanctuary
- The Mechanical Marvels of Aether
- The Sub Guardian Nightmare
- Subterranean Conquest
- Searching the Fortress
- Retrieving the Charge Combos
- Following the Echoes
- The Screw Attack Returns
- The King of all Mechanoids
- Gearing up for the Finale
- Unlocking the Sky Temple
- The Final Treasure Hunt
- Ending the War