


Chapter 16: The tip of the SkyTown Iceberg
Eradicate these Phazon growths to discover Eastern SkyTown.
Upon touching down on the ever-beautiful SkyTown, save your game here as we've got a long journey ahead of us to the Federation Landing Site in the far east. Step off the landing pad and ride the lift up to the northern exit. Step through to the Security Station and swing around the curving corridor filled with Sky Puffers. Step through the orange door at the far end to find yourself finally back in the tall shaft lined with Wall Jump surfaces you couldn't pass some time ago.
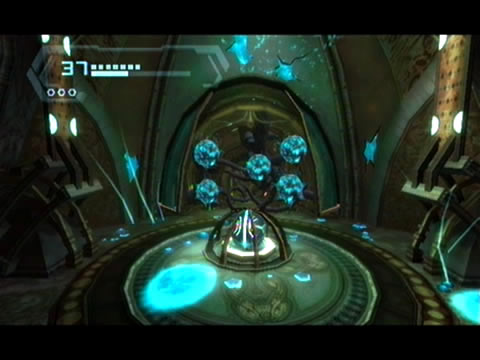
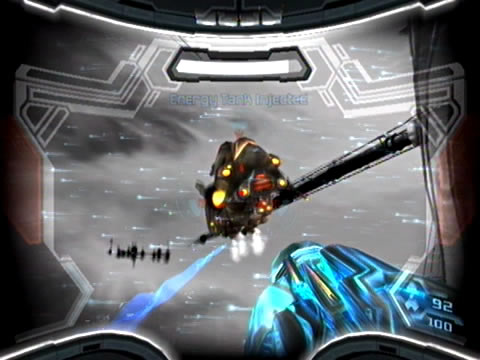
Use the Screw Attack to easily scale the shaft and discover an exit far above. Step into the chamber beyond and turn right to find the only path forward blocked by a small bunch of Phazon vines. See the Bomb Slot device on the floor in front of the shutters? Hop in it with the Morph Ball and watch as the shutters swing wide open. Simply enter Hypermode and use the Hyper Ball to eliminate the icky Phazon growths on the vines, clearing out the entire obstruction.
Who knows what lies within this complex?
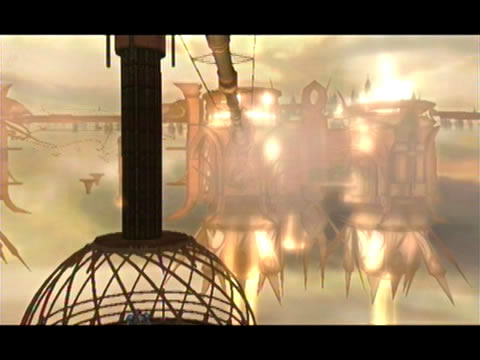
Lay a bomb to hop out of the Bomb Slot and roll on through the now-uncovered narrow tunnel. Exit the chamber on the far side to find yourself on a lone balcony - except this one possesses a massive tram system (notice the thick cable above disappearing into the horizon?). Apart from having one of the best views of the distant SkyTown pod colonies, you'll find the inactive tram awaiting power here. Simply use the Boost Ball to energize it just as you have with earlier Kinetic Orb Cannons, then stand up and touch the large hologram to engage transit.
Watch as an intricate cage surrounds Samus (for safety) and the tram rockets off into the distance. Eventually upon arrival at Eastern SkyTown you'll find another massive complex of pod structures awaiting exploration (and be rewarded with a bonus Friend Voucher). Spin around to see the distant pod complex you just departed from, and something else not so pleasant. Two Space Pirate ATCs swing into view, travelling off out of sight (but not before picking off several shots at you).
So the Pirates have indeed invaded Elysia too - let's make sure they don't get too relaxed with their foothold here. Step inside the curving Concourse Access A corridor - as you do a lone Aeromine raises its shield and hastily retreats - now they know you're here. Travel through the corridor and bust open the Space Pirate crates if you need refills. Exit the corridor to locate the Concourse - a large multi-floored chamber home to a second Theronian containment unit.
Looks like the Pirates have a strong foothold in this region.
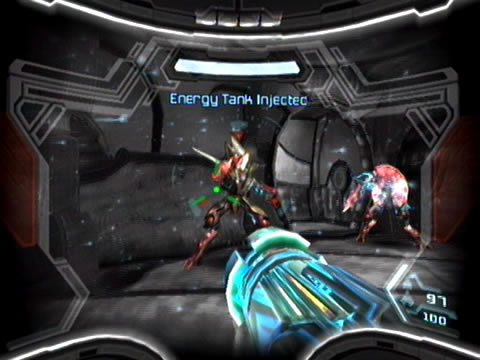
That pesky Aeromine is waiting for you, quickly zipping away before you can follow. Step around the corner into the main chamber of the region and watch as the camera pans up to the huge bomb component resting high above. No time to look around though, as an Armored Pirate Trooper rushes from behind cover to attack. He's joined by a Pirate Militia, so try to deal with both targets without losing too much health (use Hypermode if you wish).
With both targets down, step around the central round lift platform. You may now witness an odd sighting - what looks like an Armored Pirate Militia could storm out from within a small alcove on one side of the chamber. If you scan the target however, it registers as an "Armored Pirate," and yet if you view the character model it looks like an Armored Pirate Trooper. You'll receive a red credit for scanning it, but this entry won't appear in your Logbook - and this extra red credit will send your maximum possible number of collected red credits one higher. Sometimes this fella doesn't appear, if he doesn't I've found that backtracking to Skytram East and then returning here should summon him. This guide was written using the PAL version of Metroid Prime 3, so I can't vouch if this works in the Japanese or NTSC versions of the game.
Anyway, let's move on. Around the corner of the central lift platform lies another exit from the central chamber, but another Armored Pirate Trooper paired with a Shield Pirate Trooper stop you from leaving. Deal with both then head through the exit. A third Armored Pirate Trooper retreats down the corridor, trying to seal you in with a few elaborate gates. Dismantle each gate with a Missile and ride the lift up to the second floor beyond.
Sure enough, here comes the cavalry.
Blast through the third and final gate to find yourself back out in the main chamber. Watch out for more hostiles however, as the Armored Pirate Trooper summons two more of his cronies. Use Hypermode to deal with them all, then head for the exit on the northern side of the chamber (don't touch the orange energy field connecting the Theronian bomb unit with the floor though). From here you may notice three elaborate locking panels surrounding the bomb unit, scan one to reveal that only by striking all four lock pods at once can you release the panels.
Step inside the next outer corridor and look right to find an inactive elevator. Scan it to reveal that a locking mechanism is keeping it held in place on the top floor, so no luck getting up there for now. Take the left corridor to find yourself sealed inside a larger chamber guarded by three Remorse turrets. Simply enter Hypermode and deal with the trio before losing any health. Break through the gates blocking you in on either side, then take the far exit to find a door leading to the the sunlight-filled Concourse Ventilation chamber.
Step forward to the far end where a visible Wall Jump surface resides (notice the Missile Expansion outside the window here?). Scan the grating covering the floor here to learn that by energizing the nearby Bomb Slot, the grating will retract. So simply enter Morph Ball mode and hop into the Bomb Slot. Lay a bomb to retract the grating and fall down to the next level. Energize the next Bomb Slot to clear the shaft and fall down to the base. Stand up and head around to the balcony outside.
Use Hypermode to conquer Pirate ATCs.
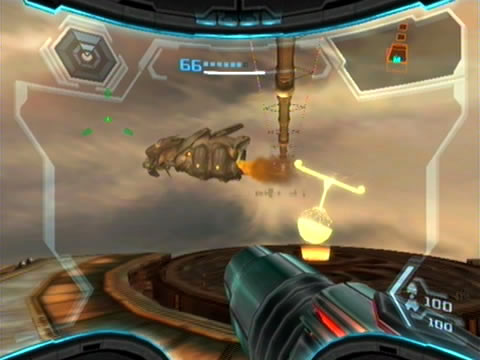
Before enjoying the view however, another Space Pirate ATC enters the region, intent on dealing you grievous harm. Don't let it by entering Hypermode and blasting the craft out of the sky quickly. Draw in any pickups it leaves behind, and don't mind the second ATC flying by further away.
Cross the balcony and exit via the southern door. Crack open the crates ahead in the following corridor and pick up anything they conceal. Turn right to discover a deep chasm along the curving corridor, bearing a single Grapple Point high on the ceiling. Swing across but take care; as you land a Pirate Militia steps out to attack. Deal with the lone target before leaving the chamber.
Through here resides a very special chamber and a key location here on SkyTown. You'll find yourself in the Chozo Observatory: a huge round open-air chamber surrounded by Bomb Slots lining the walls, intricate constellations etched on panels below each, and a huge Chozo sculpture adorning one side. But before long you'll be ambushed by two invading Advanced Aerotroopers. Scan one quickly for your Logbook, then let's use this encounter to our advantage.

Tear an Aerotrooper's jetpack off for a spectacular explosion.
Immediately enter Hypermode and shoot down one of the pair. But before you take out the second, strike the target enough to dismantle his armour, then return to normal mode. Score a direct Charge Beam hit with your Plasma Beam, then very quickly lock on and use your Grapple Lasso when the C-icon appears. Rip the grapple back to pull off the Aerotrooper's jetpack, sending him crashing to the floor as you receive the bonus Crash Landing Friend Voucher. This maneuver can be tricky to pull off, but you'll have plenty more encounters with Aerotroopers yet to try (although take note that you will eventually see the last of them).
With your position clear, bust open any of the crates nearby for health refills. Now let's take a closer look around. Break out your Scan Visor and investigate everything in sight. You'll learn that a massive (and inactive) holographic projector in the center of the chamber is used to input stellar coordinates for Elysian satellites awaiting launch beneath the Chozo sculpture. But a nearby Bomb Slot down at the base of the chamber is offline, and although the elaborate hook on the topside of the holographic projector can be grappled to lift the unit, you currently don't have anything to get the job done.
So instead, look for a small elevator unit down at the base of the chamber. Use the hand scanner to restore power, then take the lift down and exit the observatory there. Another large elevator resides in the following curving corridor, but its circuit board is heavily damaged and can't operate without repair. You know what to do, use the Plasma Beam's welder to restore the circuit good as new. Don't forget to break open the Space Pirate crates nearby for health.
The Chozo architecture here is unmatched.
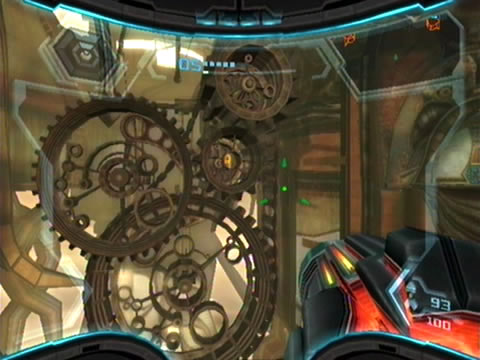
Ride the elevator up and break open any more crates you find, but take care as you step towards the exit. Two Jumpmines have been strategically placed here, be sure to snuff them from a distance. Step outside to the Gearworks for another grand view of the region. A huge set of interconnected gears reside straight ahead, your target is far across the chasm beyond there.
But before you can take action, a group of small fliers appear and begin circling each other, much like the the Phazon Nightbarbs back on Bryyo. Quickly scan one to learn that these Swarmbots also generate energy pulses to fling at you. Simply use a Charge Beam shot and blast the energy vortex before they can fire. See the lone Sky Puffer floating about on a platform suspended far out in the sky? Use the Screw Attack to reach the platform safely (watch out for the patrolling ATC flying by), then Screw Attack again from there and fly over to the next balcony (notice the Missile Expansion hiding within one of the huge gears?).

This bridge is heavily guarded with corrupt machinery.
Exit the Gearworks to find the aptly-named Broken Lift. A malfunctioning lift here stops you from travelling up a level, so instead conquer the swarm of Aeromines ambushing you here and take the exit on the far side of the corridor. Step through the following sloping corridor (watch out for the Remorse turret), and breach the fragile window at the far end to discover the active Turbine Chamber.
Scan the huge spinning structure in the center to learn that this object is actually the transport module for the Theronian containment units - the first bomb component. Scan the cradle arms holding it in place to learn that severing their power cables should allow transit to the opposite side of the chamber. See the small yellow cable on each running into the walls? Target the cables and destroy both to sever power and shut down the transport module's rapid movement.
Leap over the gap to the other side (don't look down) and exit the chamber beyond. The following curving corridor is bustling with activity - a pair of Aerial Repair Drones, a group of Sky Puffers and a lone Databot hover above the chasm. Clear the Sky Puffers and shoot the Databot to reveal its lore entry. Scan the Federation entry to learn of the Galactic Federation's first contact with the Elysians, and a time of new prosperity for both sides.
Summon your ship and simply hit the switch to initiate upgrade.
Screw Attack across the chasm and step outside to the incredible long Skybridge Athene. A lone pod structure resides on the far side of the bridge - that's our ultimate target for now. But several groups of Tinbots guarding the bridge don't want to let you through. Either use Missiles or Hypermode to deal with them (in case they enter Hypermode too). Cross the span of the bridge and enter the Landing Access corridor beyond.
Bearing another deep chasm, you'll need to dismantle the glass framework panels blocking your path before using the Screw Attack to span the gap. Exit the corridor to finally locate the SkyTown Federation Landing Site. But be sure to scan the Databot hovering nearby before riding the lift down to the landing pad. In this entry (Agreement), the Elysians tell of their trading deals with the Federation, and the installation of Aurora 217 as the Elysian atmosphere proved too dangerous for the Federation's researchers (but not Samus).
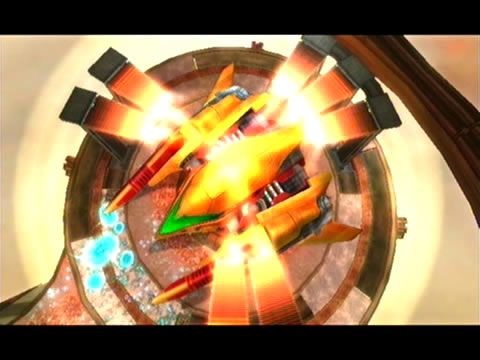
Samus' gunship receives a very handy towcable.
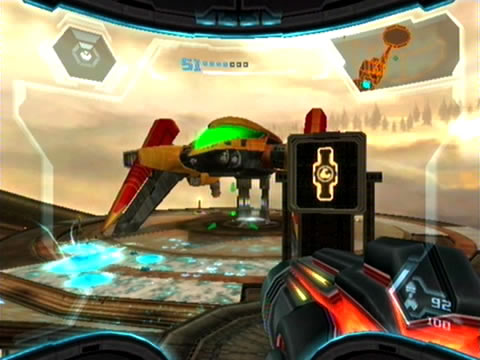
Ride the lift down to the landing pad, finding it sealed by shutters much like at Landing Site A. Aurora 217 chimes in and summons a Bomb Slot to retract the covers. Lay a bomb inside the unit to lower the shutters, allowing your ship to land safely. See the control terminal atop a small platform beside the landing pad? Scan it to reveal the terminal as a ship-upgrade station. So let's make use of it - summon your ship, then activate the terminal once it lands to grant your ship the very handy Ship Grapple upgrade!
With this safely in your arsenal your ship will easily lift incredibly heavy objects, something your mission definitely calls for. Aurora 217 chimes in again, this time marking the locations of all three Theronian bomb components on your map. The first one is nearby in the Turbine Chamber, so save your game here before heading back the way you came.
Chapters:
- GFS Olympus
- Meet the Hunters
- The Liberation of Norion
- Heroes Corrupted
- A Broken World Ravaged by War
- The Deadly Phazon Threat
- A Fallen ally
- Samus' Gunship on the Frontlines
- Disabling a Leviathan's shield
- Heart of the Phazon Corrupter
- Chozo Paradise Among the Clouds
- Restoring Aurora Unit 217
- Hunting the Rogue Machine
- Uncovering Bryyo's Secrets
- Ghost Ship
- The tip of the SkyTown Iceberg
- Piecing together the Leviathan's Bane
- The Metroids Arrive
- Save the Second Chozo World
- The Pirate's Homeworld Unveiled
- Rescue operations in Enemy Territory
- The Final Chozo Gift
- Repositories of Chozo and Pirate Worlds
- Phazon Mines Part 2
- Breaking out the Heavy Weaponry
- Storming Pirate Command
- Join the Federation's Leviathan Strike
- Return to Norion
- Excavation of the Bryyo Ruins
- Bryyo's Final Bow
- Charting out the Ruined Valhalla
- Aurora 313's Final Message
- Ridley's Final Phazon Fight
- Opening the Wormhole
- The Source of the Poison
- The Masters of Phaaze