


Chapter 24: Phazon Mines Part 2
Study the vast layout of the Pirate base closely.
Step aboard the train and activate the control console to return to Pirate Command. Upon arriving in Transit Station 3-B you'll be treated to a new tune - notice it's another wonderful remake of a classic theme from Super Metroid? Step off the train and exit the transit station to find yourself in a small, outdoor chamber housing a huge mechanical gate - on your first trip through the Lift Hub region you found yourself on the sealed side of the gate.
This time there's a handy Bomb Slot on your side of the gate, so simply step out under the rain, enter Morph Ball mode and hop in the Bomb Slot. Lay a bomb to conveniently rotate the gate. Stand up and step inside the corridor beyond. Move past the lift - we're already on the correct floor. Step outside to the Command Courtyard to find it mostly the same as your first trip through, except this time you've got company.
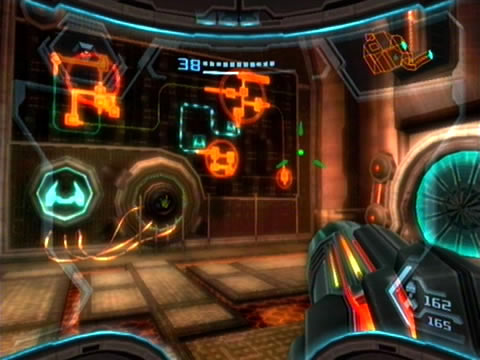
Three small Phazite panels extend from the floor before a trio of Assault Pirate Troopers leap down from above, taking cover behind the obstructions. Don't waste any time with these hostiles (especially on Hypermode difficulty) - enter Hypermode and finish them quickly. With your position clear you're free to power down the large energy field blocking the exit on the northern side (but first take a look skyward for another view of the gigantic planetary energy shield emitter - you may also spot a mammoth inactive anti-air turret high above the courtyard).
Assault Pirate Troopers and Commando Pirates don't want you in these mines.
Step towards the purple terminal powering the shield and drain it thanks to the Grapple Voltage (that one's for Gandrayda). But before going inside the now-accessible chamber beyond, climb up the Grab Ledge near the ventilation fans. Move through the tunnel network and up to the small alcove where you found an Energy Cell some time ago. Step outside in the rain and cross over to the cherry-red alcove on the opposite side to find a well-camouflaged Pirate lore terminal.
Scan this one for the Disaster at Elysia entry. This one documents the Pirate's observations of your efforts at Elysia, the defeat of Ghor and the Federation's retaking the planet. Looks like they're not too happy...
Climb down to the northern exit of the courtyard and step through. Move through the Courtyard Passage and scan one of the many drains spewing red waste into the floor to learn that these refuse units pump sewage down into an underground sewer system. Yummy. Strangely the Hazard Shield doesn't engage if you step under the raining muck. Down the far end of this curving corridor lives a huge swarm of tiny critters. Scan one to learn that these aptly-named Scritters feed off Space Pirate Phazon refuse, so no wonder they love it here.
Exit this likely foul-smelling corridor to finally locate the Skyway Access - the first point of entry leading into the Leviathan Seed's location. But you've got a slight snag - as upon stepping forward into the chamber, a massive array of alarm laser fields cover the region and trigger security protocols. Not one, not two, but three thick armour blast shields seal the exit up ahead, thoroughly blocking your progress.

Thick Phazon deposits just waiting to be mined.
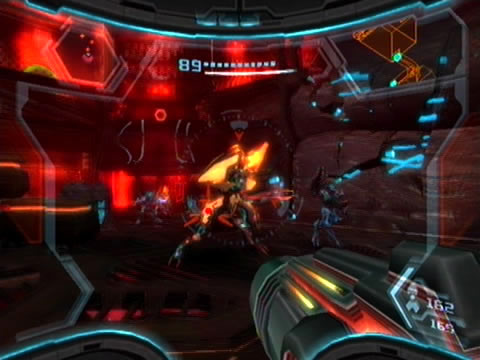
But that's the least of your concerns, as a blaring alarm sounds and summons hostile Commando Pirates. Quickly enter Hypermode and deal with any targets present. With the first wave clear, a number of small hatches around the chamber burst open as numerous Crawltanks deploy into the chamber. Use Hypermode again to easily dispatch them. As the second wave arrives, one will bust through a grate on the wall, revealing a narrow tunnel within.
Clear out any remaining enemies and be sure to crack open the scattered crates here for health refills. Scan the sealed blast door to learn that as long as the facility's defense system is active those doors won't be opening. So let's see what lies through that narrow tunnel a Crawltank so kindly opened up. Before rolling inside, be sure to scan the Pirate lore terminal right beside the tunnel's entrance for the Purification entry.
This lore entry reveals Dark Samus' plans for the captured Aurora Unit from the Valhalla. It somehow hooks the device up to Phaaze and gains command of the living planet, now able to willingly send forth Leviathan Seeds to planets at will. Now we now why so many were deployed so quickly. The first one sent forth arrived here on the Pirate Homeworld (or Urtragia if you prefer) - and amazingly the Pirate forces here tried to repel it before Dark Samus consumed their wills. So the Pirates are all acting against their own wills, pity they're still violent and seek to dominate the galaxy - so in that case not much has changed.

Summon the mining drill and carve out each wall.
They reveal that soon the Leviathan will consume their Homeworld and completely transform it into a state similar to Phaaze, giving them a solid foothold close to Federation space. Now that's something we certainly can't allow to happen (even if this planet is an acid rain-swept ball of lava). Climb inside the narrow maintenance tunnel and roll along to find yourself entering a huge Kinetic Orb Cannon similar to one you used way back aboard the Olympus during the initial Pirate attack.
The device will hurtle you to another region of the base, depositing you inside a tall round shaft in possession of a handy Spider Ball track leading skyward. But before starting your climb, stand up and look across from the Spider Ball track to find out where you are. We're now back in the Defense Access chamber, right outside the sealed entrance to the Command Station. Remember seeing an active energy shield blocking access to this alcove some time ago?
Now that we're on the same side as the purple terminal powering the shield, you're free to use the Grapple Voltage to power it down and allow easy access to and from this region. That Phazite shield blocking the Command Station's entrance is still there, so we'll need something to be able to penetrate the outer covering and strike the control switches hidden beneath.
With the energy shield lowered, climb up the Spider Ball tracks to reach the distant apex of the shaft. Here you'll discover an exit flanked by two ominous-looking wall panels, the Pirates sure love their architecture here. Step inside and through a very thin curving corridor to discover Transit Station 4-A. Find out where this one leads by first scanning the terminal adorned with a large symbol beneath the large Pirate base chart, then activate the hand scanner to summon the mammoth transit train.
Something other than Phazon hides in this corner.
Step inside and activate the command terminal to find yourself hurtling toward a new and unexplored region of the base - the Pirate's Phazon Mines. So now we know why the Pirates abandoned their efforts to extract Phazon from Aether - they're now sitting on a giant Phazon-producing factory. Step off the train upon arrival and be sure to save your game at the save station next door.
This part of the planet wasn't included in your download of the facility's map, so we'll be charting out the maze ourselves. Exit the transit station to discover the main Phazon Quarry - a huge underground cavern filled with Pirate equipment used to mine the raw rock. Sure enough, this region certainly isn't deserted. An Assault Pirate Trooper raises the alarm, quickly summoning extra reinforcements. Enter Hypermode and deal with the Pirate threat comprised of Assault Pirate Troopers and Commando Pirates.
With the area secured, break out your Scan Visor and take a look around. Two huge rock walls on either side of the chamber can be scanned - scan one to learn that multiple fractures throughout the Phazon-riddled granite indicates their candidature for mining, except you can't exactly chip away at it with your weaponry. Be sure to break open the larger Phazon containers strewn about to recover any health lost from the previous battle. Don't worry about the stacked small square crates, they're only for decoration.
Now to find a way to mine those two rock walls. Look for a small alcove hidden behind the glowing orange window along the eastern wall (where the first Assault Pirate Trooper emerged from). Step inside and down the end to discover an interesting computer terminal. Scan the machine to learn that this device commands a huge mining drill used to extract Phazon mineral deposits from the rock walls. That sounds good enough. Activate the terminal to bring up a diagnostic screen for the drill. Press the terminal again to extract the drill from its alcove and move it into position.

Use the Boost Ball on this convenient half-pipe.
The terminal now displays two sections in the region suitable for mining. Simply press one of the highlighted sections and watch as the massive drill sets to work, carving out a huge chunk of the wall. Once complete, simply select the other wall section to uncover something beneath. By drilling out the right wall you'll reveal Missile Expansion PH.08 hidden within the rock wall (how did it get there?), while drilling out the left wall reveals a conveniently-placed half-pipe.
With both sections mined your drilling helper will shut down and remain in place. Step outside the command station, notice the second floor directly above the drill's control terminal? We'll be heading up there later on. Grab your latest Missile Expansion before stepping towards the newly-formed half-pipe. Use the Boost Ball to reach the exit higher above and step through.
Beyond here lies the Mine Lift shaft. As you step forward you'll see something moving downward beyond the metal gate ahead - that's actually an elevator cabin and we're currently inside the lift shaft itself. Scan the gate blocking your path to learn that its weakened state has rendered it vulnerable to physical force. Simply lock onto the C-icon and deploy your Grapple Lasso, pulling it back to dismantle the gate. But this elevator shaft isn't unguarded, as a pair of Crawltanks emerge beside the Spider Ball track ahead.
Release the lift cabin and follow it into the abyss.
Quickly deal with both targets and take a look around. Scan the lift at your feet to learn that this cabin is used to move between floors, but if you switch on the X-Ray Visor it looks quite empty inside...
Look at the walls either side of the lift, see the Spinner devices? Scan one of the tall security clamps either side of a Spinner to learn that these devices keep the elevator secure, but manual override can be initiated via the Spinners. You can't directly enter the Spinners, but thankfully those handy Spider Ball tracks lead right into them.
So climb up the tracks and move to each Spinner, using the Boost Ball to release the security clamps. With all clamps released, the elevator itself will plummet to the base of the shaft, granting you access below. Fall down to the base and stand up - notice the Wall Jump surfaces leading back skyward? That's your ticket back up the shaft if you need to backtrack.
Note:
I've been told that if you backtrack and leave this chamber while only activating one of the two Spinners, the game might glitch and not allow you to activate both upon your return - completely stranding you here. So to play it safe be sure to activate both Spinners and drop the elevator before contemplating any backtracking.
Be sure to scan the Pirate lore terminal near the exit here before leaving for the Vanguard entry. This one is actually kind of humourous to read, as it details the beginning of Dark Samus and the Pirate's attacks on Norion, Bryyo and Elysia. They speak of turning all three planets into copies of Phaaze thanks to the Leviathan Seeds - if only they knew then that by now all three worlds have already been liberated and the Seeds reduced to Phazon-less rocks.
Chapters:
- GFS Olympus
- Meet the Hunters
- The Liberation of Norion
- Heroes Corrupted
- A Broken World Ravaged by War
- The Deadly Phazon Threat
- A Fallen ally
- Samus' Gunship on the Frontlines
- Disabling a Leviathan's shield
- Heart of the Phazon Corrupter
- Chozo Paradise Among the Clouds
- Restoring Aurora Unit 217
- Hunting the Rogue Machine
- Uncovering Bryyo's Secrets
- Ghost Ship
- The tip of the SkyTown Iceberg
- Piecing together the Leviathan's Bane
- The Metroids Arrive
- Save the Second Chozo World
- The Pirate's Homeworld Unveiled
- Rescue operations in Enemy Territory
- The Final Chozo Gift
- Repositories of Chozo and Pirate Worlds
- Phazon Mines Part 2
- Breaking out the Heavy Weaponry
- Storming Pirate Command
- Join the Federation's Leviathan Strike
- Return to Norion
- Excavation of the Bryyo Ruins
- Bryyo's Final Bow
- Charting out the Ruined Valhalla
- Aurora 313's Final Message
- Ridley's Final Phazon Fight
- Opening the Wormhole
- The Source of the Poison
- The Masters of Phaaze