


Chapter 32: Aurora 313's Final Message
Aurora 313's final transmission before the ship falls.
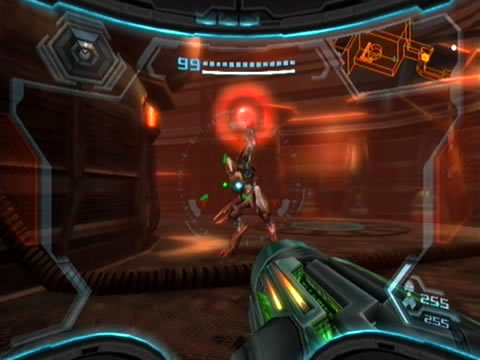
Once the target's gone, grab all the fallen health and Missile refills before climbing up to the exit high above the western wall. Step through to the Control Room Access chamber for an odd sight - a Phazon Metroid lugging around a lifeless Pirate Trooper. Three more of this one's buddies inhabit this region, so be sure to clear them all out before moving ahead.
Clear this chamber to locate your ultimate goal aboard the Valhalla - the Control Room. The place is a complete mess - both GF Marines and Pirate Trooper bodies litter the area, with a huge ruined energy generator unit on one side and a still-attached Pirate boarding craft on the other.
You'll also find an activate data terminal near the entrance - scan this one for the Anhur Incident lore entry. A nice narrative of the events back on Aether among all this carnage - this one documents the events of Metroid Prime 2 and the resulting Phazon extraction activities. Phazon recovered by the Federation from Aether during their aid to the Luminoth resulted in the development of the PED - but with Phazon reserves on Aether dwindling let's hope the Federation don't try to mass-manufacture this technology.
Power this terminal to access a vital piece of data.
See the data terminal resting before the gigantic ruined energy generator? Scan the terminal to learn that data backups of the Valhalla's ship logs can be accessed from this terminal. But upon activating the terminal you'll find yourself prompted for a security code. Now where are we going to find something like that?
The answer won't be far away... look behind the mangled energy generator to find the body of a thoroughly-impaled GF Marine resting beside a discarded PDA. The static-filled display on the PDA displays the code needed to access the ship's logs, so make a mental note of the code and input it into the data terminal.
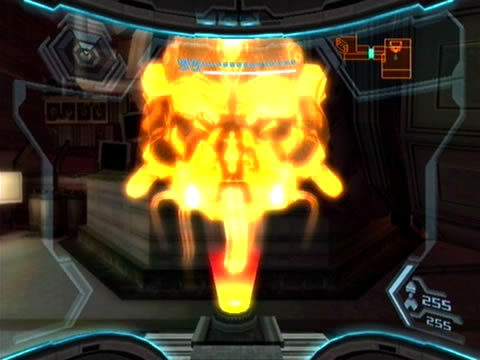
You'll be presented with a thick yellow hologram of Aurora Unit 313. The incredibly deep-voiced supercomputer relays the Valhalla's final transmission, informing the listener of the Pirate's attempts to extract it from the ship. Describing the opening of a nearby artificial wormhole during the attack, it reveals what we already know - through the wormhole lies the source of all Phazon.
Its voice dissolving into incoherentness, Aurora 313's image vanishes as the transmission ends - right before the Pirates pulled it free from the ship. For accessing this secret message you'll be granted a bonus Friend Voucher - not too shabby. But that's not the critical piece to be found on the ship - after all, those Energy Cells still need to pay off.

Samus retrieves an important Pirate Code for later use.
Step toward the Pirate boarding craft still attached to the hull nearby - the Pirates are dearly going to pay for leaving this insignificant vessel intact. Climb inside the creepy interior and step towards the purple terminal on the far side. Attach your Grapple Lasso and deliver enough energy via the Grapple Voltage to restore proper function. With power restored, a second terminal lowers down from above, looking a lot like the terminals found on the Pirate Homeworld.
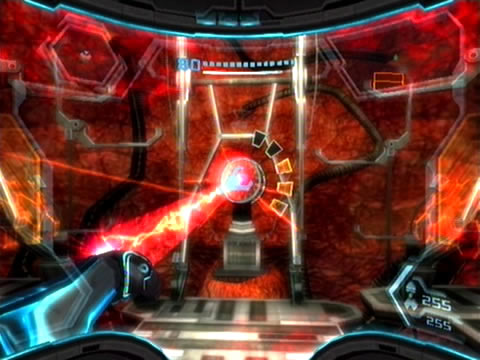
Fire up your X-Ray Visor and input the correct code sequence on the terminal to power a number of hologram displays showing a very strange object.
Samus then receives a Pirate Code - Aurora 242 chimes in and reveals that this piece of data is a Space Pirate entry code - whatever that is. Very mysterious... 242 doesn't know what the purpose of this code is, but we'll certainly find out soon enough. If you scan the hologram terminals your Scan Visor reveals that these displays detail extensive information on how the Pirates take command of Leviathans... now that's definitely useful intel.
That's it for the Valhalla - all your collected Energy Cells have served their purpose and we've picked up everything the Valhalla conceals, so it's time to leave this wreck to the dead of space. Backtrack down the path you travelled and head for your ship at Docking Bay 5 - don't let any marauding Phazon beings stop you. Climb aboard your ship - let's head for a more pleasant location.
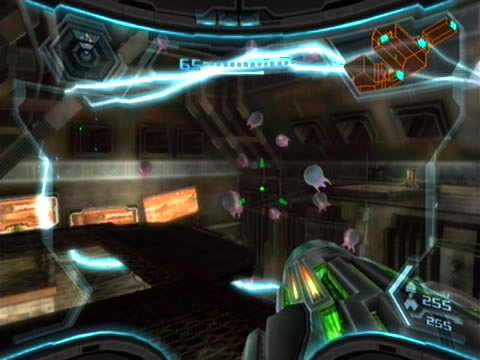
Leave these helpess Miniroids to their electrical feast.
There's one more task remaining over at SkyTown before we've secured the area - remember the Chozo Observatory? We still need to launch a satellite to receive all the item locations on the Pirate Homeworld. So select Elysia on your start chart and touch down at Landing Site B in Eastern SkyTown. Step off your ship and make your way over to the distant Chozo Observatory chamber from here.
Upon arrival, you'll see your target right after stepping off the lift. See the small Phazite panel covering a small section at the holoprojector's base? Switch on your X-Ray Visor to reveal a tiny control switch beneath. Simply strike it with the Nova Beam to expose a hidden section within the interior of the holoprojector. See the hand scanner hiding inside? Climb up and activate the switch to launch one final satellite, receiving the complete readout of all item locations on the Pirate Homeworld.
That's it for SkyTown, we've now uncovered all the secrets of this gorgeous Chozo world. Say farewell and return to your ship. Climb aboard and check your map - look closely around the Pirate Homeworld to see three dots left. The Federation strike force orbiting the planet sure has been patient, so let's not keep them waiting. We'll first head for the Research Facility.
Step off your ship upon arrival and check the map again. A white dot hovers within the Scrapworks chamber, and some distance above the Processing Access corridor. Move through the sloping lift shaft next door and enter the vast Scrapvault. A lone Armored Pirate Trooper still hides out here - he'll summon aid but you shouldn't have trouble clearing them out.
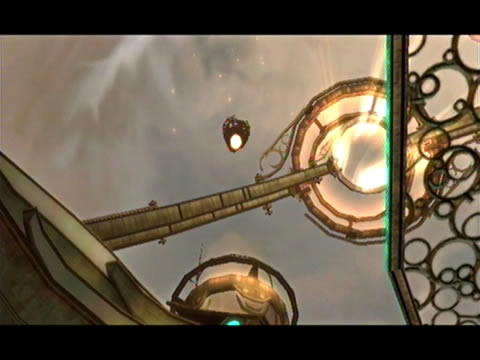
Launch the final satellite to chart out the Pirate Homeworld.
Climb up to the maintenance tunnel leading inside the Scrapworks and roll inside. Make your way through the network inside to eventually discover Ship Missile Expansion PH.01 high above, right beyond a Spider Ball track. Use the Boost Ball to reach the track, then climb along and carefully hop across two small platforms to reach the item. With this third-last expansion secured, hop down and return to the Scrapvault via the exit directly below.
Move through to the Processing Access corridor next door - remember all the laser tripwires last time you came through here? This time they're all powered down so simply stroll to the center of the corridor. Remember the two Phazite-covered switches here? Simply switch on your X-Ray Visor and strike both switches with Nova Beam fire to retract the elaborate shutters in the ceiling, revealing an active pair of Wall Jump surfaces. Don't worry about the Puffer Mines floating about the shaft, use your Screw Attack to scale the distance. High above the region lies a hidden alcove, complete with a thick energy shield protecting Ship Missile Expansion PH.02.
Scan the shield to learn that concussive blasts should do the trick. So fire enough Missiles at the layered shield to break through and gain access to your prize. With this item safely stashed away, there's only one remaining expansion to be found in the entire game - check your map to see that it resides within the Flux Control chamber back in the Command Center region.
So let's head back to Samus' gunship and set a course for the Command Center.
Touchdown and step off your ship - let's head for the Command Station chamber. Once there, hop down into the maintenance tunnels under the floor through the opening near the gross Phazon organism. Roll around to the blue lift shaft and ride it up - follow this trail to find yourself snugly back inside the Flux Control chamber. Roll out the tunnel and stand up.
Few Pirates roam the halls since operation Leviathan Strike.
Deal with any pesky Crawltanks giving you trouble before taking a look at the entrance you just came through. See the small coverplate sealing a neighbouring tunnel? Rip it open with your Grapple Lasso and roll inside to find yourself out beside the massive Flux Control generator residing here. Simply climb up the nearby Spider Ball tracks to discover Missile Expansion PH.11 waiting patiently here - your very last one.
Check your inventory, at current count we've got 99/100 pickups found. Just one left (you can probably guess where we'll receive it). Keep following the Spider Ball tracks up above to find a disabled purple terminal behind a sealed window - power it up via the Grapple Voltage to restore power to a nearby elevator (use it to travel between the floors here).
But we're done now, time to assault the Pirate Seed. Remember, feel free to leave this final treasure hunt till after destroying the final Seed, but on certain difficulties you'll find it in your best interest to pick up everything first.
Chapters:
- GFS Olympus
- Meet the Hunters
- The Liberation of Norion
- Heroes Corrupted
- A Broken World Ravaged by War
- The Deadly Phazon Threat
- A Fallen ally
- Samus' Gunship on the Frontlines
- Disabling a Leviathan's shield
- Heart of the Phazon Corrupter
- Chozo Paradise Among the Clouds
- Restoring Aurora Unit 217
- Hunting the Rogue Machine
- Uncovering Bryyo's Secrets
- Ghost Ship
- The tip of the SkyTown Iceberg
- Piecing together the Leviathan's Bane
- The Metroids Arrive
- Save the Second Chozo World
- The Pirate's Homeworld Unveiled
- Rescue operations in Enemy Territory
- The Final Chozo Gift
- Repositories of Chozo and Pirate Worlds
- Phazon Mines Part 2
- Breaking out the Heavy Weaponry
- Storming Pirate Command
- Join the Federation's Leviathan Strike
- Return to Norion
- Excavation of the Bryyo Ruins
- Bryyo's Final Bow
- Charting out the Ruined Valhalla
- Aurora 313's Final Message
- Ridley's Final Phazon Fight
- Opening the Wormhole
- The Source of the Poison
- The Masters of Phaaze