


Chapter 31: Charting out the Ruined Valhalla
The last leagacy of the horrid Ing.
Bring up your star chart and select the Valhalla's location. Climb out upon arrival and get ready to put those Energy Cells to good use.
First we'll head for the Stairwell region where two Energy Cell stations reside. Exit the Docking Bay and step through to Hangar A Access. Move towards the chasm up ahead, but take care as four purple creatures can be seen across the chasm roosting up on the ceiling.
Quickly scan one of the beings to reveal them as Phazon Shriekbats - these nasty Phazon-consumers love to dive-bomb you just like all their other cousins, except these ones expel a nasty burst of Phazon energy upon impact, so you don't want to be anywhere near them. Quickly take them all out from a distance or move away from their point of impact. Swing across the chasm and step through the heavy hangar door to the Repair Bay beyond.
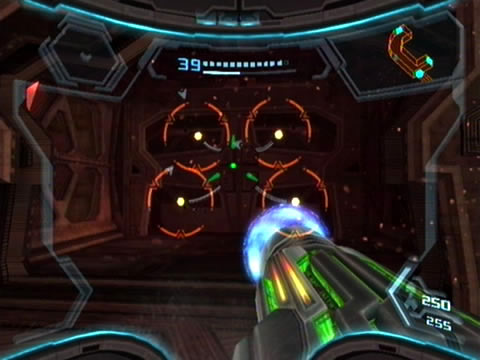
Your regular swarm of baby Miniroids still hover about the electrified remains of the mangled Stiletto fighter at the base of the chamber, but this time three Phazon Metroids also inhabit the region (no more Jelsacs). But any Metroid standing in your way is up for a nasty end - don't forget to switch on the X-Ray Visor, lock onto their glowing Phazon core and let rip with your Nova Beam to down them instantly.
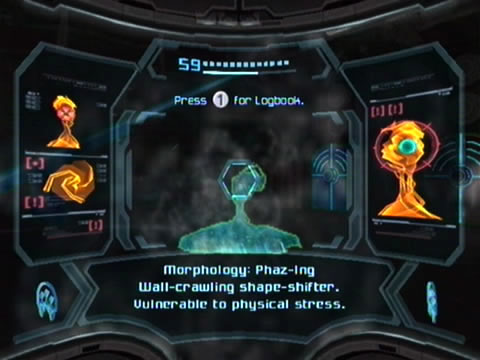
Use your Grapple Lasso to deal with the bad memories.
Move through to the Stairwell chamber in the corner on the northern wall and step over to the pair of red Energy Cell stations. Slot an Energy Cell into each station and watch as the loading ramp nearby receives enough power to groan into position, granting you access to the above floor. A trio of ugly Phaz-Ing promptly squirm up from under the ramp, so be sure to deal with them first (try out the Grapple Voltage).
Climb up the ramp and move around the ruined balcony - be sure to scan the still-active terminal found up here for the Tallon IV Incident lore entry, a great recap of the events chronicled in the first Metroid Prime title (PAL players, remember in the first Prime when it mentioned somewhere along the line that the meteor struck the planet an indeterminable amount of time in the past? This entry reveals it was in a fact a mere fifty years ago).
Step through the only exit found here to discover the Weapons Cache, home to an Energy Cell data station, Missile Expansion VH.03 and a grand view of the nebulous vista outside. You'll also spot a dead Space Pirate boarding craft floating lifeless outside - scan it for your Logbook if you forgot to back on Olympus.
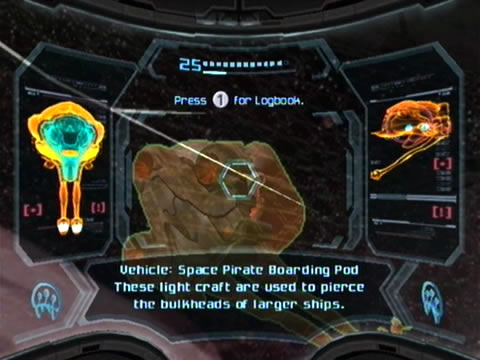
Some of the Pirate's boarding craft don't work so well...
Retrieve the Missile (scan the Energy Cell data station if you wish, but seeing as we already found all of them you won't need the clues they offer) and return to the Repair Bay.
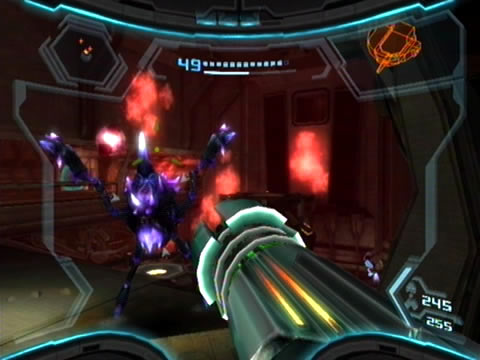
Once there, climb up the region and take care around the exposed electrical conduits (deal with the returning Metroids if they hassle you). Step through to the Security Station high above and deal with any Phaz-Ing taking up residence here. Move onward to the Security Access corridor and head left to the Auxiliary Lift (watch your back for Phazon Hoppers creeping down the corridor). Ride the lift up and move through to the Port Observation Deck.
Now we can explore deeper within the vessel. Step forward and watch out for multiple Metroids phasing into the chamber through the walls. Use the X-Ray Visor/Nova Beam combo to deal with them before heading down the far end to the sealed hatch (first take a look out the window and switch on the X-Ray Visor to see just how many Metroids float about outside).
Use the Seeker Missile to strike all four lock pods on the hatch at once, instantly opening the bay door wide and releasing a whole load of pressurized atmosphere (and the body of an unfortunate GF Marine).
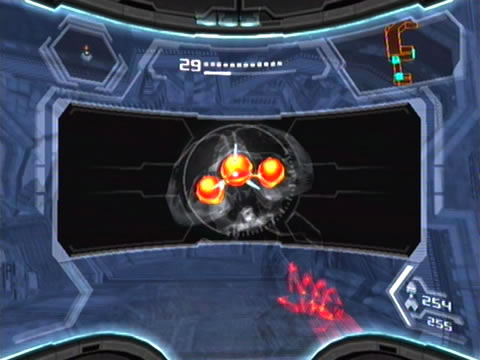
Use the Nova Beam to instantly pacify Phazon Metroids.
Step through the exit beyond to discover the Xenoresearch Lab - a chamber much like a region of the Olympus you fought multiple Pirate forces in. Except look through the observation window down into the main chamber below, this one's inhabited by a lone hovering Atomic and its Phazon Hopper buddies.
Scan the Atomic for your Logbook if you missed the one back on Bryyo. Also scan the two large cylindrical power generators stationed here - the left one hasn't got a problem but the right one is without power.
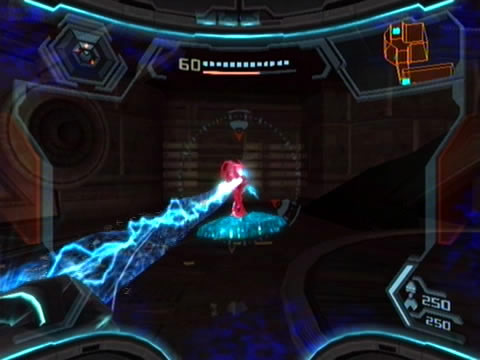
Step around the balcony to the far side where an Energy Cell data station lives (scan it if you wish). Directly opposite the hovering device lies a severely weakened security shutter sealing access to the main chamber below. Simply deliver a single Missile into it to blow the shutter clean off. Watch out for pesky Phazon Hoppers leaping up to your platform, use Hypermode to knock them off quickly.
Stay up here and use charged shots to bring down the floating Atomic. Leap down inside the chamber and finish off the remaining pair of Phazon Hoppers. Now let's take a closer look around. One corner of the chamber contains another Energy Cell data station, while if you look at the floor on the opposite side you'll spot one handy Ship Missile Expansion VH.01 resting right under the floor, along with a small maintenance tunnel beside a fallen GF Marine.
The Seeker Missile continues to prove its worth.
But how to get down there... If you also happened to miss out on the Olympus-Class Battleship lore entry way back when you first glimpsed Ghor, scan the terminal on the northern wall here for the same entry. Now let's take a closer look at the pair of power generators here. The lifeless one has a pair of metal panels covering small sections on its housing - scan one to reveal that your Grapple Lasso should be capable of tearing them off.
So let's try it out. Lock onto the appearing C-icon and rip the panel off to reveal a handy Energy Cell slot beneath. Insert one of your Energy Cells into the slot and look for the second slot on the other side of the unit. With both batteries inserted, the device will restore full power and unlock a handy maintenance access hatch. Except by doing so, a strong gust of air sucks the Ship Missile Expansion into the maintenance hatch and out of sight.
Enter Morph Ball mode and follow the trickster. Keep tailing the item as it shoots through a network of maintenance ducts, eventually catching up with it deep down in MedLab Alpha once it can't travel any further. With this latest catch secured, lay a bomb to break through the obstruction and keep on rolling through the duct network.
Eventually you'll find yourself rolling through the ceiling of the Security Access corridor, just take care near the exposed electrical conduits to make it through safely.
Dispose of the Space Pirate's husk blocking your exit and roll out of the duct network. Stand up and head for the Auxiliary Lift again - we're not finished just yet. Ride the lift topside and move through to the Port Observation Deck chamber again. Clear out the returning batch of Phazon Metroids before taking a look at the northern exit. Slot another Energy Cell into the station beside the door to release the blast shield and gain entry.
Phazon Hoppers love to get up close and personal.
We've only got two remaining Energy Cells to use, so we're almost done. Step inside the the Junction A chamber and watch out for a pair of roving Phaz-Ing. Eliminate the hostiles and take a look around - two unfortunate GF Marines rest here - one stuck within a shattered glass window. See the door beside the fallen GF Marine sitting in the corner? (you can see part of this guy's face through his cracked visor) Open the door for a shock - the husk of a GF Marine crumbles on the other side. Step forward inside the Munitions Locker to discover one good and bad sight each - the good one is Energy Tank VH.01 waiting inside, the bad one - another husk of a GF Marine.
Pick up your final Energy Tank to give Samus as maximum life energy as possible - that should help in the battle within the Pirate Seed. Return to Junction A and step down towards the green door on the northern end (notice the husk of a Pirate Trooper along the way? They'll never truly master Metroids...). Scan the green door for your Logbook first before stepping through.
Beyond in the Aurora Access you'll be greeted by an even more ominous tune (if even possible). Step forward to see something odd - what looks like a PED Marine attached to a wall covered in the beginnings of Phazon growths.
Scan the target to learn that Phazon has begun breaking down his body for consumption - save this guy's remains an ugly fate with a single shot. A Liquid Phazon being inhabits this region, and the tough target will spit out numerous Phazon Grubs before giving up. Take out any targets before they latch onto you and trail the Liquid Phazon throughout the chamber.
Work your way through the bowels of the ship.
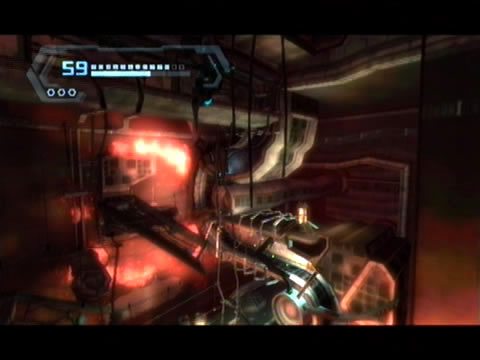
Finish the creep before taking a closer look around. Halfway along the corridor you'll find a chamber littered with debris and signs of Phazon corruption everywhere - a poor PED Marine's remains are also entangled in the ruins - notice the Phazon strains streaming from his body (and visor)? Save this one's remains some dignity too with a single shot. Step around to the exit ahead and move through for the most grim scene aboard this dead vessel.
You're now standing within the remains of the Aurora Chamber - remember the clean and concise state of Aurora 242's home back on board the Olympus? This one couldn't be more different.
A blood-red bottomless pit streams below, while barely anything remains of the Aurora Unit's holding tank. Phazon weapon damage litters the vacuum-filled chamber, while a massive mangled hole replaces the wall behind the Aurora Unit - no doubt this is where the Pirates forcefully extracted the supercomputer - I'd hate to imagine where it is now.
Step forward to discover a small alcove on your right. Two remaining Energy Cell stations reside here, but both currently have malfunctioning security clamps locked over their slots. You'll also find another Energy Cell data station in the corner. Scan the clamps to learn that internal mechanisms are jammed - looks like we need to perform some quick maintenance.
Climb up the ramp on the far side of the balcony and scan the Energy Cell data station there if you wish. Switch on your Scan Visor from here and feel free to scan the remains of the AU's holding tank - the Pirates certainly had no qualms in ruining the architecture to reach their prize. Also scan a large raised walkway high above near the exit on the western wall - looks like the Energy Cell stations below power the bridge.
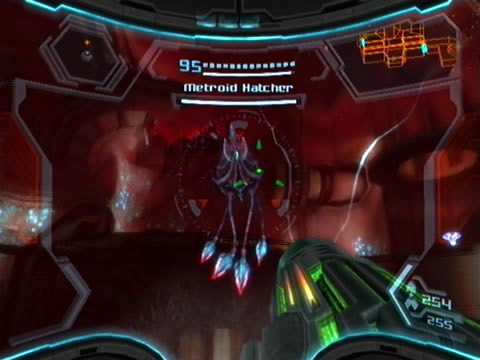
The Pirates left behind a nasty surprise - another Metroid Hatcher.
Take a look over at the wall above the Energy Cell stations - see the rotating mechanisms visible through a ruined panel? Simply lock on and send a Missile into the turbine to release its burden and unlock the security clamps. Return below and insert your remaining Energy Cells into the stations to instantly restore power to a number of walkways and lift elevators surrounding the chamber.
With your passage secured to the exit high above, there's only one remaining obstacle. The Pirates have left behind a present for anyone snooping around this area - yet another Metroid Hatcher.
The beast emerges from below the abyss - but this one possesses the least advantage of all three. Seeing as you can't enter this region without the Nova Beam, you'll always be guaranteed to have the weapon handy. So simply fire up you X-Ray Visor, lock onto the Hatcher's core and fire a single shot to finish it for good (unless you want to fight it the good old-fashioned way).
Chapters:
- GFS Olympus
- Meet the Hunters
- The Liberation of Norion
- Heroes Corrupted
- A Broken World Ravaged by War
- The Deadly Phazon Threat
- A Fallen ally
- Samus' Gunship on the Frontlines
- Disabling a Leviathan's shield
- Heart of the Phazon Corrupter
- Chozo Paradise Among the Clouds
- Restoring Aurora Unit 217
- Hunting the Rogue Machine
- Uncovering Bryyo's Secrets
- Ghost Ship
- The tip of the SkyTown Iceberg
- Piecing together the Leviathan's Bane
- The Metroids Arrive
- Save the Second Chozo World
- The Pirate's Homeworld Unveiled
- Rescue operations in Enemy Territory
- The Final Chozo Gift
- Repositories of Chozo and Pirate Worlds
- Phazon Mines Part 2
- Breaking out the Heavy Weaponry
- Storming Pirate Command
- Join the Federation's Leviathan Strike
- Return to Norion
- Excavation of the Bryyo Ruins
- Bryyo's Final Bow
- Charting out the Ruined Valhalla
- Aurora 313's Final Message
- Ridley's Final Phazon Fight
- Opening the Wormhole
- The Source of the Poison
- The Masters of Phaaze