


Chapter 19: Save the Second Chozo World
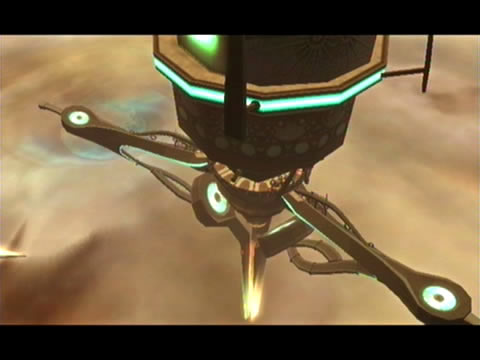
The Spire Pod aggressively detatches from SkyTown.
Converse with Aurora 217 to learn about the final stage of the plan. The plan is a tricky maneuver (but nothing too hard for our Samus), and naturally involves putting Samus in peril. Samus must take a trip on the Spire Pod as it travels over to the Leviathan Seed's location, and then cut the engines as it hovers overhead. Sounds easy enough.
With your conversation and Skytown's migration closer to the Leviathan complete, step outside to the balcony overlooking the Spire Pod (you'll find the opposite exit in the AU Chamber sealed, so now you know why you should've saved your game before speaking to 217).
Use the Kinetic Orb Cannon to board the Spire Pod and watch as the connecting cables violently detach the unit from the rest of SkyTown. The massive pointed engine at the base of the structure kicks in, diverting the pod and Samus deep into cloud cover toward the Leviathan. As you regain control you'll find the view around the Spire Pod suffocated by the thick pressing clouds. But before you can enjoy a smooth ride to your destination, Aurora 217 chimes in with a concerning report - multiple hostile targets are moving toward her position intent on removing their one obstacle to ruin. Here we go.
Heading for the Leviathan Seed's position deep under the clouds.
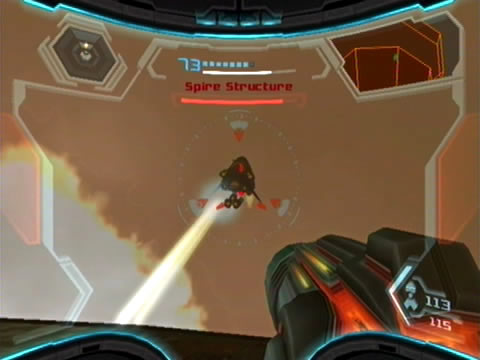
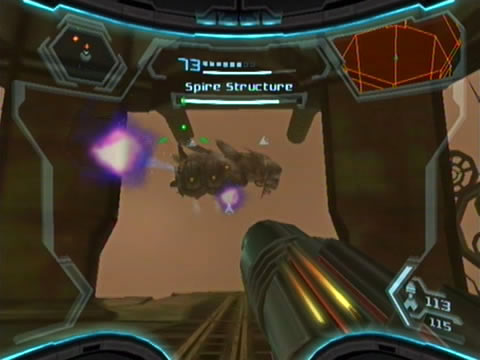
Eventually a unique Space Pirate craft streaks into view before a life bar appears below your own. Except this one represents the Spire Pod's hull integrity, keeping it above zero is definitely in your best interest. Quickly rush over to the first Space Pirate attack craft and scan it for your Logbook. This Space Pirate Assault Skiff's sole purpose is to blast the Spire from the sky, so these craft are your critical targets.
Immediately enter Hypermode and open up on the craft's forward vent. You may witness it charge up an energy cannon and let loose on the Spire. Keep firing at the target but try to avoid missing. You may wish to actually allow yourself to enter Corrupt Hypermode to help extend your firepower time and avoid using up too much health to power Hypermode.
As more and more smoke billows from the craft you'll know it's nearly done. Watch out for any Pirate reinforcements, including Jolly Roger Drones and Aerotroopers. Quickly deal with them, but don't forget to keep an eye out for Assault Skiffs (if the Spire's health bar flashes red you know there's one loitering somewhere) - watch your radar.
Don't allow the Pirate skiffs to move about freely.
An ATC may join the fray as well, deploying a few extra hostiles for good measure. As they hit the deck, fire up your Scan Visor and look for one you've yet to scan. Scan this Armored Shield Trooper for your Logbook before dealing with any rogue targets. If you spot an Assault Skiff appear however, abandon any distractions and focus on the skiff. Keep your eye on the radar to spot attacking skiffs, the thick cloud cover can make it difficult to sight them normally.
More ATCs continue to arrive, so let's end this. Destroy the third and final Assault Skiff to repel the Pirate forces completely (any remaining personnel actually leap off the Spire!?!). The Spire's made good time, you're now in a steady orbit directly above the ominous (and massive) Leviathan Seed below. Take in the sights off the edge of the balcony before moving towards the now-active engine control terminal (now you know how high SkyTown is in the atmosphere, even from here you still can't see the surface of the planet below).
Press all three of the engines on the display to initiate shutdown of all engine power. As you do so a computerized voice announces the impending engine shutdown and deployment of an emergency escape pod. The short round pod rises from the center of the deck as its rear hatch opens. A 5-minute timer then appears on the engine's terminal and begins is descent toward zero, so no time to lose. Quickly climb inside the pod and hit the activation panel inside the cozy interior.
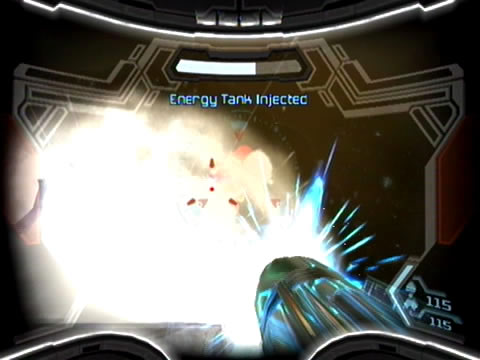
Watch the Spire's energy, keep it nice and healthy.
Except there's a slight snag, as the pod's engines fail to ignite. Uhoh. The computerized voice chimes in again, announcing engine malfunction and the opening of a nearby maintenance hatch. So we've got to perform some quick mechanic duty before time runs out - just another day at the office for Samus. Hop out of the escape pod and roll down into the maintenance tunnel.
Travel down into the bowls of the Spire Pod to find a chamber full of damaged circuit panels, looks like this place hasn't been serviced for some time. Melt the damaged metal debris blocking your path, then travel around to each of the three damaged circuit panels, breaking off any panels covering each one. Each one commands a specific function of the escape pod launch system, so all three must be repaired. Fix them all up to bring the pod back online - don't waste any time returning to the surface (watch out for the swarms of Steamspiders on the way up).
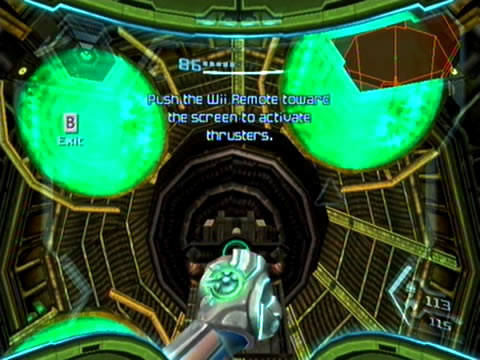
Zip up the maintenance tunnel and leap aboard the escape pod before time runs out. Activate the hand scanner within the craft to summon a control lever, then simply push the Wiimote toward the screen to engage the escape pod's engines.
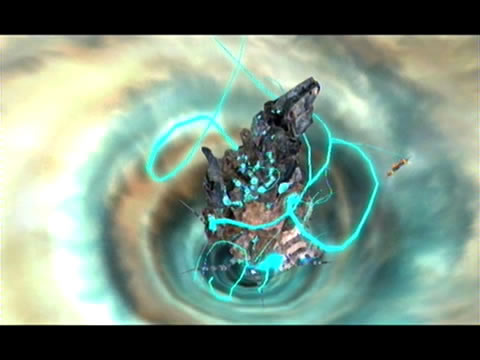
Sit back and watch as the Spire Pod's engines ultimately shut down, sending it plummeting down atop the Leviathan - but not before Samus streaks away safely aboard her tiny escape pod. The Theronian bomb detonates on contact, releasing a cascadingly massive blast and ensuing shockwave out in all directions. The plan worked - the Leviathan's shield is completely destroyed, leaving it exposed to attack.
Pirate reinforcements aim to keep you distracted.
Samus arrives at the Escape Pod Bay (now you know what that empty chamber is for) as you receive a bonus gold credit for destroying the Leviathan's shield. Upon landing safely aboard SkyTown once more, take the lift down and head for the nearby Landing Site A (217 chimes in on the way, giving you the final command to destroy the Seed once and for all). Summon your now-unencumbered ship at the landing site and climb aboard.
Time to farewell SkyTown (and save the world). Press the central helm control and select the Elysia Seed location. Watch as Samus flies toward the target, this time you'll know what to expect inside.
Step off the gunship as you land within the blue bowels of the Leviathan for a scene very much like the one back on Bryyo. Huge Phazon growths riddle the vast cavern with hovering platforms leading up to the exit in the distance. This time the chamber's floor is covered with swarms of Phazon Leeches among a hazy blue mist, only bother to wipe hem out if you didn't pick up the Exterminator Friend Voucher back in the Bryyo Seed.
Save your game first before delving deeper within. Cross the helpful floating platforms to the far side of the chamber and land on the squelchy balcony before the exit. Shoot the door and wait for the bone plates to retract (yummy) before stepping through the living doorway.
Repair the escape pod and flee the giant weapon.
The following twisting vein of a corridor houses Phazon growths similar to the ones you discovered on Bryyo, except these possess a large bony plate over their vulnerable eyes. Notice the five-pronged shape of the bones? Use your new Seeker Missile and blast all five targets at once to remove the obstruction.
With the eye exposed, enter Hypermode and destroy the growth with a number of direct hits. Deal with a second Phazon growth to reach the core's door. Exit this squelchy blue and orange corridor to discover the vast Elysian Leviathan Core. Sweep your view around the chamber, apart from the living, pulsating and multicoloured Phazon riddled-walls there's no sign of any hostiles. Scan the core's opening in the ceiling to learn that it relies on a corrupted creature for protection - but that creature is nowhere in sight.
But that won't be for long. Step forward and land at the base of the core chamber to reveal your target. Samus looks up at the ceiling where a small round object resides attached to the core's opening.
The object promptly detaches and hovers down to greet you, extending multiple limbs and brandishing what looks like an organic core within its round metal body. As you regain control the creature will summon a thick batch of Swarmbots for both offensive and defensive measures. Scan the hostile to reveal it as Helios - a corrupted automaton now serving its Phazon masters.
Infiltrate the now-defenseless Leviathan.
Helios will use its Swarmbots to their full potential, so you're up for a heated battle despite the robot's small stature. Refer to the bosses guide for tips to offline this rogue machine and its Swarmbot cronies.
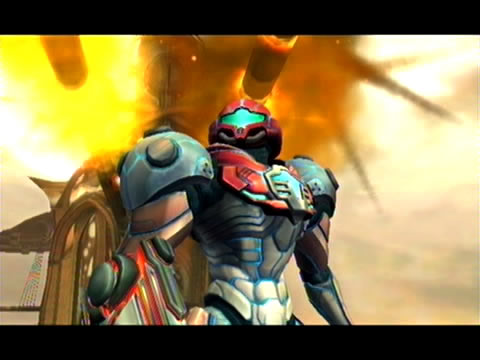
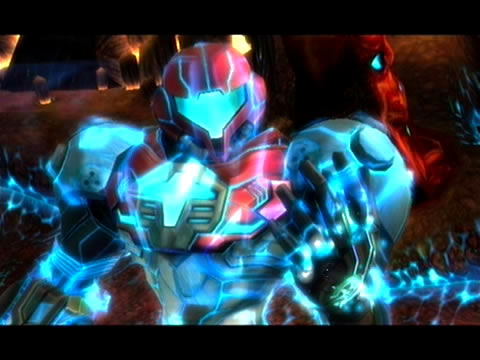
Upon delivering a fatal blow to Helios' core, the unit will explode, sending vast amounts of corruptive Phazon right into Samus' body. Here we go again. The camera reveals Phazon growths inside her body again, this time enlarging with the latest dose. Thankfully Samus won't need to relieve the contents of her stomach again, but you'll notice her PED Suit taking on yet more pronounced blue tones and highlights - the orange sections are now completely blue. Not her best look.
But it's not all bad, as Helios will leave with you a handy upgrade floating at the center of the chamber. Scan it to reveal the item as the Hyper Missile! With this upgrade installed you'll be able to discharge destructive Missiles while in Hypermode. Retrieve the upgrade and watch as four gross Phazon compounds form up in each of the four corners of the chamber.
Large spikes protrude from each - a sign you should remember when spotting more of these out in the wild. You'll enter a temporary permanent state of Hypermode so you can't scan them, but only Hyper Missiles can damage these particular growths.
Conquer Helios to expose the Leviathan's core.
If you're naughtily careless and run out of Missiles don't fret, as more groups of Swarmbots occasionally fly in through the pulsating walls of the core. Shoot them down to hopefully score Missile refills. Send a Hyper Missile into each of the Phazon growths to clear them out; with all four gone each port will eject massive streams into the core, forcing it to emerge from its bloated sac.
Just like on Bryyo, Samus' body becomes supercharged with Phazon as it elevates her into the air. You'll return to her view with the Seed's core's ugly face filling your visor as a bright red message appears, prompting you to release the Phazon energy in Samus' body into the core. So simply press A and watch as the Leviathan core receives more Phazon than it bargained for, overloading and exploding in a gooey blue mess on the chamber floor.
Well done! With your target destroyed and Samus safely evacuating the Seed, watch as huge explosions tear across the Seed's surface and ultimately consume the object. With Elysia safe and Aurora 217 happily back to pouring over new data, Samus enters low orbit before receiving communication from Aurora 242. She commends Samus for her efforts in removing both Leviathans from Federation space and performing at top class. But this conflict is far from over.
Chapters:
- GFS Olympus
- Meet the Hunters
- The Liberation of Norion
- Heroes Corrupted
- A Broken World Ravaged by War
- The Deadly Phazon Threat
- A Fallen ally
- Samus' Gunship on the Frontlines
- Disabling a Leviathan's shield
- Heart of the Phazon Corrupter
- Chozo Paradise Among the Clouds
- Restoring Aurora Unit 217
- Hunting the Rogue Machine
- Uncovering Bryyo's Secrets
- Ghost Ship
- The tip of the SkyTown Iceberg
- Piecing together the Leviathan's Bane
- The Metroids Arrive
- Save the Second Chozo World
- The Pirate's Homeworld Unveiled
- Rescue operations in Enemy Territory
- The Final Chozo Gift
- Repositories of Chozo and Pirate Worlds
- Phazon Mines Part 2
- Breaking out the Heavy Weaponry
- Storming Pirate Command
- Join the Federation's Leviathan Strike
- Return to Norion
- Excavation of the Bryyo Ruins
- Bryyo's Final Bow
- Charting out the Ruined Valhalla
- Aurora 313's Final Message
- Ridley's Final Phazon Fight
- Opening the Wormhole
- The Source of the Poison
- The Masters of Phaaze