Chapter 17: Piecing together the Leviathan's Bane
Screw Attack through the Landing Access and don't worry about the Sky Puffers taking up residence over the chasm.
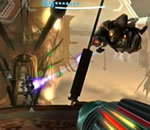
Once back at the head of Skybridge Athene, you'll witness an ATC streak in and open up on the group of Tinbots aboard the bridge. Odd that all these hostiles would be against each other... Wait for the Tinbots to clear out, then enter Hypermode and teach the ATC not to mess with you. Draw in any refills it drops and cross over the bridge, ignoring any Swarmbots entering the region to give you trouble.
Head inside the maintenance shaft and watch out for Crawltanks loitering on the walls. Clear the hostiles and Screw Attack over the pretty chasm. Travel through the Turbine Chamber and watch out for a lone Shield Pirate Trooper waiting for you on the other side. Step through the Broken Lift chamber and return outside to the Gearworks region. As you arrive, another ATC bearing a crazy pilot dismantles the small platform out in the sky before shooting down the massive gear system (who knows why).
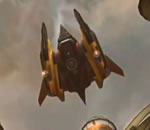
Destroy the craft when it switches attention to you, then survey the destroyed gears. The pilot actually did you a favour - Missile Expansion ST.05 now hovers completely unobstructed. Screw Attack over to the balcony far in the distance and snag the Missile along the way. Step inside and travel through the Observatory Lift back to the Chozo Observatory.
Once there, climb up to the top of the holographic projector. See the large hook atop the pod? Scan it for your Logbook - this Ship Grapple Point represents an object your ship can successfully lift. So let's give it a try. Stand back and activate the Command Visor. Lock onto the hook and watch as your ship arrives and promptly deploys a thick Grapple Beam onto the hook before lifting the entire structure up into the air.
With the outer housing removed, a damaged circuit panel is exposed within (along with a few tiny Steamspiders). Step inside the holoprojector and repair the damaged circuit to restore power to the nearby Bomb Slot (don't worry, your ship won't drop the housing on your head). Climb out and command your helpful assistant to return the projector's housing. Energize the Bomb Slot to bring the holoprojector back online, fully extending it up to an active position.
Climbing up the unit itself grants you easy access to a new exit up on the northern side of the chamber, but first we'll play with the satellite system. Scan the projector to learn that you only need input specific coordinates to send a satellite into the heavens. See the small selection of active Bomb Slots surrounding the chamber? You'll be able to reach a few of them, but need the Spider Ball to access them all.
Climb up the projector and look for a narrow opening leading into the Bomb Slots. Roll through and activate the first Bomb Slot - watch as a huge magnifying array moves into position above the holoprojector and a holographic image of Elysia appears. A satellite promptly launches from the firing tube, rocketing into the sky and out of sight. You'll now have a complete map of SkyTown, revealing a large section unexplored in the north.
Hop down and activate the next two reachable Bomb Slots on the left for some handy data: suit expansion locations for both Bryyo and Norion. This means that as you survey your maps of those worlds, large white dots pinpoint the exact location of items waiting to be found. Small white Xs represent items you've already located. So this place is the perfect location to help you find all the remaining items in the game.
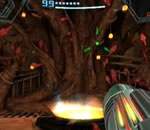
With the Observatory's full potential revealed, we'll now climb up the holoprojector and head through the orange exit on the north side. Through here lies the Botanica - home to an incredible display of Chozo ingenuity. The chambers are filled with leafy tree roots and home to colonies of Sky Puffers. The first chamber possesses a platform too high to climb, but see the container on the wall? Scan it to reveal that it can be pulled, so simply use your Grapple Lasso to extend a hardy platform.
You might also want to save your game down at the save station nearby before climbing up (it's worth a visit, the save station is home to a massive cyrlic tree and two curious models of unknown solar systems).
Further down the Botanica lies another chamber with a similar container set in the wall. Pull it out to climb up easily. But before exiting up ahead, turn back from here and Screw Attack over to the opposite visible platform. Once there, face the direction you entered this region via to spot a Missile Expansion sitting within an alcove dead ahead (a curious side note: see the metal panel curving around the wall in this corner? Remember seeing similar designs like this on the large elevator connecting the two major regions of the Torvus Bog back on Aether?). Screw Attack over the gap to easily pick up Missile Expansion ST.06.
Head for the exit with your latest item in tow. Dismantle the white blast shield you find and step through to find yourself on the upper level of the Broken Lift, where the visible elevator is still malfunctioning. A lone Databot inhabits this corridor, be sure to fire a single blast at the target and scan the readout for the Aurora lore entry.
This one details the initial function of Aurora 217 on SkyTown - the supercomputer can actually command not only the pod structure's systems, but the Elysians as well (pity it can't help now). The Federation ended up using the facilities as an effective listening and observation post, ending many threats before they even had a chance to strike. No wonder a Leviathan Seed targeted this planet.
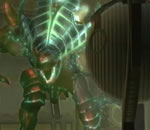
Step through the chamber and exit on the far side. You'll now discover the upper region of the Turbine Chamber, exactly where you need to be to extract the Theronian transport module. Step toward the Ship Grapple Point above the module for a nasty surprise - as Samus steps into the chamber an energy field bars her in, right before a massive lumbering Berserker Lord leaps down from above. No need to scan the target again (unless you missed out aboard the Olympus). Like your initial encounter with these Phazon-powered beasts, you'll need to crack open its Phazite armour to inflict harm.
Refer back to the bosses guide if you need to, but you shouldn't have any difficulty taking this target down (use Hypermode when its armour breaks open). Use the Ship Grapple Point for cover if you need - once the target's dealt with you'll finally be able to get to work. Four Spinners surrounding the transport module energize, waiting to be used. Use the Boost Ball in all four to release lock clamps holding the circular platform in place.
With all locks released, step over to the control unit on the wall and interface with it. Follow the on-screen instructions to release the hatch covering the transport module. A safety shield appears over the unit (no accidentally falling through here). Use the Command Visor to summon your ship and pick up the transport module. Watch as it grapples the tip of the unit, lifting the massive object free and taking off.
The control unit on the wall rotates around, revealing your exit. Roll through the narrow hole with the Morph Ball and pop down into a small chamber. Exit and travel through the curving corridor beyond, taking out any annoying Crawltanks along the way.
Step beyond here to locate the Piston Hall, home to a quaint bottomless courtyard. The contents of this unique room will depend on the version of the game you're playing. If you're playing the original NTSC version of Metroid Prime 3, a rotating gate obstruction will be blocking the room across the small chasm. You'll need to time a Screw Attack jump to move through the gate as it opens, otherwise you'll be pushed down into the chasm below. So begin a Screw Attack jump just as the gate is closing to bridge the chasm right as the gate opens again.
The original PAL version offers a far easier alternative with no gate obstruction and several Sky Puffers floating about instead. Simply clear the Sky Puffers out and Screw Attack across the chasm (notice the Transportation Drones whipping by overhead?).
Finally, the Metroid Prime Trilogy version of the game presents a different challenge to clear. Instead of Sky Puffers or the gate obstruction, an alternating energy shield blocks the far side of the chasm. It only remains active for a few seconds before switching to the other tunnel opening around the corner, giving you a few seconds to sneak through. Touch the shield and you'll be repelled backwards, so time your Screw Attack leap and begin jumping a second or two before the shield disappears to make it safely. Watch out for the second alternating shield around the corner as you pass through.
Step through the following corridor and exit to find yourself deep below the Concourse area where you once encountered a pack of Space Pirates. Remember seeing an inactive elevator in the center of the chamber? From here you'll find out why is isn't receiving power. Damaged circuit boards on either side of the long corridor await repair, so simply weld the broken equipment to restore power and grant yourself easy transit back up to the main Concourse chamber.
Except we'll stay down here for now, as you might recall that the Theronian containment unit resting above is held in place by three locked panels, each requiring four locks to be hit simultaneously to release. That should be enough of a hint to realise what the next suit upgrade is. With the elevator restored, exit the chamber via the orange door on the west side.
Climb through the narrow tunnel spanning the following curved hallway, then step outside to Zipline Station Delta. A lone Armored Aerotrooper will attack your position, try to burn its armour off with a charged Plasma Beam blast and grapple its jetpack off to score yourself a bonus Friend Voucher if you haven't already. There's no Zipline Cable down here, so you'll need to cross the gap via the array of floating platforms. Notice the first one has a malfunctioning guardrail - ensure you steer clear of it as you Screw Attack across.
Fly over to the second floating platform and watch out for an attacking ATC (so many of these things...). Destroy the target and take care before you leap to the next platform. Its guardrail is constantly rotating around the unit, so you don't want to bump into it and fall into the clouds. Begin your Screw Attack leap just as the guardrail is finishing passing around the front side of the platform to time it right.
Land safely to find a quick and easy gap to the pod structure ahead (notice the massive Phazon veins growing out from the pod's walls?). Screw Attack over to the balcony and take note of the hologram above the door as you land - the unmistakable image of a Metroid is present, meaning that this is some sort of facility for breeding and handling the parasites (no wonder there's so much Pirate activity). Shoot the door open for a shock (stand right up in front of it for a scare) - the dead husk of a Space Pirate crumbles right on the other side of the door; this target was obviously trying to escape.
Step inside to find the chamber literally filled with the brittle remains of an entire group of Space Pirates. Scan each one to learn of their grim ends, and clear out their remains if you can't stand seeing the carnage. Be sure to visit the nearby save station before delving further into this hazardous pod. Exit Transit Tube A to discover the Research Pod Lift beyond. More Pirate remains litter this area, scan the one beside the door to learn that they've only been this way for a little over two hours - but there's still no sign of their attackers.
A door at the far end of this area is covered by a multi-lock blast shield, so no luck moving through there. Instead, take the exit on the northern wall. Step through the short elaborate hallway to discover an inactive elevator, along with a very curious sight behind the elevator. Look through the wall - floating behind the elevator lies the huge remains of a Parasite Queen, remember these specimens from the Orpheon Pirate Frigate way back when this whole Phazon madness started?
Restore power to the lift via the nearby hand scanner and ride it topside. A second dead Parasite Queen rests behind the lift, thankfully you won't be finding any live ones this time. Spin around for a more welcoming sight: the small chamber ahead houses two large containment pods, and the nearest one bears an Energy Tank. But scanning one of the pods reveals that its power source is keeping an energy field active around the unit, preventing you from breaking through.
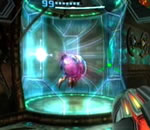
So let's move on for now. Step through the exit ahead to find yourself in Xenoresearch A - the tip of the iceberg. More containment units line the walls throughout the region... and some of them contain live specimens. Step forward to receive your first encounter with a live Metroid, housed inside a nearby containment unit. The parasite may react adversely as you approach and rear its ugly underside (check out the tiny teeth lining the mouth). As long as the containment units receive power, none of these beasts can break free.
Move deeper into the region, noticing more and more Metroids held within containment units. Looks like the Pirates really had it going here. Further along this area you'll find a path blocked by another multi-lock blast shield. Take the nearby corridor instead to find a chamber packed full of small green holographic panels. See the sealed door connected to a nearby Spinner? Use the Boost Ball in the Spinner to open the door wide, but by doing so another door seals the entrance. So there's only one way forward now.
Keep moving through the glowing and sometimes Phazon-riddled corridors to eventually locate an exit on the northern side. Step inside to find another inactive elevator beside a pair of containment units. Restore power via the hand scanner and ride it topside. Exit the chamber to discover Xenoresearch B, home to more of the currently-passive Metroids.
Move down the corridor and head past the first opening on the right; if you travel down there you'll find the path blocked by a multi-lock blast shield. Up ahead nestled between two containment units lies a small tunnel opening up in the wall (where all the power cables rest). Travel through the narrow tunnel to find yourself overlooking the chamber on the other side of the multi-lock blast shield. Look for a weakened section of the railing on the other side, lay a bomb to break through and fall below.
With the multi-lock blast shield bypassed, travel down the corridor and take a right. Follow the tunnels around to locate a dead-end housing a small cracked grate cover in the corner. Lay a bomb beside the cover to break it off, then roll through and breach the second cover to find yourself in an adjoining corridor. Travel around the corridors to ultimately discover your target: a suit upgrade resting inside a lone containment unit.
Within this Phazon-riddled chamber lies the power source keeping all the containment units sealed, simply tear the cover off with the Grapple Lasso to discover none other than an Energy Cell station beneath. If those Steamspiders crawling all over the ceiling could talk they'd probably advise you to not remove the battery, but there's not much else we can do. Retrieve Energy Cell #5 from its station to deactivate all the shields protecting the containment units.
With the shield (and lights) down, a multi-lock blast shield seals you inside. But not to worry, simply breach the containment unit's glass with a Missile and scan the item inside to reveal it as the Seeker Missile! Step forward to claim your latest upgrade.
The Seeker Missile will make short work of the multi-lock blast shield. Normally you'd engage the targeting reticule by holding Down on the D-Pad, but this usually wastes a single Missile to engage. But oddly enough, if you activate the Scan Visor, hold Down on the D-Pad, then press A, you'll return to normal view and the targeting reticule will engage without firing a Missile. Remember this trick for later.
Wave the reticule over the five lock pods and release once they're all fixed. With the multi-lock shield lowered you'll be free to start the journey back outside. But it certainly won't be easy, as you've now opened up a hornet's nest by deactivating all those containment units. Even the music sets the scene as you exit the chamber and hear a Metroid's screech...
Chapters:
- GFS Olympus
- Meet the Hunters
- The Liberation of Norion
- Heroes Corrupted
- A Broken World Ravaged by War
- The Deadly Phazon Threat
- A Fallen ally
- Samus' Gunship on the Frontlines
- Disabling a Leviathan's shield
- Heart of the Phazon Corrupter
- Chozo Paradise Among the Clouds
- Restoring Aurora Unit 217
- Hunting the Rogue Machine
- Uncovering Bryyo's Secrets
- Ghost Ship
- The tip of the SkyTown Iceberg
- Piecing together the Leviathan's Bane
- The Metroids Arrive
- Save the Second Chozo World
- The Pirate's Homeworld Unveiled
- Rescue operations in Enemy Territory
- The Final Chozo Gift
- Repositories of Chozo and Pirate Worlds
- Phazon Mines Part 2
- Breaking out the Heavy Weaponry
- Storming Pirate Command
- Join the Federation's Leviathan Strike
- Return to Norion
- Excavation of the Bryyo Ruins
- Bryyo's Final Bow
- Charting out the Ruined Valhalla
- Aurora 313's Final Message
- Ridley's Final Phazon Fight
- Opening the Wormhole
- The Source of the Poison
- The Masters of Phaaze


