Chapter 21: Rescue operations in Enemy Territory
Travel back through the Lift Hub Access and return to your ship. Climb aboard and save your game before heading for the Research Facility. Upon landing, you'll find the place almost identical to the landing site back in Pirate Command, save for another exit in the distance covered by an energy shield.
Cross the landing pad over to the only accessible exit, and be sure to scan one of the large blue Heavy Phazon Canisters for your Logbook. These Phazon reserves can be quite handy; destroy them from a distance to usually see a trio of health refills pop out.
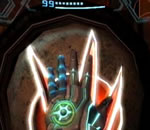
Exit the landing pad to discover a long sloping lift shaft extending into the hazy red distance. Activate the hand scanner beside the empty lift to restore power, then hop aboard and travel up the lift shaft, watching the flurry of activity as irises and mechanical rails move about to allow you passage. A sealed chamber awaits you at the top - scan the gate barring your path to learn that its control unit is somewhere nearby.
See the small metal panel blocking a chute on the left wall? Crack it open with a Missile and climb through to find yourself in a very cozy observation chamber. Peer out the narrow window to spot the gate's control unit - simply fire a single shot into it to energize the gate and clear your path. Climb back through the chute and step through the now-unobstructed gate.
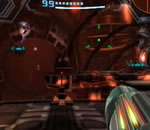
Exit the chamber beyond to discover the Scrapvault; a massive intricate chamber home to a thick red foggy atmosphere. Switch on your Scan Visor and look up, see the huge visible blue mass? Scan it to reveal that this massive slab of meat was once a Pirate biological experiment - now it's just a rotting corpse.
Step forward down the narrow passage and keep your Scan Visor on - just as you pass by two Space Pirate crates a pair of Shriekbats emerge ahead and dive-bomb your position.
Try to scan one of the targets for your Logbook before they impact. Scanning one will reveal them as Urtragian Shriekbats - does that mean this planet's real name is Urtragia? Don't be worried if you miss the scan before they explode.
Step forward and swing around the corner up ahead. Take a close look at the right wall along here, notice the tall red gate? Two thick power cables run into the wall alongside the gate. Trail the cables back to their origin: a huge control station positioned high above the deceased slug.
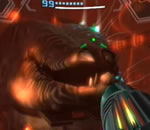
So to unlock that gate, you'll need to find a way into that control station - notice that a long narrow chute runs from the western wall right over to it?. Move around the front of the dead creature (its face is kind of disturbing...) but take care near the blue Phazon vents set in the floor. One of them ejects a trio of Phazon Grubs, take them out safely from a distance.
Now to find a way through this region. Only a large open area filled with crates awaits around the corner on the other side of the slug (notice the pair of little inactive alarm beacons on the walls here?).
Look skyward however and you'll spot a multitude of platforms around the region. But before starting your climb, head back to the first Phazon vent in the floor and look high up at the wall nearby. See the pair of Shriekbats roosting there? Scan one from here if you missed out earlier, and shoot them down to avoid trouble.
Now let's starting hopping up. Climb atop the first platform on the western wall and travel around through the passage intersecting the slug's mass. Climb up beyond here to eventually discover a small Grab Ledge in the north-western corner.
But before leaping up inside the narrow tunnel, take a look over at the western wall from here. See the platform above the long chute running over into the control station? Use your Screw Attack to leap over safely. From here, spin around and face the dead slug. Look up, see Missile Expansion PH.04 atop a platform? Leap across and snag the Grab Ledge to reach this item easily.
Jump back down to the small Grab Ledge in the corner and pull yourself up into the narrow tunnel. Follow the chute along and exit the Scrapvault, locating the narrow confines of the Scrapworks region tucked beyond. The base of this area's filled with Phazon, so naturally Phazon Grubs are aplenty. But an automated turret keeps them in check, so you'll have more to worry about. Roll inside and deal with the first Phazon Grub blocking your path.
Shortly after you'll find a Bomb Slot - activate it to open wide a hatch in the adjacent chute. Climb up into the visible tunnel on your left and quickly boost through the section of tunnel covered with a glowing red strip - as you pass through here an active turret swings down to open fire. Down the far end of this section lies a vertical Spider Ball track, so climb up the shaft bearing a pair of moving platforms instead.
Dismantle the Phazon Grub up ahead and keep moving to find your path blocked by a small obstruction. Lay a bomb to clear the blockage, but climb up the nearby chute on the left before rolling onward. See Energy Tank PH.01 resting at the top of the chute? Grab it before leaving.
Take out the nearby Phazon Grub and roll onward down the unobstructed chute you cleared recently. Beyond here you'll find yourself directly above the hatch you opened via the first Bomb Slot, but another small piece of machinery blocks your access.
See the second Bomb Slot higher up? Climb up and energize the slot to clear the way. Hop down and roll on through the open hatch to ultimately find yourself cruising along the chute connected to the control station back in the Scrapvault region (don't mind the patrolling surveillance drone).
Follow the chute to access the control station. Inside you'll discover the large red gate's control terminal without power. See the damaged circuit panel on the left? Those Pirates really need to work on their maintenance protocols. Simply repair the circuit with your Plasma Beam, then use the X-Ray Visor to successfully input the correct code sequence into the terminal.
With the code entered and power restored, the gate will retract as a pair of platforms grant you access to the exit beyond (wouldn't want to be standing between them as they deploy...). Roll back into the chute and make your way back to the Scrapworks. Once there, climb inside the network of chutes and head right. Eventually you'll spot a turret going to work on a swarm of Phazon Leeches - right above here lies a Ship Missile Expansion, but without the Spider Ball you're out of luck.
So let's find a way to open that sealed hatch nearby. Use the Boost Ball to ascend the half-pipe and travel right. Stop as you reach the chutes containing Spider Ball tracks (this entire region circles around). Drop down the shaft right before the tracks to locate the third and final Bomb Slot - activate this one to open the hatch further left. Make your way back there and climb inside to find one final obstruction blocking your path. Lay a bomb to hop down off-screen and find yourself deposited back in the Scrapvault.
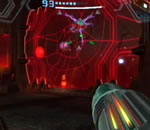
Now for the exit. But before you can act, a pesky surveillance drone hovers in and spots its prey. Activating the nearby alarm beacons, a blaring alarm summons hostiles right to your position. Literally appearing from thin air, a pair of very-heavily armoured troopers arrive as a third Pirate dressed in thick red armour (and a funky cone-shaped helmet) commands them to strike (before teleporting away).
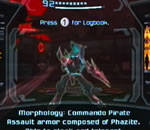
So it's just you and the two goons. Quickly scan one for your Logbook - these Commando Pirates are the top of the Pirate military tree, so don't expect an easy trip (yet). Normally Missiles don't do much against their armour, but on Hypermode difficulty they tend to enter Hypermode almost always, so use your own Hypermode against them.
They also tend to teleport and cloak themselves, if the latter occurs quickly fire up the X-Ray Visor. Something to note with the X-Ray Visor however, is that as long as the commandos are not in Hypermode (so that your visor isn't filled with static), you'll notice a glowing red Phazon core in their heads. Don't forget that...
With both targets repelled, feel free to crack open the many crates in the region to recover health. Move back through the slightly-less reddened region and climb up through the gate you opened earlier. Proceed beyond the orange exit to find yourself in the long and narrow Processing Access corridor.
But don't move just yet. See the intricate hardware units setup along the corridor? Scan one to reveal them as security devices, emitting tripwires too faint to detect with the naked eye. So fire up your X-Ray Visor to reveal a multitude of laser tripwires stretching into the hazy distance.
Touch one of those and you can surely expect company. But the Pirates set these up too high - simply activate the Morph Ball to safely roll along under the lasers. Stand up at the center of the corridor to discover a pair of Phazite-covered switches on either side. Scan one to learn that only a high-frequency beam can penetrate the facade and strike the switch underneath. Looks like you've got a new weapon coming up later on...
A sealed hatch covers the ceiling above, see the Wall Jump surfaces up through the cover? Also be sure to scan the nearby Space Pirate lore panel for the First Disciples entry. Read this one carefully, you're not going to believe a word of it. The previous lore entry reeked of the Pirates' hatred of Dark Samus, this one couldn't be more different. As revealed here and now, the Pirates have sworn sole allegiance to Dark Samus, grovelling before the creep enough to make Mother Brain jealous.
So that's how their alliance began... This Phazon corruption is really getting out of hand. We'd better find that GF Marine before he suffers the same fate. Activate the Morph Ball and roll on through the eastern end of the corridor. Exit the corridor to discover the vast Metroid Processing chamber beyond, home to more of the Pirate's favourite weapons. But before taking a peek around, a pair of Assault Pirate Troopers spoil the show while one quickly raises the alarm. Both spring down and deploy personal shields, so quickly scan one of these Assault Shield Troopers for your Logbook.
Quickly enter Hypermode and deal with the pair, as they'll most likely do the same. A single Commando Pirate also joins the fight, so be sure not to lose too much health (especially on Hypermode difficulty). With your position clear a control unit on the southern wall restores power. Take a look around, several Phazon Metroids lull about behind thick containment shields. Be sure to break open any visible crates for health refills.
You'll find the only exits here are up on the second floor of the vast complex, so that huge malfunctioning tank in the center is your only ticket up there (they really should fire those technicians already). A Spider Ball track runs up a wall nearby, but that shortcut will only come in handy later on. Be sure to scan the varied experiment equipment around the chamber to learn more about the Pirates' incessant Metroid research - Phazon corruption certainly hasn't slowed them down.
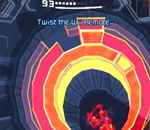
Now to repair the damaged central tank. Step over to the large sealed hatch on the southern wall, see the control unit beside it? Fire up the X-Ray Visor and interface with the control unit to successfully power it up (twist each section and slot them in correctly). Doing so will summon an elevator behind the once-sealed hatch.
Hop aboard to ride below into the bowels of the chamber. Two paths link around the central tank, take the right one first. Here you'll find a damaged circuit panel, effect repairs to instantly restore the tank's movement between floors above.
Before heading topside, be sure to take the left path around the tank. Looks like the Pirates love their stolen Federation technology, as Energy Cell #7 powers the Metroid's holding cells above from here. Extracting the power cell will no doubt release the Metroids, but you certainly need this device. Pick it up before returning topside.
Step back into the main chamber to find all three captive Metroids break free to the classic Chozo Ghosts theme. Deal with the pesky parasites and be sure to pick up Missile Expansion PH.05 hiding among the Metroid eggs in the eastern containment chamber. With all the excitement over we'll take a trip up the central specimen tank. Look for a small opening along the base of the tank and roll inside. Wait for the tank to lower down and touch the slot inside to find yourself promptly raised above.
Stand up and head for the white blast-shielded door in the corner. Be sure to scan the pair of computer terminals beside it, one of them contains the infamous reference to Metroid Dread - will it ever prove true? Anyway, take a quick trip through this exit to the Creche Transit chamber beyond. Acid Rain will bar your progress here, but be sure to bust through a Talloric alloy cover in a nearby corner and follow the maintenance tunnels along to discover Missile Expansion PH.06 tucked away.
Head back to Metroid Processing and make a mad dash for the opposite orange door before the respawning Metroids give you trouble. Beyond lies the Airshaft, home to a towering chasm - your exit lies directly above. Step towards the visible Wall Jump surface ahead, but don't fall off the cliff (that Phazon pool down below doesn't look welcoming). There's no partner for the Wall Jump surface ahead, but spot the four small lock pods instead? Simply line up your Seeker Missile and fire at all four pods at the same time to extract a second handy Wall Jump surface.
As the second wall deploys, the four locks will promptly be replaced by four annoying Crawltanks. Try to use your Seeker Missile again for a stylish maneuver, or use Hypermode if they enter their own hyper state. You may also notice small puffer creatures emerging from hatches out above the shaft - scan one from here for your Logbook. These Puffer Mines are identical to all their cousins, but don't worry about them for now. Use the Screw Attack to ascend the shaft, then climb up to the overhanging platform directly above the entrance.
If you're very low on health (once again, especially on Hypermode), stay by the edge of the cliff and take out the emerging Puffer Mines. Draw in any health refills from here to bring yourself back to safe levels. Before leaving the chamber via the nearby exit, be sure to scan the well-camouflaged Pirate lore entry on the northern wall. More revelations to be found in this one. "The Source Discovered" reveals more of Dark Samus' activities with her new Space Pirate goons.
Riding atop a "starborne beast," it lead the Pirates through an artificial wormhole back to the source of all Phazon: the sentient planet Phaaze. Guess where you're heading after the Pirate Homeworld?
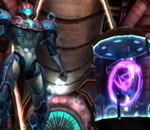
Exit the Airshaft to locate the Craneyard, a huge outdoor area home to a massive central structure. Step towards the nearby window and watch as a Pirate Trooper housed within a small command chamber far in the distance activates a mechanical crane arm - revealing an item resting within a pod below. Notice the prominent rotating S-logo on the object? Samus sweeps around the chamber, revealing a towering Spider Ball track leading up the rear wall and along the ceiling - no doubt you'll need to travel along there to reach the bowels of the huge central structure outside.
Scan the upgrade item down in the pod from here to reveal it as the Hazard Shield - that's the item you'll need to survive the constant deluge of acid rain outside. There's not much else you can do from here, but feel free to scan the central structure and pair of Spinners down at the base to learn more about the region (also take note of the visible Missile Expansion sitting at the end of a short chute).
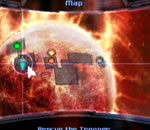
If you check your map now, you'll find that right next door is the room where the GF Marine awaits, so let's go check up on him. Be sure to crack open any nearby crates for health before leaving. Step inside the following region to find a curving tunnel leading around to a roomy chamber - right where the GF Marine takes cover as three Armored Pirate Militia bear down on him.
The Marine manages to strike one down, but quickly take out the remaining pair. With your position secure, step forward to meet a friendly face in this most unlikely world. After a quick thanks, the Marine offers a hint: a special suit shield should be able to allow entrance to the Seed and safety from the acid rain. Showing you the region where the Pirates build the devices (right next door), now you're definitely going to need that Hazard Shield, but need the Spider Ball first...
The Marine offers to show you a back entrance to that location, but needs your help to restore power to the elevator in this chamber (strange, wouldn't he just want to join Samus and head back to her ship? No need to be taking risks in such deep enemy territory...). Scan the objects around the chamber to learn more about this energy-producing facility (pity you can't sabotage anything). You may as well also break open any destructible crates for health refills. The control unit on the eastern wall curiously can't be accessed, so take a look at the elevator control unit instead.
Stand on the opposite side to the Marine and interface with the control unit. Follow his directions to successfully restore power to the lift. Good thing you had a buddy here - watch as the intricate elevator deploys and awaits travel. Follow the Marine on board and touch the hologram to ride it topside. The pair of you arrive in a deserted chamber with a single exit, but things are about turn really messy.
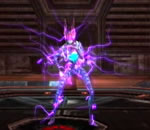
Samus steps off the lift and heads for the door, but immediately senses danger. The Marine goes AWOL and actually fires a few shots at Samus - all missing. But before Samus can even ask why, the Marine starts laughing - but doesn't sound remotely like a man anymore. Purple energy courses over the Marine seconds before his form dissolves into that of none other than Gandrayda (bet you didn't see that coming).
So that settles it, all three hunters suffered corruption and now follow Dark Samus haplessly along with the Space Pirates. Her cocky nature certainly goes hand-in-hand with the scenario, as Gandrayda's once-playful rivalry with Samus now dissolves into a battle to the death. Gandrayda engages you right here atop the lift, refer to the bosses guide for tips to survive her mimic abilities and odd dancing battle techniques.
Upon conquering Gandrayda you'll know what to expect - after going out T-1000 style and giving you one last look at Ghor and Rundas, Gandrayda mimics Samus' exact form and reaches out for aid, but there's nothing you can do. The Dark Samus specter arrives and consumes the final corrupted hunter before retreating like the coward it is.
Chapters:
- GFS Olympus
- Meet the Hunters
- The Liberation of Norion
- Heroes Corrupted
- A Broken World Ravaged by War
- The Deadly Phazon Threat
- A Fallen ally
- Samus' Gunship on the Frontlines
- Disabling a Leviathan's shield
- Heart of the Phazon Corrupter
- Chozo Paradise Among the Clouds
- Restoring Aurora Unit 217
- Hunting the Rogue Machine
- Uncovering Bryyo's Secrets
- Ghost Ship
- The tip of the SkyTown Iceberg
- Piecing together the Leviathan's Bane
- The Metroids Arrive
- Save the Second Chozo World
- The Pirate's Homeworld Unveiled
- Rescue operations in Enemy Territory
- The Final Chozo Gift
- Repositories of Chozo and Pirate Worlds
- Phazon Mines Part 2
- Breaking out the Heavy Weaponry
- Storming Pirate Command
- Join the Federation's Leviathan Strike
- Return to Norion
- Excavation of the Bryyo Ruins
- Bryyo's Final Bow
- Charting out the Ruined Valhalla
- Aurora 313's Final Message
- Ridley's Final Phazon Fight
- Opening the Wormhole
- The Source of the Poison
- The Masters of Phaaze


