


Metroid Prime 3: Corruption overview

Metroid Prime 3 title screen.
Retro's conclusion to the Metroid Prime trilogy marks Samus' first epic outing on the Nintendo Wii. As the centerpiece of the new console, the Wii Remote's intuitive point-and-aim control delivers a silky smooth experience like no other.
The stakes couldn't be higher. The Space Pirates have secured a limitless supply of Phazon and allied with Dark Samus, all the while attempting to repeat the events of Tallon IV's Phazon corruption across numerous worlds.
Teaming up with the Galactic Federation, Samus thankfully won't be alone in this war. Alongside legions of GF infantry and the sophisticated Aurora Units, Samus must navigate several planets and annihilate Phazon seeds before they utterly corrupt entire worlds. The only catch? One of Dark Samus' more sinister efforts results in Samus herself becoming corrupted by Phazon.
But Samus is one hard bounty hunter to corrupt. Plenty of upgrades await her on each world, expanding the arsenal and making the most of the Wii Remote's aiming and motion-sensing system. A host of Phazon-powered abilities, weapons and even Samus' gunship will aid players in their quest to rid the universe of Phazon and Dark Samus forever.
Controller overview
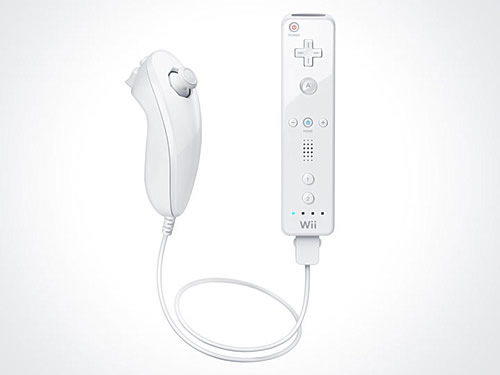
The Nintendo Wii Remote.
Take Metroid Prime 3 for a spin and you'll never go back. The basic control method couldn't be simpler - just point and shoot. Simply aim Samus' arm cannon with the Remote while guiding her movement with the Nunchuk's control stick. A good way to keep your endurance up is to rest the remote on your lap and point at the screen gently, no need to hold the remote up in the air and tire yourself out after ten seconds.
Veterans of the first two titles shouldn't have any trouble picking the controls up, just don't be disheartened if it feels unnatural or clunky at first - with experience the natural flow will sink in.
Throughout the game you'll also encounter interactable objects - simply follow the on-screen instructions to manipulate the object (such as rotating the remote clockwise or pushing it into or pulling it away from the screen). See below for a complete control rundown.
| Button | Operation |
|---|---|
 |
Press A to fire Samus' arm cannon. Press repeatedly for continuous shots, or hold down and release for a stronger Charge Beam blast. While in Morph Ball mode, press A to lay up to three bombs at a time. |
 |
Press this to jump. Press a second time while in mid-air to perform a Space Jump to propel Samus higher. While in Morph Ball mode, hold B and release to use the Boost Ball ability. Once you secure the Screw Attack ability, hold forward and perform a Space Jump, pressing B a third time and continuously to perform Screw Attack leaps. |
 |
Press Down on the D-Pad to fire a missile, or a Hyper Missile while in Hypermode. Lock onto a target before firing to release a homing missile. Hold the button to engage the Seeker Missile's tracking reticule, then point at up to five specific targets to lock on before firing. |
 |
Press and hold Minus to summon a selection of your currently equipped visor modes. Initially you'll begin the game with the Combat, Scan and Command Visors. While holding Minus, point at one of the three regions on the screen to select a visor, or point at the center to return to the Combat Visor. |
 |
Press and hold Plus to enter Hypermode. See the Hypermode Guide for more details. |
 |
Press C to enter Morph Ball mode. From here, direct Samus with the control stick, lay bombs with A, hold B to use the Boost Ball ability, hold Z to attach to magnetic rails with the Spider Ball and perform a Spring Ball jump by flicking the Wii Remote up vertically. |
 |
Hold Z to lock onto any nearby enemies. Depending on your Lock On/Free Aim settings, your target reticule will either latch onto the selected target or simply act as a guide while the reticule remains freely moveable. See below for more details. |
 |
Press 1 to view your current position on the world map. From here you can also view Samus' inventory, browse the Logbook or change game settings. |
 |
Press this for an in-game hint on what your next target should be. |
Controller settings
| Option | Effect |
|---|---|
| Sensitivity | Select the Wii Remote's pointer speed with this option. Beginner players can set the speed to Basic if having difficulty aiming correctly, while most players should find the Standard setting just right. Veterans of PC mouse-and-keyboard configurations may find the Advanced setting suitable, just keep in mind that it's very sensitive. |
| Lock On / Free Aim | When switched on, if you lock onto an enemy target with Z, Samus will remain facing the target to keep it in view. Your aiming reticule will remain freely moveable, allowing you to fire at anything while keeping the enemy in view. Switching this off will render the lock-on exactly as it was in Metroid Prime and Echoes, keeping your aiming reticule firmly attached to the target. |
| Switch Jump / Fire | This option allows you to swap the functions of the A and B buttons (default A to fire, B to jump). |
| Switch Visor / Hyper | This option allows you to swap the functions of the Minus and Plus buttons (default Minus to select visor, Plus to enter Hypermode). |
Difficulty settings
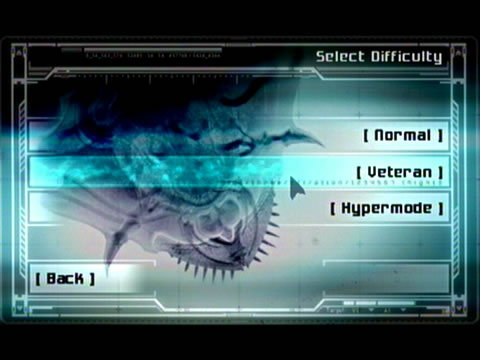 |
When beginning a new game from scratch, you'll initially have a selection of Normal or Veteran difficulty settings. Complete the game on either Normal or Veteran to unlock Hypermode, the toughest challenge the game has to offer. The Hypermode difficulty is incredibly hard - enemies and bosses possess more health, the Pirates tend to use their own Phazon-powered Hypermode all the time, and enemy attacks take greater chunks of your health with each hit. To unlock everything in the extras menu you'll need to play through the game on each setting to collect the various Gold Credits upon defeating bosses and completing other tasks. Upon completing the game you'll be asked if you wish to save, select Yes to start from the beginning again and select a different setting to continue your hunt for credits. If the Hypermode difficulty is giving you nightmares, I suggest you refrain from unlocking any of the Soundtrack items in the Bonus gallery to leave yourself with enough extra credits to spend on the good stuff. |
Samus' gunship
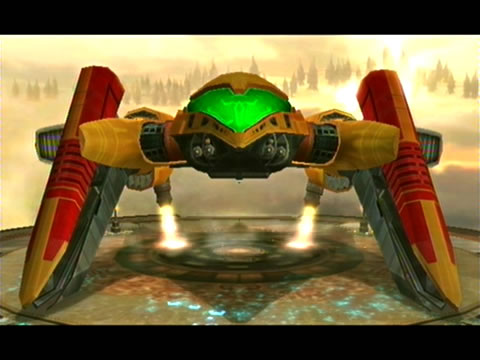 |
No longer acting solely as Samus' mobile base, her gunship now truly lives up to its name. Samus' gunship once again can be used to save your game and restore all health and ammunition. This time you'll be taken inside the cockpit itself and have command of a variety of the ship's functions. As you discover more landing zones on each world, the gunship can be summoned to save long treks and open access to new areas. |
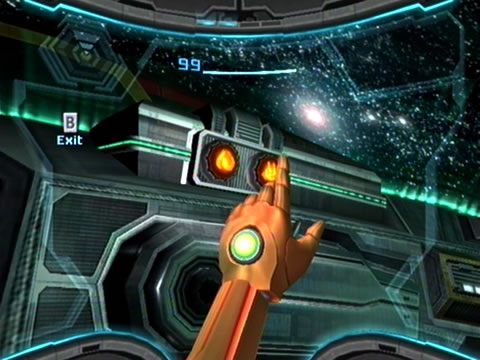 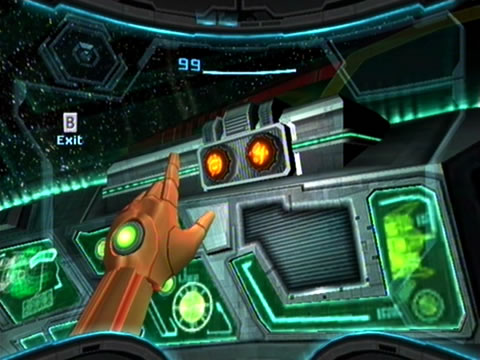 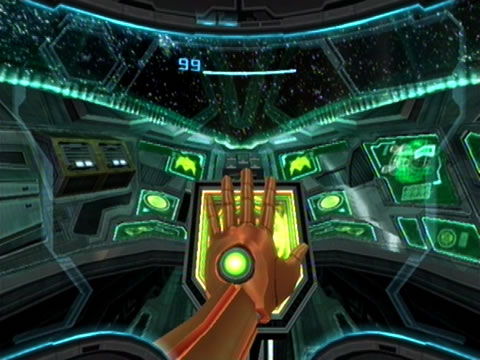 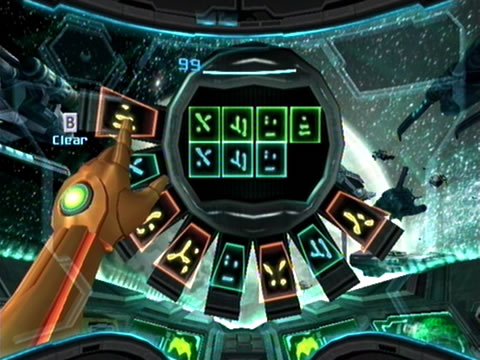 |
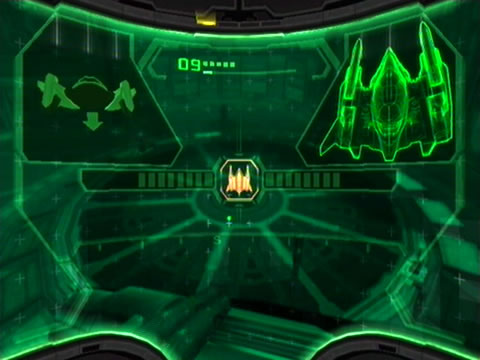
Inside the cockpitWhile seated at the controls you'll see a number of instruments laid out across the panels. Switch on the Scan Visor and scan the panels for a quick rundown of what each button does. Left side: Starting from the left side, you'll see two small buttons above the large thruster switch. The left switch summons a terminal detailing various statistics recorded during the game, such as enemies defeated, shots fired and percentage of rooms visited. The right switch primes the ship's weapon systems, but you won't find yourself using them from inside the ship. Below the two switches, touch the thruster panel, then push the remote toward the screen to engage the ship's engines (only works in orbit). Right side: Two switches adorn the right side of the cockpit. Press the left to engage the cockpit's protective armour shield - although this is purely for show. The right switch summons another terminal displaying a number of overlapping symbols. Rotate the Wii Remote slightly to align the symbols till they completely overlap, then hold it there as four blue bars appear across the top of the terminal. A bioscan will commence and deliver a report on Samus' current condition (this will change throughout the game). Center panel: In the center region you'll see a large glowing terminal as well as a switch above your head. Touch the glowing terminal to select a location to visit, or press the switch above to summon the ship's communication terminal used to communicate with nearby vessels. |
 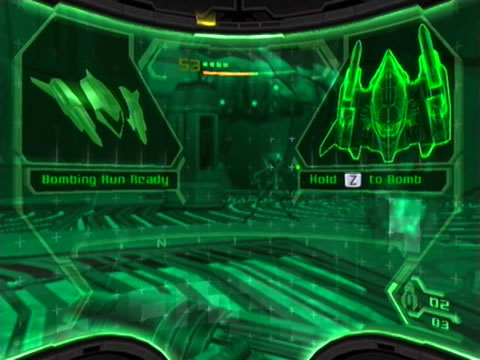  |
The Command VisorSamus' new Command Visor allows her remote access to the ship, granting her the ability to summon the vehicle for a variety of functions including execution of bombing runs on enemy targets, lifting heavy objects or touching down at specific landing zones. Activate the Command Visor by holding the Minus button and pointing at the lower-right corner of the screen. With the visor active look for icons above any target the ship can interact with before holding Z to summon the ship. You can also summon the ship manually to attack any visible targets in large open areas. Simply switch on the Command Visor and hold Z to summon the ship (stand well back as it deploys ordnance). Bombing run note: If radio jammers are active nearby, you'll need to disable them before summoning the ship successfully. Simply lock onto the front of the jammers and disable them temporarily with the Grapple Lasso. Quickly summon the ship before the jammers reinitialize. |