Data
Guides and strategies
- Techniques Guide
- Power-up locations
- Bosses Guide
- Mini-bosses Guide
- Search View Guide
- Obstacles Guide
- Walkthrough
- Game endings
- Secrets and tips
- Game maps
Media
Chapter 19: Path of Destiny
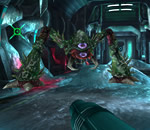
Step through the northern door to meet a new face. A big green Sidehopper look-alike inhabits the chamber. This is a Baristute, a much stronger cousin of the Dessgeega. These targets can withstand several strikes from the Screw Attack, so either leap into the air and pepper it with the Screw Attack, or treat it like a Dessgeega and freeze it with a Charge Beam shot, then Overblast the immobile target.
Once Samus is safe, feel free to uncover and grab Missile Tank S2.12 hiding in the right-hand wall. Travel onward to the Navigation Booth and save your game if you wish. Move through to the adjacent snow-and-ice region, and climb up the icy cliff around halfway through. Remember the corridor where the Speed Booster was activated? It's directly south from this position, so we'll use it as a short-cut.
Go through and make your way beyond the Water Tank and adjacent ice cavern (if the Kyratians in the Water Tank give you trouble, introduce them to the Screw Attack). Once you reach the long corridor where a Gigafraug still resides, clear the beast out and feel free to pick up Missile Tanks S2.13 and S2.14.
Continue onward to the nearby chamber where you discovered a lifeless Gigafraug some time ago. This is the Gigafraug that Samus thought had fallen prey to Metroid predation - how fitting that we're now a few metres from the path to Sector Zero? Two Baristutes now inhabit the area, but no need to engage them unless they cause any grief.
Climb up into the open tunnel on the wall, not far from the Gigafraug's remains. A Seeker Missile door awaits at the far end - curious adventurers have no doubt already seen this before. Stand back from the door and enter first-person view. Target one of the pods and fill up the charge gauge to lock onto all five targets. Release fire and watch your projectiles make short work of the blast shield, revealing a regular door underneath.
Now we're on the right track. Follow the path to discover a long narrow corridor, home to several meandering Snomers. This place looks like any other indoor part of Sector 2, but a special surprise awaits. Further down the corridor, Samus' progress is suddenly halted. An inhuman sound echoes through the chamber as the gravity is literally flipped around, sending Samus plummeting towards the ceiling. A fancy motion blur over the screen helps inform us that any room with this visual effect will have irregular gravity, Super Mario Galaxy-style.
At this point Samus is now at the "base" of a pit, and a tall cliff bars her progress. Backtrack and climb up the tall staircase on the right. Once at the "top", use the Space Jump to fly across to the left side of the corridor, easily bypassing the cliff. Proceed onward to find a larger chamber full of small platforms. Use the Space Jump and wall-jumps to navigate through this vertically-reversed platforming segment (who messed up the gravity here anyway?).
Move onward to the next corridor, home to two "pits" and their inhabiting Baristutes. Simply Space Jump over the angry residents to navigate this corridor safely. Beyond here lies a gravity junction - a corridor pointing south bears a deep blue/purple hue in contrast to the current teal-coloured corridors. Step inside the south corridor to find the gravity restored to normal, except at several times the normal pressure. Samus now moves sluggishly in this region - even sound effects are muffled under the heavy atmosphere.
Step through to the next long corridor. Four FG-II Graham units greet Samus and are unaffected by the heavy gravity, so quickly deal with them before they become a nuisance. Stomp down the corridor and take care further down (notice the green slime-lined hole in the ceiling? I wonder what caused that?). In the second segment of the corridor (lined with support pillars), purple-coloured Skree dive-bomb Samus from the ceiling as she slowly walks through.
These purple Skree are Cyclaws, capable of lunging at Samus from ground level if their initial dive-bomb misses. Don't let them grab hold, otherwise their self-destruct attack will sap a big chunk of your health - on Hard mode, the horrible monsters will give you an instant Game Over. You can try to use a sequence of Sensemoves to avoid the whole swarm of Cyclaws, pushing forward to eventually depart their segment of the corridor.
But on Hard mode, either hug one side of the corridor and walk forward very slowly, or hug the wall and run for your life! If you try to outrun them, you should be able to run past all the diving Cyclaws. Either way, keep firing rapid shots just in case.
If you choose to travel slowly, and keep firing rapidly, every time a Cyclaw descends (one at a time if you walk slowly enough) Samus will shoot them down before they can harm her. Normally the Screw Attack would help, but Samus will eventually slump to the ground, even if you tap the jump button rapidly.
Two FG-1000 units guard the remaining section of the corridor - simply open up on them with Plasma Beam shots to finish this gauntlet. Exit the corridor to meet your next challenge - two Kyratians happily bounce around, completely unaffected by the increased gravity. Take a risk and close in - use the Screw Attack to decimate each one on contact. Have your Sensemove instinct ready as you close in - the gravity won't stop a successful Sensemove.
Move through this corridor and look closely at the wall where the path turns right. A small glowing E-Recovery Tank rests inside an alcove, but unfortunately you can't reach it yet. Leave it there for now and follow the corridor on the right. Step through to the next region and clear out any Snomers and Baristutes encountered (use the Charge Beam and Overblasts on any Baristutes). Eventually this path concludes at a dead-end where a narrow shaft leads skyward. A hovering Grapple Point resides near the shaft.
A large open section of the ceiling is set slightly back from the Grapple Point; ensure that a potential Baristute leaping down from above is dealt with. Face the wall before entering first-person view. Swing up onto the Grapple Point and leap off it toward the wall. As Samus begins sliding down the wall, quickly tap jump rapidly to Space Jump up the narrow shaft.
A cluster of Snomers and another Baristute likely await up above. Clear them all out before moving onward. Travel to the left side of this platform to find a gaping hole. Hold forward and tap jump as rapidly as you can to Space Jump over the gap, hopefully stopping Samus from accidentally plummeting down the hole.
A successful traversal of the hole will present another ledge high above on the right. A second Grapple Point will allow Samus to easily reach that upper ledge. Swing up and stomp through the empty corridor above. Move through the next corridor to mercifully find the exit of this trippy gravity world. Cross the next deserted corridor to locate a handy Navigation Booth. Save your game to unlock the door and reveal a tiny unexplored section of Sector 2's map, along with the elevator leading to Sector Zero.
Phew, almost there. Exit the chamber to find yourself within a tall, multi-storey chamber. A large fancy device rests at the centre of the chamber - is that the gravity generator responsible for the loopy gravity you've endured here? The camera pans up the chamber to reveal a door high above. But it doesn't show you the intricate ceiling of the chamber - feel free to enter first-person view and take a look at it from here.
Let's scale up the chamber to have a closer look at the ceiling. Use the narrow shafts on each floor segment to climb up (or use the handy Grapple Points positioned above each shaft). For a bit of fun, see if you can Space Jump from one side of the chamber to another and maintain your direction as the camera swings around.
Upon reaching the apex of the chamber, the object on the ceiling is much clearer to see. It looks like something is plugged into the ceiling - numerous wires and cables keep the object fixed firmly in place, and a long tail-like section hangs beneath it.
But enough sightseeing, let's move on. Step towards the exit for a nasty (but predictable) surprise. The object attached to the ceiling suddenly comes to life, locking Samus in the chamber. Electricity courses through its body as the object activates a gravity-manipulating generator attached to its "tail". Ripping itself free of the entangling cables, players can now see what this thing really is.
Metroid Fusion veterans will instantly recognise it - say hello to the 3D debut of Nightmare! This familiar face was completely unexpected... However, we always knew that the Nightmare in Metroid Fusion was built by the Galactic Federation (for "military applications") - so now we know that its origins lie in the Bottle Ship. The nostalgic reunion with Nightmare quickly concludes as a pitched battle ensues. Refer to the bosses guide for tips to disable this version's gravity well projector and deal with the other surprises it has in store.
Defeating Nightmare will cause its protective faceplate to explode violently, revealing its mutated green face we all know and love. Several shrieks from the six-eyed beast precede its gravity well projector malfunctioning, sending the entire creature crashing to the base of the chamber. Nightmare falls in a motionless heap, supposedly dead.
Feel free to save your game at the adjacent Navigation Booth before moving onward (and check out Nightmare's ugly face up-close if you wish - how could the Federation create such a sight?!?).
Scale up to the top of the chamber and exit through the lone door at the top. The game takes control of Samus in the next corridor as she runs through a maintenance tunnel. We then see an exterior shot of the Bottle Ship. The gargantuan engine at its base suddenly roars to life - who turned the engines back on?
Computer terminals buzz and whir to life all around Samus, accompanying the shuddering of the ship all around her. What is going on now? Let's move on and find out. Step through the door ahead to find an intricate elevator chamber. Climb aboard the elevator and ride the transport down to your target - Sector Zero.


