


Data
Guides and strategies
- Techniques Guide
- Power-up locations
- Bosses Guide
- Mini-bosses Guide
- Search View Guide
- Obstacles Guide
- Walkthrough
- Game endings
- Secrets and tips
- Game maps
Media
Chapter 14: The Mini-boss King
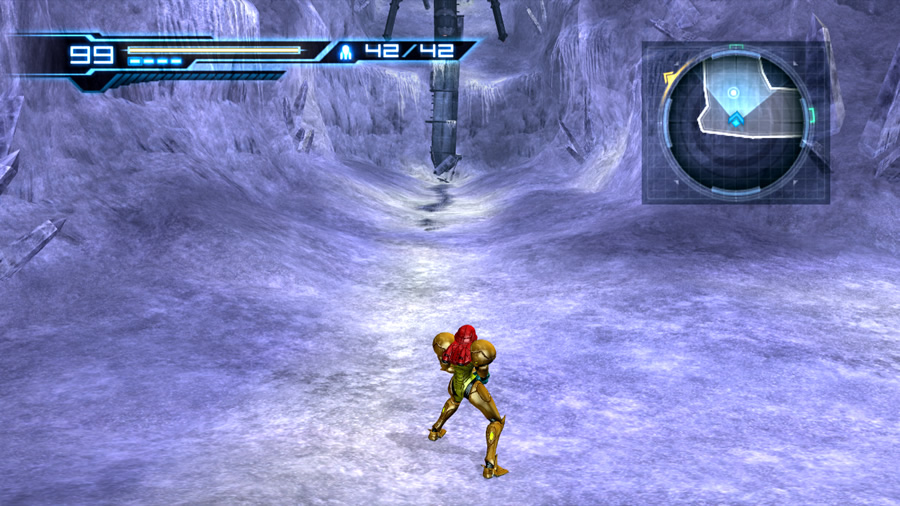
Use a Shinespark jump to scale the icy cliff.
Depart the Navigation Booth to find a large T-shaped junction, home to a few forgotten storage crates. This big cluster of stacked crates hides Missile Tank S2.10 in a corner, so feel free to pick it up on your way through. You now have a choice of two paths to choose from; one directly up a short incline, or another through a corridor filled with ice and snow.
Feel free to explore the area up the ramp/stairwell, but to find the way forward you need to step through the door in the icy corridor. Through there lies what can only be described as a ridiculously long (and tall) freezer, packed with snow and ice. Step forward in the roomy chamber to be greeted by three Volfons.
Conquer these pests to clear the area and reveal a nearby item on the map. Tall pylons hang from the ceiling along this chamber's main drag - if you walk along the corridor, the game will remind you how to perform a Shinespark. Sure enough, a tall cliff bars progress further down; it must be scaled with a Shinespark leap.
But first, run back towards the first pylon to build up the Speed Booster's charge. Use a vertical Shinespark jump to reach Missile Tank S2.11 high above. Return to the base of the chamber and use a Shinespark jump to scale the distant cliff at the western end. As Samus nears the peak of her jump, push forward to land snugly aboard a hanging pylon.
This one possesses a powered Morph Ball Launcher. But before climbing inside, take a look at the environment up ahead. A steep icy slope ascends into the distance, and several pieces of debris and clusters of ice litter the slope's terrain. Try to target and destroy as many of the ice clusters as possible (you'll be sliding down that slope soon).
Climb inside the Morph Ball Launcher and lay a bomb. Samus will rocket up the length of the pylon and arrive inside an attic, high above the corridor. The narrow confines of this rudimentary attic is your only way forward, and unfortunately the area contains harmful obstacles. Samus will be stuck in Morph Ball mode while up in the attic, and several Snomers have managed to make this area their home.
The little pests still like to hurl themselves at Samus - bombard them with bombs and keep your distance to clear them out (you can also try to anticipate their darting movements by laying bombs where they'll land). Don't let them sap any of your health on Hard mode.
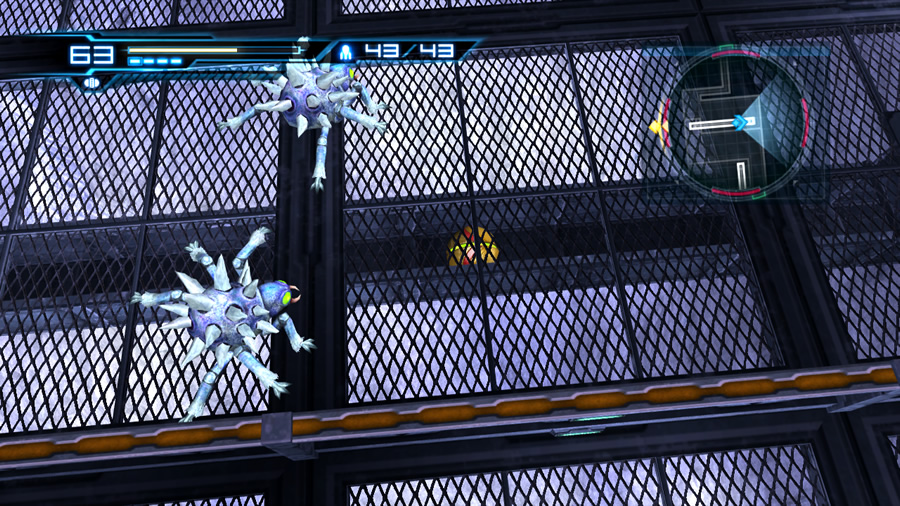
Snomers in the attic... Use bombs to clear them out.
If the Snomers weren't enough of a bother, electrified floor panels certainly will be. The floor is made up of an array of large square panels. Some of the panels discharge bursts of electricity across their surfaces. If Samus touches the discharge she'll take damage from the electricity. Time your movements and roll through when a discharge ends - you should have plenty of time to roll away from danger.
Small vent tunnels connect the segmented attic together, so keep a lookout for them. Just make sure that there is a vent tunnel below it, as some vents open out directly into the corridor below - you don't want to fall down and have to repeat the entire procedure again. Eventually an exit will present itself at the far end of the attic. Follow the tunnel and fall down to arrive aboard the next pylon.
You're now closer to the top of the steep slope - feel free to use your Missiles to clear out any more visible ice clusters below. Climb inside the Morph Ball Launcher and launch Samus back up into the ceiling. The second attic won't have any electrified floor panels, so you only need to deal with roving Snomers this time.
Follow the attic and vent tunnels (but don't fall through any open vents!) to reach the exit on the opposite end of the attic. Roll through an extended tunnel to find yourself deposited into a small maintenance chamber, well outside the boundaries of the freezer. If you're playing on Normal mode, the maintenance chamber's only exit locks itself, but a welcome surprise of Energy Tank S2.02 rests in plain view.
Scoop up the item and have a look through the glass window behind it. This window observes a deep chamber below, stretching off to the left. Curiously, a windowed enclosure houses a Sensor switch directly opposite your position. With no visible way to reach or shoot the switch through the solid glass, this looks like a job for the Wave Beam!
Adam doesn't authorise the Wave Beam just yet, so let's backtrack and see what we can do (the door should unlock itself now). Slide down the slope in the enormous freezer and clear out any remaining ice clusters (you can still enter first-person view while sliding down). Don't touch the ice clusters or Samus will lose health - luckily the other metal debris won't harm her.
Use Sensemoves to easily dodge your would-be hunters' attacks.
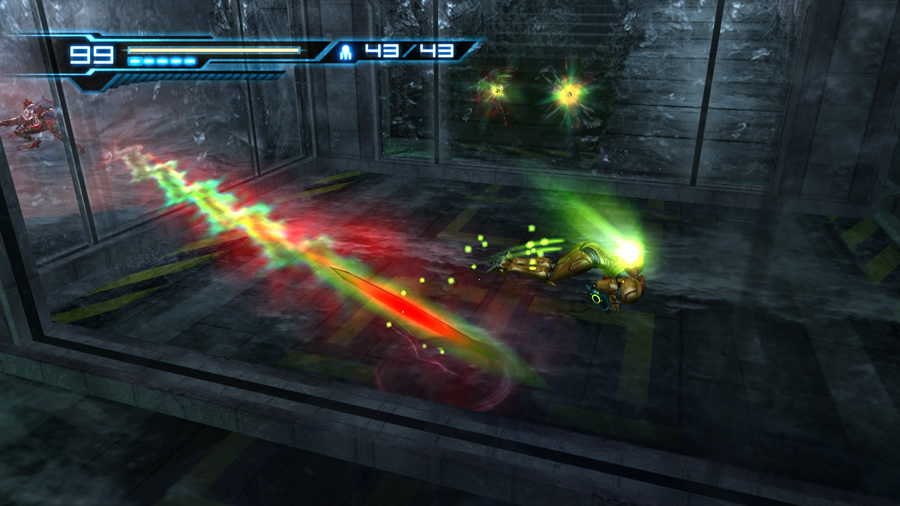
After enjoying the slide, fall down the cliff and return to the adjacent T-junction chamber. Step inside and Samus will automatically walk towards the centre of the room - uhoh. Suddenly, three glass panels slide up into the ceiling, locking Samus inside a makeshift prison. Three red-coloured Cyborg Zebesians leap down to confront their cornered prey.
These guys are Super Zebesians, packing heavier firepower and enhanced defense. Each one possesses a Wave Beam-like energy weapon, granting them the ability to fire energy blasts at Samus through the glass walls. There's nothing you can do to harm these foes, so keep your distance from them and use Sensemoves to avoid the hot streaming plasma.
If you're playing on Hard mode, hopefully you've avoided any health loss recently. Either way, there's a very small margin for error here - don't relent your Sensemoves. Eventually Adam will interrupt and authorise the use of the Wave Beam - but keep Sensemoving while he speaks and don't stop until the game forces Samus to a standstill.
With the trusty Wave Beam available, open up on the now-vulnerable Zebesians. Use Charge Beam shots to bring them down faster, and don't forget to keep Sensemoving their attacks. Conquer your would-be prison wardens and the glass panels will promptly retract into the ground (why did the scientists set up this cage here? Ah well...).
Now that you have the Wave Beam, the Sensor switch at the far end of the freezer can be activated. Feel free to save your game at the Navigation Booth next door before moving on. Return to the freezer and try out your fancy new purple Wave Beam on the attacking Volfons. Clear them out and use a Shinespark jump to scale the frozen cliff again.
Hop inside the Morph Ball Launcher and send Samus up to the first attic. This time the floor panels are unpowered, so only Snomers will bother you on the way through. Move through the attic and travel down to the next pylon. Before entering the second Morph Ball Launcher, make sure that any visible ice clusters down on the slope are gone - you want to make sure that the slope is nice and smooth.
Launch Samus up to the second attic to find that this area is now riddled with electrified floor panels. Some of the panels will remain permanently charged, so don't roll around recklessly. Keep in mind that some of the regular panels may take a few seconds longer to fade out after a discharge. Aggressive Snomers will continue to bother you as well, and they can't be harmed by the electrified panels. Lay bombs and clear them out before attempting to cross through electrified areas, or they'll bug you from behind.

A very difficult battle will play out on that cargo transport.
The last area in this attic presents the trickiest challenge. Conquer the pair of Snomers here and take a look at the final set of four connected floor panels. Three of the panels will energize continuously, while a single panel is let uncharged in each cycle. If you watch closely, the uncharged panel will change in an anti-clockwise direction.
Watch the sequence and get ready to move onto the top-right panel when it will be uncharged. From there, wait for the next discharge to end before quickly moving to the now-safe top-left panel. Exit the attic ahead and follow the tunnel to arrive in the maintenance chamber again. Enter first-person view and use a Charge Beam shot to energize the switch through the glass windows.
An alarm will ring out, heralding the arrival of a large cargo platform below. If you had travelled to the chamber below without summoning the cargo platform first, there would've been no way forward. The Union Jack-inspired platform will remain there, so we'll return to the freezer and backtrack to the T-junction chamber. But one last surprise awaits in freezer-land.
As you retrace your steps and set foot on the slope, two huge vents on either side of the door will burst, sending a torrent of snow and ice cascading into the chamber. The debris will quickly turn into a full-blown avalanche, billowing down the slope. Despite her protective Varia Suit, if that avalanche touches Samus, it's an instant Game Over.
So let's make sure that doesn't happen. The absence of all the ice clusters on the slope will provide an easier escape, otherwise they can potentially slow Samus down. You can try to outrun the avalanche by simply sliding down the incline and avoiding any obstructions, but activate the Morph Ball instead for an enjoyable escape. The Morph Ball will roll down the slope at a much greater speed, giving Samus a brilliant lead on the falling snow.
Stand up as Samus falls down the icy cliff, then simply run for your life to the far end of the corridor. Upon reaching the end, Samus will automatically perform a stylish Shinespark-fueled escape. Once you regain control, feel free to go back inside the freezer to see the result of the avalanche - most of the area is now completely snowed-in. Don't worry if you missed out on Missile Tank S2.11 up aboard the first pylon - come back later once you have the Grapple Beam.
If one of these platforms collapses under Samus' weight, strike it with an iced Charge Beam.
Step back to the T-junction and feel free to save your game next door to recover any lost health. Climb up the short stairwell/ramp and move through to find another ridiculously long corridor. This one contains a steep incline dotted with metal platforms to allow passage. Torrential streams of water border the incline, and several Joulions inhabit the base of the slope. Take them out from a distance before commencing your climb (the electrical discharges they emit are very apparent here).
As you scale up the footholds, try to avoid touching the incline or Samus will slide down automatically. Two of the platforms on the way up are frozen - simply enter first-person view and send a Missile at them to thaw the platforms out. Two more of the platforms will also retract into the ground when Samus steps on them (one after the first frozen platform and one at the very top of the incline). Enter first-person view below these platforms, then lock-on and send a Charge Beam shot into each one to freeze them in place.
Complete your climb to the top and step around the bend ahead. Two Kyratians bound into view, barring Samus from the exit around the corner. These two are an optional fight just like the pair you saw in the Water Tank. The Navigation Booth's door up ahead won't be locked, so feel free to play with the Kyratians or simply leave them behind.
Step inside the Navigation Booth and save your game, revealing another long corridor on the map. This one extends far to the south, leading very close to the main elevator's position. Exit the Navigation Booth to arrive in the Materials Transfer Lift. The cargo transport summoned earlier awaits your arrival (look up and you can see the alcove where the Sensor switch was hidden). You're now standing at the start of a deep transit tunnel steadily rising into the distance. The cargo transport is all set to go, so simply step aboard and activate the attached terminal to begin the ride.
Only the gentle hum of the cargo transport accompanies Samus along the darkened transit tunnel. But this trip can't be that easy. Soon into the ride, a pack of Super Zebesians rudely interrupt the silence. They'll utilise their full arsenals in this open arena. Check the mini-bosses guide for more details, and expect to face seven Super Zebesians in total.
Stay as far away as possible from each target to give yourself plenty of time to Sensemove their projectile attacks, and try to avoid being surrounded. Remember to use Charge Beam shots to freeze the Zebesians' claws and halt their projectile attacks momentarily.
The ultimate challenge awaits players after the onslaught of Super Zebesians. A brief moment of respite follows the Zebesian attack, so quickly use Concentration if your health is low enough.
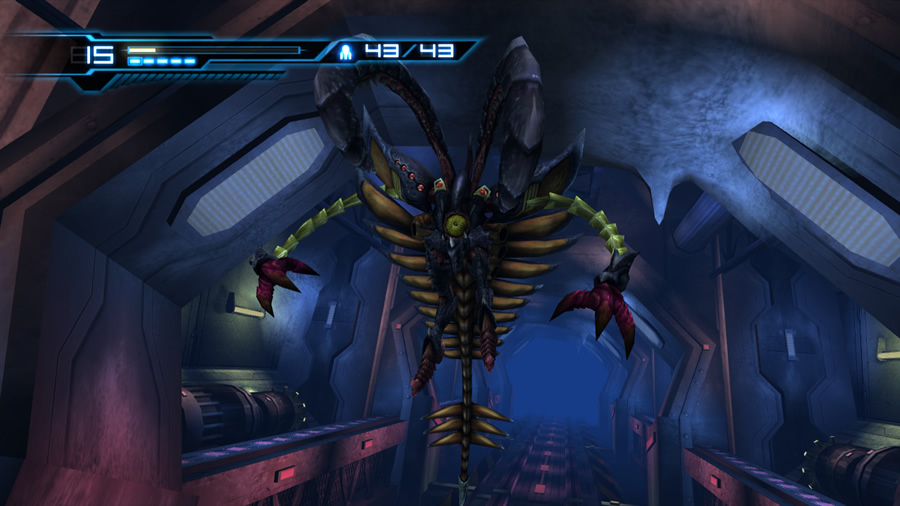
Hello pain - this creature is likely your hardest opponent aboard the Bottle Ship.
The most annoying mini-boss in the entire game makes its grand entrance. A large creature hovers over the platform and assaults Samus with a hail of missile fire. Say hello to the Rhedogian - a long-armed, tail-whipping, oversized mandible-faced frustrating pile of fish meat. With the formalities out of the way, you now need to fight this foe aboard the transport and must defeat it to escape the Materials Transfer Lift. That won't be an easy task, most especially on Hard mode. Get ready to push your Sensemove skills and patience beyond their current limits. Refer to the mini-bosses guide for tips and tricks to survive this often maddening encounter.
Don't be disheartened if you lose to this creep a few times - give the game a rest if you need to. Thankfully, the well-placed Navigation Booth next door allows a quick return to the Materials Transfer Lift.
During the battle, the cargo transport will likely arrive at its destination. Hold your ground and keep battering the Rhedogian (see if you can Lethal Strike the creep). The battle is won when it hovers into the air and retreats from the scene, hurtling back down the transit tunnel and out-of-sight.
Well that was fun. If the Rhedogian is smart enough to retreat from the galaxy's best bounty hunter, you can certainly expect to see it again sometime.
Step off the cargo transport and exit the chamber. Walk through the next corridor (watch out for scores of Snomers detaching from the ceiling) and move through to a seemingly dead-end chamber.
Have a close look at the environment here. A Power Bomb blast shield pod adorns the far wall (leave it for now), while four large glass tanks are lined up against the southern wall. Each tank is filled with an opaque muddy-brown liquid. Look closely at the wall on the right of the tanks - can you see a glowing red power line running towards a sealed hatch on the wall? That seems to be a likely candidate for your exit.

There's a Sensor switch cleverly hidden behind these glass tanks.
Step back towards the entrance of the room and inspect the tall vertical pipes beside the mud-tanks. Can you see an open hole at the base of one? Activate the Morph Ball and roll inside the damaged pipe. Follow a narrow tunnel network under the floor to find two red sockets set in the tunnel walls and floor. Lay a bomb within both sets of these red sockets to drain the liquid from the glass tanks.
Climb back up and inspect your handiwork. A red power line is now visible along the length of the wall behind the tanks. Step toward the closed hatch and look back through the tanks - an oddly-placed Sensor switch is visible, hidden behind a fifth tank in a tight alcove. Via the Wave Beam, send a charged shot into the switch to pop open the small hatch in the wall. Phew, now you can move onward.
Climb inside the open hatch and roll through. The tunnel soon opens up to a nice view of outside space - you're now moving along the outer hull of the Bottle Ship. Travel along the lengthy tunnel to eventually re-enter the closed confines of the ship. The tunnel then deposits Samus snugly inside Sector 2's main elevator, bringing your journey of this sector full-circle. Jump in the elevator and return to the Main Sector.