


Data
Guides and strategies
- Techniques Guide
- Power-up locations
- Bosses Guide
- Mini-bosses Guide
- Search View Guide
- Obstacles Guide
- Walkthrough
- Game endings
- Secrets and tips
- Game maps
Media
Chapter 15: Catch of the Day

This view of outer space reminds us where we really are.
Upon arrival at the Main Sector, Sector 1's elevator is now curiously locked. The map (and Adam) points you to Sector 3, so we'll go straight there. Hop in the Sector 3 elevator and listen to the ship's computer during the trip. We learn that irregularities have been detected in the geothermal and experimental desert regions, and that all personnel should evacuate the sector. Guess which areas in Sector 3 you're about to visit?
Upon touchdown in Sector 3, we find that the door on the right is locked and glowing orange. That's the way you need to go according to the map, so you'll first need to unlock this door. With no other option, travel west and move through to the volcano's Crater Interior.
Climb up the volcano and play with the resident Dessgeegas if you want (I'm surprised that you don't see frost evaporating from Samus' Varia Suit after all that time she spent in Sector 2...). Keep an eye out for the Morph Ball Launcher hiding in an alcove further up the volcano. That's your way out of here; use it to launch Samus up to the volcano's maintenance chamber.
Step through to the neighbouring Navigation Booth and save your game if you wish. Move outside to the long bridge crossing the lava lake. This time the looming volcano in the background lies dormant (no more Goyagma), and the air is clear of falling meteorites.
However, earlier meteorite activity has damaged the bridge, rendering sections of the walkway unusable. Simply leap over the first two damaged sections, then use the next stretch of solid ground to build up the Speed Booster's charge. As the Speed Booster engages, run to the edge of the next wide hole and Shinespark forward to leap over the lengthy gap.
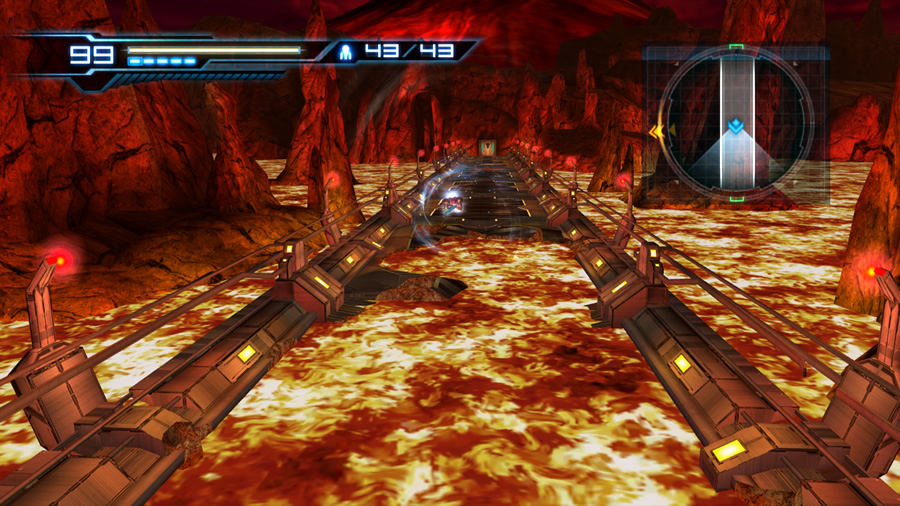
Meteor damage has ruined this bridge - time for a Shinespark!
Cross the remainder of the bridge and step inside the next chamber. Several Novas and a pair of wayward Cyborg Zebesians inhabit this small room, so feel free to deal with them or simply barge through and move onward (there's no locked doors). The Floor Observation Room awaits next door. An Asborean was once fought here, and the big computer terminal on the central wall was originally unusable.
This time you might have better luck. Step toward the computer terminal, but be ready to Sensemove immediately; a new Asborean has taken up residence and will attack on-sight. Check the mini-bosses guide again if you need help with this foe. If you manage to rip the Asborean serpent from its shell, remember to climb up atop the computer terminal's platform - the poor thing can't follow you up there.
Conquer the Asborean to power up the terminal. The video screen above the terminal displays the locked door back in the main elevator, so activate the terminal to finally unlock it. Now you need to backtrack to the main elevator (curiously, the opposite exit here in the Floor Observation Room remains locked). Exit the chamber and use the small adjacent corridor to begin a Speed Booster charge, then use a Shinespark leap to safely cross the damaged bridge outside. Retrace your path back through the volcano and up to the main elevator.
Save your game along the way (for insurance) and travel through the unlocked door at the main elevator. Carefully knock down the pair of Heat Bulls in the next corridor before moving onward - no need to worry about the meandering Novas. Move to the chamber beyond for an unexpected sight - the sadistic Rhedogian is back (complete with its freshly-regrown mandibles) and is currently locked in a heated battle with none other than Anthony Higgs.
Both combatants are dueling on the upper floor of this chamber, and the small connecting shaft you used earlier is now gone, replaced by an exposed lava pool. The only way for you to climb up there is via a Grapple Point hovering high above, but you still don't have authorisation to use the Grapple Beam.

Our good friend Anthony is heading for the Geothermal Power Plant.
Change the status quo by running forward and entering first-person view. Quickly target the Grapple Point to trigger another short cutscene, in which Anthony finds himself immobilised in the Rhedogian's grip. The monster will dangle him directly above the lava pool and threaten to let go. The game then returns to Samus as Adam chimes in with permission to finally use of the Grapple Beam. Don't waste any time - as soon as the Grapple Point turns green, target it and hit A to swing up, then press 2 to jump across and save Anthony from a fiery demise (which you can actually fail if you take too long).
Now let's give Anthony a hand. Three pesky Novas are in league with the awful Rhedogian, so quickly clear them out to avoid any nuisance damage. There's not much room to move around in this chamber, but thankfully (or not) the Rhedogian will mostly use the same attacks as before. Check the mini-bosses guide for tips, and don't give up (remember to Sensemove all the time). Don't worry about Anthony; he'll always pick himself up after taking a fall, and you can't hurt him by accident.
After draining enough of the Rhedogian's health, the creep will once again turn tail and run, diving head-first into the lava pool and out-of-sight. Anthony thanks Samus for saving him (they're even now!) and reports that all the troopers were ordered to the Geothermal Power Plant. No-one else turned up - we now know that apart from Adam and Anthony, only one other soldier remains alive. One of them is The Deleter.
Anthony engages in small-talk with Samus, triggering another flashback cutscene. We witness one of Adam's most difficult missions, and the reason for Samus' departure from the Galactic Federation's armed forces.
Anthony departs the scene as you regain control (surely he can't be The Deleter after what they just experienced). Move onward to the next Navigation Booth and save your game there. Step through to the lava-filled industrial chamber where you originally couldn't travel through without the Grapple Beam. Before using the Grapple Beam to cross the first lava pit, watch out for an emerging Magdollite. Freeze it with a Charge Beam shot before swinging overhead, or simply outrun it.
Vorash is a very hungry fish - it enjoys an organic and metallic diet.
Cross the second lava pit to find the exit. Don't forget to search for Energy Part S3.04 hidden beneath the floor. Move onward to locate the Blast Furnace Observation region. There's a small glass enclosure housing a control terminal a few metres away. Step toward the glass viewport and take a look inside the main blast furnace chamber.
An enormous lava lake inhabits a vaguely circular region, home to three rocky islands. Garbage chutes high up on the walls periodically deposit debris into the chamber, where the solid waste is then incinerated in the lava. The entire arena looks just the right size for a major boss encounter...
You can't access the control terminal's enclosure for now. Instead, an inviting maintenance hatch is wide open on the floor nearby. Leap down into the darkened pit and step further inside to find a small round tunnel bearing a sealed hatch. A Grapple Point hovers nearby, leading to a small open hatch high up on a wall. With no other option, use the Grapple Point to reach the hatch and climb inside.
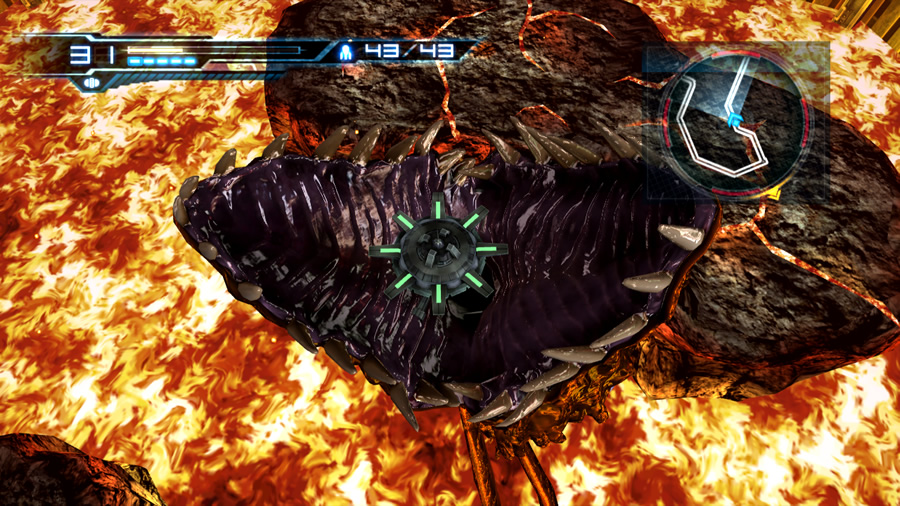
Follow the winding tunnels and use a convenient Morph Ball Launcher to quickly find yourself high above the lava lake. Roll onward to reach the centre of the area, where a rack of five Grapple Points are attached to a pipe. Lay a bomb beside each Grapple Point to release the clamps and send the object floating downward - it looks like you'll use them to cross the lava lake below.
However, the second Grapple Point will run into trouble. As the device floats downward, the massive lava fish Vorash disgorges from the lake and consumes the device in one snap of its massive jaws. Uhoh, there's your boss encounter ready to go.
Release the remaining Grapple Points and follow the pipe onward. The pipe will eventually reach the far wall, and the tunnels beyond will deposit Samus right beside the control terminal you saw earlier. Activate the terminal to open the round hatch below, granting access to the main furnace chamber. This will also open the control station's glass door, but simultaneously locks you inside the blast furnace region. Climb down the maintenance shaft again and step over to the open hatch.

Swing inside the furnace to battle Vorash.
Enter first person view and use the Grapple Beam to enter the chamber. This time you'll finally face Vorash in battle - no more running. Vorash doesn't waste any time - the overgrown fish immediately lunges up at Samus. Thankfully she automatically (and stylishly) avoids its maw. You'll regain control of Samus as she lands on a rocky island. Check the bosses guide for details and tips to conquer Vorash.
Defeating Vorash will restore the chamber to its regular state. The raised lava will recede, uncovering both exit hatches on the northern and southern walls. Descend to the lowest of the three islands and climb inside the northern hatch to find the way forward (but before you leave, don't you think the textures on the rocky islands look similar to the decor of the Dodongo's Cavern in the Legend of Zelda: Ocarina of Time?).
Step through the hatch and look for another maintenance shaft in the darkened room. Climb up to find the northern observation chamber, where an adjacent Navigation Booth awaits. Step inside and try to save your game, only to be interrupted by Adam. He orders Samus to track the purple monster to the geothermal electric power generator, which is also where Anthony is going. The marker on the map is somewhere on the western side of Sector 3, far away from here. Save your game to reveal a fresh new area on the map. Two large areas extend north, apparently concluding at a dead-end.