


Data
Guides and strategies
- Techniques Guide
- Power-up locations
- Bosses Guide
- Mini-bosses Guide
- Search View Guide
- Obstacles Guide
- Walkthrough
- Game endings
- Secrets and tips
- Game maps
Media
Chapter 17: The Bounty Hunter's Ordeal
Exit the chamber and move onward. The next area presents an ominous musical piece, just like the one heard during your investigations at the Exam Center. Uhoh, important plot point coming right up...
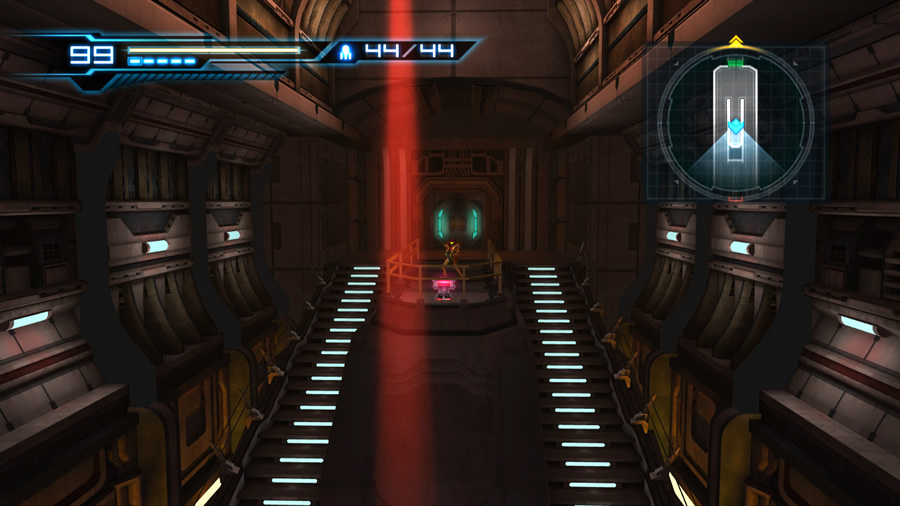
Move into the open area of the chamber and Samus will automatically run forward and enter first-person view.
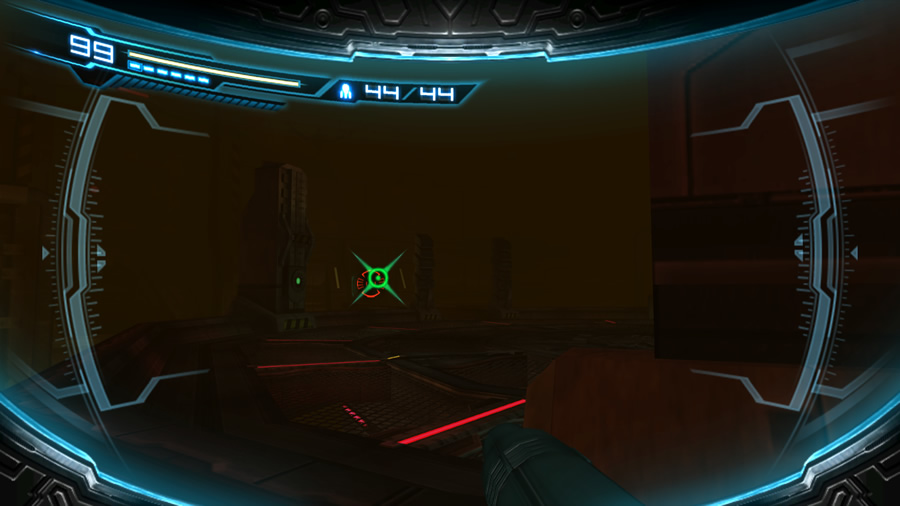
Search View segment #9 - On the way to the Geothermal Power Plant
Something very out-of-the-ordinary inhabits this chamber. It needs to be targeted to complete this segment.
 The husk of a creature is attached to the wall above the door. Target the open cavity on its back (slightly below the head) to complete this segment.

Oddly, the drones generating these force fields can't be destroyed.
Samus has finally caught up with the purple monster from Sector 1. Unfortunately, all that remains is its discarded shell, attached to the wall with thick cobwebs. Its messy green blood drips on the floor. The open rib-like cavity on the monster's back suggests that it has molted to the next stage of its life cycle, and is now a far-cry from the cute little fluffy white chicken you first met. If you haven't seen any spoilers about the game, you might be able to make a very accurate guess as to what the monster looks like now...
The music takes a sinister turn, and the yellow-red glow of the lava definitely helps set the mood. Leave the monster's shell behind and step through the door below it. Beyond lies a long, upward-sloping glass tunnel with a spectacular view of a new lava lake.
Plumes of lava erupt from the lake, and the swirling red and purple clouds continue their angry dance in the fake sky. But enough about the scenery - the Geothermal Power Plant awaits. But before you can reach it, three pairs of cheeky FG-II Graham units have been positioned throughout the tunnel, creating impenetrable force-fields between each pair.
For an unknown reason, these units can't be destroyed with your current weaponry. All you can do is use the Charge Beam to freeze one of each pair of drones, temporarily disabling the force-field in the process. Keep disabling one of each pair to successfully traverse the tunnel.
This convenient Energy Tank will help in the Geothermal Power Plant.
Step through the door at the top of the tunnel to finally arrive at the mighty Geothermal Power Plant. The door promptly locks itself as Samus enters, so there's no going back. There's a Super Missile blast shield directly in front of Samus here, but you'll deal with it later. Instead, climb up the stairs and be sure to pick up Energy Tank S3.01 along with Accel Charge S3.02.
Enter the vast adjacent chamber, only to find it seemingly deserted at first - a heavy brown fog darkens the entire room. But as Samus automatically steps onto the central platform, a laser sight slowly creeps up her armour, coming to rest directly on her visor. The Deleter! He's found her!
Luckily for Samus that isn't the case - we quickly see that the laser sight originates from Anthony's plasma cannon. Samus rushes to join him behind a pillar; we then briefly glimpse Anthony's intended target. A massive flying creature lurks around in the darkness - by now you should know its identity...
Anthony suggests searching for the exit and Samus happily complies.
Search View segment #10 - Inside the Geothermal Power Plant (1)
You're now stuck behind the pillar with Anthony on your right. Follow his advice and look for a viable exit from the chamber.
 Out beyond the left side of the pillar, look for the faint green glow of the door far ahead. Target the door to end this segment.
Samus sights the exit, but before they can escape, an enormous plume of fire erupts from above. The firestorm obliterates the connecting bridge linking the door to the main platform - so much for that exit. Samus volunteers to confront the beast and steps onto the main platform.
As you regain control, get ready to Sensemove plumes of fire as they stream down from above. Try to avoid any damage at this point. The reign of fire from above is endless, so enter first-person view to continue the story. While in first-person view, the fire inexplicably no longer harms Samus. Adam chimes in and orders her to shoot the magma eruption port to fill the chamber with hot lava.
Search View segment #11 - Inside the Geothermal Power Plant (2)
You need to look for the magma eruption port. Once found, target it and fire a Super Missile.
 The eruption port is on the left side of the door - spin around until you can see the door, then look for a large wall panel beside it. Target it and Adam will authorise Super Missile use; fire a projectile to complete this segment.
Once open, the magma eruption port lives up to its name and spews steaming hot lava into the deep pit below the main platform. As a bonus, you can now use Super Missiles! A poignant cutscene now plays as Samus tries to locate her prey. The monster lands atop the platform, right in front of her. It's Ridley! All along, that little white chicken and the vicious purple monster were Ridley's infant and adolescent forms!
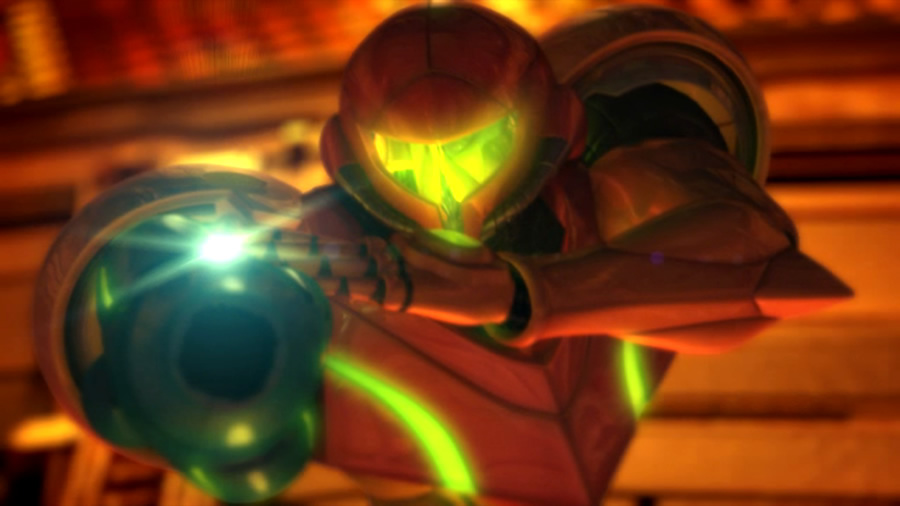
Samus regains her composure for the rematch against Ridley.
Despite defeating Ridley numerous times in the past (including his Meta and Omega forms in the Metroid Prime trilogy), Samus freezes in fright and is unable to move or fight. Ridley takes the advantage to immobilise her further. Only Anthony can save the day now.
Stepping in to save Samus in her dire hour, Anthony gives Ridley a healthy dose of his plasma cannon. The blast releases Samus from his grip, and she safely lands on solid ground. Unfortunately for Anthony, Ridley sweeps his tail into him, knocking the 07th Platoon's finest soldier over the edge of the platform and down to the lava pit far below. He's gone...
All the while Ridley creates havoc, Adam runs into trouble back in the Main Sector's control room. He frantically grants Samus access to the Plasma Beam to use against Ridley, but Adam's not alone anymore. A gunshot rings out, and Adam's comlink earpiece is knocked to the ground. Looks like The Deleter found him...
The tragic loss of Anthony knocks Samus back to her senses, and you finally regain control after the Plasma Beam activates. It's time for a good old-fashioned fight against Ridley. The classic Ridley boss theme accompanies this battle, and is brilliant to hear fully-orchestrated. To be frank, if you're playing the game on Hard mode, this may well be the hardest battle of all. One hit from most of Ridley's attacks will drain Samus' single energy tank instantly. Normal mode will naturally offer a much easier (but still challenging) battle; refer to the bosses guide for tips to survive this encounter.
Upon yielding defeat, Ridley falls flat on his back. Samus walks away from his battered and apparently-lifeless body to inspect Anthony's fallen plasma cannon. Of course, you should never turn your back on Ridley whether he's moving or not. Ridley suddenly lunges up and dives at Samus, but she automatically leaps clear. Ridley's definitely learned his lesson - he wastes no time in retreating from the chamber, leaving Samus alone to mourn Anthony's loss.

Ridley kindly creates this improvised exit.
Once you regain control, feel free to inspect the chamber to find a way out (take in the sights now, as once you leave there's no way to return here). There's a rocky ledge far below in the lava pit; pity Anthony couldn't have fallen directly on top of that when he fell. The connecting bridge to the door is ruined, and the door itself is locked. Luckily, a Grapple Point now hovers above the gap. Use the Grapple Beam to swing up through the hole Ridley conveniently made during his escape.
Move through the makeshift door to arrive back at the entrance of the Geothermal Power Plant. Grab the Energy Tank or Accel Charge if you missed them before, then climb down to the Super Missile blast shield across from the locked door. Enter first-person view and send a Super Missile into the blast shield to uncover an exit.
Climb inside the blue-lit maintenance tunnel to find a deep descending narrow shaft. A large sealed blast door resides at the top of the main shaft, while small Novas quietly wander around the walls. Slide down the left side of the shaft to eventually find a Sensor switch; energize it to open the blast door partially. Before climbing back up, slide further down the left wall (but stay out of the lava at the very bottom) to find Missile Tank S3.05 at the far end of a cosy tunnel.
Scale back up the shaft and crawl through the open blast door. Inside awaits a single Morph Ball Launcher set in a dead-end. Use the device to launch Samus through a seemingly-endless network of tunnels. She'll promptly reappear in the corridor right beside Sector 3's main elevator (you may remember seeing an inactive Morph Ball Launcher here before - from now on it will remain active).

Look for a Sensor switch deep down this shaft.
The entrance to the volcano's interior on the left is currently locked, so let's travel back to the main elevator. From the main elevator, if you try to travel over to the Blast Furnace Observation chamber where Vorash was fought, a locked door bars your progress at the nearby Navigation Booth. So the game is silently telling you to return to the Main Sector.
Use Sector 3's main elevator to return topside. En route, Samus becomes concerned over the lack of communications from Adam since the Ridley battle. She believes that The Deleter would consider him a priority target. You were with Anthony when The Deleter attacked Adam, so if Anthony and Adam aren't The Deleter, he must be K.G. or James...
As Samus returns to the Main Sector, she finds that the Main Elevator is already occupied. A lone helmeted Federation Trooper is slowly walking to the Sector 1 elevator. Guess who? It must be The Deleter. The game gives you an over-the-shoulder perspective so you can't simply run after the traitor. Instead, follow him slowly to the elevator and watch as he strolls inside. All the other doors here are locked, so let's follow him into Sector 1.