


Chapter 11: The Journey to Torvus
One Aether temple restored - two to go.
For now there's nothing else to pick up in Agon, so head back to the main elevator and return to the Temple Grounds. To access the next major region of Aether we'll need to give U-Mos a visit, but first we'll stop by the GF's base near Samus' ship for a few items. Return to the Landing Site (don't take the lift back down into the GF facility in Hive Transport, instead scan the violet translator gates nearby to open up a shortcut) and save your game before moving on (notice that Samus' ship is actively busy repairing itself).
Right across from Samus' ship you'll spot a small column nestled underneath an inaccessible ledge. The column possess a cluster of purple crystals on one side, if you lock on and blast the crystal cluster with the Light Beam you'll energize the column to move it into a position allowing you easy access to the ledge above.
Jump atop, turn left and scan the Luminoth warrior lying behind the columns for your Logbook. Feel free to explore beyond the door ahead but you'll find your path blocked by a green and purple door, both of which you can't penetrate for now. From the Landing Site, follow the path you first took into the Hive Access Tunnel and drop down the narrow shaft you originally fell through (what seems like ages ago now).
If you're wondering why you should bother returning to the Splinter-infested GF facility, you'll see why once below. Before you among scattered crates is the remains of a GF trooper... now that certainly wasn't there before. Walk forward to witness an Ing Darkling possess the trooper and bring it back from the dead. This isn't any ordinary trooper, this guy carries its own Missile Launcher. Make sure you scan the Dark Missile Trooper first (it's a one-of-a-kind) before laying into it with your own missiles and the Light Beam. With the creature down it'll leave behind Missile TG.02.

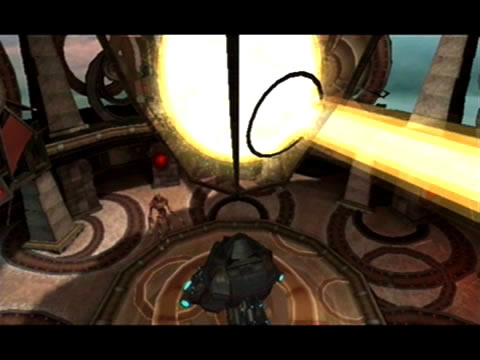
That bulbous object up there is the Sky Temple.
Now there's one more missile to retrieve here. Move through the facility and watch out for any Worker Splinters or the odd Dark Trooper crossing your path. Once at Hive Chamber B, move through the chamber till you reach the narrow tunnel bypassing the jammed cargo pod lift. Right next to the open tunnel is another sealed tunnel covered with a cracked cover plate. Now that you possess the Morph Ball Bomb, use one to crack it open to find Missile TG.03 waiting inside.
We'll now go pay U-Mos a visit. Return to the surface via the cargo lift up ahead and make your way to the Temple Assembly Site. Upon reaching the Assembly Site, you'll find a second column adorned with a purple crystal cluster. Might as well do some exploring then. Shoot the crystal with a Light Beam blast to move the column, revealing an inactive Dark Portal beyond.
Travel to Dark Aether to find yourself in the Plain of Dark Worship. The area's a complete dead-end, save for the purple door nearby you can't open for now. Run outside beyond the safe zone and take a look around, you'll find Ingclaws all over the walls and a large gross towering structure up ahead. Scan it to reveal the structure of the tower as huge mutated Ingworms, thankfully they can't hurt you. Right inside the "slither tower" is what you're after - Missile TG.04.
With the missile secure a Warrior Ing will ambush you from the rear, use your Light Beam to deal with it easily. But before leaving, step back from the Ingworm tower and look up to the sky. That massive structure hovering ominously in the sky is appropriately named the Sky Temple - and that one less planetary energy beam directing towards it is thanks to your efforts in Agon. Once you've restored the final two temples you'll be closer to accessing the Sky Temple - and the game's ultimate goal (believe me it's not pretty up there).
Return to Aether and venture further into the Temple Assembly Site. Deal with the pair of War Wasp Hives, then head towards the western end. Climb atop the cliff side on the left, then follow it around and use the Morph Ball to squeeze through the narrow tunnel you find to locate Missile TG.05. Just one missile left to grab before heading topside. Leave the Assembly Site and move on to the Communication Area.
As the steam rises, what lies inside?
Once there, deal with the two nearest War Wasp Hives, then jump atop the small jagged cliff near the entrance. On the rugged ground before you lies a large metal capsule, scan it to reveal that this stasis chamber is vulnerable to explosives. Lay a Morph Ball Bomb beside it to crack the seal - inside you'll find Missile TG.06. High above the Comms Area is a single door leading to Storage Cavern A - make your way in there and scan the Luminoth warrior there for your Logbook (you'll find out later why there's nothing else in this area).
There's more goodies beyond at the GFMC Compound, but there' a security gate barring your path in the Trooper Security Station area, so you'll have to turn back. Return to the Temple Assembly Site and take the lift up to the Great Temple.
Once inside the Great Temple, you'll pass through Transport B Access on the way to the Main Energy Controller. Give each of the three Lightflyers you find a missile each, then take a closer look at the grooves lining the walls along the corridor.
Activate the Morph Ball and use bomb jumps to propel yourself throughout the walls; eventually you'll locate Missile GT.01. With your latest item tucked away, move on to the Temple Sanctuary. Inside, directly across from you lies a translator gate with an amber hologram - scan it to reveal that this path leads to Torvus. But the door beyond is covered with a telekinetic barrier - meaning you'll need to visit U-Mos upstairs first. Take the elevator up to the Main Energy Controller and speak to U-Mos.
Once he's spoken of and granted you access to Torvus, head back downstairs and through the now-unsealed door. Inside the adjacent tunnel you'll find your path blocked by a column with a crystal cluster on its side. Shoot the crystal with the Light Beam to open the path. Beyond the column floats two familiar creatures, remember the Pulse Bombu from Tallon IV? Scan one to reveal the Aether version as a Harmony Class Drone.
Like before they deposit energy bursts into the ground, so try to keep your distance while taking them out (watch out when using the Charge Beam - remember they're attracted straight to you when you charge it up). Activate the elevator in the chamber beyond with the Scan Visor and transit back to the Temple Grounds.

There's a few items around the Temple Grounds to find.
Once outside you'll come face-to-face with a translator gate adorned with an amber hologram. Scan the gate to lower it and gain access beyond. Before you lies a large half-pipe, but without the Boost Ball you can't utilize it for now. The path down the left leads to a green door, so for now we'll travel down past the half-pipe. Deal with any pesky War Wasps, and watch out for a swarm of Sandbats emerging from the cave further on.
Exit via the lone door you find in the cave and move through the narrow canyon beyond filled with red "eyes" adorning the walls. Climb atop the small cliff to find your next exit blocked by a green door. Turn around to spot something handy - an inactive Dark Portal. Deal with the War Wasp Hives across from the portal before charging it up and travelling to Dark Aether.
Once on the other side you'll find a swarm on Inglets surrounding the portal. Take them out and head through the normal door ahead (where the green door was on Aether). Beyond here you'll find a long winding canyon - look up to see an inactive Light Portal on a ledge nearby. That's our target, as once back on Aether you'll have bypassed the green door. Move forward quickly past the two Ingclaws as there's no safe zones nearby.
Up ahead and around the corner you'll find a circular open area where a number of objects within the walls emit sweeping energy beams. Scan one to reveal them as Corrupted Sentreyes. Either shoot them with the Power Beam to stun them momentarily, or use a charged blast of the Light Beam to rip them off the walls. Around the corner at the far end of the canyon you'll find something interesting - a large Luminoth supply cargo unit equipped with its very own safe zone.
Now we just need to get this thing powered up and it'll take you right around to the inactive Light Portal. Climb atop the mound below the cargo unit and activate the Morph Ball. Sit atop one of the two visible moving pistons to be taken up higher alongside the cargo unit. Up above you'll find a circular track running around the cargo unit with four Bomb Slots.
Each one connects to one of four clamps holding the cargo unit in place. But as you release each clamp, an obstruction lowers down blocking a section of the circular track. So you'll need to release each clamp in the right order to open them all up and escape.

U-Mos guides Samus to her next target.
Follow this order to release them all successfully. Go up the right piston (facing the Ingworm dead-end) and pass the first Bomb Slot. Activate the other three as you pass by each one - each one's obstruction will lower down behind you, allowing you to move onwards. With the first three locks released, go back up the right piston and release the final lock. Jump inside the cargo unit and touch the hologram to set off.
While aboard the cargo unit you'll be stuck in position while the unit takes you around to the inactive Light Portal. A number of Nightbarb swarms will promptly swoop down along the way, just try to fend them off as best you can. Once at your destination, energize the Light Portal, jump across and dive in. Once back on Aether you'll spy a Pirate Skiff take off ahead, so there's some of your old buddies around here.
Drop off the ledge and move down through the canyon (leaving that pesky green door behind you). Two Pirate Troopers will run forward in ambush, but not long after two Ing Darklings appear and take control of them. Use the Light Beam to smite them easily, then shoot the crystal on the side of the column with another blast and move onwards.
Around the corner you'll discover a large block in your path, jumping atop it you'll spot a Pirate Grenadier up ahead beyond the circular clearing. Stay right back and deal with him from afar, drop behind the block if his grenades land too close. With the threat gone move on ahead (there's a moveable column here in the clearing but beyond it is a for-now impenetrable green door).
The cliff atop which the Pirate Grenadier once stood is too tall to reach, so turn around to spot a crystal on the side of the block you jumped over to reach the clearing. Shoot it with the Light Beam to move it closer to the cliff side, giving you an easy rise. Around the corner where the cargo unit lived on Dark Aether, you'll find a shallow pool of water where another moveable column rests. Shoot it to pull it out of its alcove, giving you an easy stepping stone.
Jump atop and head through the tunnel ahead. Before you now is a translator gate complete with amber hologram. Scan it to unveil a door leaving this twisting canyon. Before moving on, notice that small hole in the wall just to the left of the gate? Roll through to find a small cave with a Luminoth Lore Projector and a moveable column. Scan the Lore Projector for your Logbook and shoot the column to move it out of the way, finding yourself back at the entrance to the canyon. Use this nifty shortcut whenever coming through here to avoid taking a long trip through the canyon.
Return back up the narrow tunnel and head through the door uncovered behind the translator gate. Follow the cliff-with-a-view beyond (watch out for annoying War Wasps) and blow the red blast shield off the door ahead with a missile. Inside you'll find the transport lift to Torvus - scan the terminal to fire it up then ride it down. At the base you'll find yourself in a moist and damp cavern. Turn around and scan the massive piece of machinery behind the lift for some environmental info before carrying on.
Chapters:
- Planetfall
- The World Divided
- Fate of the Federation Troopers
- The Plight of the Luminoth
- The Sands of Agon
- Dark Aether
- The Space Pirate's Lair
- Samus vs Dark Samus
- Unlocking the Dark Agon Temple
- Restoring the Energy Controller
- The Journey to Torvus
- The Everlasting Deluge
- Restoring the Flooded Temple
- Taking the Fight to the Ing
- Expanding Samus' Arsenal
- The Underwater Temple
- Securing the Dark Torvus Temple
- The Path to Sanctuary
- The Mechanical Marvels of Aether
- The Sub Guardian Nightmare
- Subterranean Conquest
- Searching the Fortress
- Retrieving the Charge Combos
- Following the Echoes
- The Screw Attack Returns
- The King of all Mechanoids
- Gearing up for the Finale
- Unlocking the Sky Temple
- The Final Treasure Hunt
- Ending the War