


Chapter 6: Dark Aether
This Luminoth-made portal leads right into Dark Aether.
So there's plenty to do now. I-Sha grants you access to scan the amber holograms, so there's a few more translator gates you can now open. Don't forget to scan the Luminoth Lore Projector hidden in an alcove here before leaving. Exit the room and return to the Agon Temple. Head back to the door you originally entered via, just watch out for the War Wasps making themselves home up above.
Return to Mining Station A where you had your first Pirate encounter. Head over to the translator gate across the area, just watch out for the pack of Lumites fluttering about. Scan the gate to lower it, then head inside the room beyond to locate Missile Expansion AW.01.
Head back outside and drop to the sand pit below. Jump up the platforms among the sandfalls and head through the first door you find. Inside you'll discover a tall structure with an Orb Cannon. Use the cannon to reach the top of the structure, then wind your way through a small tunnel and drop down to reach the other side. At the base you'll discover the remains of a Luminoth lying in front of a small alcove where Missile Expansion AW.02 rests. Use the Morph Ball and sneak around the Orb Cannon to reach it.
Exit the room via the door beyond to locate a long chamber filled with Luminoth architecture. This room houses the portal used to transfer to Dark Aether, but at the moment it isn't receiving power. Looks like you're not the only one interested in dimension-hopping, inside you'll be greeted by two Pirate Troopers. Dispatch them both to summon yet more troopers, except these ones have a nastier fate to face.
More Ing Darklings will enter the area, their targets being the Pirate Troopers. After meeting little resistance they'll turn your enemies into Dark Pirate Troopers (scan one before attacking). These creatures will take a lot more to take down, just keep your distance and unload Charge Beam shots and missiles into your prey. They unload shots far more rapidly than regular troopers, so try to keep strafing but don't stop firing back. Finish them off to secure the area.

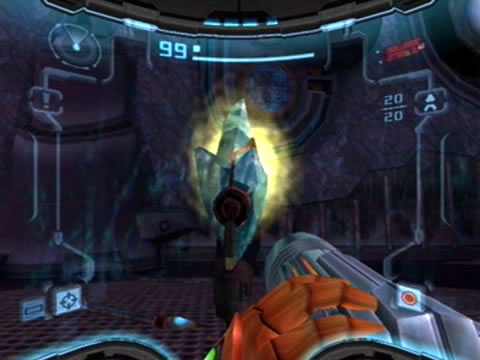
The very atmosphere of Dark Aether harms Samus' Power Suit.
You'll find the portal inactive at the far end of the chamber, to power it up you'll have to complete a few tasks. There's plenty of components to the system you can scan, scan them all to understand how the solar-powered system operates. You'll also find a weird semi-transparent Bomb Slot beside a sealed door at the rear of the room, whenever you see something like this it means that the object resides in the opposite dimension, in this case Dark Aether. Upon defeated the Dark Pirate Troopers a Bomb Slot will power up way over in the corner of the room (beside the portal), so we'll start there.
Before heading up the ramp scan the Luminoth Lore Projector hidden behind a sandfall on the left corner beside the ramp. Activate the Bomb Slot to power up a Morph Ball lift over on the right. Enter the lift to be taken up inside the wall itself. Blow apart the Talloric Alloy block barring your path and roll forward to land on the first solar lens unit as it folds open. Stand up when you can and deal with the War Wasps entering the area before they cause any trouble.
Jump across the solar lens to reach the opposite wall and ride up the elevator lift using the Morph Ball. Roll through the narrow tunnels and blow open the block barring your path to extend the second solar lens. Drop down to it and deal with the next wave of War Wasps. Jump across to the opposite wall but stop before you reach it. Look up to see two small critters crawling around inside the wall - scan one to reveal them as Pillbugs.
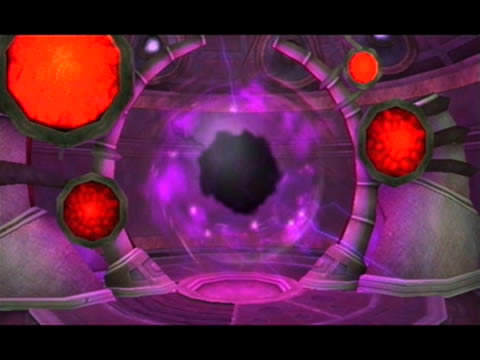
Enter the tunnels on the wall and watch out for the Pillbugs as you move through. Destroy the blockage beyond to move the final solar lens into position. With that done a massive light beam will strike through the lens and into the main dynamo, powering up the portal. Once you regain control head over to the portal unit (jump in the path of the light beam to discover a new definition of sun glare, hehe).
Scan the now-active control terminal to power up the portal. With the swirling purple portal active, Samus will automatically dive into it. Watch as she's absorbed into the twisted dimension just like before, but this time you'll have a permanent two-way path. Once in Dark Aether you'll already see how dark and murky it is, as Samus finds herself within a safe zone. The game explains that Dark Aether's atmosphere can harm you directly (no kidding) and that the glowing spherical safe zones are your only sanctuary here.
These Light Crystals grant Samus a miniature sanctuary from the corrosive air.
Take a look around, scattered around the room are a number of Bladepods (scan one for your Logbook), these things usually contain energy and ammo. Walk forward and quickly run to the next safe zone ahead before you lose too much health. Scan the Light Crystal at the center of the sphere to learn more about how and why these things exist. Beyond this safe zone you see another light sphere but it's too far away. See that small ball of sparkling light ahead of you? Scan it to reveal it as a Light Beacon.
These ones need to be fired at to charge up the light sphere, and only remain active for a few seconds. Shoot it from here to power up the sphere, then run across. Jump over to the next safe zone to discover that Bomb Slot you could vaguely see in the light world is solid here. Drop a bomb inside it to raise the gate blocking your path (the gate in the light world will also crank open).
You might notice by now that whenever you're standing within an active light sphere, your health will slowly regenerate, keep that in mind if you stay outside for too long. Exit the room via the door in the corner and quickly charge up the Light Beacon down the tunnel ahead. Beyond here you'll see a light sphere at the base of a half-pipe where some odd liquid forms are roving about. Eventually small creatures will appear among the liquid and shoot dark matter at you, scan them to reveal them as Inglets.
As the weakest of all Ing forms you shouldn't have much trouble with them, just avoid their projectiles and keep in mind that you can still harm them in their liquid state. Cross this room and quickly energize the Light Beacon in the next tunnel. Watch out for more Inglets as you cross the tunnel beyond. Run down the tunnel to activate the Light Beacons, at the far end you'll locate a Save Station.
Hear that sound? Turn around to find a large swarm of small creatures flying about above you, scan one to reveal them as Nightbarbs. Save your game here before moving on. Dash for the door down the tunnel and blast it open, hitting the Light Beacon directly opposite the door for safety. Once outside in the Duelling Range (dark version of the Mining Plaza), take in the alien environment around you (especially the disturbing views of the sky).
From within the light sphere you'll have two paths to choose from. The sand pit on the right is empty - no safe zones for you there. Take the left path and dash for the Light Crystal visible down in the sand pit. Once you take a dive into the pit you'll be greeted by a large Ing in puddle form. Emerging from the puddle you'll encounter your first Warrior Ing (you might recognise it from your first outing with Dark Samus).

A Warrior Ing - don't underestimate their tenacity.
Scan the beast for your Logbook before engaging. Stay where you are and don't wander outside the Light Crystal's range. The Light Beam works wonders against these dark apparitions, but with only your Power Beam available, hand over a few missiles and Charge Beam shots. Keep firing rapidly when it enters puddle form - you can still deal out the pain.
Watch its movements and take care if weird blue spheres appear before it, as long sharp projectiles will quickly track you. Before it unleashes its projectile torrent, put the Light Crystal between the two of you to block some of them. The monster won't dare enter the Light Crystal's range so keep close by.
With the Warrior Ing dead you'll be clear to move on. Run over to the next Light Crystal and scan the door in the corner of the area - without the Dark Beam you can't penetrate it. Turn around and look up along the canyon wall - there's a creature roving about generating its own light sphere. Scan it now to reveal the Lightbringer, your only friendly in this dark region. Wait for it to wander nearby before following it up the wall.
Dash for the next Light Crystal and turn around (see that inactive light portal behind the metal gate? You can only access those once the Light Beam is yours). Climb across the rocky terrain and make a dash for the next Lightbringer wandering across the bridge. Dash for the exit ahead and head through. Inside you'll discover a narrow opening in the rock wall, crawl through to find a circular structure housing a visible missile. Leave it for know (you need the Spider Ball) and exit the tunnel ahead.
Exit the tunnel to find yourself in Dark Agon's version of Mining Station A (where you first met the Space Pirate presence on Aether). Head forward to the lone Light Crystal in the center of the room to face a nasty sight. A large and nasty looking Warrior Ing enters from above, except this one exhibits uncanny jumping abilities. This Jump Guardian has mercilessly stolen your Space Jump Boots ability - time to take it back. Refer to the bosses guide to send this thing on its way.

Samus wins back the Space Jump Boots.
With the monster conquered and the Space Jump Boots safely tucked away, you'll be clear to explore the area further. Spin around, you should eventually spot a low platform below a circular safe zone. Reach the platform thanks to your reclaimed toy and climb your way up along the wall. Ignore the first normal door you find; it leads back to the Portal Site but doesn't offer any Light Beacons or Crystals so you're in for a world of hurt if you venture inside.
Keep climbing up the Judgement Pit, eventually you'll discover the Luminoth statue familiar from the light world resting before a green door (ignore the black door you pass by). Green doors can only be budged with Super Missiles, so no luck for now. Cross the cliff edge to the red blast-shielded door beyond, use a missile to break it open.
Once inside, traverse past the creepy tree-root-filled tunnel (walk through the tree-roots for a trippy visor view) to locate Dark Agon's temple. Inside you'll discover a tall sealed door blocking access to the open-air temple beyond. Look through the window outside, you'll see a large dark mass of something lying outside motionless. If you switch on your Scan Visor you'll see a large blue sphere visible among the mass but can't scan it from here. Scanning the sealed door reveals to you that three locks are sealing the door - you'll need to seek out three keys hidden in Dark Agon to open up passage.
Time for your first treasure hunt. Surprisingly the first key is closer than you think. Take the left open passage beside the sealed door and activate the Light Beacon ahead before taking too much damage. Run for the next one and turn left. Open up the door to reveal a floating, rotating, glowing red object inside a tiny chamber. Scan the funky device to reveal it as Dark Agon Temple Key 1. With this one in hand you've got two more to find.
Chapters:
- Planetfall
- The World Divided
- Fate of the Federation Troopers
- The Plight of the Luminoth
- The Sands of Agon
- Dark Aether
- The Space Pirate's Lair
- Samus vs Dark Samus
- Unlocking the Dark Agon Temple
- Restoring the Energy Controller
- The Journey to Torvus
- The Everlasting Deluge
- Restoring the Flooded Temple
- Taking the Fight to the Ing
- Expanding Samus' Arsenal
- The Underwater Temple
- Securing the Dark Torvus Temple
- The Path to Sanctuary
- The Mechanical Marvels of Aether
- The Sub Guardian Nightmare
- Subterranean Conquest
- Searching the Fortress
- Retrieving the Charge Combos
- Following the Echoes
- The Screw Attack Returns
- The King of all Mechanoids
- Gearing up for the Finale
- Unlocking the Sky Temple
- The Final Treasure Hunt
- Ending the War