


Chapter 29: The Final Treasure Hunt

You'll need plenty of everything to find all the remaining items.
Five down, four to go. Screw Attack back to the other side of the chasm and return to Aether via the Light Portal beyond the tunnel. Now with the fortress clear we'll head across to Agon. Return to the Hall of Combat Mastery on the ground floor of the fortress and travel to Agon via the nearby lift. Once in Agon, let's get straight to work. Head out to Ventilation Area A and exit via the western side, entering the massive Sandcanyon.
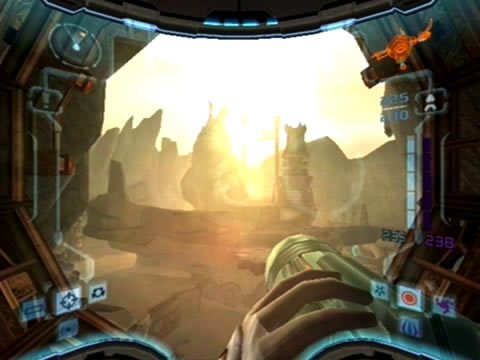
See that giant statue way out in the middle of the canyon? Aim and Screw Attack over there, landing squarely on the platform below the statue. Once out in the middle of nowhere, scan a small cracked section of the base of the statue to learn that it's laced with Denzium. So let's drop a Power Bomb to see the entire statue collapse into the abyss, revealing Power Bomb AW.01.
With your latest Power Bomb secured, head west to the Agon Temple. From there, travel to Mining Station A and across to the Mining Plaza. Once there, step forward and take a look at the three large lens pieces beside the statue of Amorbis. Looks mostly like decoration, doesn't it? Switch on the Echo Visor and you'll see a whole different story.
Shoot all three sonic emitters sending signals to each lens to move them into position, beaming a solid beam of light at the wall panel above the western door of the area, revealing an alcove where Energy Tank AW.04 resides. Screw Attack across the gap from the top of the bluff to reach it (it may take a few tries to avoid bouncing off the wall).
Now let's get the next Sky Temple Key. Travel to Dark Aether via the portals at either the Transport Center or the Portal Terminal. Once in Dark Aether, travel down to the Duelling Range and swing around to the Judgement Pit by way of the Junction Site tunnel. In there you'll be able to acquire Missile AW.14. Let's now move onto the Judgement Pit. Inside, save your game at Save Station 1 nearby if you wish.
This Energy Tank's alcove has a great view.
Climb up to the green door at the eastern end of the Judgement Pit and blow it off with a Super Missile. Inside the tunnel beyond you'll discover a vein of Phazon running under the floor at the far end. Look below near the green door, see the missile there? Use the Scan Visor to spot a weakened section of the floor coverings and blow it open with a bomb. Quickly run through the Phazon-filled tunnel and grab Missile AW.15 before making a hasty escape.
With the missile secure take the eastern exit to the Battleground. Directly above you here on the right lies a Flying Ing Cache, but to reach it you'll need to do some walking. Proceed on to the Doomed Entry room and head back towards the Battleground via the upper corridor. Once there, deal with the two pesky Warrior Ing running around in the sand pit below. With the area clear, switch on the Dark Visor. You'll now see four visible floating platforms. Carefully travel across them to reach the ledge where the Flying Ing Cache resides, then pop it open to retrieve Sky Temple Key 1.
The second key here in Dark Agon is nearby, so let's go hunting. Return to the Doomed Entry room and travel through the black door on the north side. Proceed through to the Dark Oasis room and visit the Ammo Station nearby if you wish. Inside the Dark Oasis you'll discover a large cracked wall riddled with Denzium. So let's do some house cleaning. Lay a Power Bomb to rupture the wall, revealing a large underground lake beyond.
This place boasts heavy Ing protection - sadly for them the Ingstorm particles and murky water won't harm you. Deal with the few sentry Inglets on the walls before diving into the muck. Switch on the Dark Visor and search for the Flying Ing Cache (in this case swimming) hiding in a corner. Blast it open to retrieve Sky Temple Key 2.
With only two keys left, Torvus Bog is our next stop. But before going there's pair of items to pick up first. Exit the Dark Oasis via the eastern door and travel through the Hall of Stairs. Save your game beyond and travel to the Phazon Site. Once inside you'll find the Phazon-riddled area inhabited by three Dark Tallon Metroids.
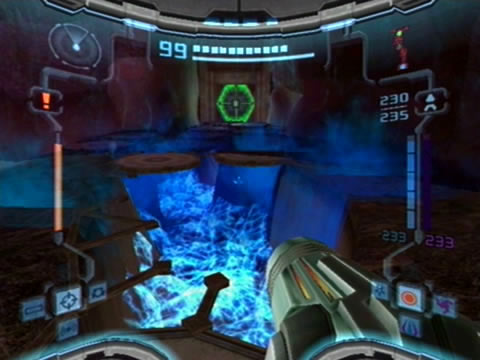
There's a missile down in that Phazon mess.
Take each one out with the Charged Dark Beam followed by a Missile combo attack. Look high above the chamber, see that gray door up on a ledge? Climb up to the middle of the three floating platforms, then simply Screw Attack across to reach it. Step inside the small chamber beyond to locate your final upgrade - the Sonic Boom.
With the Annihilator Beam's Charge Combo secured, return to the Phazon Site. Travel across to the Feeding Pit via the Watering Hole, then take a dive into the murky water of the small lake. Search around for a hidden underwater alcove, inside you'll find Power Bomb AW.02 waiting. Surface and return to the Doomed Entry room. From there, head across to the Dark Oasis and use the Light Portal there to transit back to Aether.
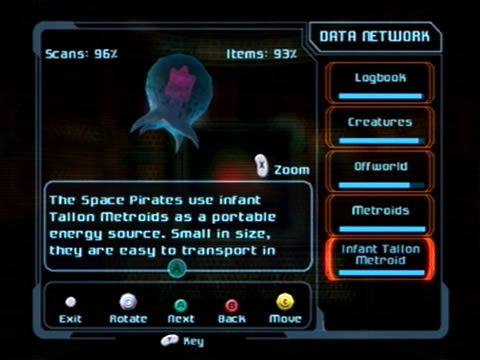
We're almost done with Agon. Travel south to the Command Center, then proceed onwards to the Biostorage Station. Inside you'll discover a number of pods hanging from the ceiling that weren't there on your first trip through. Scan one for your Logbook, these Metroid Cocoons house the adorable little Larva Metroids. Step nearby one to see a tiny creature pop out - scan this little fella for your Logbook.
The Infant Tallon Metroids will only send their squishy little bodies at you in a ramming attack, but if they bask in a puddle of Phazon (of which this room conveniently has many) they'll turn into a regular Tallon Metroid, so watch out. With both items scanned for your Logbook it's time to say goodbye to the little tykes and leave.
Return to the Command Center and travel over to the Transport Center beside the Portal Terminal area. From there, take the lift next door down to the Torvus Bog. Once there you'll be in close proximity to the Torvus Temple, so we'll clear out the upper level of the region first.
These infant Metroids are strangely adorable...
Inside the Temple proper, take the northern exit and travel to the Torvus Grove. Once there, look up at the massive tree growing here. Remember those weakened roots laced with Denzium? Now we can do something about it. Lay a Power Bomb beside each of the roots to weaken both enough to cause the entire tree to collapse and break open a section of the rock wall, uncovering Missile TB.12.
With this item secured head next door to the Meditation Vista. See that floating platform moving back and forth off the cliff side? Time your move and Screw Attack across to the platform as soon as it travels to the left. Landing cleanly on top will give you a clear view of Energy Tank TB.04 once hidden from view at the cliff edge. Allow the platform to draw you towards the item to grab it cleanly.
Let's go and score the second-last Sky Temple Key now. Screw Attack back to the cliff side and scan the terminal beside the portal and travel to Dark Aether. From the Gloom Vista, travel over to the Dark Forgotten Bridge area. Once there, deal with your two welcoming Dark Pirate Commandos.
See that yellow door down on the south-eastern side of the lake? Blow it open with a Power Bomb and step inside. Follow the narrow tunnel around to a small pond where a Phlogus dwells. Shoot the creature as it opens its maw and step aboard the flipped-over platform. Look to the right to see a cracked wall alongside the pond. Scan the wall to reveal its Denzium composition, so let's blow it open with a Power Bomb. Waiting patiently inside you'll find Power Bomb TB.01. With this item tucked away, exit the Putrid Alcove and enter the Poisoned Bog.
Terminate the Hunter Ing welcoming you and dive into the murky lake. Switch on the Dark Visor so you don't trip over the twisting vines underwater. Take a look around to find a Flying Ing Cache hanging about down a dead-end. Blast it open to recover Sky Temple Key 3 within. Let's now track down that ninth and final key, shall we? Return to the Dark Forgotten Bridge area and use the inactive Light Portal there to transit back to Aether.
Before diving into the lower region of Torvus, head across to the Great Bridge by way of the Abandoned Worksite. Once standing atop the ledge beside the control terminal used to activate the Kinetic Orb Cannon in the distance, search for a Denzium-lined rock blockage covering the wall on the left. Use a Power Bomb to rip the cover off the narrow tunnel beyond, then follow it through to locate the Power Bomb TB.02 (the final one), hiding inside. With your Power Bomb payload now maxed out, you should only have two missiles left to find (if you've been following this guide of course).
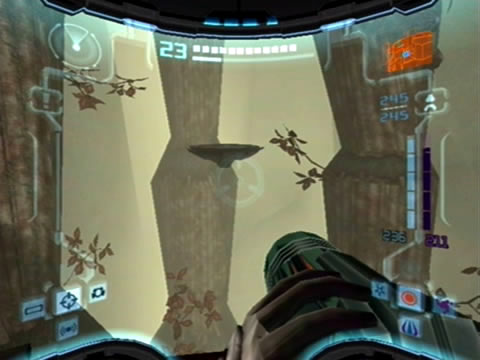
With proper timing, the Screw Attack should get Samus over there.
Travel to the Torvus Temple and descend to the Hydrodynamo Station. Save your game at Save Station B first if you wish. See that transit tunnel on your map you haven't visited yet? Enter it thanks to the Annihilator from either the Catacombs or Gathering Hall end. Inside Transit Tunnel South you'll discover a network of tunnels with several jet streams running up and down the shafts. There's three Bomb Slots here capable of reversing the water currents, follow the jet streams after energizing each, eventually you'll travel up the tallest shaft and discover Missile TB.13 waiting there.
Swing by the nearby Transit Tunnel East and travel to the northern end of the underwater tunnel. Can you see the Bomb Slot near the entrance? Energize it to see jets of water travel upward through the vertical tubes ahead. Roll through to the third vertical tube and bomb-jump yourself to the top, laying bombs just before you stop your ascent to blast yourself higher (it'll take time to figure out the timing). Energize the Bomb Slot at the top of the tube, then quickly travel back to the left and bomb-jump yourself to the top of the tube now with water streaming up it to snag Energy Tank TB.05 before time runs out and the water stream reverts back to its downward motion.
Now travel back to the Catacombs and transit to Dark Aether via the Dark Portal there. Once in the Dungeon, dispatch the two nasty Dark Grenchlers welcoming you and take a dip into the murky water under the Light Portal. Step forward to find yourself boxed in with no opening in the walls. Turn right to see a Light Beacon hovering directly above a small round object blocking the wall. Scan this little fella for your Logbook, this Watchdrone will stay where it is until exposed to bright light.
So give it a jolt by energizing the Light Beacon, then roll through the narrow opening in the wall as the creature hobbles forward. Search for a second Watchdrone guarding a wall around the corner, then pass through to find a seemingly dead-end. You know what to do here. Switch on the Dark Visor to locate the very last Flying Ing Cache hiding out in here.
Blast the wacky eye monster to claim Sky Temple Key 4 - the final one - paving your way to advance inside the Sky Temple. Before returning to the Temple Grounds, check your scan percentage. If it's locked in at 96%, you've scanned everything you can before facing the final guardians of the game, so you're all set. Now there's only one, sneaky little missile left to locate. Thankfully, it's not that far away.
Stay in Dark Aether and travel to the Undertemple Shaft by way of the Sacrificial Chamber (if you find an object blocking your path at the Sacrificial Chamber's doorway, rip it down with a Power Bomb). Once at the Undertemple Shaft, descend to the Undertemple where you fought the Power Bomb Guardian.
Wipe out the two Hunter Ing loitering down there, then head through the opening at the northern wall of the chamber. See those Wall Jump Surfaces leading up to a Light Portal? Jump up the walls to the very top of the shaft, up there you'll discover your last item waiting inside an alcove - Missile TB.14. Well done! Don't be too disappointed for only a message informing you of your achievement, you'll get something special for it eventually. Use the Light Portal below to return to Aether, than make the long trek back to the Temple Grounds.
Chapters:
- Planetfall
- The World Divided
- Fate of the Federation Troopers
- The Plight of the Luminoth
- The Sands of Agon
- Dark Aether
- The Space Pirate's Lair
- Samus vs Dark Samus
- Unlocking the Dark Agon Temple
- Restoring the Energy Controller
- The Journey to Torvus
- The Everlasting Deluge
- Restoring the Flooded Temple
- Taking the Fight to the Ing
- Expanding Samus' Arsenal
- The Underwater Temple
- Securing the Dark Torvus Temple
- The Path to Sanctuary
- The Mechanical Marvels of Aether
- The Sub Guardian Nightmare
- Subterranean Conquest
- Searching the Fortress
- Retrieving the Charge Combos
- Following the Echoes
- The Screw Attack Returns
- The King of all Mechanoids
- Gearing up for the Finale
- Unlocking the Sky Temple
- The Final Treasure Hunt
- Ending the War