


Chapter 9: Unlocking the Dark Agon Temple
A variety of Luminoth tech remains on the surface of Dark Aether.
From the Main Reactor, open the black door with the Dark Beam and head through. Inside you'll find the room where Dark Samus first made its entrance before heading to the reactor. Use the Dark Beam to open both security gates to allow access. Scan the terminals on your way through, then head through the right door at the far end of the room to return to the Command Center. Inside you'll be greeted by two Space Pirates, scan one to reveal them as Pirate Grenadiers.
Move quickly and close distance on them as they'll pump nasty plasma grenades at you (with surprising accuracy). With both taken care of it's now time to utilise that dark portal of theirs. But before you enter the portal, go back to the Biostorage Station. Inside there's a black door you passed by earlier you can now access - but upon entering the room those nasty Metroids will finally break free from their containment tubes to give you trouble. Charge the Dark Beam up to freeze them, then pop in a missile to finish them off.
If a Metroid manages to grab you, activate the Morph Ball and lay a bomb to shake it off. Deal with both then ride the lift up and open the black door nearby to discover Missile AW.05. With your latest missile in hand return to the Command Center and deal with the two respawning Pirate Grenadiers. With the room clear, fire a single Dark Beam shot at the rift portal to energize it then step in to explore a new region of Dark Aether.
Once back in Dark Aether you'll be met with a large open chamber much like the Command Center you just left. Scattered around are several lifeless Space Pirates - the things they do for that gooey Phazon. Directly ahead and above you'll spot a good sign - the second Dark Agon Temple Key awaits. You'll also see a few concentrations of Phazon on the ground, scan one pile for your Logbook. If you check your map it identifies this room as Doomed Entry, turn back to where you entered to see why.
There's no light portal where you entered, so you'll have to find another exit somewhere else. But first we need that Dark Temple Key. See those creatures flying about the room? Scan one to reveal it as a Dark Preed. Shoot them from afar as they'll release a noxious gas cloud upon exploding, something you don't want contact with.
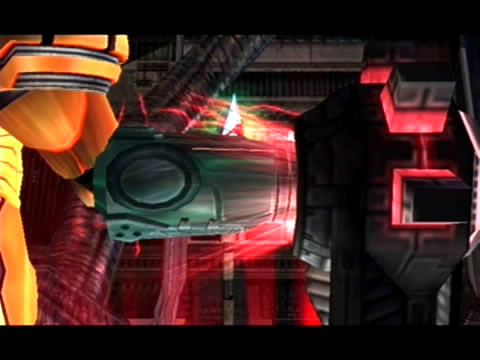
Samus receives the Light Beam - the Ing's worst nightmare.
Scan the Space Pirates around the room to learn of their fates, then head forward and quickly look around. There's a Nullified Crystal over on the left, scan it for your Logbook before opening up with a few shots to clear the crystal and re-establish the safe zone. You can't access either of the two white doors on the ground level, so you'll need to climb up the rocky terrain to reach the black doors higher up.
While within the safe zone you cleared turn around and scan the Luminoth statue head nearby. The statue is composed of Brinstone, so destroy it with a single missile. A Light Lift Crystal is now uncovered, scan it for your Logbook before sending a shot of the Dark Beam into it. The entire rock structure above the crystal will lower to the ground, allowing you to easily jump atop. From here, fire a Dark Beam shot into the Light Beacon over by the white door then scan it for your Logbook (so you don't forget to later on).
Jump up to the higher rock platform and quickly head across to the Light Beacon ahead. As you jump across the rocky terrain watch out for any Dark Preed floating about as they have a tendency to respawn. From here you'll easily be able to jump across and grab Dark Agon Temple Key 2, do so then quickly activate the Light Beacon nearby to recover your health. Beyond the black door on the Dark Key's ledge you won't be able to proceed thanks to a white door, so head through the other black door in the corner of Doomed Entry.
Proceed through the next tunnel, just take care at the second Light Crystal. Don't shoot at the Phazon containers nearby if you want to keep your health, but watch out for the Warrior Ing greeting you from ahead. Deal with the monster and move on. Beyond this room you'll locate the Dark Oasis - the Dark Aether version of the Main Reactor.
A giant rock wall blocks your path directly ahead and the left path leads to a white door, so turn right. Take out the Inglets ahead before moving on. Around the corner you'll find a positive sight - an inactive light portal behind a dead Pirate and a pair of Phazon containers. That Light Beam can't be far away now.
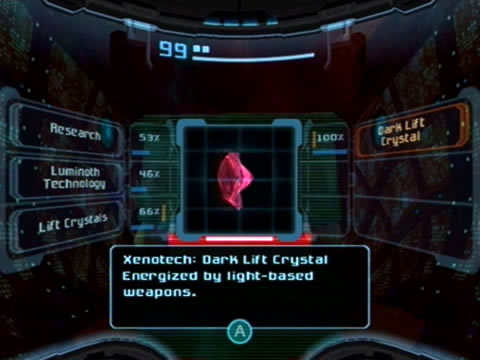
Proceed down the tunnel through the door nearby to discover a large half-pipe with a tall column standing in the middle of the room. Scan it before moving around to the back of the column. Look up at the top of the column - you'll spot a Light Lift Crystal attached to the side. Shoot it once with the Dark Beam to lower the platform to within jumping height.
Scan the crystal as it's now a Dark Lift Crystal, a blast from the Light Beam now would raise the column back to its original position. Jump atop the column then quickly spin around and jump across the ledge above. Activate the Light Beacon and blow the red blast shield off the door ahead with a missile.
Use Ammo Recharge stations whenever they cross your path.
Beyond you'll discover a Save Station, save your game now before moving on. The next room ahead contains a narrow tunnel, so fire up the Morph Ball and roll on through. Inside you'll find a tunnel with a Phazon-riddled pit. You'll need to traverse over the pit to avoid some serious damage. If you do fall in very quickly bomb-jump your way out. Beyond this tunnel awaits a massive open chamber with most of the ground below covered in Phazon puddles.
The doorway ahead down on the ground is your target, but it's protected by a number of energy beams. Three corresponding terminals are hidden through the room, you'll need to find and scan all three to access the door. Watch out for the Phazon puddles and numerous Phazon containers riddled throughout the region.
One is over on the right side of the room, while a second is over on the far right (hidden behind a number of large crates). The final lock is hidden directly above the door on a ledge. Use the three floating platforms to reach it. With the door clear, drop down (don't fall into the Phazon) and head through. Beyond is a large open chamber where three large claw-like objects inhabit the far wall. Scan one for your Logbook - these Ingclaws are mostly for decoration, only the purple gas spewing from them can hurt you.
The invisible Lumites launching dark energy at you are another matter entirely, watch out for their projectiles and try to take them out from afar. Shoot the Nullified Crystal from here to clear it, then take out the Lumites as they cling to the edge of the safe zone. With the room clear head over to the next door and blow the red blast shield off to gain access.
The following room is Dark Aether's version of the Biostorage Station where the Pirates were keeping their stock of Metroids. Thankfully there's none to be found here. Follow the tunnel past the Phazon puddle and drop down to the Light Crystal below. Ahead of you is a large pond of purple goo, you definitely don't want to go for a dip in this stuff (but you will eventually). Try to take out the swarms of Nightbarbs around the two columns from here.
Work your way around to the white door in the corner and look up at the nearest column. Send a Dark Beam blast into the visible Light Lift Crystal to lower it down. Jump across to the Light Beacon over on the far side of the pond and look up; firing another Dark Beam blast into the Light Lift Crystal attached to the second column. With both lowered, use them to reach the black door high above.
Try out the Light Beam on these aggressive Warrior Ing.
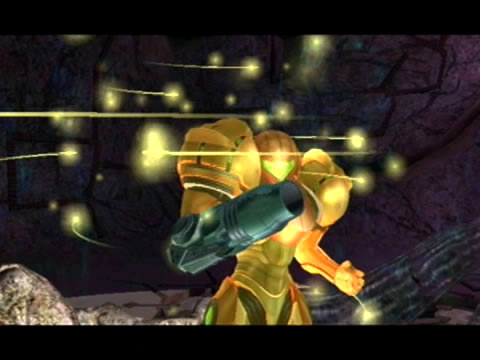
Inside you'll discover a nifty new toy, the Light Beam! With this awesome new weapon in your arsenal you'll be able to open up white doors, do so to exit the room. The game will remind you that to recover weapon ammo, destroy enemies (or objects like crates) with the Light Beam to recover Dark Beam ammo, and vice versa. Jump down the columns in the Feeding Pit and head for the white door below (watch out for the Lumites though).
Inside you'll find a tunnel blocked by a nasty-looking web with a roving eye in the center. Scan the Webling for your Logbook before allowing it to be the first Ing creature to suffer the wrath of your Light Beam. While you're here, shoot the Light Crystal nearby with the Light Beam as well to create an Energized Crystal (scan it for your Logbook). Keep in mind that when doing this, if an Ing wanders inside the safe zone it'll be instantly incinerated by the light energy.
At the far end of the tunnel you'll discover two Bladepods beside the white door. Shoot them with the Light Beam to see Dark Beam ammo pop out of them. Strangely whenever you walk near Light or Dark Beam ammo it'll automatically be drawn to you. Beyond here you'll find yourself back in the Doomed Entry. Quickly shoot the Nullified Crystal nearby with the Light Beam - a few Dark Splinters have shown up and are standing very close to it - show them why they shouldn't.
With the area clear (except for the respawning Dark Preed), destroy the scattered Bladepods with whichever weapon doesn't need ammo. Remember that inactive Light Portal way over in the Dark Oasis? We need to secure the third and final Dark Agon Key before leaving this nasty place again.
Head through the door on the ledge where the second Dark Key rested and quickly shoot the Light Beacon in the narrow tunnel ahead with the Light Beam - it'll take out the Dark Splinter wandering about. Stand in the safe zone and take down the second Dark Splinter ahead. Move forward and head through the white door at the far end of the corridor. Beyond you'll discover a huge open area the map calls Battleground, so something's about to go down here (you can also get a really good view of the trippy sky from here).

Take note of the positions of these fallen Luminoth warriors.
Walk forward and look down below - Dark Agon Temple Key 3 is resting in the center of a safe zone down in the sand pit below. Before you step forward make sure you've got plenty of health and Light Beam ammo (use the Bladepods to recover ammo if need be).
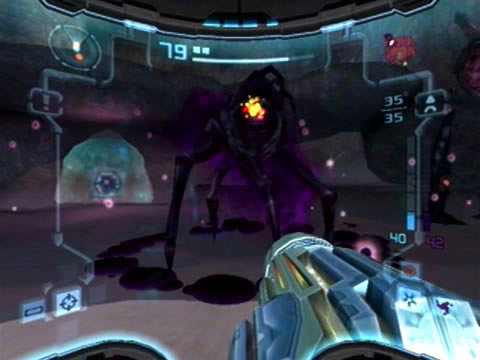
As you walk closer to the safe zone containing the key, an Ing puddle promptly appears to make off with your prize. A small Ing Webtrap then appears over each door of the area, so there's some baddies to take care of now. Four Warrior Ing will enter the area to test their mettle, time to put that Light Beam to good use.
First scan the creature covering the door ahead for your Logbook, these Ing Webtraps will only disappear when their commanders are dead. Open up on each Warrior Ing while staying inside the safe zone, you unfortunately can't energize this safe zone so focus your attacks on the Ing. If you run low on Light Beam ammo quickly shoot at the numerous Bladepods surrounding you with the Dark Beam to regain Light ammo. Use the Charge Beam in tandem with the Light Beam to give them a real run for their money.
As each one of the pack tends to enter puddle form and slither around the area, shoot the separate Light Beacons behind you with the Light Beam, especially if one of them is in close proximity. Finish the group easily with your new toy and they'll not only return the Dark Agon Temple Key 3, but the Ing Webtraps will also disappear, allowing you to leave. Grab the key to finally secure all three - you're now ready to enter the Dark Agon Temple.
Chapters:
- Planetfall
- The World Divided
- Fate of the Federation Troopers
- The Plight of the Luminoth
- The Sands of Agon
- Dark Aether
- The Space Pirate's Lair
- Samus vs Dark Samus
- Unlocking the Dark Agon Temple
- Restoring the Energy Controller
- The Journey to Torvus
- The Everlasting Deluge
- Restoring the Flooded Temple
- Taking the Fight to the Ing
- Expanding Samus' Arsenal
- The Underwater Temple
- Securing the Dark Torvus Temple
- The Path to Sanctuary
- The Mechanical Marvels of Aether
- The Sub Guardian Nightmare
- Subterranean Conquest
- Searching the Fortress
- Retrieving the Charge Combos
- Following the Echoes
- The Screw Attack Returns
- The King of all Mechanoids
- Gearing up for the Finale
- Unlocking the Sky Temple
- The Final Treasure Hunt
- Ending the War