


Chapter 26: The King of all Mechanoids

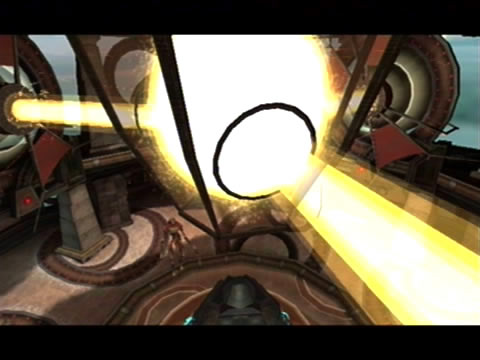
The Screw Attack in action - you'll need this to conquer the Ing Hive.
Exit the Vault and return to the Grand Abyss. Now this jump is really going to test your skill. Learn to time your consecutive jumps so as to drag out the distance as far as possible, so don't worry if this one takes a number of tries. With the abyss cleared, exit ahead and return to the Watch Station. Inside you'll be welcomed by two Pirate Aerotoopers, deal with them both before moving onward. Now we can go in search of the final two Dark Temple Keys here and face the temple's guardian. Return to the Main Gyro Chamber to save your game nearby if you wish.
Remember that Dark Temple Key you saw locked inside an alcove at the Aerial Training Site? We'll go for that one first. At the Watch Station, head through to the Central Area Transport West shaft and travel down to the Main Research Chamber. From there, use the inactive Dark Portal to travel to Dark Aether.
Exit the Staging Area via the door up on the western wall to reach the Central Hive West Transport shaft. See the Wall Jump Surface sections leading up the shaft? Here's another chance to give the Screw Attack a spin. Scan one of the wall sections for your Logbook to learn more about them. To jump up there, stand a fair distance back from the wall and jump forward, initiating a Screw Attack jump so you bump right into the wall.
Press B again just as Samus begins sliding down the wall to Screw Attack off it further up. Keep this up to scale the shaft easily. Once at the top, fill up on ammo via the Ingworm Cache littered about, enter the next room to find yourself inside that small sealed red alcove of the Aerial Training Site, with Hive Temple Key 3 right in front of you. This key is actually the third one of this area, but picking it up now is more convenient as the second key is right outside the entrance of the Ing Hive Temple itself. With the key secured, power down the alcove's shield by scanning the control terminal nearby.

That's a big robot... and no safe zones in sight either.
Two Dark Pirate Commandos will appear across the other side of the area, quickly Screw Attack across to them and take both out. With both annoying targets dead, walk over to the inactive Light Portal and look up. See the two Wall Jump Surfaces? Screw Attack up them to easily locate Missile SA.06 up in an alcove overhead.
With this missile secure, return to Aether and proceed back to the Main Gyro Chamber. Move on to the Dynamo Works room and power up the Dark Portal there. Once back in Dark Aether, proceed beyond the white door ahead and quickly energize the Light Beacon in the following chamber to incinerate the attacking Warrior Ing.
Now look at the sealed door ahead of you. Look familiar? Switch on the Echo Visor and look for four sonic emitters. With all four shut down the door will lower, clearing your path. Beyond this chamber lies the Hive Gyro Chamber - the access point to the Ing Hive Temple. Go over to the gyro chamber itself to see a different sight - a giant sphere exists in the center covered in Spider Ball tracks and surrounded by floating platforms.
Step forward and look above the giant sphere, yep, that's a Dark Temple Key. Jump atop a nearby floating platform and shoot at any Darkling Tentacles flailing out of the sphere. Climb onto the sphere and move around it, looking for a small Spider Ball track leading up. Climb up and boost yourself up to the circular horizontal track above. Then simply boost yourself across, intersecting Hive Temple Key 2 as you go. With all three keys secured, you're now ready to enter the Ing Hive Temple. But first, go up to the alcove at the northern side of the chamber and go through the door there.
Inside is a chamber similar to the one where you saw Dark Samus defeat three Dark Pirate Troopers a while back. This one is instead inhabited by two Warrior Ing whom attack one after the other. Deal with both quickly and exit the room up ahead. The chamber beyond where the lift leading up to the Aerie lies on Aether is a dead-end, but a dead-end equipped with an Ammo Station.
Use it to reload your payload, then return to the Hive Gyro Chamber. Before going up to the temple, drop below to the alcove under the door you just entered via. Blow the red blast shield off the door nearby and go inside to locate a Save Station. Save your game here before facing the guardian.
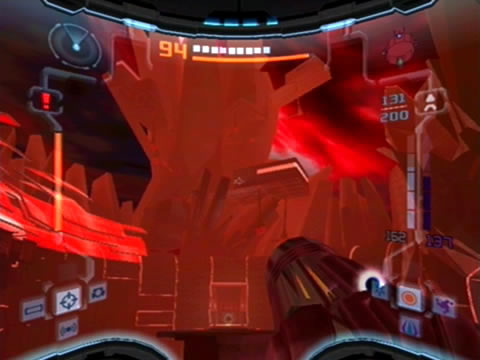
The Ing Hive glows an angry red without its planetary energy.
Return to the Hive Gyro Chamber and make your way up to the upper alcove on the south side of the room. Proceed through the door there to reach the Hive Temple Access - and the sealed gate lies dead ahead. Step inside the aura resting before the door to unlock it, clearing your path beyond. Proceed through the chamber and beyond the exit ahead to finally locate the Hive Temple. Take a look down in the massive chamber - all that's there is a gigantic robotic monster - inactive for now.
Ride the lift down and step forward towards the inactive drone. Watch as a huge puddle of an Ing Darkling swarms up the robots legs, bringing it to life instantly. Meet Quadraxis, the biggest and baddest machine on the planet. Check the bosses guide to send this final guardian on its way, paving your way to restore the third planetary energy to its rightful place.
With the Quadraxis head module crashing to the ground and exploding spectacularly, it'll leave behind your prize - the Annihilator Beam! Pick it up quickly as your health is still dropping thanks to the safe zone-free environment. With your new toy safely secured, the main body will explode into a pile of goo, then watch as a large structure rises from the ground.
Climb up the walls to the top, then face the southern end of the temple and Screw Attack across the gap to the door way over on the wall opposite. Open this gray door with a burst from the Annihilator Beam, then step inside the Hive Controller Access. Proceed through to the Energy Controller and step forward to watch as Samus once again reclaims Aether's planetary energy.
With the sky turned a blood-red colour again, let's get the heck out of here. Return to the Hive Temple and Screw Attack across to the top of the central structure. If you wish, you can quickly go explore the tunnel leading off the western exit of the temple, except you'll find a swarm of Ingstorm inside (scan them for your Logbook) which seriously damage you if contact is made.
So let's return to the Hive Temple Access instead. Once inside, use the Screw Attack (while standing on the slightly elevated platform in front of the door) to reach the top of the tall wall up ahead and return to the Hive Gyro Chamber. From here, feel free to drop by the Ammo Station or Save Station nearby if you feel like it.
With all three temples restored, Samus' mission is almost complete.
Let's finally get out of here. Return to the Hive Dynamo Works and use the portal there to return to Aether. Then head up to the Temple Access room from there. Inside you'll discover two Rezbit floating about, deal with them both before moving on. Before you enter the temple, there's a missile you can recover in here.
First, make sure that the Kinetic Orb Cannon is active. If it isn't, activate the Dark Visor and look up at the wall above the door leading to the Sanctuary Temple. Shoot the four red pods with the Seeker Launcher to power up the cannon. Use the cannon to return to the entrance of the chamber, where you'll hear the familiar sound of a sonic emitter.
Switch on the Echo Visor and look for it. Shoot it to cause the Kinetic Orb Cannon's target above to move forward slightly. You'll hear a timer countdown, so quickly drop below and jump in the Kinetic Orb Cannon to be launched up to the target, where you'll fall through a tunnel to a section under the floor. Roll over and grab Missile SA.07. Use the Spinner to open up a section of the floor ahead to make your escape.
Now let's head over to the temple. Screw Attack across the expanse and use the Grapple Beam to make the final gap. Head inside to the Energy Controller and watch as Samus restores the planetary energy to the final temple, making U-Mos the happiest Luminoth of the day. With that task complete, the war against the Ing is almost over. Only one Energy Controller on Dark Aether remains - up in the Sky Temple. If you can secure the energy there, the dark world is history.
Chapters:
- Planetfall
- The World Divided
- Fate of the Federation Troopers
- The Plight of the Luminoth
- The Sands of Agon
- Dark Aether
- The Space Pirate's Lair
- Samus vs Dark Samus
- Unlocking the Dark Agon Temple
- Restoring the Energy Controller
- The Journey to Torvus
- The Everlasting Deluge
- Restoring the Flooded Temple
- Taking the Fight to the Ing
- Expanding Samus' Arsenal
- The Underwater Temple
- Securing the Dark Torvus Temple
- The Path to Sanctuary
- The Mechanical Marvels of Aether
- The Sub Guardian Nightmare
- Subterranean Conquest
- Searching the Fortress
- Retrieving the Charge Combos
- Following the Echoes
- The Screw Attack Returns
- The King of all Mechanoids
- Gearing up for the Finale
- Unlocking the Sky Temple
- The Final Treasure Hunt
- Ending the War