


Chapter 15: Expanding Samus' Arsenal
This grand open chamber houses a new ability for the Prime series.
Back in the Temple Grounds, you'll now find you can exit the Path of Eyes room (remember the dimension-jumping fun you had there?) by destroying the green blast shields on the doors with your Super Missiles. The northern door will lead you to a massive chasm beyond which lies a yellow door (and an inaccessible Energy Tank), so for now we'll head back towards the Meeting Grounds. We ultimately need to get to the bottom of the Great Temple in the center of the map where the three elevator shafts rise up to the structure.
Once back at the Meeting Grounds, you'll find that half-pipe you passed through earlier is still there, so time to make use of it. If you instead go around the corner and blow off the green blast shield on the door down the narrow tunnel you'll find the Service Access area. But if you follow this path you'll eventually reach the Path of Honor room adjacent to where you need to go, but that tricky purple door is blocking your path.
So instead we need to bypass it. Boost yourself up the half-pipe in the Meeting Grounds and scan the Luminoth Lore Projector you find there. Roll through the narrow opening in the small cave nearby and follow the tunnel. Inside you'll find yourself higher up in the Service Access tunnel. Boost your way across the breakable sections of the tunnel, if you fall just head back to the Meeting Grounds and try again. Once through, simply follow the tunnel and it'll lead you straight over the purple door and into the Hall of Honored Dead.
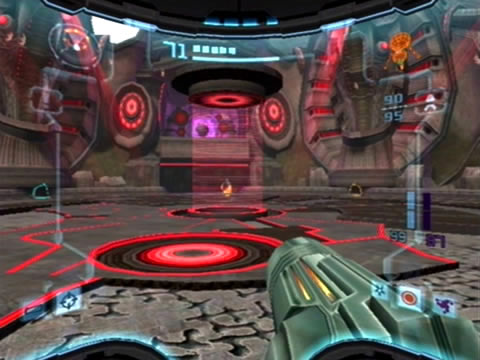
What lies ahead is an invasion of the senses. Right above you hovers the massive Great Temple, while below in the very center of this gargantuan chamber lies your target. But a cage currently houses the item, so you'll need to find a way to open it. Scanning the chamber reveals that four rotatable locks below it are responsible for the lockdown. Look around you at the four massive Luminoth statues overlooking the chamber, at the foot of each one is a coloured Spinner.
Scan the statues to learn more about them, and the order that each Luminoth Sentinel they represent. Don't worry about that active Dark Portal over on the north side of the chamber, you can't reach it and it won't play a part in your adventures until later on.
Use the Spinners around the chamber to rotate the ground locks.
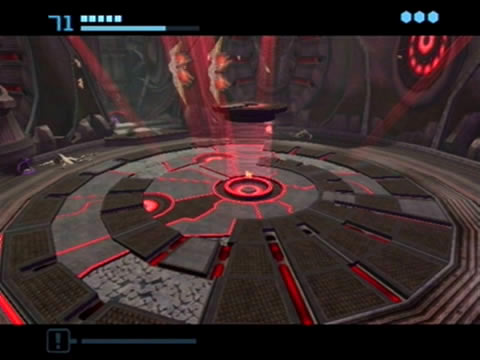
Now see what happens when you use a Spinner. Each one controls one or two of the rotating circular locks around the containment chamber. You need to spin them all until they lock into place and glow a gold colour. Experiment with the order until you lock them all in place (it isn't particularly hard). Once all locks glow, a large circular lens assembly will rise from the ground, focusing light onto the containment unit and shattering it. With that, your prize is now up for the taking, the Seeker Launcher!
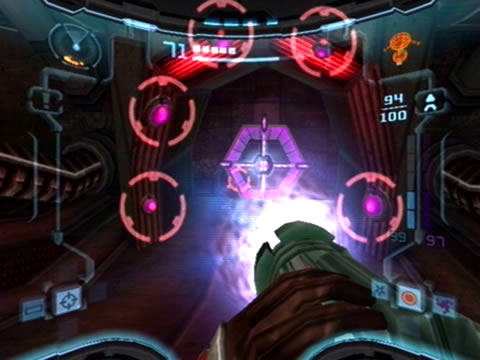
This awesome new concussive weapon can fire up to five missiles at once at either single or separate targets. You'll also be given a bonus Missile Expansion with this (effectively allowing you up to 255 missiles in this game). Let's put it to use straight away. Head down towards the purple door and stand back from it. You should clearly see five small purple pods surrounding the door. Fire a missile and hold Y to engage the Seeker's reticule.
Wave the reticule over each pod to lock on, then release Y once all five are targeted. Watch as five missiles stream towards their targets at once, blowing off all five pods and the blast shield at the same time. With the door opened step through and make your way through the Service Access. We can now return to Torvus and explore further, but before returning to the Meeting Grounds pay your ship a visit and save your game there.
Return to Torvus and firstly proceed to the Forgotten Bridge. Before we descend into the bowels of the Bog, we'll take one last trip to Dark Aether. Use the nearby portal to head to the Dark Forgotten Bridge area. As a side note, you can put off visiting this part of Dark Torvus Bog until you've picked up the second Dark Temple Key down in the depths of the region, but we'll go now anyway to pick up a few handy items.
Once there, jump across to the bridge and head over to the green door (watch out for Dark Preed floating about). Blow off the green blast shield with a Super Missile and head inside. Within the next dark tunnel you'll discover a small pool of murky water where a platform with a crystal embedded atop resides. Scan it for your Logbook, this Liftvine Crystal will rise skyward when energized by the Light Beam.
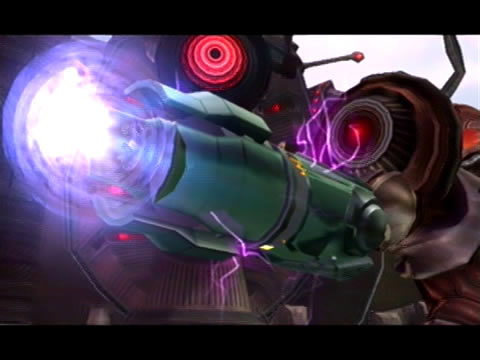
The Seeker Launcher - a vital piece of equipment in this quest.
Shoot down the two Dark Preed and energize the crystal. Jump atop the raised platform to reach the next cliff. Turn the corner and exit this room via the door ahead. Beyond is the Venomous Pond - the first thing you'll notice is the Dark Temple Key resting atop a ledge. Sadly you can't reach it for now, as you'll need the Grapple Beam to score it.
But let's have a look around anyway. That narrow red tunnel on your left leads up the ledge opposite the key, so for now let's drop below (don't fall in the purple liquid though). A lone Hunter Ing will appear to challenge you, simple energize the Light Beacon near the white door and fight the creature off with the Light Beam. With the area clear, head over to the red blast shielded-door and blow it off to find a Save Station inside a chamber beyond.
Save your game before moving on. Head through the white door back in the Venomous Pond and follow the narrow tunnel to find yourself in the Dark Torvus Temple. The elevator itself is the lock, once you've found all three keys you'll be able to ride it up into the temple's main chamber.
For now let's take a look around. The blue door on the southern side of the room leads to an Ammo Station, head in to refill your payload. Return to the temple and roll through the narrow red tunnel hidden behind the three elevator locks. Shoot off the green blast shield on the door you find with a Super Missile, then walk inside the next chamber to locate a handy item, Energy Tank TB.02. With this area clear let's head back to the Venomous Pond.
Once there, deal with the Hunter Ing and head through the black door across the pond. Inside you'll find a narrow tunnel leading off, roll through to find a large chamber where an inactive Light Portal resides (you might remember passing through the light world version of this room where a missile lived. Move on through the tunnel and stand up. Look up and jump atop the visible platforms, at the top you'll find a small opening leading back inside the chamber where the portal was. Go inside and fire up the portal, once back on Aether pick up Missile TB.05 straight ahead.
Use the Seeker Launcher right away to exit the chamber.
With the missile tucked away, return to Dark Aether. Head through the door on the eastern side of the Portal Chamber to find a murky lagoon inhabited by a Hunter Ing. Deal with the creature and use your new Seeker Launcher to destroy the purple blast shield on the door nearby. Step inside the chamber to locate a very handy item - Beam Ammo Expansion TB.01. With this item in hand this area's clear, time to head back to Aether. Return to the Dark Forgotten Bridge and use the portal there. From here head over to the Torvus Temple.
At the temple, before descending down into the depths of the Bog, blow off the purple blast shield on the door on the southern side of the area and step inside to locate a lift transport. Scan the control terminal to reveal that this lift will take you directly to the Agon Wastes. Why not do a little exploring and take the lift up? Up in Agon you'll be faced with another purple blast shield. Remove it and proceed through to find yourself high up in the Transport Center room, right near the Portal Terminal chamber.
See that inactive Dark Portal up atop the half-pipe? Use the Boost Ball to propel yourself up there and energize the portal. Step inside to come face-to-face with Missile AW.07. With this missile tucked away, we'll head back to the Torvus Bog. Use the portal terminal at the Portal Site nearby to return to Agon, then use the same lift you took here to transit back to Torvus.
Chapters:
- Planetfall
- The World Divided
- Fate of the Federation Troopers
- The Plight of the Luminoth
- The Sands of Agon
- Dark Aether
- The Space Pirate's Lair
- Samus vs Dark Samus
- Unlocking the Dark Agon Temple
- Restoring the Energy Controller
- The Journey to Torvus
- The Everlasting Deluge
- Restoring the Flooded Temple
- Taking the Fight to the Ing
- Expanding Samus' Arsenal
- The Underwater Temple
- Securing the Dark Torvus Temple
- The Path to Sanctuary
- The Mechanical Marvels of Aether
- The Sub Guardian Nightmare
- Subterranean Conquest
- Searching the Fortress
- Retrieving the Charge Combos
- Following the Echoes
- The Screw Attack Returns
- The King of all Mechanoids
- Gearing up for the Finale
- Unlocking the Sky Temple
- The Final Treasure Hunt
- Ending the War