


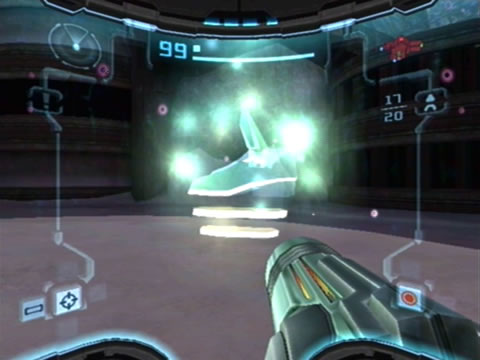
Samus' upgrades
Samus' upgrades | Missile locations | Power Bomb locations
Energy Tank locations | Beam Ammo Expansion locations | Dark Temple Key locations

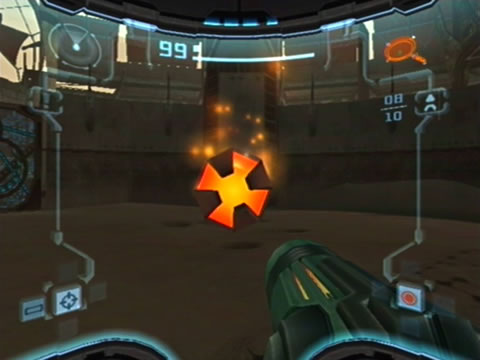
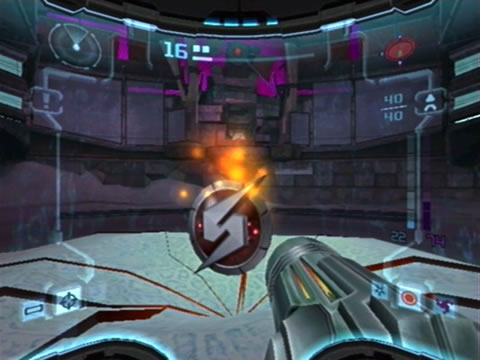
Missile Launcher
The Missile Launcher grants Samus the ability to discharge highly concussive projectiles. You'll only start with five missiles in your payload, so you'll need to track down the many Missile Expansions riddled throughout the game for more.
Check out the Missile Locations section for the entire list. Press Y to fire (Down on the D-Pad in the Metroid Prime Trilogy version). If you lock onto a foe with L before opening up (Z in MPT), the missile will home-in on its target. Use missiles to destroy red blast shields covering certain doors. Fire missiles rapdily by pressing Y and A together repeatedly.
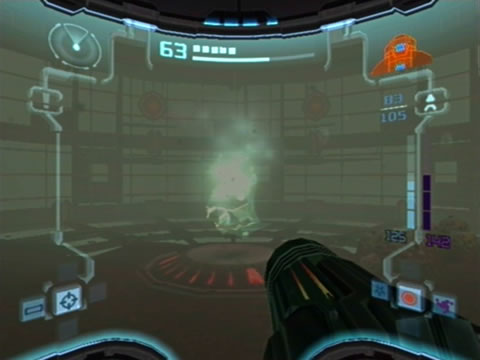
Found in: Temple Grounds (GFMC Compound)
You'll find the Missile Launcher packed inside the oversized yellow-marked ordinance crate on the port side of the GF trooper's ship. Blow it open with a blast from the Charge Beam to reveal your prize.
Morph Ball Bomb
The primary add-on for the Morph Ball, this ability grants you the power to lay explosive bombs while in Morph Ball mode. Up to three can be laid at any time before a delay in delivery occurs. The explosions generated are harmless to Samus, yet strong enough to destroy smaller foes. The bombs can also be used to destroy objects composed of Talloric Alloy.
The bombs can also propel Samus up into the air slightly while in Morph Ball mode, but you'll need to practice the technique to propel her even higher. Flick the Wii Remote up vertically in the Metroid Prime Trilogy version of the game to perform a short Spring Ball jump.
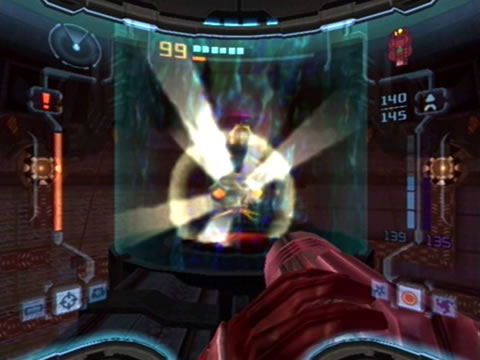
Found in: Agon Wastes (Agon Temple)
The Bomb Guardian possesses your Morph Ball Bomb. Destroy its oily hide to recover this trusty ability. Refer back to the bosses guide for tips to beat this guardian easily.
Space Jump Boots
Another important ability, without this Samus can't explore much of her surroundings. The Space Jump Boots grant Samus a double-jump, press B after an initial jump to launch yourself higher. Use it often and time the second jump to bridge ravines and cushion large falls.
Found in: Dark Agon Wastes (Judgement Pit)
The vile Jump Guardian inhabiting the Dark Agon Wastes has stolen your Space Jump Boots ability. You'll need to crush this monster in its homeland to recover it. Refer to the bosses guide for tips to survive this heated battle.
Dark Beam
Samus' first new beam weapon of the day. The Dark Beam grants Samus the ability to discharge rounds of dark energy attuned to the damaging atmosphere of Dark Aether. The weapon is best used against foes on Aether, as it won't deal much damage to the Ing or other inhabitants of Dark Aether.
Especially useful against Metroids, this weapon also possesses a limited freezing ability when charged. Both the Dark and Light Beams consume ammo when used, destroy enemies or objects with the Light Beam to recover Dark Beam ammo and vice versa.
If you run out of ammo, you can still fire a shot from the beam by charging it up. Also use the Dark Beam to open black doors.
Found in: Agon Wastes (Storage D)
You'll be clear to find the Dark Beam once you've claimed the first Dark Temple Key in Dark Agon. Right before finding it you'll have your first confrontation with Dark Samus, for precise directions refer back to the walkthrough as you'll be exploring a fair deal of the Space Pirate's facility in Agon before finding this weapon.
Light Beam
The Light Beam discharges pulsing beams of pure light energy. Perfectly suited to combat the denizens of Dark Aether, with enough concentrated fire the beam can set most targets on fire. Firing a blast at a Light Crystal or Light Beacon will supercharge the device, creating a safe zone capable of destroying any Ing haplessly wandering within range. Use the Light Beam to open up white doors.
Found in: Dark Agon Wastes (Ing Cache 1)
With the Dark Beam in your possession you'll be able to enter the Dark Agon Wastes via the portal in the Command Center. Once inside, follow the rooms from there until you reach the Feeding Pit. Raise the two columns inside by firing Dark Beam shots at the Light Crystals attached to each, then climb up to the black door above. Inside you'll find the Light Beam waiting patiently.
Dark Suit
This fancy new suit grants Samus added protection against regular attacks and slows the caustic effects of Dark Aether's corrosive atmosphere on her suit's shielding.
Found in: Dark Agon Wastes (Dark Agon Temple)
You'll need to conquer the enormous Amorbis in the Dark Agon Temple before claiming this prize. Refer back to the walkthrough for directions on where to find all three Dark Temple Keys and the bosses guide for tips to cook Amorbis' hide.
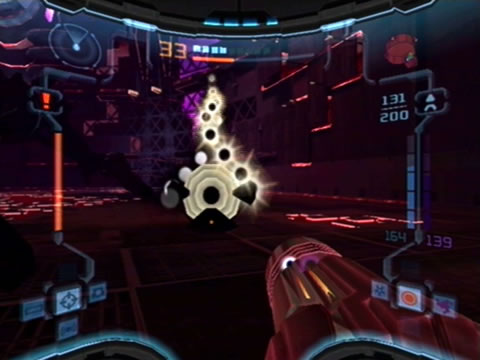
Super Missile
The first Charge Combo you'll receive is the Super Missile. Just like in Metroid Prime, this weapon unloads a devastating single missile attack. Using 5 Missiles per shot, this destructive projectile is also capable of destroying green blast shields covering a number of doors on the planet. Fire one by firstly charging up the Power Beam, then while holding A press Y (Down on the D-Pad in MPT).
Found in: Torvus Bog (Torvus Temple)
The Super Missile is locked away in the Torvus Temple. Upon reaching the temple, deal with the numerous Space Pirate foes you encounter, upon which the force field covering this item will disappear, granting you access to your prize.
Boost Ball
A classic ability from Metroid Prime, the Boost Ball allows Samus to travel at increased speeds while in Morph Ball mode. Enemies rammed immediately after launching the ball will receive slight damage while Samus escapes with none. Hold B while in Morph Ball mode to charge up the Boost Ball, then release it while moving to propel Samus.
The Boost Ball's real power shines when used on a half-pipe. To launch yourself to great heights, charge the Boost Ball and release it just as you roll upward into the pipe. With practice you'll be able to reach incredible altitudes.
Found in: Dark Torvus Bog (Dark Torvus Arena)
Take the northern exit from the Torvus Temple and follow the path to the Torvus Grove. Beyond here lies the Meditation Vista and an inactive portal. Scan the terminal to charge up the portal and step inside. Once in Dark Aether, follow the path till you reach the Dark Torvus Arena (make certain to save your game along the way). Defeat the Boost Guardian you discover there to reclaim this ability.
Seeker Launcher
The Seeker Launcher is a great new toy for your arsenal. With this device you'll be able to fire up to five missiles all at once at either single or multiple targets. When surrounded by multiple targets, fire a missile and hold Y (Down in MPT). A target reticule will appear at the tip of the arm cannon, when it does wave it over a target to "paint" it.
Do the same for up to five separate targets and release Y to unleash the assault. You'll need this weapon to destroy purple blast shields sealing doors with five lock pods surrounding the door. As an added bonus you'll also receive an extra 5 maximum missiles for your payload. If you want to avoid wasting a single missile to engage the launcher, activate the Scan Visor and hold Y to return to the Combat Visor and power up the Seeker Launcher.
Found in: Temple Grounds (Hall of Honored Dead)
Once you've recovered the Boost Ball from Dark Torvus and have the Super Missile Charge Combo in your arsenal, return to the Temple Grounds. At the Meeting Grounds area, boost yourself up the half-pipe there and roll through the small opening in a nearby cave atop the half-pipe.
Boost across the breakable floor sections in the Service Access room and follow the tunnels till you bypass a purple door and enter the Hall of Honored Dead chamber. The Seeker Launcher resides inside a containment unit at the center of this massive chamber. You'll need to use the four Spinners placed at the foot of each giant Luminoth statue.
Each Spinner controls one or two rotating locks in the floor around the unit, you'll need to get them all glowing to unlock the unit. Experiment with the locks until you align them all, once you do a large lens assembly will rise from the floor and focus light rays onto the containment unit, shattering it. Now you can claim your prize.
Gravity Boost
You'll be needing this device to move about freely underwater. The device also grants Samus a limited boost while underwater. Space Jump as you normally would while underwater then press and hold B to activate the boost. Normally out-of-reach underwater platforms can easily be reached with this. You'll also be granted free movement and enhanced vision while underwater.
Found in: Torvus Bog (Hydrochamber Storage)
Once you've secured the Seeker Launcher, head down to the depths of the Torvus Bog. In the Hydrodynamo Station you'll need to scan three terminals to unlock a door at the very base of the shaft.
Unlock the first terminal near the bottom of the shaft, then blow off the purple blast shield on a door you can now access. Travel to the Training Chamber beyond and take both paths leading out of this room individually to reach rooms that will ultimately lead back to the Hydrodynamo Station, granting you access to the other two terminals.
With all three locks disengaged, travel through the door at the base of the shaft. Keep descending beyond till you reach the Main Hydrochamber. Search for a door on its southern side, then head inside to find this item waiting for you in the deepest region of the planet.
Grapple Beam
Once again you'll be needing the swinging ability of the Grapple Beam in this adventure. When you spot an icon hovering below a grapple point in the environment, look straight at it. When the icon grows slightly, press and hold L to engage the Grapple Beam (or Z in the MPT version). From there you can swing around freely and this time retain the ability to fire your arm cannon.
Found in: Dark Torvus Bog (Sacrificial Chamber)
You'll need to conquer the nasty Grapple Guardian to recover this. Once you've picked up the Gravity Boost, head to the Catacombs chamber in the Torvus Bog and open up access to the inactive Dark Portal there by way of an underwater Bomb Slot.
Once in Dark Aether, make your way around to the Undertemple Shaft (you'll pass through the lower section of the Sacrificial Chamber along the way), then from there you can access the main upper section of the Sacrificial Chamber where the Grapple Guardian awaits. Refer to the bosses guide for tips to finish the beast off.
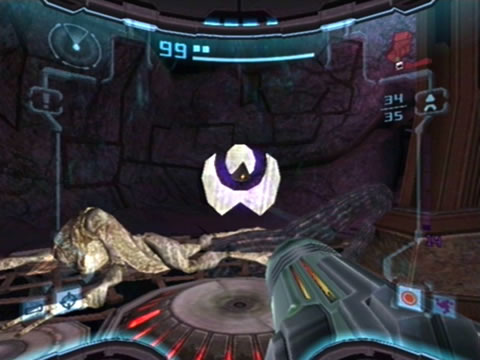
Dark Visor
This hi-tech visor will certainly help you out in more ways than one. All enemies in view will glow red while the visor's active, and any dimension-jumping Ing won't be able to hide from your sights. The visor can also detect trans-dimensional objects and anything else not normally detectable in the visible spectrum. Press D-Right to activate the Dark Visor (in the Metroid Prime Trilogy version of the game, hold Minus and point to the lower-left corner of the screen).
Found in: Dark Torvus Bog (Dark Torvus Temple)
To secure this new visor you'll need to conquer the Chykka Guardian in the Dark Torvus Temple. Refer to the walkthrough and bosses guide for tips to locate the three Dark Torvus Temple Keys and hints to send the massive dragonfly on its way.
Spider Ball
By the time you recover the Spider Ball you'll have discovered a myriad of special magnetic tracks around the environment. By holding R while in Morph Ball mode (Z in the MPT version), you'll be able to attach Samus to any of these tracks and move around freely on them. This will open up many new areas to explore (some weirder than you think).
Found in: Sanctuary Fortress (Dynamo Works)
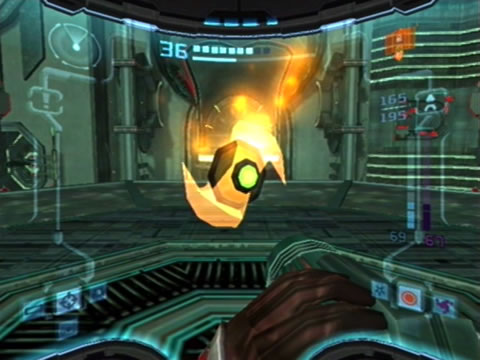
Recovering the Spider Ball requires you to locate and defeat the immensely annoying Spider Guardian in the Sanctuary Fortress. Refer to the walkthrough for precise directions, and check out the bosses guide for tips to eliminate this creature with hopefully a less-than painful experience.
Power Bomb
A deluxe explosive deployed while in Morph Ball mode, the Power Bomb effectively incinerates any hostiles unluckily nearby. The bombs are also capable of penetrating objects composed on Denzium. There's only a few to be found in the game, so use them wisely. Press Y in Morph Ball mode to use (or Down on the D-Pad in the MPT version).
Found in: Dark Torvus Bog (Undertemple)
Once you've recovered the Spider Ball, you'll be able to locate this power-up. Dive to the very depths of the Torvus Bog, way down to the Main Hydrochamber where you faced the Alpha Blogg.
Reach the Dark Portal on the northern side of the chamber via the Spider Ball track, then transit to Dark Aether. Drop off the ledge you appear on and enter the main chamber to confront the Power Bomb Guardian. Defeating this monster rewards you with your first Power Bomb, check the bosses guide for tips to send it away.
Darkburst
The Darkburst is the Dark Beam's deadly Charge Combo. Unleash this attack to generate a massive swirling vortex capable of drawing any nearby enemies to their doom (thankfully it doesn't affect you). One shot drains 5 missiles and 30 Dark ammo from your arsenal.
Found in: Agon Wastes (Mining Station B)
To recover this item you'll need the Boost Ball and Seeker Launcher. Mining Station B lies beyond the Mine Shaft (beside the Agon Temple). Use the Seeker Launcher to breach the purple blast shielded-door in the Mine Shaft and move through to locate the Darkburst's home. You'll need to play with the mining drill, transit to Dark Aether, then find your way back here to reach the Darkbusrt, refer to the walkthrough for precise directions.

Sunburst
The Light Beam's Charge Combo. This weapon unloads a ball of pure white light upon which slowly travels towards its target. Any hostiles in close proximity to the ball are instantly set alight (if not incinerated). The ball unleashes a massive blast of pure light energy upon impact. Each shot drains 5 missiles and 30 Light ammo. The deadliest weakness of all Ing, use this against a group of slower-moving enemies for best effect.
Found in: Temple Grounds (Grand Windchamber)
You'll need the Boost Ball, Power Bombs, Seeker Launcher and Grapple Beam to secure this item. Head to the Path of Eyes region in the Temple Grounds and proceed through the green blast shielded-door on the northern side of the area. Proceed through the Windchamber Gateway and blow off the yellow blast shield covering the next door with a Power Bomb.
Inside is the huge Grand Windchamber - the Sunburst is waiting atop the large structure in the center of the area. But to reach it, you'll need to first travel to Dark Aether via the nearby portal. Once there, see the Spinners positioned around the central structure? Use each one to rotate one of the half-circle rings attached to the central structure.
Firstly, rotate all the rings and line them up so they all glow yellow. Travel around to the front of them, lock onto all four pods attached to each ring with the Seeker Launcher and open up to activate the system. Doing so will raise two metal arms outward from the structure. Rotate all the rings again to the opposite side so they all glow blue. Travel around to the front of them again and use the Seeker Launcher to activate the system.
Two more arms will raise out around the structure before all the control rings promptly fall off into the chasm below. Return to Aether and use the Grapple Points on the extended arms to reach the lone platform where a Kinetic Orb Cannon resides, then simply jump in the cannon to be launched atop the structure where the Sunburst awaits.
Echo Visor
The final new visor for the day. The Echo Visor enables you to effectively see sound waves bouncing around the environment. Naturally you'll be blind to almost everything else, so don't use the visor unless there's a specific need. Use this to see and interact with sonic security systems. Also use this against foes who remain invisible to both the Combat and Dark Visors. Press D-Pad Down to activate this visor (hold Minus in the MPT version and point to the lower-right corner of the screen).
Found in: Sanctuary Fortress (Aerie)
You'll need the Spider Ball and Power Bombs to reach this. Return to the Main Gyro Chamber and travel up to the door leading to the Sanctuary Temple. Destroy the fallen canisters above the Bomb Slot at the observation window, then energize it to bring up three coloured power conduits on the window. Rotate the corresponding nodes to line up with the correct conduits to cause a second Bomb Slot to rise from the floor.
Energize this one to shut down the rotating inner gyro wheel, revealing a Spider Ball track running along it. Go down inside the gyro chamber and climb up along the inner gyro ring. Boost yourself into the cracked glass window to gain access to the yellow door on the northern side of the room. Blow the blast shield off the door with a Power Bomb and enter the room beyond to witness Dark Samus take out three Dark Pirate Troopers.
Follow the beast around and exit the room via the next door to reach the base of a huge elevator shaft. You'll now need to take down Dark Samus before recovering this - refer back to the bosses guide for tips. With the area clear, step out through the wall section Dark Samus destroyed and walk along the balcony you find to locate an inactive Dark Portal. Power it up and transit to Dark Aether.
Once there, walk around the balcony and climb up the Spider Ball track at the end to access the main chamber. See the Spinner across the other side of the room? Use it to rotate the Spider Ball track assembly in the center of the chamber. Then, climb up the tracks and boost yourself up to a ledge above. Jump across to the inactive Light Portal and travel back to Aether. Finally, jump across to the ledge ahead where your prize awaits.
Screw Attack
The awesome Screw Attack finally makes the jump to 3D. With it you'll be invulnerable while it's active and can bridge huge horizontal chasms with ease. Engage the Screw Attack by jumping forward, hit B a second time for a Space Jump then press it a third time. You'll have a third-person view of Samus as she performs the attack.
Time consecutive jumps with B to keep her going for up to five jumps. You'll definitely need practice to master it, but eventually you'll be bridging gaps and climbing up those special Screw Attack walls in no time.
Found in: Sanctuary Fortress (Vault)
You'll pick up the Screw Attack after securing the Echo Visor. It's a fairly long trip to the Vault for this item, so refer to the walkthrough for complete directions and details on what to do once you're there to secure this lovely new toy.
Annihilator Beam
The mother of all beams on Aether, this mighty cannon combines the power of the Light and Dark Beams to produce an energy blast deadly to foes of both worlds. Don't underestimate the modest projectile it launches, just use it sparingly as each shot drains 1 round of ammo from both your Light and Dark Beams. Even if you're not locked onto a foe, the blast can automatically home-in on a nearby target.
The Annihilator can also be used to interact with certain sonic security systems in tandem with the Echo Visor.
Found in: Ing Hive (Hive Temple)
You'll need to locate all three Hive Temple Keys (and a number of items) before unlocking the Hive Temple. Refer to the walkthrough for details and directions, then refer to the bosses guide for tips to defeat the guardian of the temple, Quadraxis, to claim this deadly beam weapon.
Light Suit
The ultimate suit available to Samus. Upon restoring all three planetary energy collectors, U-Mos will grant you the Light Suit at the Great Temple. Not only will your defense level increase, you'll also now become completely immune to the damaging effects of Dark Aether's atmosphere, allowing you to spend as much time as needed in the dark world.
As an added bonus you'll be able to access a light energy transit system granting instant access between the four energy controllers.
Found in: Great Temple (Main Energy Controller)
Simply restore the planetary energy to all three temples of Aether and visit U-Mos to be granted the ultimate protection available to Samus. Easy.
Sonic Boom
This deadly Charge Combo utilises the Annihilator Beam. Delivering a severe projection of sonic force, enemies caught off guard by the blast won't survive the impact. The funky blast impacts whatever solid object stands before you very quickly, so use it to catch fast-moving targets off guard. Use it sparingly as each blast drains 5 missiles, 30 Light ammo and 30 Dark ammo.
Found in: Dark Agon Wastes (Ing Cache 2)
The Annihilator Beam and Screw Attack will allow you to track this final item down. Head to the Phazon Site at the Dark Agon Wastes to find the area inhabited by three Dark Tallon Metroids. Deal with all three customers and look up to see a gray door way up on an out-of-reach ledge.
Climb atop the middle of the three floating platforms, then simply Screw Attack across to the ledge to reach it neatly. Open the door with the Annihilator to find the Sonic Boom awaiting you in the following chamber.