


Chapter 24: Following the Echoes

There's a few secrets at the Sanctuary Fortress entrance.
Return to Sanctuary via the nearby transport lift and cross the chasm of the Sanctuary Entrance thanks to the Spider Ball. Before entering the complex, there's another item we can pick up here. On the left side of the entrance you'll find what looks like an elevator shaft sealed with a cracked window. Scanning it reveals that Space Pirate weaponry has damaged the window, using a Power Bomb will completely destroy it. Ride the lift up to a small alcove where a control terminal lies, scan it to power up a Kinetic Orb Cannon below.
Go down and jump in the cannon to reach a platform high above the chasm. Climb to the top of the structure to find a Vigilance Class Turret emplacement there. Jump in and look around, there's a number of weakened objects attached to the fortress entrance up ahead. Destroy the large cracked objects up ahead above the door, then aim down at the bottom right corner of the structure and don't stop firing till you see something break apart.
Spin the turret around to face the cliff where you entered the area via, and send off a number of shots into the upper wall of the cliff until you see a section break off, revealing an item hidden in an alcove. With all three targets taken care of, return to the ground and go over to the right of the fortress entrance.
With that large jagged rock formation gone, you'll see an alcove ahead lined with Spider Ball tracks, and a Luminoth Lore Projector. Scan the projector for your Logbook before climbing up the Spider Ball tracks. Follow the tracks along to reach a high platform where the body of a Luminoth warrior lies. Scan it for your Logbook, then jump in the Kinetic Orb Cannon in the corner to be launched way over to the cliff wall where Power Bomb SA.02 awaits. With this secure, let's (finally) head back inside the fortress.
Inside the Reactor Access you'll need to deal with both Ingsmashers waiting for you. Take them both out one at a time, then move onto the Reactor Core and save your game nearby. Now let's go grab the next upgrade waiting for you at the very top of the fortress. Climb up the Reactor Core and proceed to the Hall of Combat Mastery.
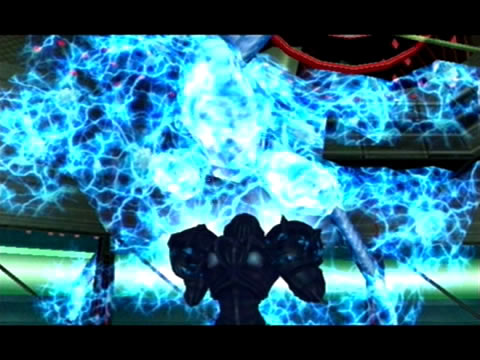
You again! Get ready to face Dark Samus in battle.
Along the way, make sure you destroy any visible Luminoth crates with the Dark Beam, as you're going to need plenty of Light ammo. Take the Central Area Transport East lift up to the second floor and make your way across to the Main Gyro Chamber. Once there, step over to the observation window of the gyro chamber and look up. See that yellow door up in an alcove covered by a cracked window? That's where you need to go.
Go through the green security door and take the lift up one level. See that group of large canisters beside the window covering the Bomb Slot? Take them out with a Power Bomb to uncover the device. Energize the slot to see a sight similar to the time you powered down the first gyro ring. Rotate the coloured nodes to line up with their corresponding conduits as before to cause a second Bomb Slot to appear.
Energize this one to power down the inner gyro ring. Except this ring will stop at a funny angle, you'll see why in a minute. Go back down and enter the main gyro chamber. Step onto the outer ring and walk over to the inner ring, running along it you'll see a handy Spider Ball track. Climb around, then simply boost yourself into the cracked window to shatter it easily.
With the window taken out, we're almost there. But I strongly recommend you drop below and save your game at Save Station B before moving onwards. With your game saved, blow the yellow blast shield off the door with a Power Bomb and step inside the next chamber. Inside you'll be greeted by a very odd sight. Through an observation window ahead you'll witness three Dark Pirate Troopers firing at something off-screen on the right.
Step forward to see that they're firing at none other than Dark Samus. It'll quickly dispatch them before letting off a hearty guffaw as it begins sapping Phazon from the containers on the left. Not much you can do now, so proceed around the corridor ahead to find a sealed door leading to the chamber where Dark Samus was.
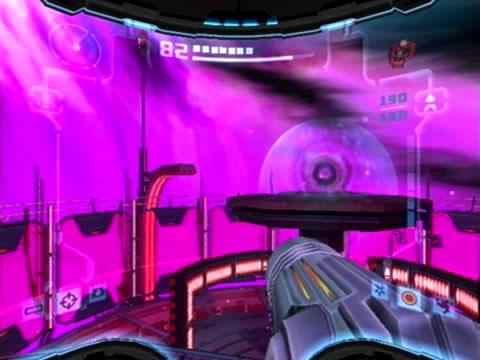
Somewhere here lies the means to reach the Echo Visor.
At the eastern end of the hallway lies quite a collection of Luminoth crates, fill up your Dark and Light Beam ammo here. Walk up to the sealed door and watch it open automatically, only to reveal the chamber beyond is empty. Destroy the pesky Phazon containers and look for a door ahead on the right. Enter the chamber beyond to find yourself at the base of a gigantic elevator shaft. Directly ahead is your target, sapping Phazon from the far wall. Refer back to the bosses guide for tips to make the score two - nil.
With Dark Samus apparently dead (again), you'll be clear to recover the new item way up in the Aerie. You can't access the platforms directly above the lift from here, so let's jump out through the wall Dark Samus so kindly destroyed. Look for a narrow catwalk running around the outside of the lift and follow it around to discover an inactive Dark Portal inside a small room. Power it up and step inside. Once in Dark Aether, recover some ammo via the three Ingworm Cache on the right, then go outside and follow the balcony around.
The wall Dark Samus destroyed is still intact here, instead look for a Spider Ball track and climb up. Once inside the main chamber you'll see a number of tracks running along pillars in the center, but you should also spot a Spinner over on the western side. Jump in to rotate the entire network assembly of tracks in the center of the chamber around. Once complete, climb up the tracks and work your way around to an angled section. From there, boost up to land on a ledge where two Ingworm Cache reside. From here you can easily jump across to the visible Light Portal in the center of the chamber.
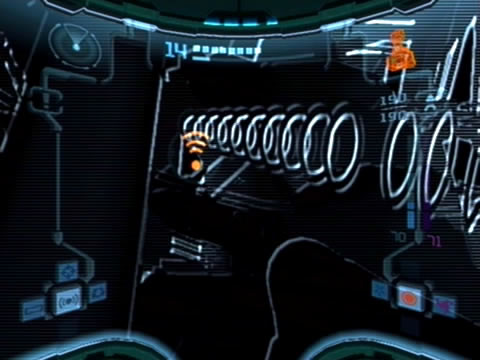
With the Echo Visor, Samus can visually see sound waves.
Transit back to Aether (turn around at the portal and look up at the structure first for a grand view), then Space Jump across to the ledge directly ahead where a visible item awaits. Scan it to reveal the item as the Echo Visor! Claim your prize to secure your last Visor upgrade. With this funky new piece of technology you can literally see sound waves as they bounce around the environment. Now you'll get to use it to find a way to power up this gigantic elevator for the return trip down below.
Drop off the ledge to the elevator platform below. Hear that pulsing sound? Scan the elevator platform to reveal that a sonic security system is keeping it locked in place, but by destroying the sonic wave emitters the elevator can move once again. So let's switch on the Echo Visor and take a look around.
See those three padlock icons atop the elevator? You'll be able to see sound waves beaming at them. Look to the source to discover three separate emitters attached to pillars around the elevator. Shoot each lock once to release them, with all three down the elevator will power up. Switch back to the Combat Visor and ride the lift back down.
Step inside the Checkpoint Station at the base to abruptly find yourself locked in. Step forward into the main chamber - hear that pulsing sound? You got it... switch on the Echo Visor and look for an invisible drone beaming the lockdown command at the door. Destroy it to unlock both doors. Return to the Main Gyro Chamber and save your game nearby.
Chapters:
- Planetfall
- The World Divided
- Fate of the Federation Troopers
- The Plight of the Luminoth
- The Sands of Agon
- Dark Aether
- The Space Pirate's Lair
- Samus vs Dark Samus
- Unlocking the Dark Agon Temple
- Restoring the Energy Controller
- The Journey to Torvus
- The Everlasting Deluge
- Restoring the Flooded Temple
- Taking the Fight to the Ing
- Expanding Samus' Arsenal
- The Underwater Temple
- Securing the Dark Torvus Temple
- The Path to Sanctuary
- The Mechanical Marvels of Aether
- The Sub Guardian Nightmare
- Subterranean Conquest
- Searching the Fortress
- Retrieving the Charge Combos
- Following the Echoes
- The Screw Attack Returns
- The King of all Mechanoids
- Gearing up for the Finale
- Unlocking the Sky Temple
- The Final Treasure Hunt
- Ending the War